Waveform: the good, the bad, the weird. - Version 9.1.1, Part 9: Instruments and Effect Review
Reader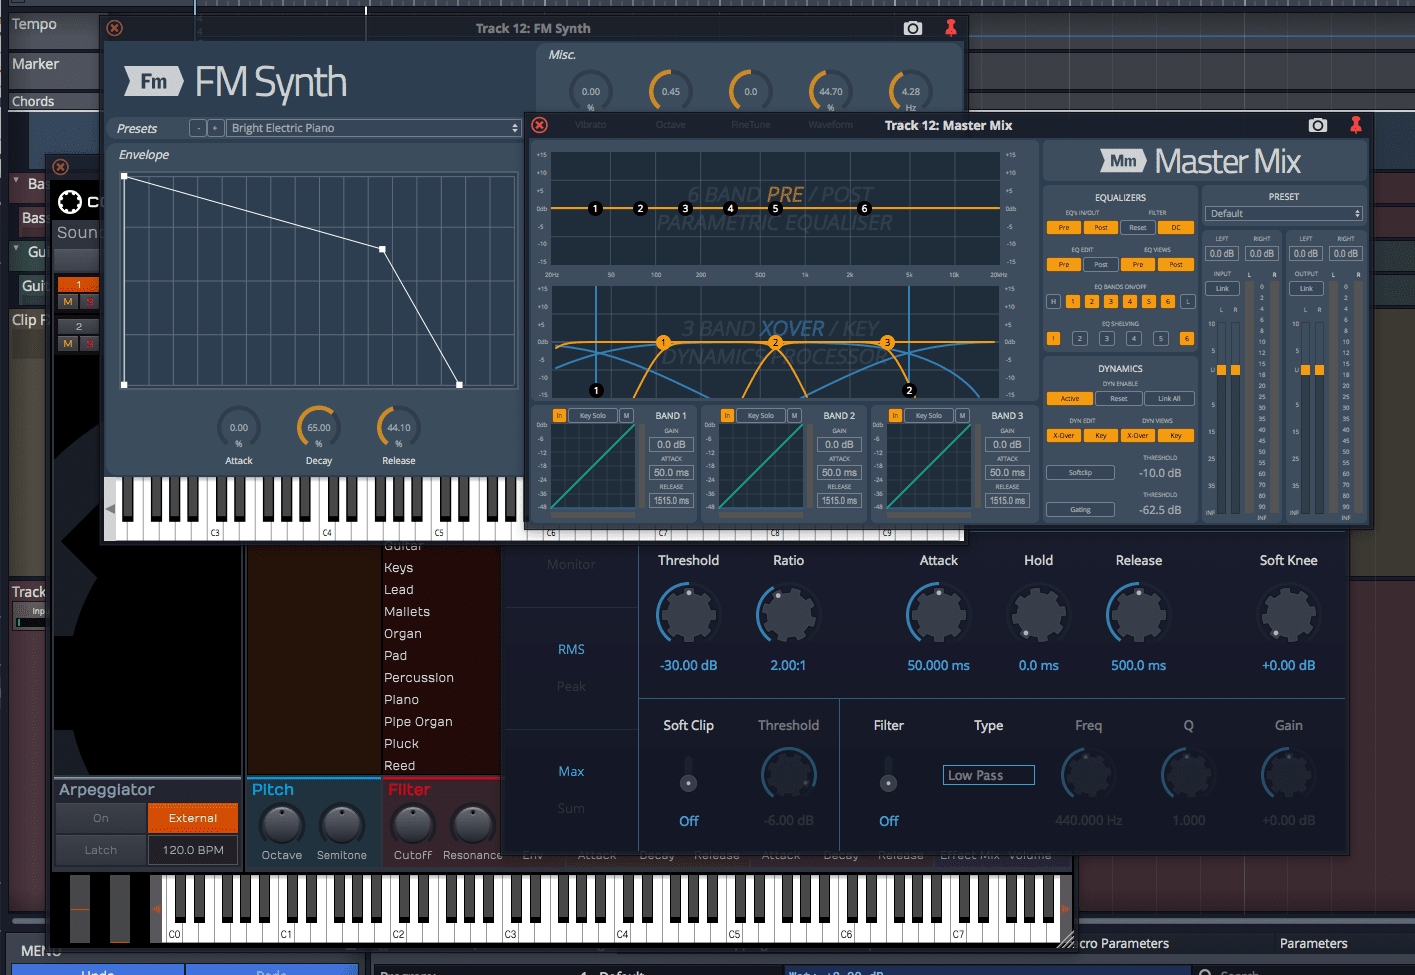
42 plugins I counted. I think that’s right… That’s what you get with the Waveform Ultimate bundle. 41 in Waveform+ and there’s 24 (I think) in the Basic version.
So it’s time for the part of the DAW review where I spend a ridiculous amount of time testing and doing reviews of every single plugin that’s included. Each plugin will have one of 3 labels on it that indicate my overall review of the plugin, along with my commentary. Here’s what the labels mean:
- Fantastic - These are plugins that I think would be an excellent value to purchase if possible. Likewise, they compare favourably with third-party plugins on the market.
- Sufficient - Sufficient get the job done without much hassle. There may be no fancy extra features like some third-party competitors, or maybe the DAW version is missing some common feature, but nevertheless it’s enough to get the job done.
- Flawed or Replace - As the name implies, these plugins have some sort of flaw or they are so limited that they can be replaced by a better solution. I will only use the ‘Replace’ option if I explicitly know of a free multi-platform (mac/win, sorry Linux dudes) option that I think is better.
It’s important to recognize that Biotek and The DAW Essentials Collection come as VST/AU/AAX/Linux VST. Master Mix is available as an external plugin, but that does not appear to come with Waveform Ultimate.
Spoiler - Overall rating Waveform Basic:
Other parts in this series:
- Version 9, Part 0: Intro
- Version 9.1.1, Part 1: Browser, Mixing, GUI, VCAs
- Version 9.1.1, Part 2: Modulation, Plugin browsing, Annoyances, GUI
- Version 9.1.1, Part 3: Macros, UI design, Ghost tracks, Buying
- Version 9.1.1, Part 4: Pattern Generator, Edit Clips, Folder editing, Chord Track
- Version 9.1.1, Part 5: Step Clips, Loops, Clip Linking, Loop Recording, Track Presets
- Version 9.1.1, Part 6: MIDI Editing
- Version 9.1.1, Part 7: Recording
- Version 9.1.1, Part 8: Clip Layer FX, Multisampler, Scripting, Project Management and more
- Version 9.1.1, Part 10: Conclusion
- Version 10.1.0
-
VERSION - This review is (hopefully) accurate as of Waveform 9.1.1. Further versions may obsolete these views.
Contents
- Ultimate Only or Standalone
- Waveform+ Only or Standalone
- Waveform Basic
- Conclusion
- Support Me!
Ultimate Only or Standalone
Biotek
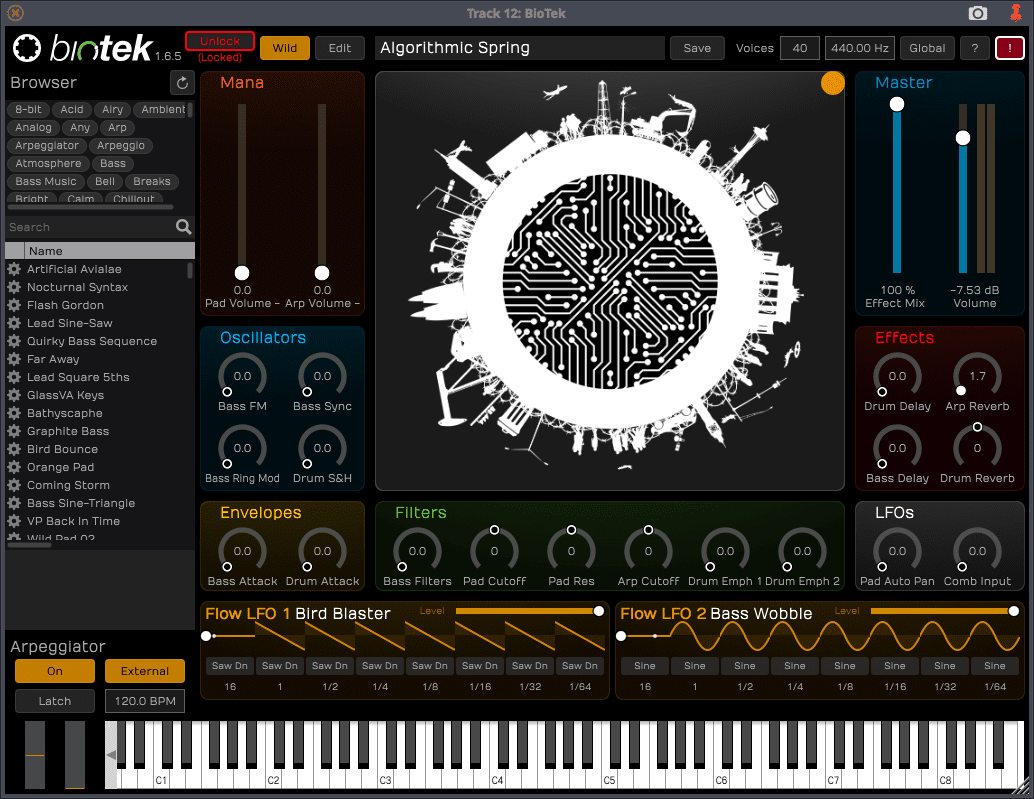
Biotek’s main draw is that it can be very simplistic. You have the ‘Wild’ interface that lets you just control a main graph to select the artistic quality of the patch. It’s basically just an X/Y mod with a fancy graphic. Meh.
The wild GUI also gives you a number of controls for certain selected parameters for the patch. If you’re not a synth nerd then you’ll be quite happy with how easy it is to tweak and how unintimidating it can be.
But for you synth nerds… get ready!
- Multiple layers - You can have many presets layered on top of each other for monster sounds.
- Trigger logic! - This allows you to control when/how a sound layer is played. Want that layer to only sound if it’s played on a 1/4 note division with a specific key switch selected? You can do it.
- 4 fm-able oscillators with glide (portamento or glissando)
- Sample, sine, triangle, pulse, saw, white and pink noises for each OSC.
- The sine waveform is very flexible
- The sample waveform has key/velocity shift and sample start that can be modulated
- Sample, sine, triangle, pulse, saw, white and pink noises for each OSC.
- 8 multishape LFOs that can be assigned to anything
- 2 of the LFOs are multistage LFOs that have 8 stages of shapes.
- 2 filters with 12 modes and 6 overdrive modes.
- Filters frequency response is drawn as a background
- An EQ
- A modulatable amplifier and pan control
- 4 envelopes with forward and reverse looping
- 4 effects slots with 9 types of effects.
- Effects have a small triangle that you can click to see the current modulation source
- Modulation table
- Modulation assign mode (click assign on the source, then tweak the destination)
- Easy to setup macro control for the Wild mode
- An acceptable arpeggiator
- An excellent preset browser
- Creating, labeling and tagging presets is nice too.
- The GUI is freely resizable and looks great at any size.
Biotek is capable of some amazing sounds, and you can dive in deep to create your own monsterous noises. It may not be the most complex synth out there, but once you begin to understand the trigger capabilities then it really opens up a whole new world of synthesis.
Waveform+ Only or Standalone
DAW Essentials Collection
TAuto Filter
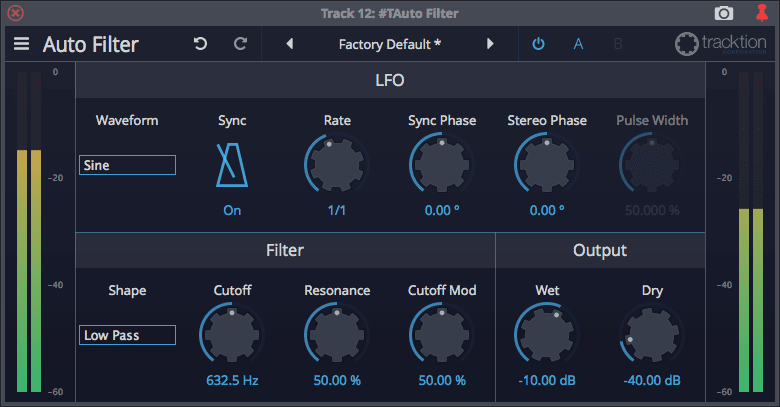
TAuto Filter is a resonant filter that has a built in LFO modulator.
The filter isn’t exactly brilliant. There’s not much grit if you want it, there’s only 3 shapes. No feedback. No ringing. No fun :(
But hey, it does do some cool useful things and it’s not often that you need an auto filter.
TBus Compressor

TBus Compressor is a simple compressor with Threshold/Ratio/Attack/Release controls. When I first tried it, I thought it sounded unusually squashy but I thought not much of it.
Eventually I realized…
The Attack and Release timing timings are strange. Click that link a few words ago for more info.
I took one of the more popular premium ‘Buss Compressors’ and compared a 30ms attack time to TBus compressor and TBus Compressor was significantly faster. The shape is also more extreme.
The result is a compressor that likes to ‘click’ on heavily percussive sources and is difficult to allow a large part of the transient through if you’re trying to make for a more punchy sound.
Despite that… I love it. It’s a weird beast that doesn’t do what I expect, but it sounds pretty good on a variety of sources. I’m glad that the DAW Essentials Collection is available as VST/AU/AAX/Linux VST because this is a fun compressor.
I do really wish it had oversampling though. Due to the very short release (despite the labeling), it’s really easy to create a lot of harmonics that end up causing aliasing on some sources. You just have to be careful, but that goes for most things.
TChorus
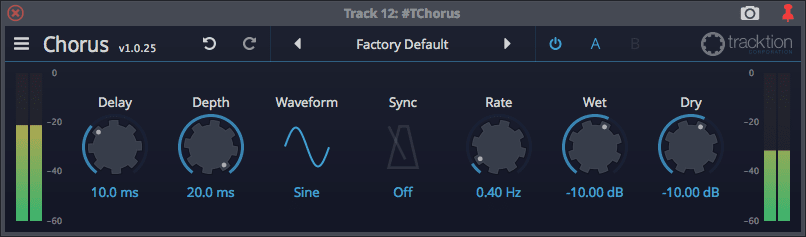
I’m not sure what the guys at Tracktion were thinking with this one. A chorus with no stereo controls. That’s what this is.
There’s not much to talk about when you realize that.
TCompressor
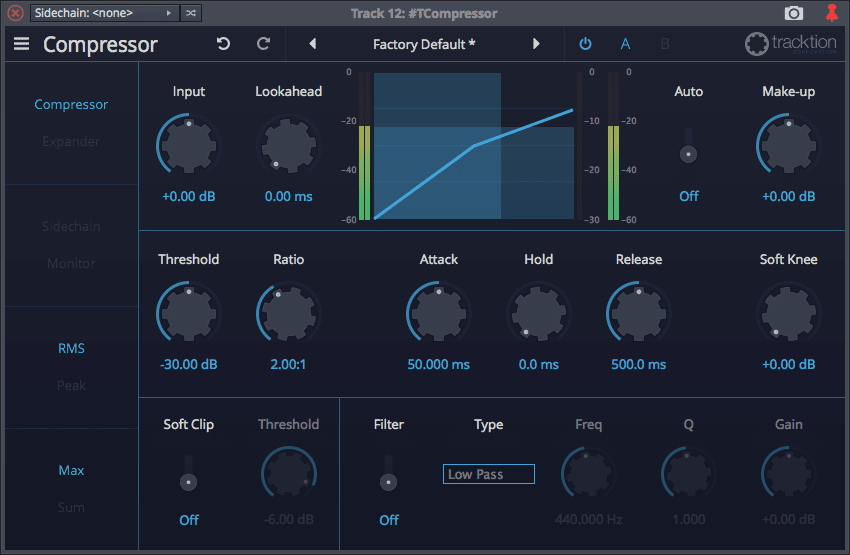
A powerhouse compressor that still ‘suffers’ from that extreme attack/release setting thing that I talk about later.
You have:
- Quick access to sidechain input
- Sidechain filter
- Peak and RMS modes
- Soft clipper
- Hold control (which is a great control to have on a compressor)
- Automatic make-up gain
- Expansion mode - this turns UP the signal when it surpasses the threshold rather than turning it down. Hold control is extra nice here too.
- Max or sum modes - this adjusts how a stereo signal influences the compressor.
If you have no other compressors, then this is great. As a part of the bundle, it’s sufficient. As a standalone product, you can do a lot better.
It looks nice though, like all of the other DAW Essentials Collection products.
TCrossover
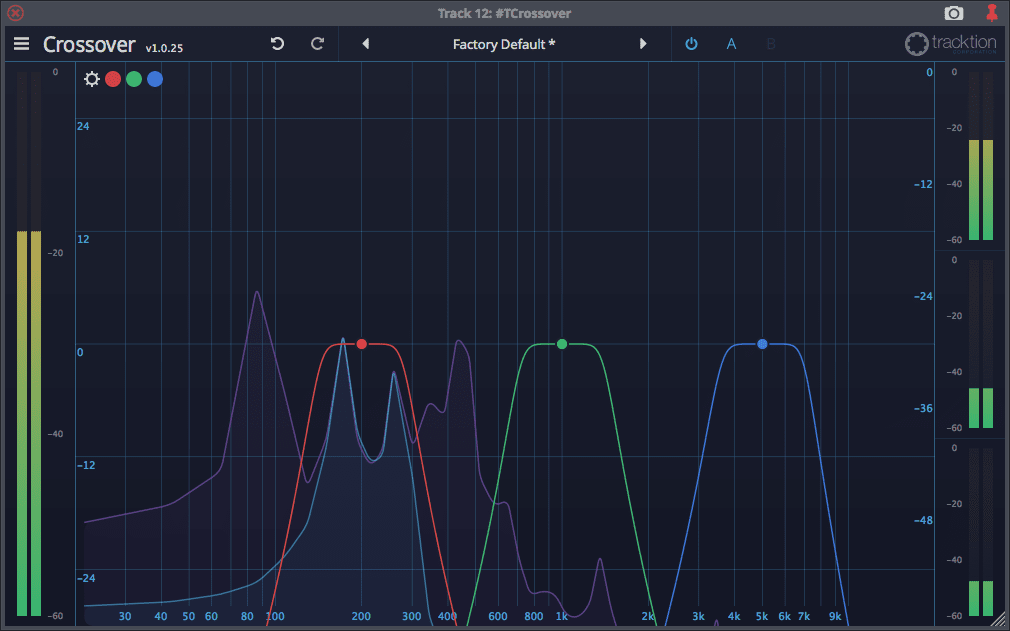
This is basically TEqualiser but with 3 bandpass filters.
The difference is that it has 6 outputs so you can separate your audio in to different bands. An excellent addition to Racks. Also useful for working in surround (at least as much as Waveform allows you to work in Surround… which is not very much).
There’s no 6db slope, the shallowest filter slope is 12db/oct.
There’s one big flaw here though… if you adjust the Q you might get blasted with big peak of audio. BUZZZZZZ. Unusable until fixed. (Waveform 9.1.1)
TCrusher
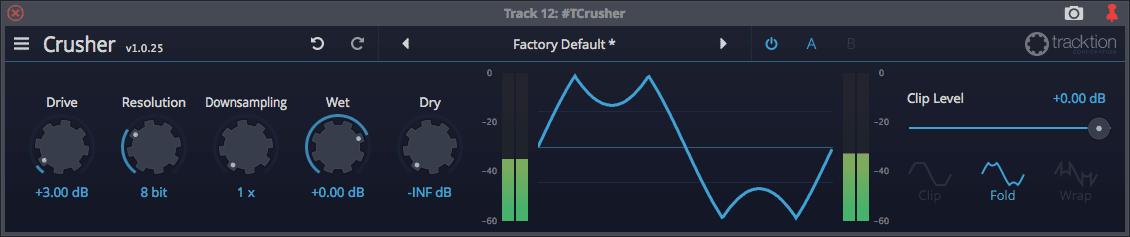
A deliciously disasterous bitcrusher and downsampler. 3 types of clipping with downsampling and bitrate reduction.
It’s simple, and it works, even if you can buy better.
TDelay Studio
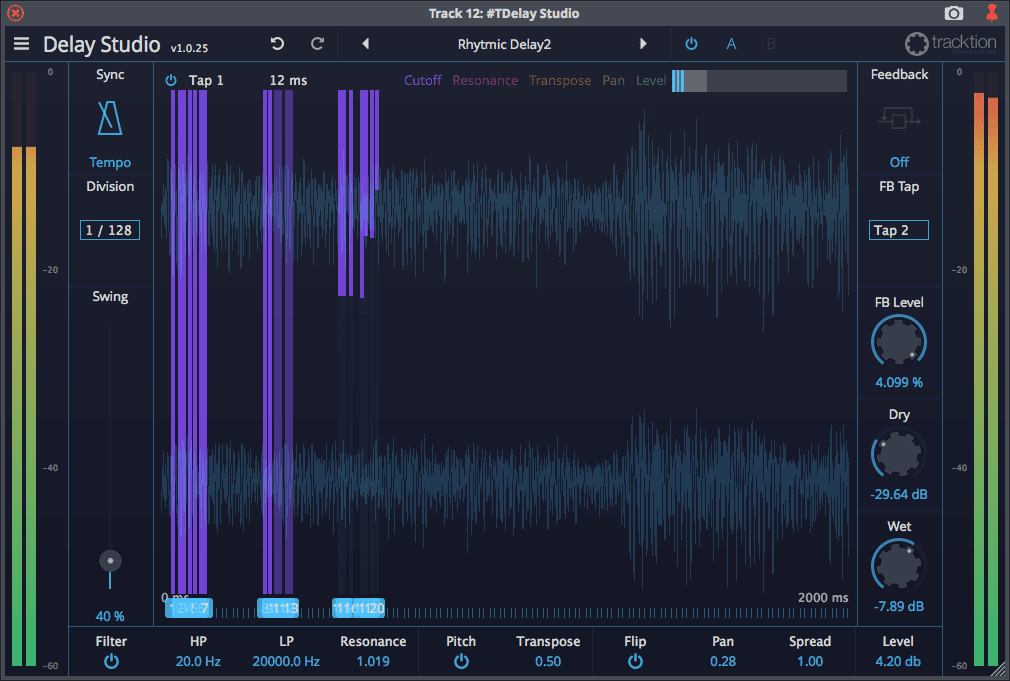
TWENTY delay taps.
TWENTY.
Yes. 20.
Each one has a filter, pitch transposition, polarity inversion, panning, amplitude and access to which tap is the feedback path. By the way… TWENTY taps.
There’s a graph that allows you to easily see the layout of the delay taps, and makes selection of the TWENTY taps rather simple. The tempo control adjusts their spacing with optional swing.
It’s a fantastically fun delay plugin. The only downside is that the graph zoom can be zoomed in too close and you can’t zoom out again. When you have delay taps close together it can be somewhat annoying to refer to the pulldown menu to select what you want.
Still worth it.
TDucker
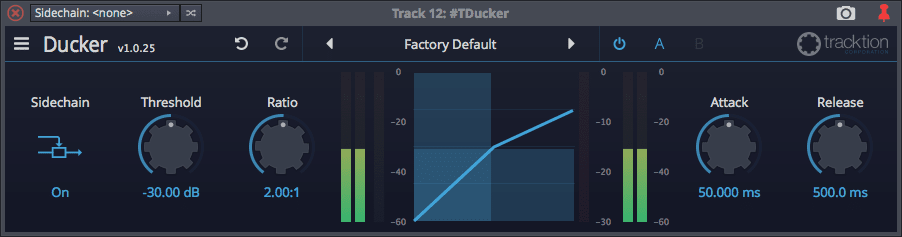
TDucker takes a sidechain filter. The signal coming in from the sidechain controls compression on the assigned track.
So if you want a bassline to be turned down when a kick drum hits, you place this on your bassline and feed the kick drum in to the sidechain.
If you want voice to turn down a music backing, then you put this on the music backing and feed it the voice signal in to the sidechain.
You can do this with a normal compressor plugin of course, but this is quick and easy and it seems to have more gentle attack/release curves. (I did not test this)
TEqualiser
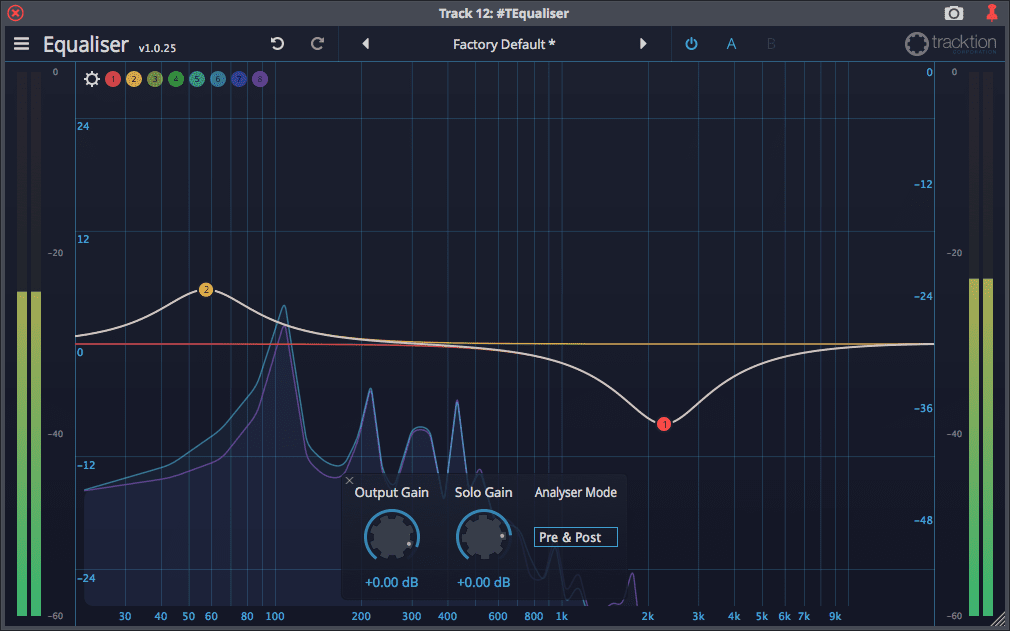
An equalizer with minimum-phase design that has taken inspiration from some familiar places.
8 bands with low/high pass, shelving filters, peak, band pass and band stop. The high/low pass are resonant varieties.
There’s no cool shortcuts or visual aids for changing the Q, Gain or Frequency. Just a dot as a handle, and the scroll wheel always adjust the filter Q. No adjustments for the visualization. No graph adjustments. No unique features.
There’s no frills here at all. It’s a very simple EQ.
There are free alternatives that are nicer.
TFlanger
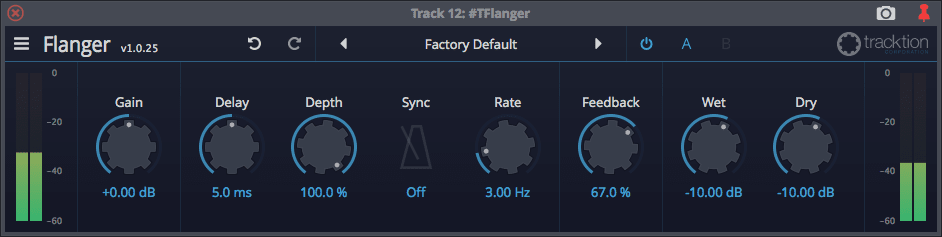
TFlanger is a bare-bones flanger. There’s not much to write about. I have no qualms with it.
TGate Expander
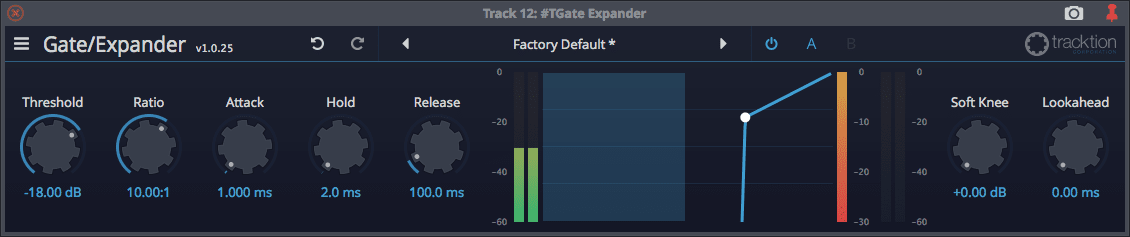
This Gate/Expander clicks when the gate opens with a high ratio, and it has no hysteresis (gate close threshold). It’s damn near useless.
TLimiter
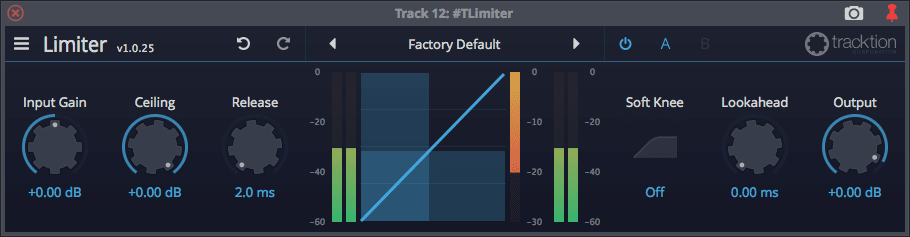
Tlimiter is a Brickwall limiter. Strangely it defaults to a 2ms release time and no Lookahead though…
The issue with this is that if you have any sort of standards you must adhere to, then it’s not going to help you much since there’s no true peak limiting (and it lets a lot through!)
Soundwise, I know of at least 3 other free Limiters that allow you to get louder but more transparently. There’s nothing really special about this limiter that would make me want to use it.
TPhaser
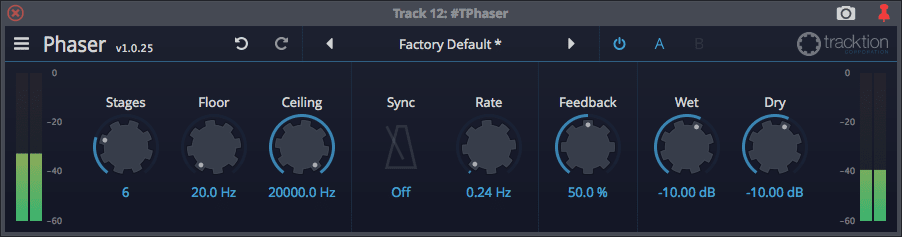
Up to 12 stages of allpass filters that swirl around between a min/mix frequency in your audio. Sync and feedback are there.
It’s pretty alright.
TReverber8
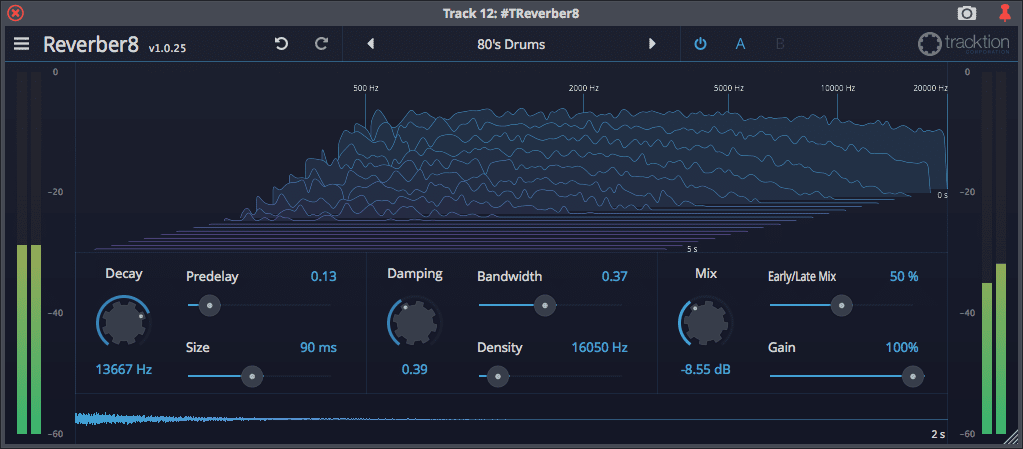
TReverber8 has an interesting display that shows you the decay of each frequency as the reverb applies to the signal.
Unfortunately you have minimal control over that neat display. The traditional damping control is there which relieves the high frequencies a bit, and you can change the decay/predelay/size. There’s an Early/Late mix, but no control over the early reflections at all beyond that.
The sound isn’t exactly inspiring either. You can hear a nasty twang/echo with “high” (low frequency) density settings that you can’t do much about. There’s no way to deal with low-end build up. Small room sounds are wholly unbelievable. The decay is listed in Hz?? I had numerous graphical glitches.
I could go on. It’s an interesting attempt that seems like it was rushed out the door. Even the ancient FreeVerb gives you more control over a reverb and lets you come up with something that’s more useful.
TStereo Delay
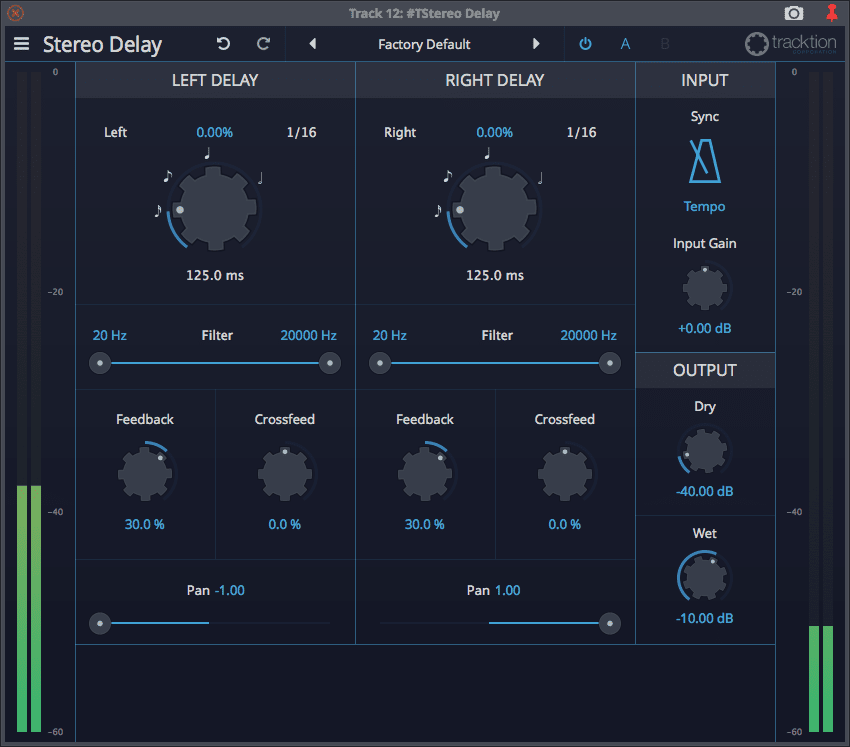
2 simple delays, one for the left channel, one for the right channel and a crossfeed option. There’s a high and low pass on each channel.
Large, clean, uncluttered GUI and it does what you’d expect.
TTape Delay
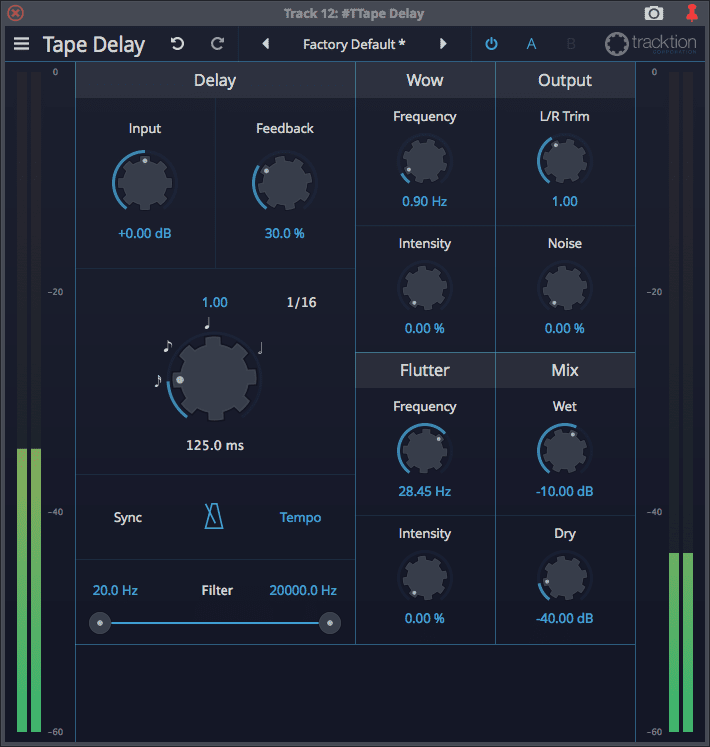
TTape Delay is yet another delay plugin (Tracktion guys love delays, I can tell) that offers you Wow and Flutter on the delay signal similar to a looped tape delay of yesteryear.
There’s no saturation/distortion available on it though, which is a big letdown. You can add noise though, which I’m sure everyone is excited about.
It is a nice addition to thicken up some parts though, so I’m pretty happy with it. I just really wish it had some tape saturation, it’s not much of a tape delay without it.
Waveform Basic
Effects
Volume and Pan
This is nothing more than a volume and pan plugin. This is how you control volume and pan in Tracktion.
One of the nice things is that the pan law is selectable between linear, -2.5, -3.0, -4.5 and -6.0 variations per plugin. Pan Law is a compensation for the fact that having the same sound coming out of two speakers will sound louder than that sound coming out of only 1 speaker. So a ‘Mono’ signal that’s centered (coming out of two speakers!) will sound louder than a ‘Mono’ signal coming out of a single speaker. Pan Laws adjust the gain of the signal to compensate for this so that a hard panned signal and a centered signal should seem similarly loud.
The pan plugin lacks settings for the pan law curve, which is only a minor thing. There’s also no options for ‘compensated’ pan laws, which increase the gain on the sides, rather than decreasing gain in the center (which is the default mode in Waveform).
The option for flipping polarity is in this plugin. Thank goodness.
Volume and Pan also optionally applies to incoming MIDI signals if it’s placed before a MIDI consuming plugin (such as a VSTi).
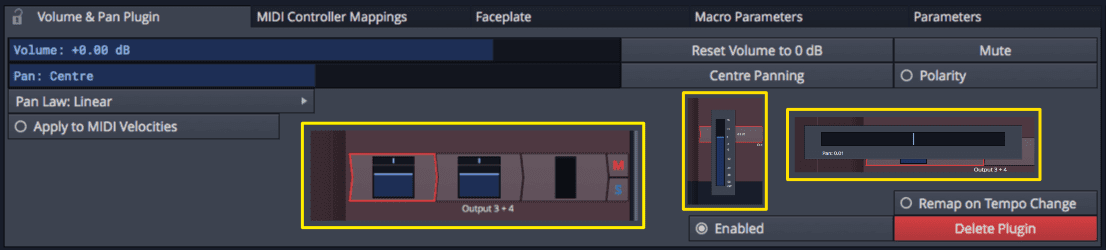
I’m a fan of how Volume and Pan is a plugin similar to how Ardour and Mixbus do it. This makes it easy to Gain Stage with minimal hassle. However as I mentioned earlier in this review using the mixer is a bit weird due to this flexibilty, since only the last ‘Volume and Pan’ plugin is used.
The plugin shows an easy to use overlay in the plugin chain area. You can always see what your volume/pan settings are. When you click this inline drawing, you get a popup that’s easier to read and adjust. I’ve shown these features in the image above inside the yellow rectangle.
Level Meter
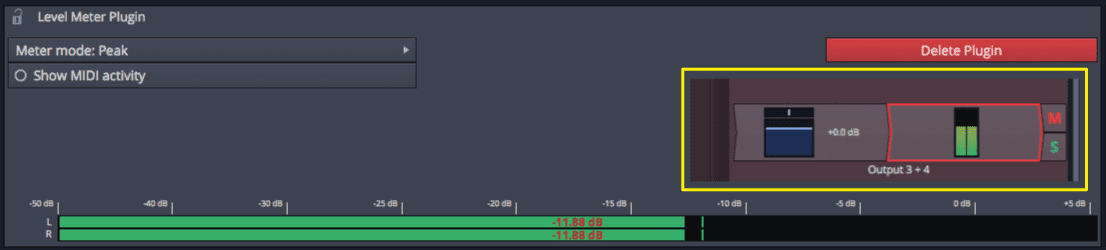
A level meter with Peak, RMS and Mid/Side metering modes (called sum/difference). Optionally shows MIDI.
Nothing fancy about this.
Optional ‘True Peak’ or oversampling would be nice, as would more modes (like LUFS and especially VU).
The plugin has an overlay showing the meter inside the effects chain. I’ve shown this inside a yellow box in the image above.
I’ve reluctantly marked this as sufficient. There’s nothing wrong with it, but it is the bare minimum.
4-Band Equaliser

This EQ offers you a high shelving filter, a low shelving filter and 2 peaking bands. You can control gain, frequency and Q. It’s easy to use.
The plugin has an overlay in the effects chain that shows you its current setting.
The frequency graph is extremely accurate, more so than many third-party EQs that I’ve tested. It’s actually kinda neat.
That said, I absolutely would suggest replacing this. It’s alright for very light use, but given the importance of EQ in modern production I would strongly suggest replacing it.
Reverb
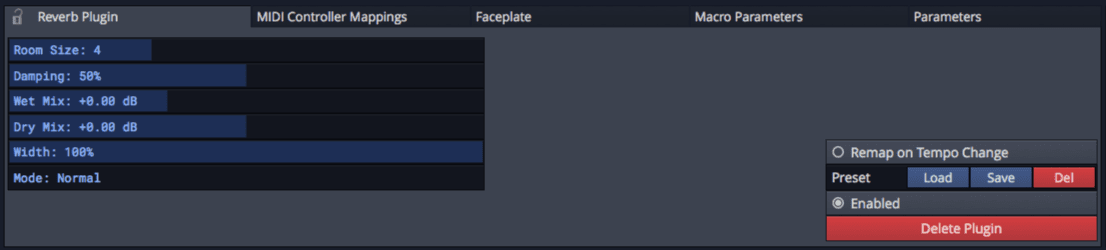
An absolutely dreadful sounding reverb. Clangy and metallic on drums. Resonant on guitars. Brings out the sibilance in vocals. eww. Extra ewww.
I don’t often recommend alternatives in these reviews, but I strongly suggest replacing this with the free OrilRiver reverb. It’s a vast improvement over Waveform’s ‘Reverb’ plugin.
Delay
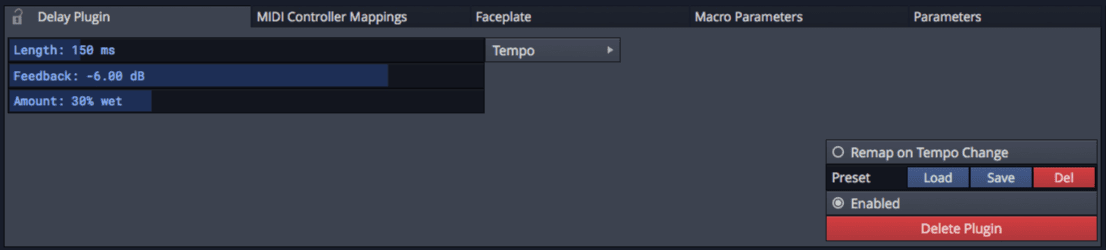
‘Delay’ is a single tap delay with feedback. You can set the delay to specific tempo divisions easily.
I would consider this nearly sufficient if the length parameter was adjustable without zipper noise. Adjusting delay length in realtime is a fun effect and also part of the pleasure of adjusting a delay. No such thing here, it’s pops and clicks galore as you adjust the parameter.
Once again this is easily replaced by a number of free alternatives that sound much better.
Chorus
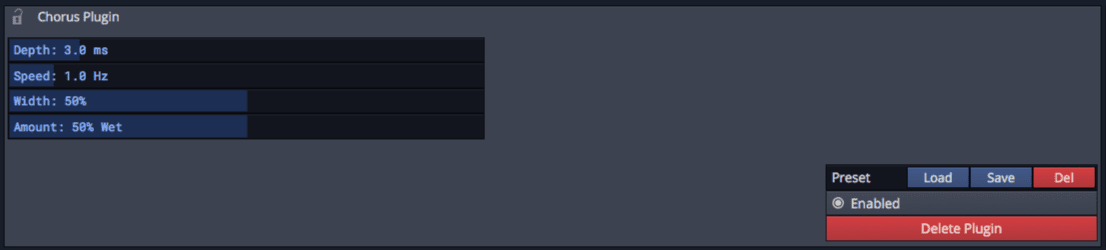
Very simple chorus. Depth and speed with width.
You get awful zippering noise when adjusting the depth parameter, and speed has no sync.
Replace it.
Phaser
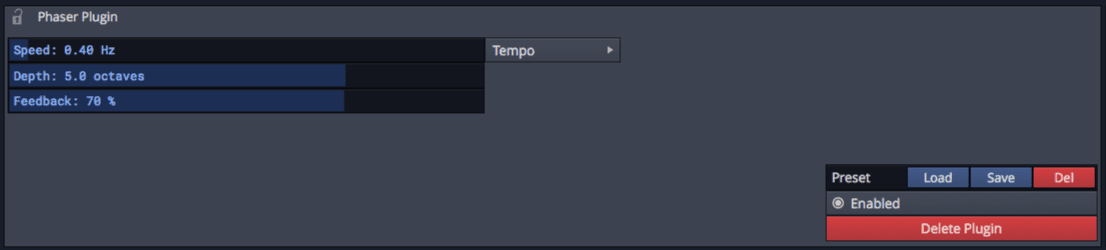
Phaser appears to be a 2 stage phaser with an interesting non-sinusoidal shape to the modulation.
It’s simple, but it works.
Compressor/Limiter
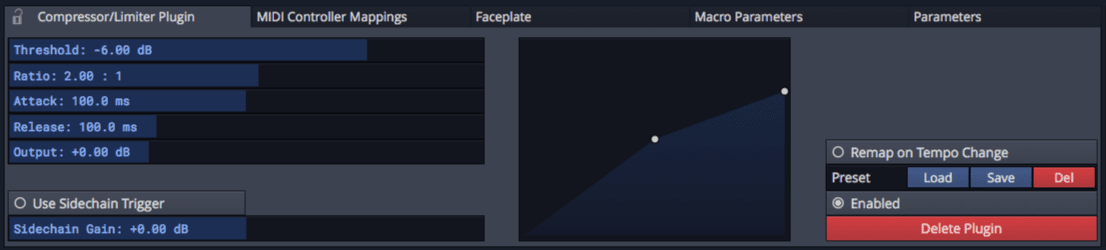
I don’t know how to review this plugin. I’m very familiar with using compressors (and developing them). Compressor/Limiter uses some, uh… ‘interesting’ parameter labeling.
So what’s wrong?
- I’m going to cover the Attack and Release separately.
- The ratio slider is reversed from what I’d expect. Increasing the fader decreases the ratio.
- The transfer graph is a nice addition, but with normal compression settings (a threshold of around -18dbFS), the graph is entirely useless because the displayed breakpoint is drawn at the bottom of the graph
- There’s not even a simple sidechain filter
On the plus side, setting up a sidechain from another track is very easy.
If you want to learn to use compression better, this is not going to help you. Using anything else will end up being confusing when you try to map parameter values to other products. Start with something a bit more… normal.
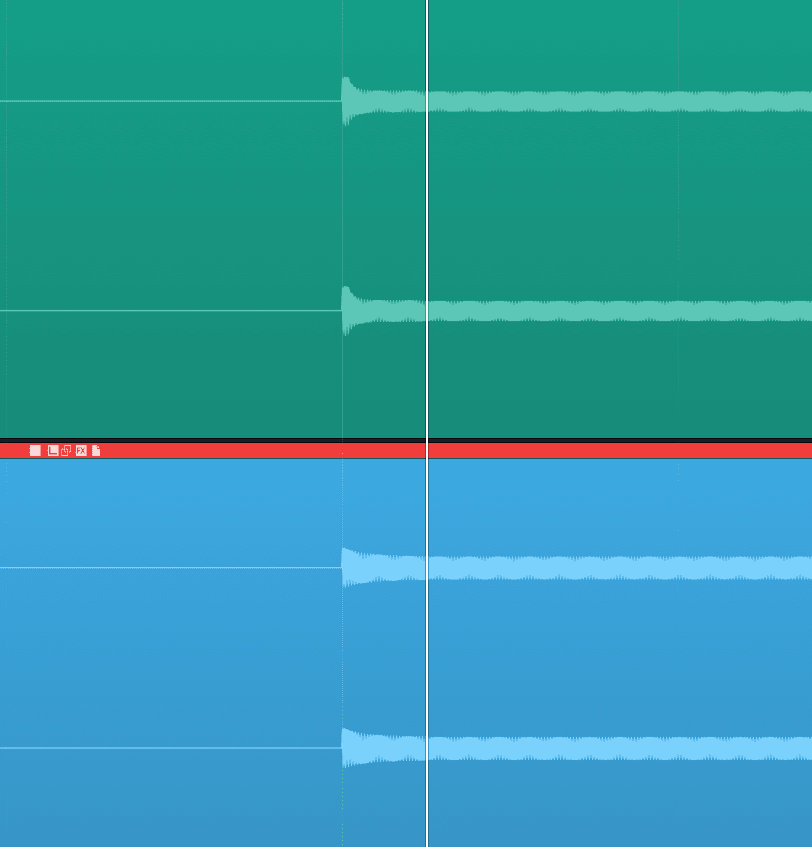
Attack and Release.
Let me just be clear up front: Attack and Release timings are arbitrary. No 2 compressors agree on what ‘20ms attack’ mean… 20ms to what? That ‘what’ is up for debate. You shouldn’t expect 2 compressors to have very similar attack/release timings.
That said… the attack and release stages on Waveform’s Compressor/Limiter are weird.
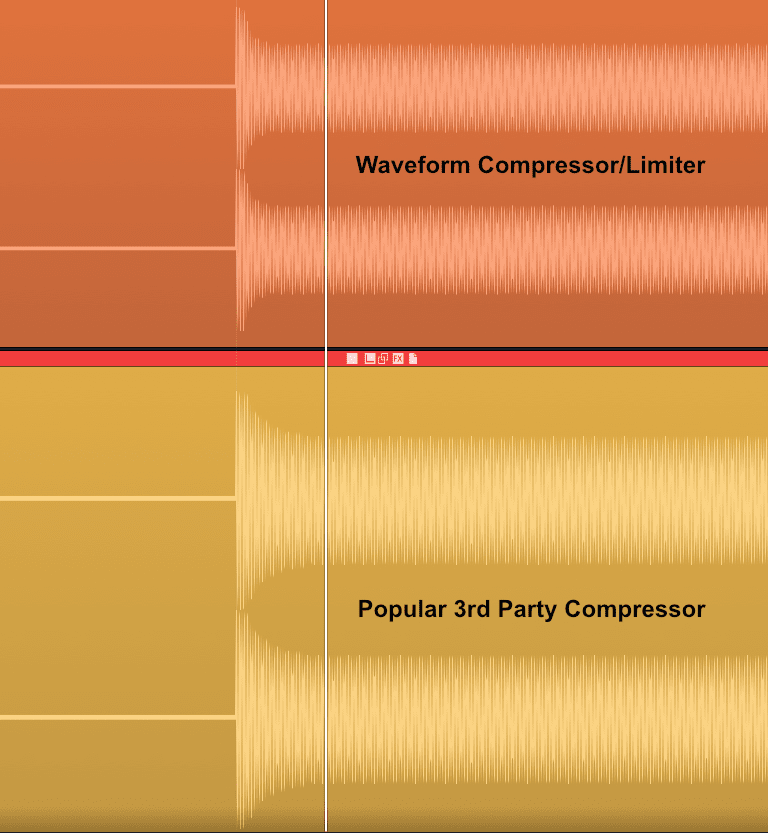
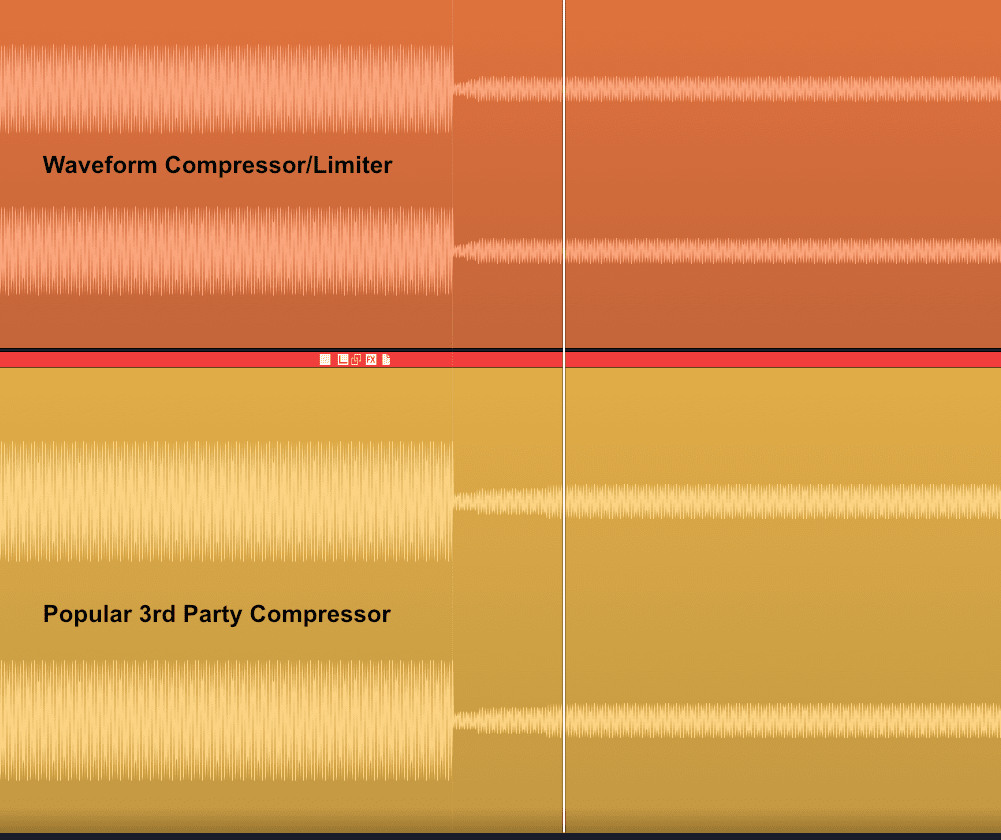
In the images above I’ve compared the attack and release timing of the Waveform Compressor/Limiter with the most popular 3rd party compressor on the market.
Waveform’s attack/release values are different by a factor of 4-5! I tried about a dozen other 3rd party products from the most modern of compressors to famed digital emulations… Waveform was out in left-field.
Trying to use Waveform’s Compressor/Limiter when you have a general idea of what settings sound appropriate on a specific source is frustrating. Where I’d use a 10ms attack on a snare drum, I’m often finding that I need a 50-80ms attack in Waveform’s Compressor.
I suspect this plugin is using extreme logarithmic curves and defining the total time as the time it takes to decay to near-zero.
If you are an experienced user then the values will frustrate you when using Compressor/Limiter. If you’re a newbie then moving to a 3rd party product will be confusing after using Compressor/Limiter.
If you’re an experimental weirdo that “just uses their ears” for everything with absolutely no mental dictionary of what is likely to work for a specific source… then you’re fine. Just use it.
(That last line was partially a joke)
Pitch Shifter
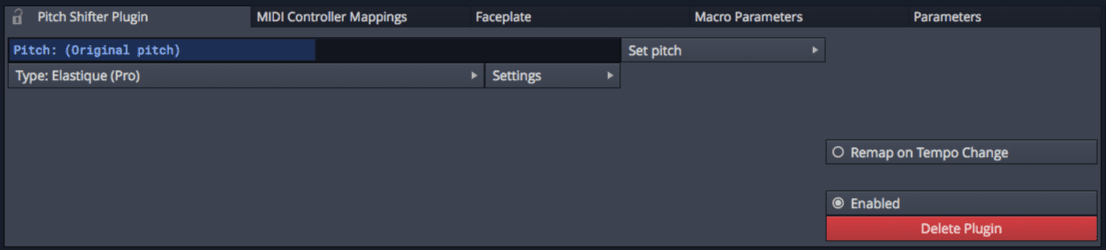
A pitch shifter, that uses Elastique. It sounds quite good all things considered.
There’s various settings available for the Pro mode that allow you to fine tune things nicely.
Low/High-Pass Filter
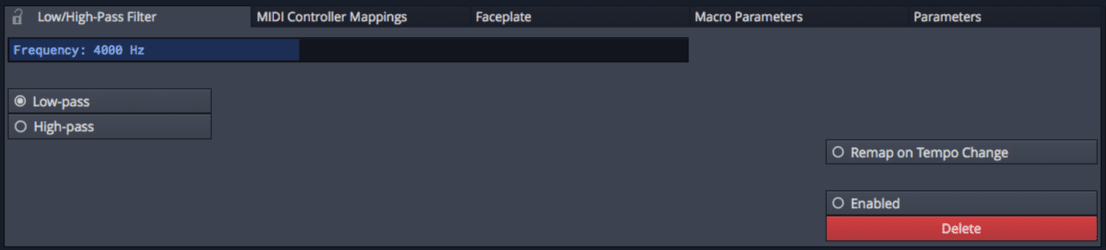
A High pass and Low pass filter with a major flaw.
The High Pass portion is borderline unusable via mouse. From 0-100hz is about 5% of the controls throw. If you want to fine tune a high pass, you’ll have to resort to holding command (macOS) or control (Windows) every time.
There’s no Q, order or slope controls.
Patch Bay
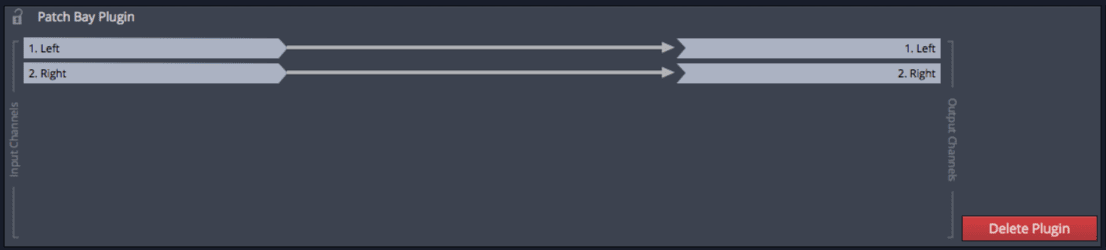
Patch bay allows you to route internal audio channels. The simplest of this operation would be switching left/right channels.
Patch bay shows its true colours when you’re working with plugins that have multiple ins/outs like Racks or Multisampler.
Patch bay would be far more useful if it could be used inside Racks to serve as a de-cluttering device, but Patch bays can not be inserted in to a Rack.
Aux Send and Aux Return
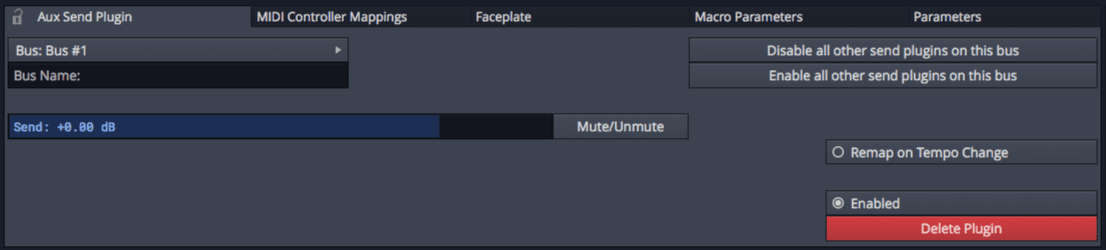
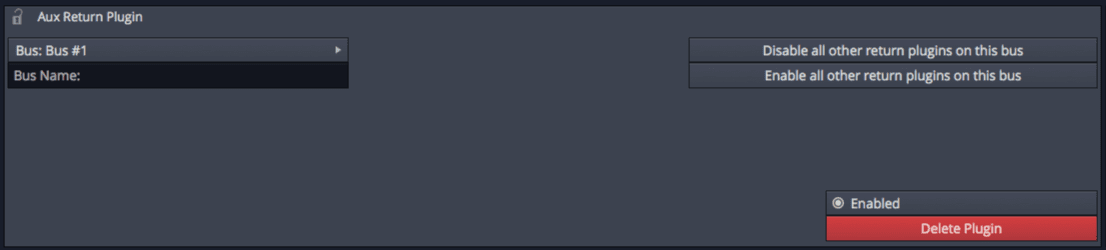
Aux Send and Aux Return is how you send data from one track to another.
The beauty of this system is that you can put an Aux Send anywhere in your effects chain. You can also have multiple returns placed wherever you want.
Aux Send and Aux Return both have a fader overlay on their plugin chain that pops up a larger version. I forgot to take a screenshot of this but check out Volume and Pan to see how it works.
I love this type of Aux system… I just wish they gave us more than 32 busses. :(
Text

Text gives you a plugin that you can rename, and a place to put notes. The text shows up in your plugin chain, and you can click to see notes.
Fantastic. I love it.
Freeze Point

I discussed Freeze Points already. Go read that for more information.
They’re neat.
ReWire Device

I hate rewire. I’m not reviewing this. I have rewire totally removed from my system. It’s a nuisance and a pain in the butt to setup and use.
I suppose this is part of how you use rewire. I’m sorry if you have to use that, my condolences.
Insert
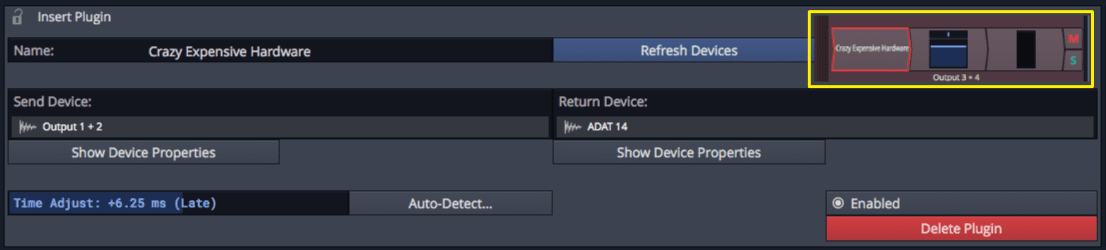
Hardware inserts. This plugin allows you to insert a hardware send/return in to your effects chain so that you can use external hardware.
There’s a neat feature that lets you rename the plugin to reflect what it’s passing through.
I found 2 major issues though:
- It doesn’t render - Even with a track on 1x render, Inserts don’t render for me. The track is mute and no audio is passed to the hardware.
- The Auto-Detect is wrong I think - I’ve checked with multiple devices and the time adjust always gets set to the wrong value. The Recording Delay Compensation appears to use the same functionality, but performs better.
I suspect that these are both bugs, but as of Waveform 9.1.1 this plugin is unusable.
Master Mix
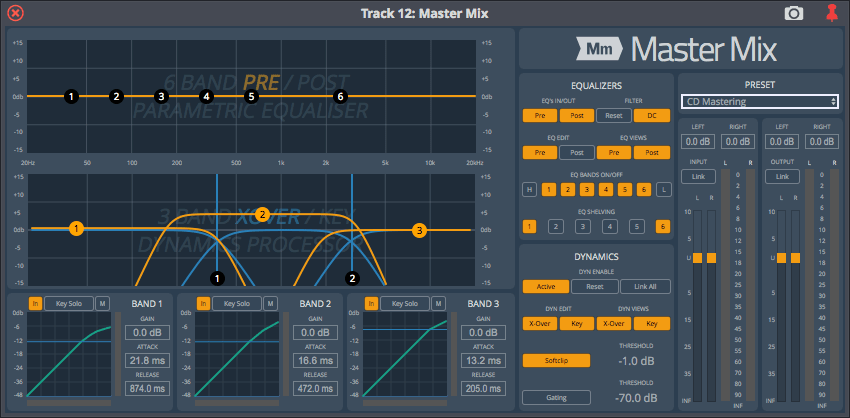
Master Mix is a multiband compressor, EQ, gate and soft clipper. There’s 2 EQs both pre and post.
The GUI is tiny on my 27” screen. The EQ window measures 1”x5” (2.5cm x 12.5cm), which isn’t exactly enough room to do precision work.
The nicest feature in Master Mix is the ease of decoupling the multiband detection signal, and the processing band. Each band can react to, and operate on different parts of the spectrum. This is an excellent feature for cleaning up audio or dealing with microphone leakage on individual tracks.
Master Mix works quite well on a wide variety of sources, not just on your master.
My main issue with it though, is the tiny GUI. I can’t get over it. If they’d fix that, then it’d be great.
Instruments
Sampler
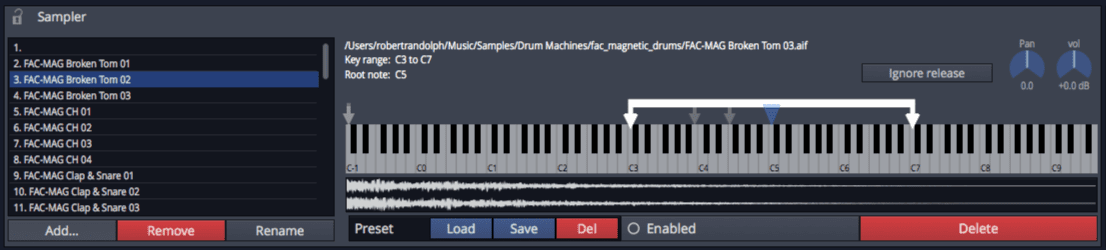
Sampler is a simple sampler that allows you to map an audio sample to a MIDI key. You can set which note corresponds to no pitch shift, and the range that the sample can be played.
There is no ‘pitch shift without affecting time’. Notes higher than the root play faster and notes lower than the root play slower.
There’s free samplers out there that are much nicer. There’s not really any reason to use this.
Multi Sampler
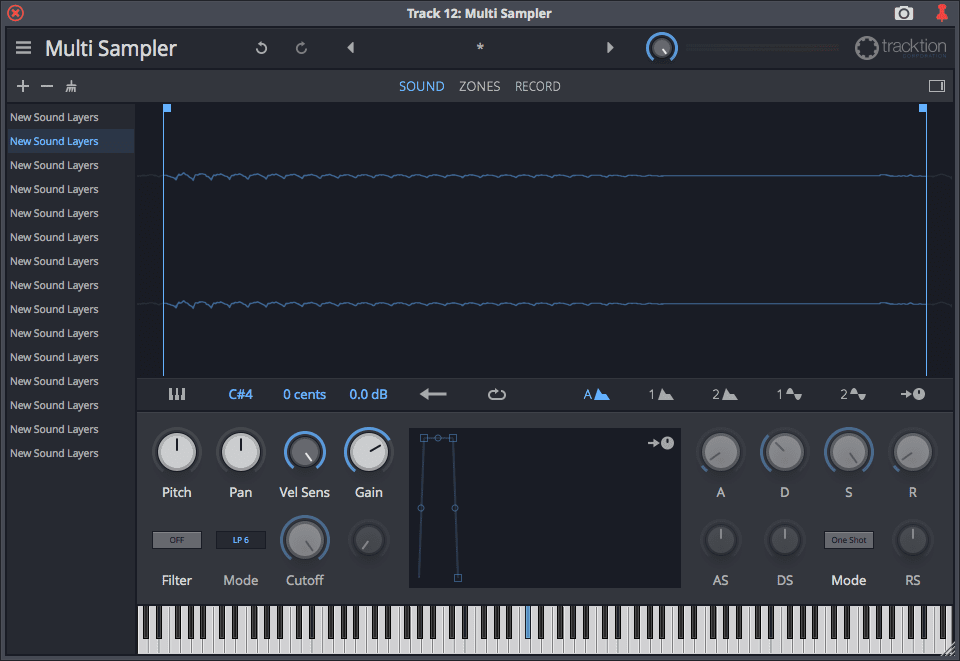
Multisampler is like Sampler but with much more functionality.
- Samples are assigned to a range of note and velocity.
- Each sample has various adjustments - pitch, pan, velocity sensitivity, gain.
- There’s a fully functional ADSR envelope for each sample.
- The attack and decay modes have an adjustable curve (AS and DS parameters along with the handle on the envelope graph)
- Samples can be optionally one shot
- Each sample has a filter.
- There’s 2 modulation envelopes that can be assigned to a variety of parameters per sample.
- There’s 2 LFOs that can be assigned to a variety of parameters per sample.
- Timber, pressure, note, velocity and 128 MIDI CCs can be assigned to a variety of parameters per sample.
- Note hold and loop functionality includes a crossfade for seamless looping.
- Sample reverse is present.
- You can record directy in to the sampler
- Don’t forget the Multisampler integration!
- Single audio files can be sliced up and assigned to their own key/velocity assignments
It’s fairly capable for a built-in sampler, but it suffers from the same (IMO, major) flaw that sampler does… pitch shifting affects time. Waveform comes with Elastique. Why doesn’t Multisampler allow you to use that?! It’s a bit confounding, and it does limit the use of the sampler quite a bit in some cases.
I tend to hit the ‘delete’ key when trying to work in Multisampler to delete things, and instead of working on the last thing you selected… it deletes the entire plugin from the effects chain. Uncool.
There is no features like round-robin functionality to help reduce the ‘machine-gun effect’ on samples. You have to rely on velocity mapping or modulation to do that, and that works alright in some cases.
The net result is that Multisampler is great in the context of Waveform, but once you see what other DAWs offer for built-in samplers then you will be rather disappointed. Of course there’s at least 3 free plugin samplers out there that are better than Multisampler, but without the slicing integration.
Even though it’s a great attempt… it’s not difficult to replace it for free.
With a few adjustments, it’s not far off though.
FM Synth
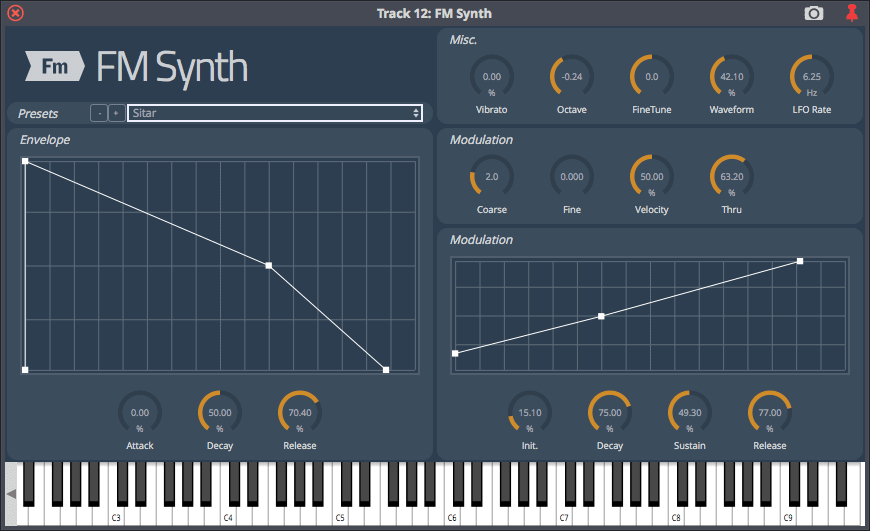
Frequency Modulation Synthesis is a type of synthesis that takes time and effort to master. A reaction from some developers is to greatly simplify it, and the result of such an effort is what you see in FM Synth.
You get an envelope and some parameters to adjust operator modulation.
As an FM synthesizer it’s infuriatingly simple and limited. As a simple synthesizer it’s ok… sorta. I guess.
No it’s not. The last straw for me is not being able to grab the nodes on the modulation or envelope graphs.
Collective
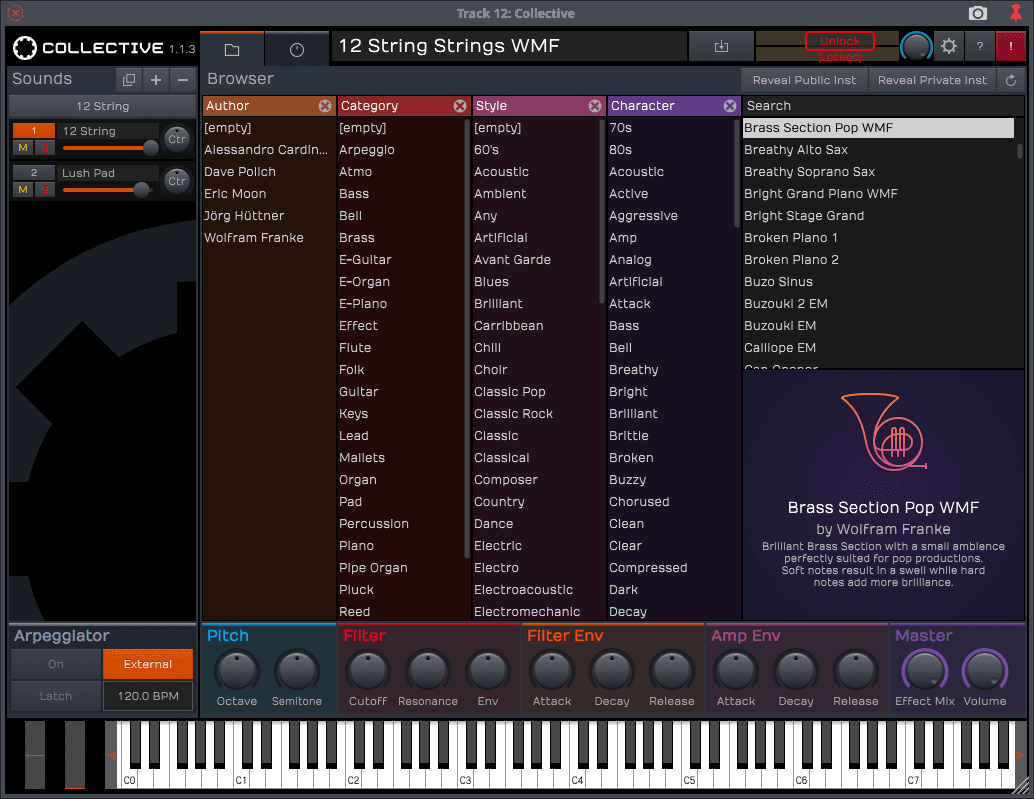
Here we go! A real synth.
- Multiple layers - You can have many presets layered on top of each other for monster sounds.
- Trigger logic! - This allows you to control when/how a sound layer is played. Want that layer to only sound if it’s played on a 1/4 note division with a specific key switch selected? You can do it.
- 4 fm-able oscillators with glide.
- Osc 1-2 have wavetable-like oscs with velocity modulation
- Osc 3-4 have simple shapes but with pitch modulation, saturation, symmetry etc…
- Pitch settings have a nice drawing as a background to show you what’s happening.
- 4 multishape LFOs
- 2 filters with extensive modulation
- Filters frequency response is drawn as a background
- An EQ
- A modulatable amplifier and pan control
- 4 envelopes
- 4 effects slots with 9 types of effects.
- An acceptable arpeggiator
- An excellent preset browser
- Creating, labeling and tagging presets is nice too.
- The GUI is freely resizable and looks great at any size.
Does this sound cool? I haven’t even covered everything. It’s no Alchemy but it’s pretty close.
Collective is available in even the Basic version of Waveform, and it’s free. It’s awesome.
MIDI Plugins
MIDI Modifier
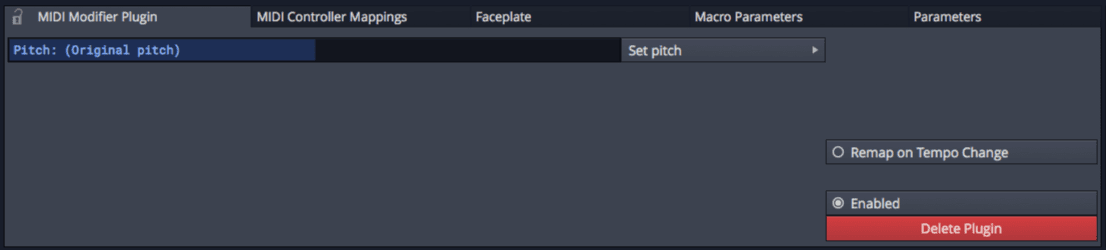
MIDI Modifier is a MIDI transposition plugin.
There is no note mapping. There’s no fancy transpose features. There’s not much here. :(
It’s not flawed, it’s just disappointing. There could be so much more.
MIDI Chord Player
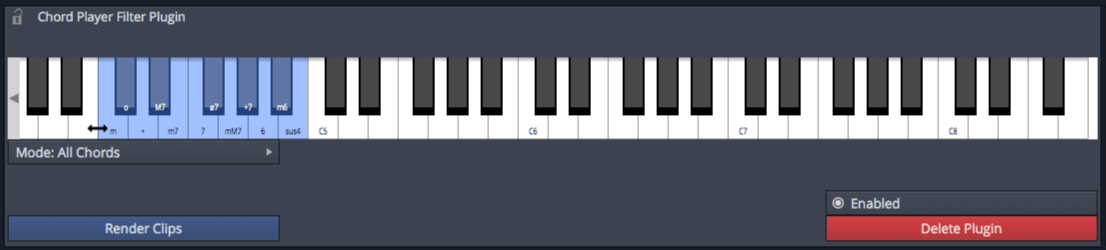
MIDI Chord Player allows you to play one key, and get a chord out of it.
There’s an octave of keys that you press to select the chord quality: Major, Minor, diminished, M7, sus4, etc… Then any other key you press is played as that chord.
Good enough. Other DAWs have better, but this works nicely.
MIDI Patch Bay
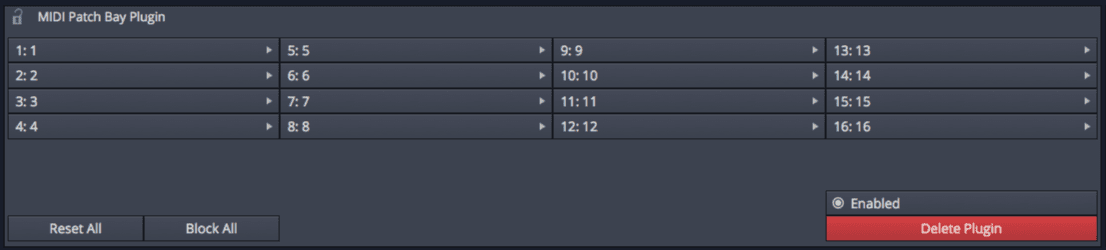
It’s like Patch Bay but for MIDI. Surprising, I know.
MIDI Patch Bay lets you map MIDI Channels to other MIDI Channels.
Conclusion
Overall rating Waveform Basic:
Waveform is missing a number of plugins that I think are core these days:
- Good and flexible saturation plugin
- Convolution Reverb
- Some form of vintage effects (even if it’s only a placebo to make people feel warm and fuzzy about how cool their DAW is)
- A larger variety of simple synthesizers
- Integrated multiband compressor that doesn’t involve messing with racks or Master Mix’s tiny GUI
- Creative filter plugin with various filter types (thing analog emulations)
- Vocoder
- Stereo field adjustment FX
- Guitar/Bass amp plugins
- Trigger plugin (sample trigger for drum replacement)
- Pitch correction
- A tuner
- A de-esser that doesn’t require fooling with extra routing
- A gate that doesn’t suck.
- Visualization tools - stereo visualization, frequency visualization, scopes etc..
- Anything unique? Waveform has nothing that’s particularly unique or fun.
Even though I think that Waveform Ultimate does offer ‘enough to do production’, when you compare it to the offerings of other DAWs it’s really far behind.
Even when you consider the price of Waveform, other DAW offerings give you far more stock product. For some people that means a lot, as they expect to purchase a product that gives them everything they need. Waveform is just barely enough for that type of user.
If you’re the type that doesn’t care about stock plugins at all… then this review really doesn’t matter to you except for Biotek and Collective anyway.
What do you think about the selection of effects presented? Do you think this is enough to be included in a DAW in 2018? Comment below… no registration necessary.
Support Me!
This post took 16 hours to research, screenshot, write and edit. If you appreciate the information presented then please consider joining patreon or donating!
