Part 4. There’s just so many neat little workflow things in Waveform, that I may have to do a couple posts on just ‘good things’.
Today I’m covering arrangement and composition tools. Part 5 will also cover a similar topic.
- Good
- Pattern Generator
- Edit clips
- Bad
- Folder editing
- Weird
- Chord Track
Other parts in this series:
- Version 9, Part 0: Intro
- Version 9.1.1, Part 1: Browser, Mixing, GUI, VCAs
- Version 9.1.1, Part 2: Modulation, Plugin browsing, Annoyances, GUI
- Version 9.1.1, Part 3: Macros, UI design, Ghost tracks, Buying
- Version 9.1.1, Part 4: Pattern Generator, Edit Clips, Folder editing, Chord Track
- Version 9.1.1, Part 5: Step Clips, Loops, Clip Linking, Loop Recording, Track Presets
- Version 9.1.1, Part 6: MIDI Editing
- Version 9.1.1, Part 7: Recording
- Version 9.1.1, Part 8: Clip Layer FX, Multisampler, Scripting, Project Management and more
- Version 9.1.1, Part 9: Instruments and Effect Review
- Version 9.1.1, Part 10: Conclusion
- Version 10.1.0
VERSION - This review is (hopefully) accurate as of Waveform 9.1.1. Further versions may obsolete these views.
Contents
Good
Pattern Generator
Each MIDI clip has an optional pattern generator. It can generate arpeggio patterns, chord patterns, basslines and melodies.
The patterns can follow the chord track or each pattern can have its own progression.
The video above explains it pretty well, but if you liked videos instead of text you probably wouldn’t be here. I’m going to go through each section myself.
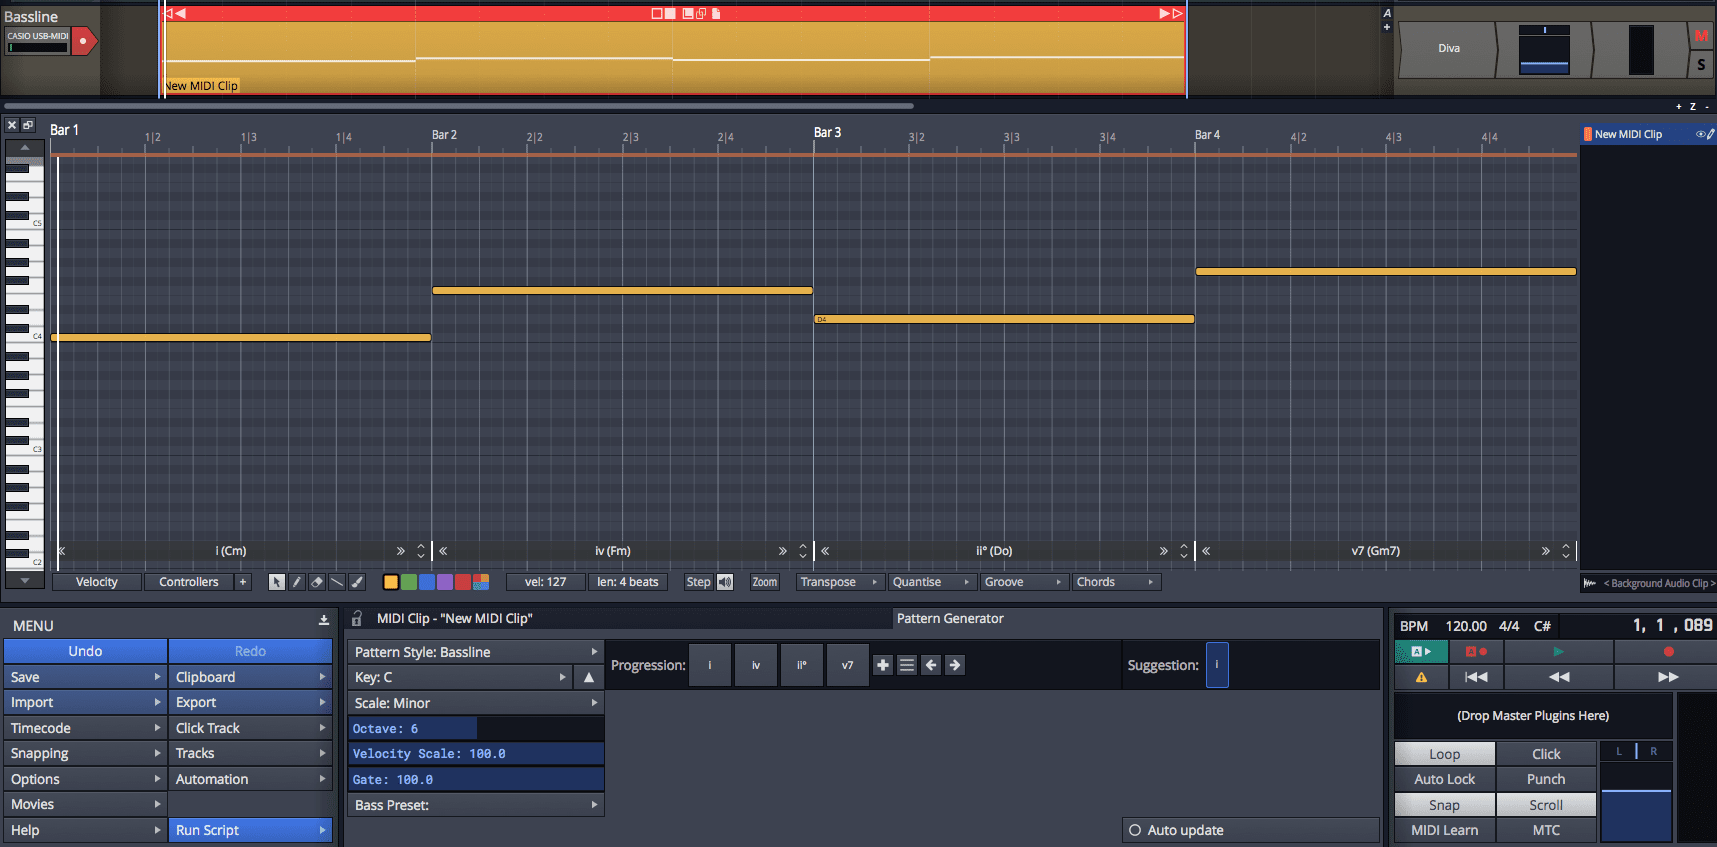
The first thing you need to do is create a MIDI clip then select it and go to the “Pattern” tab in the bottom panel then you have a number of options.
General info
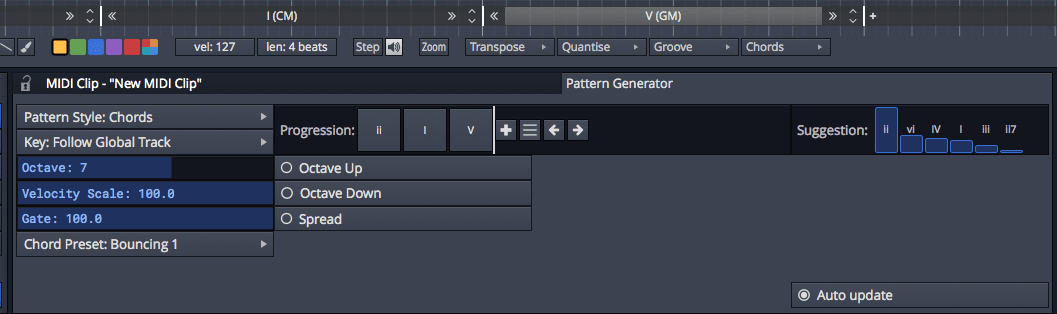
The basic idea once you select a type of pattern is that you can input chords progressions easily. The core of this functionality is the progression bar.
The progression bar is where you can create a progression. Each chord is shown in roman numerals, but you can optionally work in spelled pitches as well.
There are a number of popular chord progressions available, and you can easily switch between them using the arrow buttons. There’s 3 and 4 bar presets along with custom presets (which you can easily save your own of).
Each individual chord can be changed as required. Roman numeral representation is available for non-decorated chords and 7th chords. For chord extensions beyond a seventh you must select a pitch class root and then the extensions that you want. Extensions are only available up to 9ths, but since you can still manually edit the MIDI that isn’t a major issue. In settings you can also define your own custom chords, however currently not for roman numeral representation.
There is a suggestion box on the right side that shows you the statistically most likely next chord in your current progression that’s supposedly based on an analysis of popular music. I’ve tried dozens (probably hundreds) of chord progressions and it seems to work fairly well. I can’t attest to the statistical accuracy, but the results are familiar. If you have a pattern generator on another clip, you can select ‘Other’ and get the pattern from that clip without saving a preset first.
Each clip can have its own selectable key, which is based on a scale (grr… music theory nerd is raging). The clip can also follow the global track or chord track as well. The Global track is the ‘Tempo’ track and you can enter key changes there.
| Each chord’s length can be adjusted with the | between chords in the Piano Roll. On that same bar you can move through chord inversions using the up/down arrows. |
From there each section has its own unique settings. Once you have the pattern generated, the MIDI can be edited as normal. If you make changes to the pattern, your manual changes are lost though.
Arpeggio
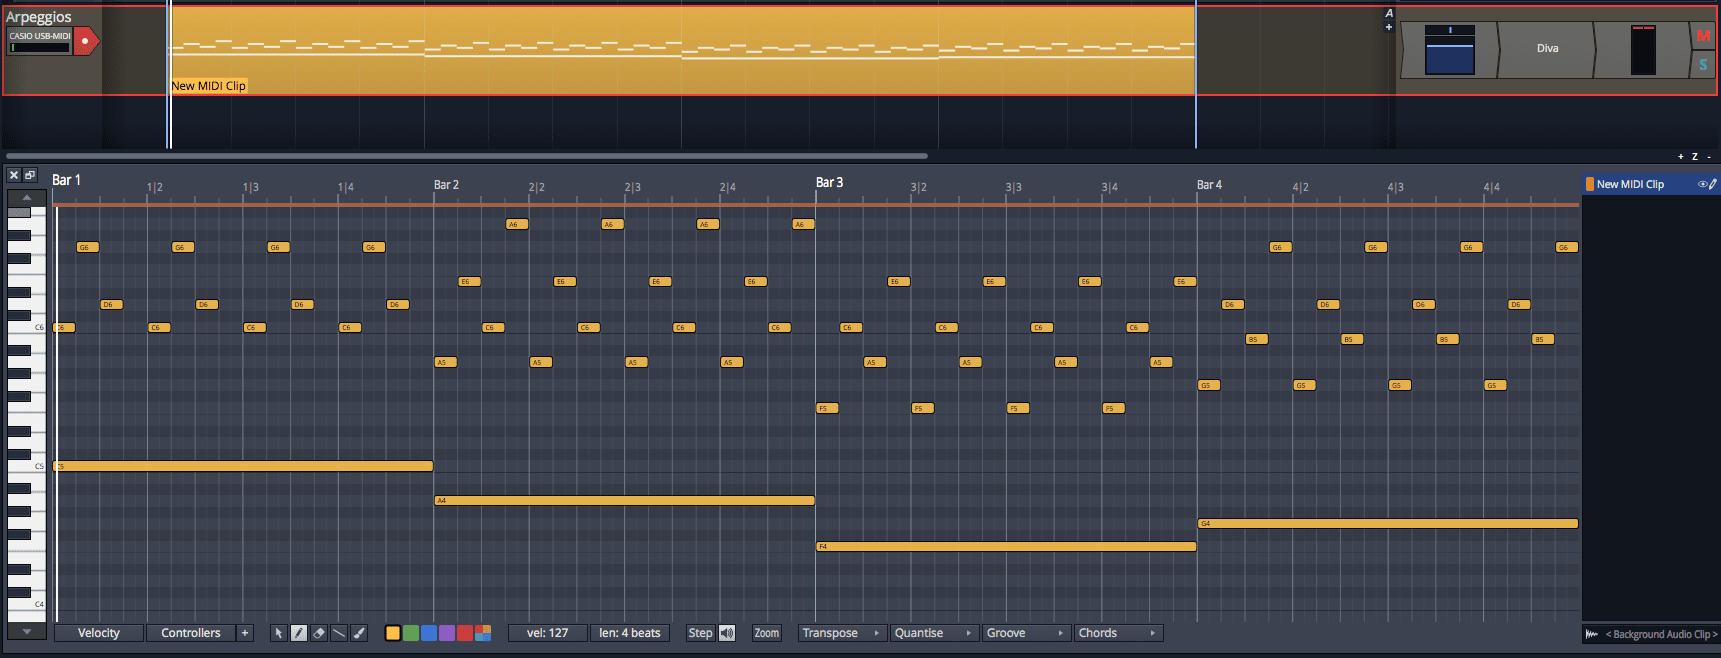
The first option is to generate arpeggios.
The things you’d expect are here: pattern length (which is basically “speed”), velocity, octave, gate (note length) and the number of steps.
Arpeggios have various styles that are shown as cute drawn lines. There’s different styles for up and up/down modes. If you are looking for ‘down’ modes, they are a type of style presented while in ‘up’ mode.
The root note of each arpeggio can be toggled to play or not.
The Arpeggio generator is really simple, but unlike other DAWs that force you to use a MIDI plugin for this task, you are given the MIDI that you can edit and modify yourself.
Chords
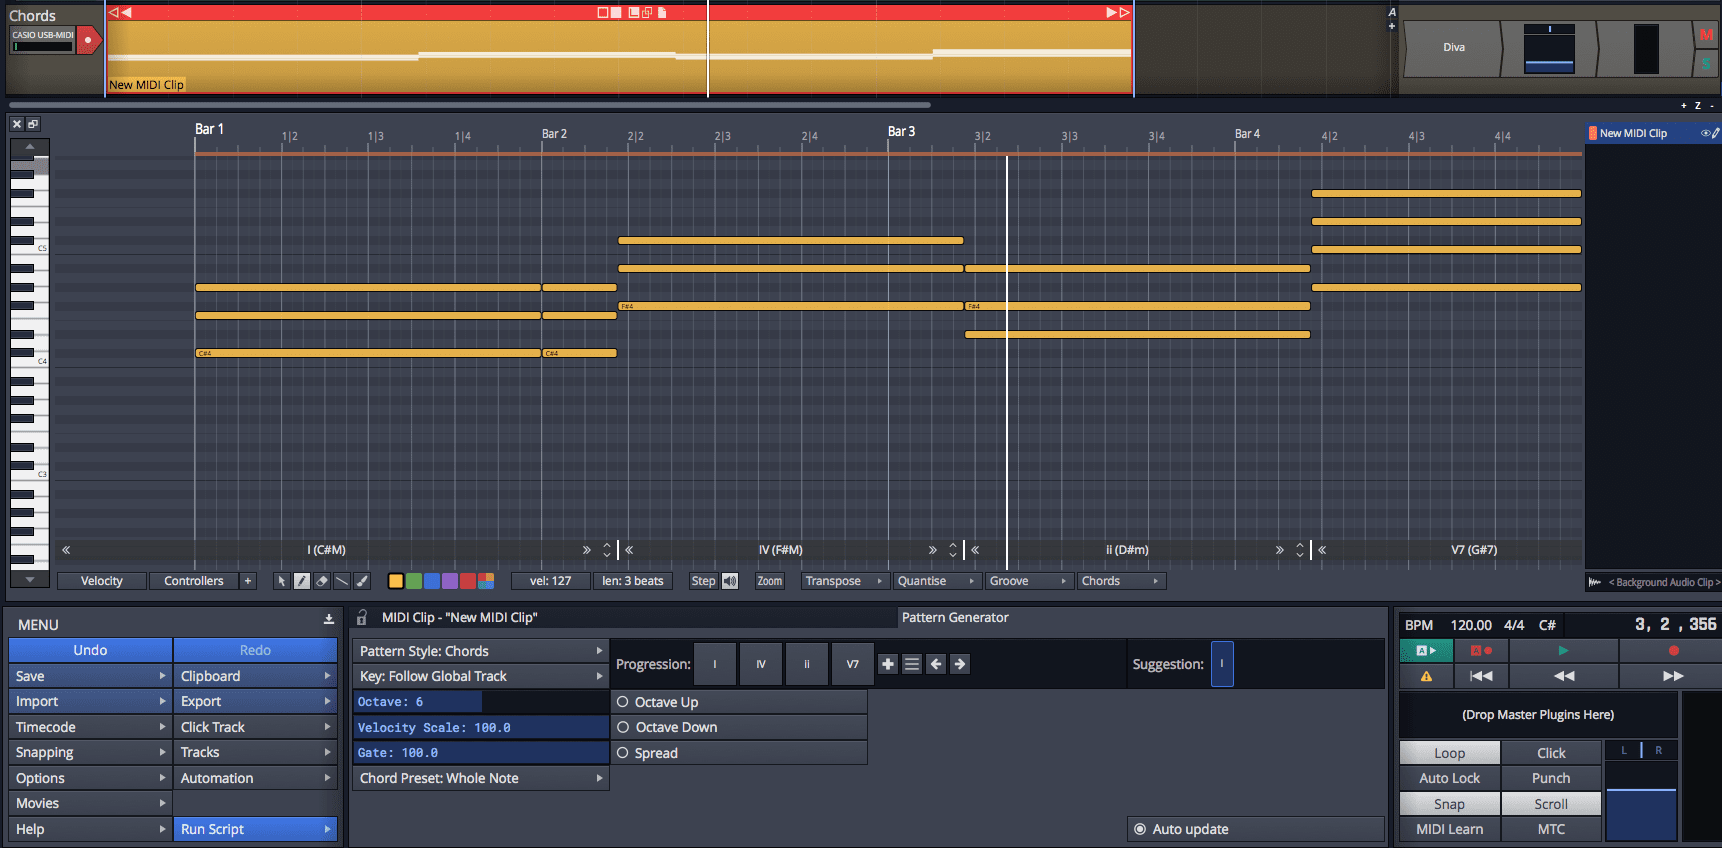
Chords are fairly simple. It generates chords for the given progression. The only notable options are to add an octave up/down of the root, and the spread option. The spread option appears to move the 3rd an octave up.
Chords have rhythmic options. There’s a number of chord presets which offer you rhythms for the chords. You can select a group of notes in a MIDI track and create your own chord preset if you have a specific rhythm that you want presented. Neat.
Bassline
Bassline patterns are like chord patterns except they only use the root by default. Bass presets offer rhythmic variation that’s a separate context from chord patterns.
That’s all there is to it.
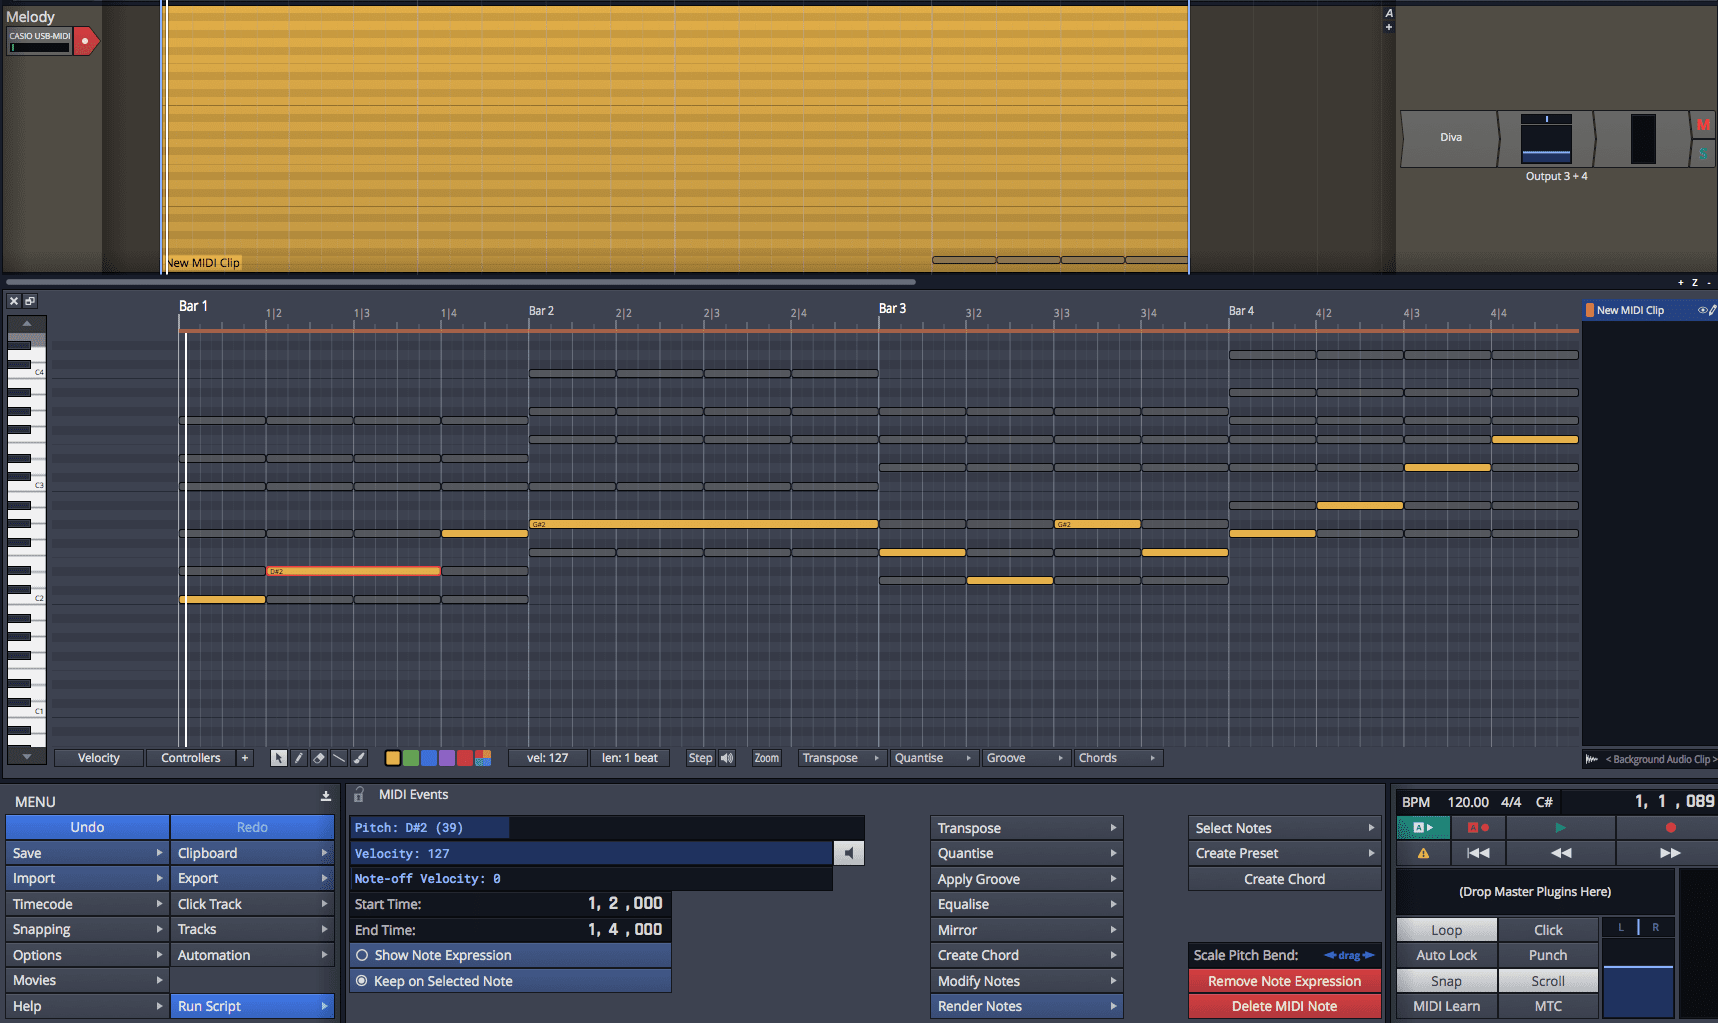
Melody
This is where things get cool. The melody generator gives you the chords of your progression, but split up by a selectable division. With the paint brush tool you can pain a melody using the chord tones. It’s a guaranteed pleasant melody that follows the chord progression that you want.
Notes can be merged using normal MIDI editor commands, split, adjusted etc…
There is a randomization feature that randomizes melody using chord tones. That’s fun to play with.
Criticisms
These criticisms are for Waveform 9.0.37.
The Tracktion team may have changed these since I wrote this. During the course of this review I will try to maintain this, but after the review is over it’s unlikely I will keep this up to date. Please try the demo yourself first before becoming upset by these things!
- There’s no option to work in flats. As a classically trained musician this is insufferable! When I’m trying to work in Db, the ii is not D#m. It’s not. It never will be. A C7 does NOT have an A# in it. PLEASE fix this Tracktion guys. It causes a cognitive sludge to develop for some of use.
- Complex chords can only be input by pitch class. If you want a I7#9, you can’t input that as roman numeral. It’s only available as C7#9 (assuming you’re in C). This disconnect between pitch class and roman numeral adds another cognitive mud to the pile. My brain is constantly translating between things.
- When using pitch class, the chord no longer follows the Chord track. So if you wanted a Ib9#11 chord, it won’t follow the key of the project when you change it, nor will it follow the chord track.
- Manual changes are lost when editing the pattern. Ideally the pattern would only adjust notes in the ‘previous’ chord, and there be an optional action to delete everything in that current chord’s section. Perhaps a ‘destructive’ and ‘non-destructive’ mode. This is really important when trying to use extensions that the pattern editor does not provide like 11s and 13s.
- There does not appear to be any way to adjust the length of a chord without changing EVERYTHING after it. Often I wish to move the boundary between 2 chords and leave all subsequent chords alone. I think this should be the default behaviour.
- If you make a melody, then want to change a chord you lose everything. Yes, really. One chord change and your entire melody is gone.
- Melody patterns can’t use chord presets. That would make for some more interesting melodies if the spliced chord was split by the chord preset boundaries rather than a fixed even division.
- ‘Randomise’ notes sometimes creates overlapping notes that sound terrible. The “random” melody loves to have major and minor 2nds overlapping each other, and that’s not a great recipe for a nice melody.
Edit Clips
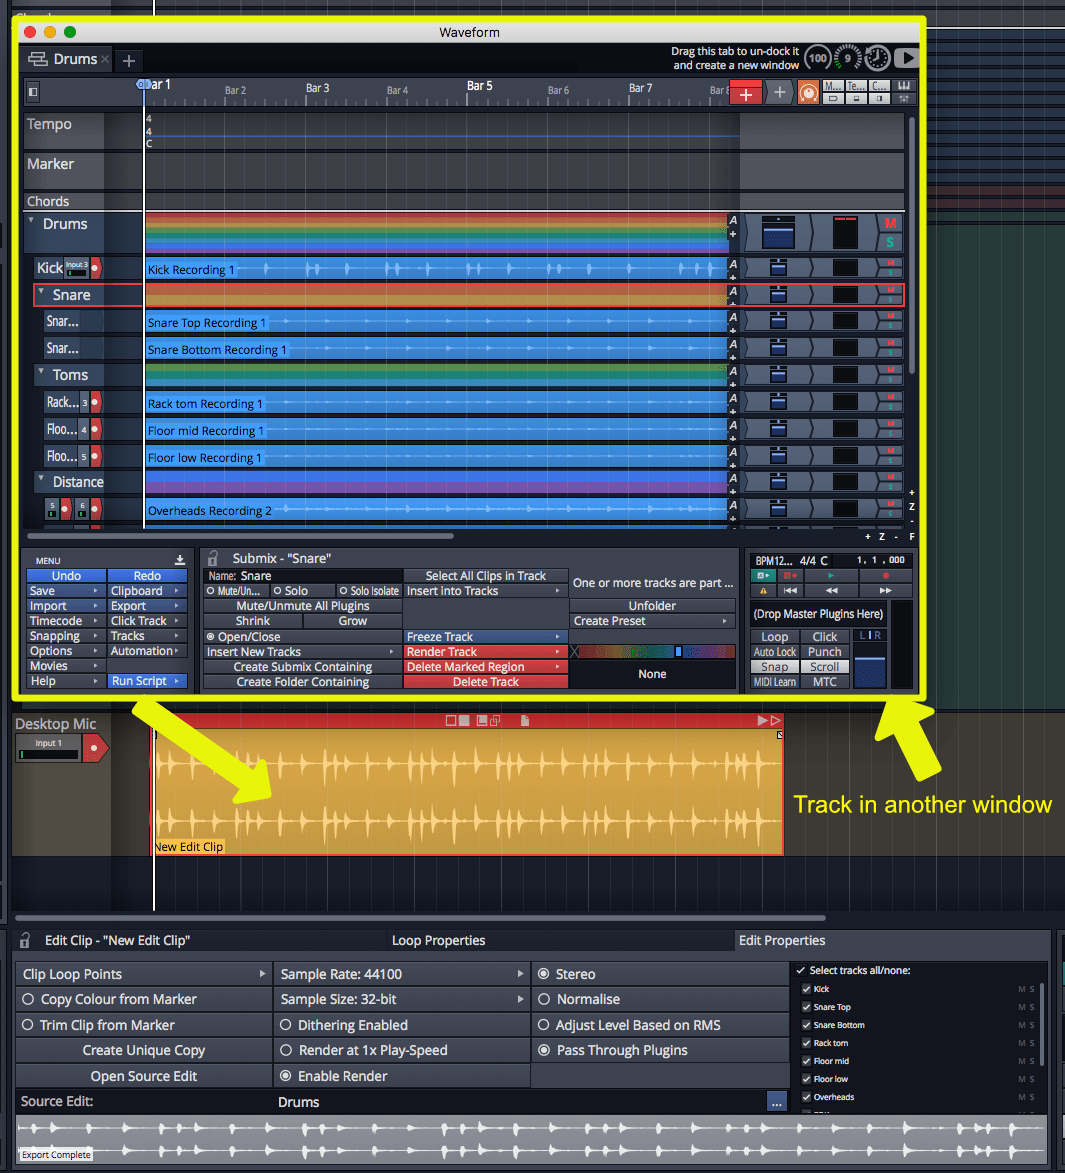
Edit clips are clips that are projects. You can drag and drop a project in to another project. The project is rendered and inserted. The ‘new clip’ object (red box with the + at the top) can also create an edit clip, and you select the source in the properties panel.
You can select which tracks you want in the edit clip, normalize and turn off plugins in the referenced clip. There is an option to normalize the clip based on RMS value, which is a great way to make sure your imported clip matches the general level of the parent project.
Basically every ‘idea’ you have can be its own project. Want to import a drum loop from a failed project? Edit clips to the rescue. Have a big multitrack recording that you don’t want to clutter your project with? Edit clips to the rescue! Have a number of parts that you want to sequence together? Edit clips to the rescue.
Waveform does nicely handle varying tempos as it uses the clip’s native ‘root tempo’ and time stretching facilities to match tempo.
There’s not much to say about edit clips, it’s a simple feature that has a lot of use if you are creative about it.
Criticisms
These criticisms are for Waveform 9.0.37.
The Tracktion team may have changed these since I wrote this. During the course of this review I will try to maintain this, but after the review is over it’s unlikely I will keep this up to date. Please try the demo yourself first before becoming upset by these things!
- Edit clips can’t play live. They are always rendered
- Selecting tracks often resets the view. If you have a lot of tracks to deselect, then you are constantly scrolling around.
- Referenced projects can’t be selected via a browse dialog. They have to be drag/drop from the tab bar or opened in the background. Draggind a .tracktionedit file from your file manager does work though.
Bad
Folder Editing
If the author(s) of Waveform love(s) me, they have a funny way of showing it.
I do a lot of multitrack recording and I often need to edit multiple tracks (or clips) as if they are a single object. Waveform attempts to facilitate this by having folders have a clip that’s a representative of the underlying tracks.
This sounds neat until you try and use it.
Usually when editing multitrack objects, it’s necessary to zoom in on a part and edit that with the desire that the grouped/linked tracks follow. Folder tracks don’t let you do that. If you want multiple tracks to follow the same edits then you need to move the folder track clip, which takes you away from the detailed view of the actual track that you’re trying to edit.
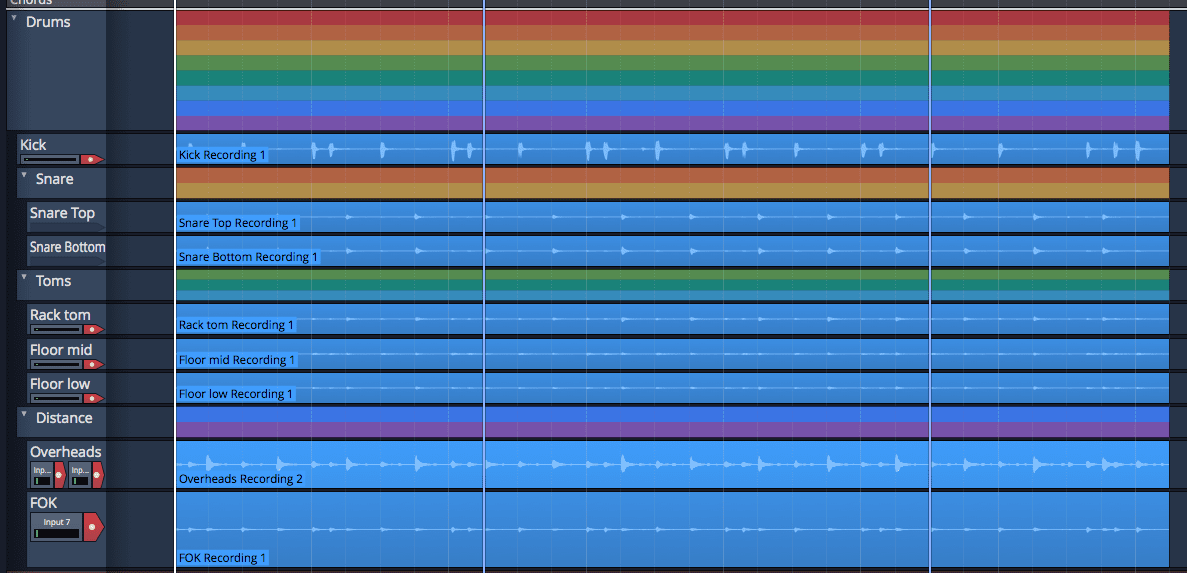
Imagine that in the clip above I want to make an edit with the ‘FOK’ (front of kick) track. I need to zoom in and get it just right. You have to edit the folder track for ‘drums’ to do this and have everything line up properly. So at best I’m re-arranging my tracks around, and I lose potential zoom area since I need at least 2 tracks (‘FOK’ and the folder track) open.
A number of important clip editing commands don’t work, the most important of which is split. That’s right, you can’t split a folder clip (in 9.0.37). Argh! You can’t crossfade either.
The next issue is that warping doesn’t work on folder tracks. Bleh. I use that feature often in other DAWs.
Folder track editing is a feature I guess. If you just want to drag groups of clips around, which you can do by selecting them anyway. For actual multitrack editing it just doesn’t cut it. In fact, I can’t find anything in Waveform for this. I’ve had to cheat on my ‘30 days’ by using REAPER for most multitrack editing duties.
Weird
Chord Track
When you see ‘Chord Track’ you might think of Cubase’s Chord track or Logic’s Chord track, but you would be sadly disappointed.
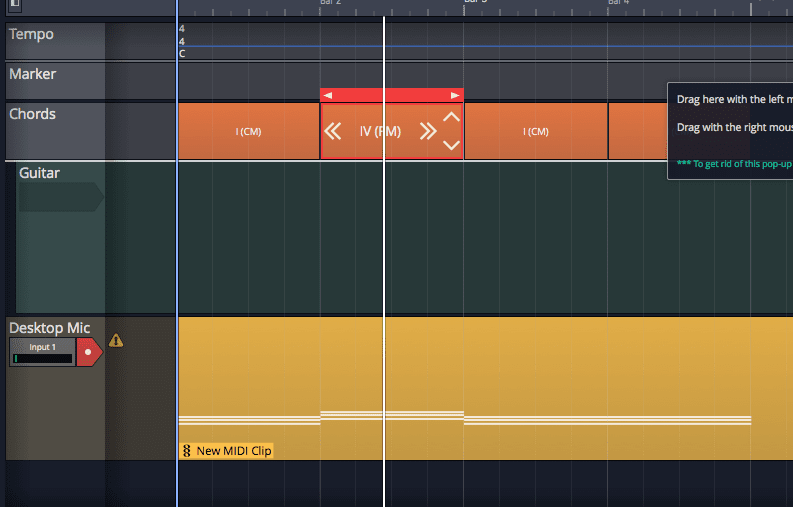
The chord track is just a way of controlling pattern generators. The pattern generators can follow the chord track, so it’s possible to use the chord track to sync up various pattern generators around the project.
Unfortunately, that’s all the chord track does. It has no idea about the pitch of audio clips. It doesn’t integrate with melodyne, which I’m not sure is technically possible but it’d be great if it was. It doesn’t have any function to make manually-edited clips diatonically follow the chord track.
Another strange thing about the chord track is that it allows you to enter progressions, but each chord is 1 bar long. I can’t find any way to change the length of the chord. The chord track also makes the following clips have the same inversion, which is rarely a desired track, usually you want clips to have their own voicing. EDIT - Ok, so this is just confusing behaviour. You need to make the chord track >1 bar to see the extra chords. If oyu are using multiple chord clips then this becomes messy quickly. Another work around is to use multiple chord clips alone, but then you lose the ability to use the suggestions feature and to keep progressions together easily.
The chord track isn’t bad per se, but I struggle to find out how its use outweighs the workarounds necessary for utilizing it fully.
Support Me!
This post took 7 hours to research, photograph, write and edit. If you appreciate the information presented then please consider joining patreon or donating!