It’s time for the Logic Effects review, finally! Sorry this has taken nearly an extra week, but we’re here now. I spent 55 hours specifically reading the effects manual, evaluating every plugin on a number of sources, testing with various analysis tools, reading the manual again, writing about plugins and editing this document. (I’m totally sick of it btw, jeez). That doesn’t include the time I’ve spent so far just casually using the products. There may be an error here or there, so please let me know if you see one!
This time I’m doing the effects review differently than I have in the past (Mixbus Effects, Mixbus Instruments, Bitwig Effects, Bitwig Instruments, Cubase Effects, Studio One Effects and Studio One Instruments). Instead of rating every single plugin, I’m splitting the plugins in to 3 categories: Fantastic, Sufficient and Flawed. The categorization is decided as follows:
- Fantastic - These are plugins that I think would be an excellent value to purchase if possible. Likewise, they compare favourably with third-party plugins on the market.
- Sufficient - Sufficient get the job done without much hassle. There may be no fancy extra features like some third-party competitors, or maybe the DAW version is missing some common feature, but nevertheless it’s enough to get the job done.
- Flawed - As the name implies, these plugins have some sort of flaw. I would suggest replacing these with a third-party product.
Many of the plugins are vectorized for clean resizing and retina screens. I’ve marked the non-vectorized models as of Logic 10.4.
There will be a total rating for everything included though, and that rating is…
Spoiler - Overall rating:
Parts in this series:
- Cool things in Logic Pro X Part 1
- Cool things in Logic Pro X Part 2
- Cool things in Logic Pro X Part 3
- Cool things in Logic Pro X Part 4
- Cool things in Logic Pro X Part 5
- Logic Pro X Tips & Tricks and more cool things
- Cool things in Logic Pro X Part 10.4
- Logic Instruments and MIDI Effects Review
- Things I hate about Logic Pro X and Conclusion!
EDIT Updated for Logic 10.4!!
Contents
- Fantastic Effects
- Bass Amp Designer
- Binaural Post-Processing
- Channel EQ
- Chromaverb
- Compressor
- Delay Designer
- Distortion II
- Direction Mixer
- Ensemble
- Enveloper
- EVOC 20 TrackOscillator
- Flanger
- I/O
- Linear Phase EQ
- Match EQ
- MultiMeter
- Noise Gate
- Phase Distortion
- PhatFX
- Ringshifter
- Rotor Cabinet
- Space Designer
- StepFX
- Stereo Spread
- Surround Compressor
- Tape Delay
- Test Oscillator
- Vintage Console EQ
- Vintage Graphic EQ
- Vintage Tube EQ
- Sufficient Effects
- Flawed Effects
- Conclusion
- Support Me!
Fantastic Effects
Bass Amp Designer
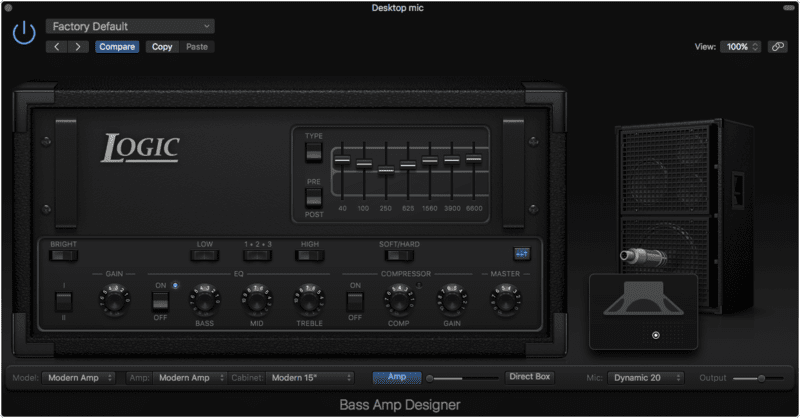
Bass Amp Designer is similar to the Amp Designer, and likewise all the same criticisms apply.
However, Bass Amp Designer is far more well suited to a Bassists expectations of an Amp Sim. Every model has 2 channels, a bright switch, a semi-parametric EQ (the frequency that’s controlled by the knob is variable by a switch), a graphic EQ or fully parametric EQ, and a compressor with 2 modes: hard/soft. I find that these additions are more important to a bassist than having tremolo on a metal amp is to a guitarist. Particularly since I’m rather fond of the Bass Amp Designer compressor, it sounds fantastic.
A major feature of Bass Amp Designer is that it has an integrated Direct Box that can be variably mixed with the Amp/Mic combination. The DI Box has a high frequency cut, input gain, and 6 ‘tone presets’. The ability to blend this in with a mic’d amp sound is a classic technique that often yields excellent sounding bass tracks.
Another feature that sets the Bass Amp Designer apart is that in the cabinet selection, you can select direct from either the power amp or the preamp. This is another classic studio technique that allows for a wide palette of sounds.
Bass Amp Designer is functionally far more well suited to Bassists than Amp Designer is to guitarists. In fact, as someone that’s primarily a bassist (of 3 decades, including my college education), I would buy this as a third-party plugin in no time.
That’s not all either. Bass Amp Designer is a great way to fatten up synth basses and kick drums as well. I tested it on a wide array of synth basses, and almost without fail I was able to add something to the sound that was worth the time spent tweaking. I’d even go as far as to say that for clean sounds, Bass Amp Designer is a better amp simulation for guitars than Amp Designer is.
I think at this point you can tell by my enthusiasm why I’ve placed this in ‘Fantastic’.
Amps
- Modern Amp -
- Classic Amp -
- Flip-Top Amp -
Cabinets
- Modern Cabinet15 -
- Modern Cabinet10 -
- Modern Cabinet 6 -
- Modern Cabinet Distant -
- Classic Cabinet 8x10 -
- Flip Top Cabinet 1x15 -
- Direct (PowerAmp Out) -
- Direct (PreAmp Out) -
Mics
- Condenser 87 -
- Dynamic 20 -
- Dynamic 421 -
Binaural Post-Processing
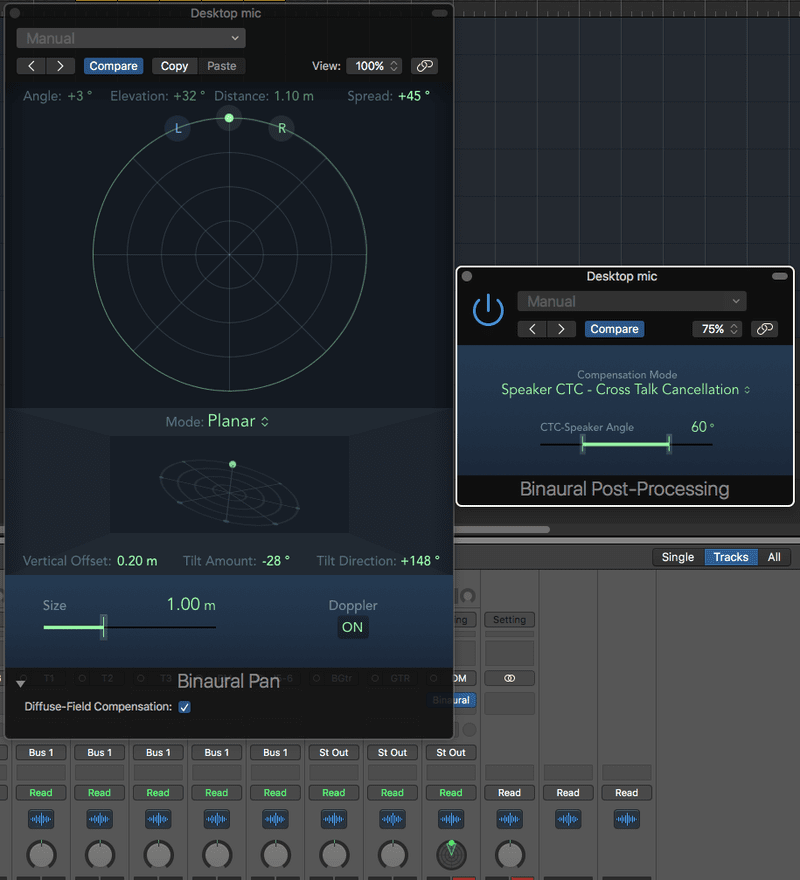
Binaural post-processing is a plugin that lets you customize how the binaural panners in Logic work.
First, what is binaural panning? Every channel strip in Logic can be set to ‘Binaural Pan’. This allows you to use a complex panner (shown on the left) that lets you pan in side a virtual space. You can position things vertically, a distance from you, behind you, and more. You can even change the orientation of the plane used for 2d panning!
Binaural Post-Processing adjusts how this binaural panning is encoded essentially. The default mode for the binaraul panner is setup to work for headphones. The Binaural Post-Processing plugin lets you adjust this to a number of other headphones modes, plus a Speaker mode with variable speaker angle.
Here’s what the modes do according to the manual:
-
Headphone FF—optimized for front direction: For headphone playback, utilizing free-field compensation. In this mode, sound sources placed in front of the listening position have neutral sound characteristics.
-
Headphone HB—optimized for horizontal directions: For headphone playback, optimized to deliver the most neutral sound for sources placed on, or close to, the horizontal plane.
-
Headphone DF—averaged over all directions: For headphone playback, utilizing diffuse-field compensation. In this mode, the sound, on average, is most neutral for arbitrarily placed, or moved, sources.
-
Speaker CTC—Cross Talk Cancelation: For speaker playback, allowing you to play back binaurally panned signals through stereo loudspeakers. Good spatial reproduction is restricted to a limited range of listening positions, on the symmetrical plane, between the speakers.
It’s not necessary to use the Binaural Post-Processing on every single channel with a binaural panner. The binaurally panned tracks can be sent to an aux and processed with a single Binaural Post-Processing plugin.
This plugin, and the associated binaural panners, are a rather unique feature in Logic. While binaural panning can be somewhat of a gimmick at times, it can be exceptionally useful for sound design and foley work. Fantastic.
Channel EQ
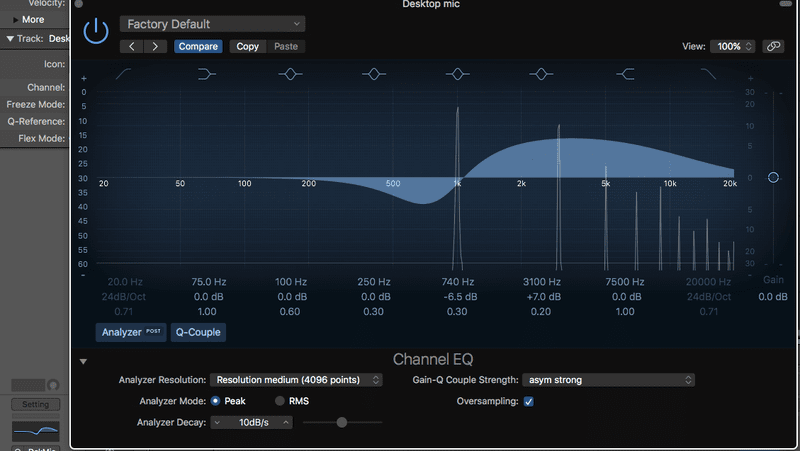
Channel EQ is Logic’s built-in EQ. Every channel strip has a place for it, and the channel EQ has its own tab in the Smart Controls EQ window.
Is it a good functional EQ? Yes. It’s not anything particularly fancy, but it does have some features that I think make it a particularly nice EQ to have handly at all times.
- Oversampling - I’ve complaining about EQ cramping before. Oversampling is one fix to this (in fact the best fix for it) and the Channel EQ offers it. The nice thing here is that it only adds 0.3ms of latency to the signal for oversampling, which is a very tiny amount. That makes it usable for real-time monitoring, and the latency is compensated for.
- Analyzer modes - the analyzer has a number of parameters to increase the resolution, its decay and if it’s peak/rms. This is located in the expanded section if you click the arrow in the lower left.
- Q-Couple - Q-couple links each band’s gain with its bandwidth. This means that the more extreme the cut/boost, the narrower the bandwidth becomes. ‘Q-coupling’, as Logic calls it, is a feature of many classical EQs and often a big part of what the ‘Analog’ mode in EQ will be. There are q-couple modes in the expanded section (the arrow in the lower left). They vary from light to strong with 2 modes
- Symmetrical - This applies similar gain-q interaction for cuts and boosts
- Assymtrical - This applies more extreme narrowing of the bandwidth for cuts, but not as much for boosts. Some beloved analog EQs behave this way, and it’s a very pleasant way to work. I have a strong suspicion that this classical behaviour is a big reason for the advice of ‘Cut, don’t boost’, along with other factors (such as increased noise and audible phase differences with boosts).
- Proportional - Similar to Symmetrical Strong, but a bit narrower with a less gentle curve.
One of my favorite things about the Channel EQ is the gain and bandwidth handles. When you select a band a box is drawn around it to indicate the current frequency range. You can simple resize that box to change the bandwidth, and adjust the gain via a line across the peak of the filter. It’s an efficient workflow that I prefer.
It may not appear on the surface that Channel EQ has mid/side modes, but every plugin in Logic does!.
Channel EQ only has 4 peak bands, 2 shelves, highpass and low pass. The high/low pass go up to 48db/oct. This may be an issue in some cases for very complex EQ work, and if you end up having to use a second channel EQ, only the first one on the channel strip is shown in the strip EQ window and the smart controls.
Channel EQ may not be something that I’d purchase as a third-party product, but due to how it integrates with Logic, its relatively unique features and ease of use… I’m considering this one Fantastic.
Chromaverb
ChromaVerb is Logic’s new reverb. This apparently is a replacement for PlatinumVerb, since PlatinumVerb is now relegated to the ‘Legacy’ effects folder.
Is ChromaVerb any good? YES. It’s awesome. It superficially bears resemblance to Fabfilter Pro-R due to the fact that you can adjust frequency specific decay, but there’s more here.
ChromaVerb offers 14 types of reverb algorithms. Each of those algorithms has the usual reverb controls: pre-delay, wet/dry, and decay. There’s a few extra cool features about it too:
- Main window cool stuff - select ‘Main’ in the upper right
- Attack - you can variable change the build time of the reverb.
- Pre-delay sync - pre-delay can be synced to project tempo and set to specific note values.
- Decay Sync - decay values can be synced to project tempo and set to specific note values.
- Freeze - the current sound can be infinitely reverberated inside the current algorithm. This is automatable!
- Details window cool stuff - select ‘Details’ in the upper right
- EQ - the wet signal of the reverb can be EQ’d with a version of ChannelEQ.
- Modulation - the late portion of the reverb signal can be modulated by sine, random and noise shapes which are smoothable.
- Early/Late mix - I discussed before why I like this. The balance between the early reflections and late reverb signal greatly influence how the reverb sounds. I generally use lots of early reflections when I’m trying to emulate normal sized spaces or just give a ‘sense’ of space to a sound, and I use more late reverb when I want to add texture to a sound or emulate very large spaces.
- Mono Maker - this parameter allows you to collapse the reverb to mono below a specific frequency. This can be very helpful when trying to use ChromaVerb on a signal that’s reliant on being firmly in the center channel for its impact. Very useful on snare drums.
Each algorithm has 2-4 damping bands on the ‘Main’ page. These bands are not an EQ. They change how damped that frequency area is in the reverb output. You can think of these like frequency specific decay controls.
Let’s also not forget that fancy display. You need a computer that supports Metal to see them (if you don’t, that’s why!), but it’s pretty fun. Unfortunately for me I have to turn it off because the colours are reversed to me. I don’t associate low frequencies with red and high with blue. It’s nearly the opposite, with some differences in the middle. I do not think that I have synesthesia, but considering how much this annoys me… maybe? (Really, it makes me feel angry to watch the display. Weird to experience.)
I already said ChromaVerb is AWESOME, but I’m going to say it again. Both from a usability standpoint, and from a sonic standpoint, ChromaVerb is my absolute favorite algorithmic Reverb in a DAW.
Compressor
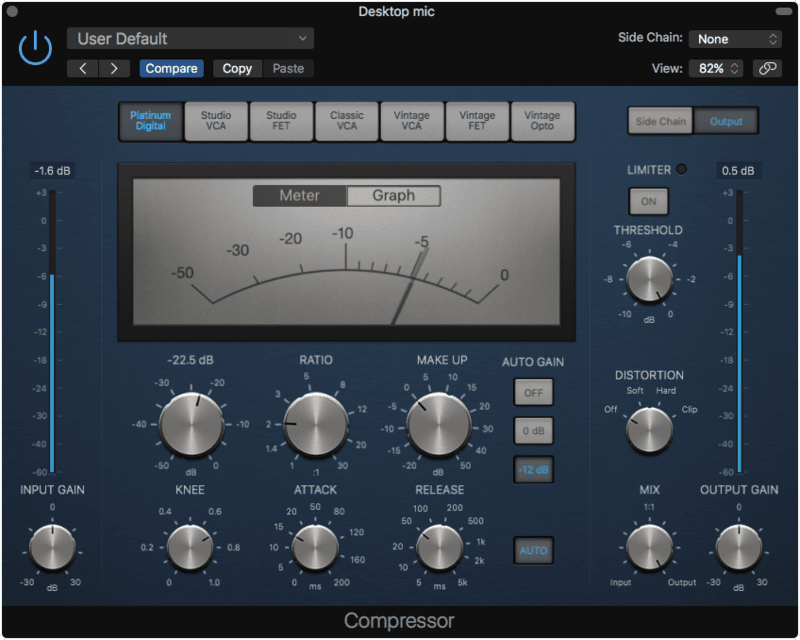
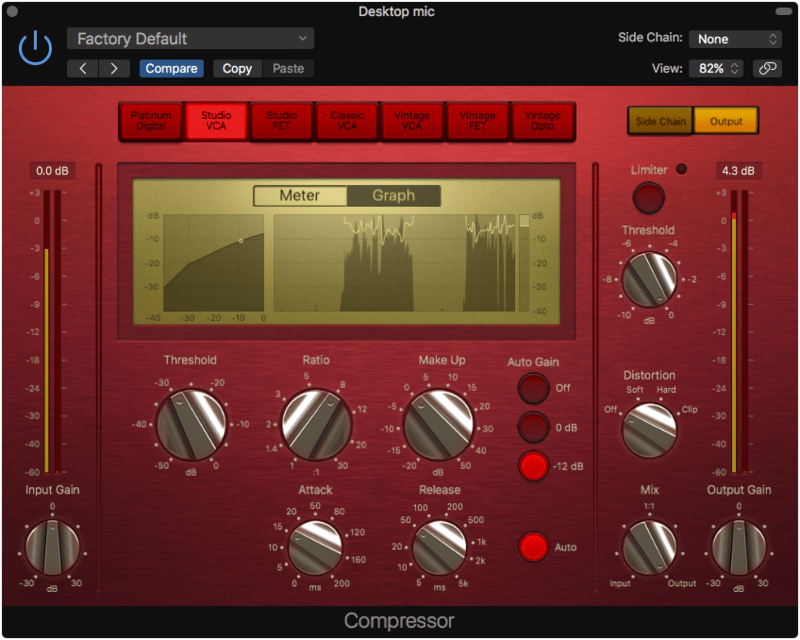
Compressor! My absolute favorite Logic effect. I know it’s not just me either, because I’ve seen a great deal of praise online and in person for it. So why is this compressor so great?
- 7 Compressor modes - The compressor modes change how the compressor acts
- Platinum Digital - Your typical digital compressor.
- FET - a very fast and ‘snappy’ type of compressor. It can be very aggressive on peaky material.
- VCA - a wide range compressor style. It can go from snappy to laid-back easily.
- Studio VCA - A Focusrite Red3 inspired mode
- Classic VCA - A DBX160 inspired mode.
- Vintage VCA - A SSL 4000 G Bus Compressor inspired mode
- Vintage Opto - Opto compressors literally use a light sensor and a light. How fast the light and sensor respond change how the audio is processed. Opto compressors usually are thought to be very gentle, but some modern models can be as aggressive as old FET compressors. This is a Vintage VCA - LA2A inspired mode.
All of these modes sound fantastic. Are they accurate? Absolutely not. No way. Do they act very similarly to the compressors that the GUI implies they are emulating? Yes.
Similar to the Amp Designer, if you are a purist then you might throw your monocle at the scream proclaiming, “Balderdash!” when attempting to use these. If you just care about having a palette of compression options that span a wide variety of common compression styles, then you will be very happy.
That’s not all though, there’s more…
-
Compressor Graph - There’s both a transfer curve and a gain reduction graph if you click the ‘Graph’ mode above the meter. Excellent for figuring out how much compression is occurring. You can see some of the compressor flavours show up when you move the ratio knob. Watch the transfer curve graph on the left as you mess with the Studio FET ratio. Some fun things happen as that signal moves in to the compressor. Smashy-smashy!
-
Sidechain - The Logic compressor supports easy sidechaining with a wide variety of options. Sidechaining is when the compressor acts on signal X, but is triggered by signal Y. A common example is when you want your bass to be compressed as the kick drum hits. The Max/Sum buttons control if a stereo signal triggers the threshold when one, or both signals violate it. The Platinum Digital model lets you choose peak or RMS detection as well. You can optionally listen to the incoming signal and filter it as well. Using the sidechain filter is a fairly significant part of using a compressor, since it allows you to change the signal that triggers the compressor, but not the outgoing signal. So with the filter you can emphasize or de-emphasize frequency areas without actually boosting/cutting those in the output signal.
All in all the Compressor is a fantastic and valuable compressor effect. I would be very happy to have this plugin in ANY DAW. I’d pay for it without a second thought.
Delay Designer
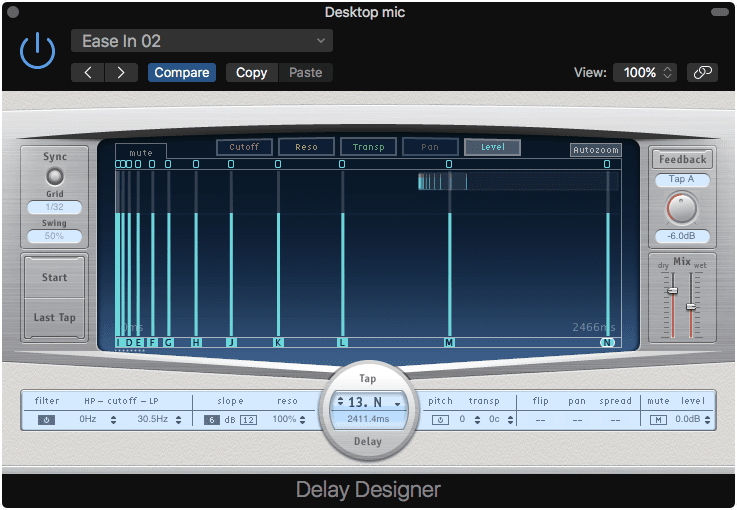
10.4 - NOT VECTORIZED
Delay Designer is awesome. It’s a fully sequencable 26-tap delay with filters, pitch adjustment and pan/spread.
So first let’s cover what a ‘Tap’ is. A tap is simple a copy of the original signal that’s been delayed by a specific amount. So you have up to 26 copies of the original signal that you can spread out in time, filter, pitch transpose, pan and spread. The delay time of these taps can be set manually, graphically or you can record them by pressing the ‘Start’ button and just tapping along to the music. Delay Designer places a new tap ‘in time’ when you tap the button. You stop it by pressing ‘Last Tap’
One tap can be selected as the feedback tap, which means that the output of it is re-routed to the input. This makes the tap in to an echo.
The graphical interface allows you to view the Cutoff, Resonance, Pitch Transpose, Pan and Level values of each tap. The taps are shown as a vertical line with a slider that allows you to change the main parameter of that type. The graph can be automatically sized with ‘Autozoom’ or navigated with the mini-window at the top. At the bottom there’s a parameter area showing all of the values for each delay tap.
Delay Designer is a great deal of fun. It may seem complex at first, but it’s actually rather simple once you get the idea of having multiple copies of the signal as taps. It’s a fantastic delay plugin that puts most other DAW delays to shame.
Distortion II
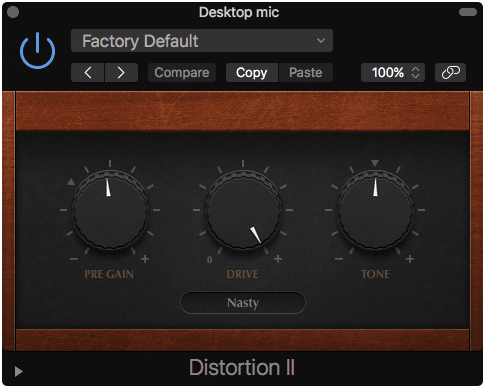
Classic distortion sounds often used with the Hammond B3 organ. There’s 5 types of distortion as described in the manual:
- Growl: Emulates a two-stage tube amplifier similar to the type found in a Leslie 122 speaker cabinet, which is often used with the Hammond B3 organ.
- Bity: Emulates the sound of a bluesy (overdriven) guitar amp.
- Nasty: Produces hard distortion, suitable for creating very aggressive sounds.
- Class AB soft: Emulates a softer crossover distortion encountered in transistorized amplifiers when driving a higher
- Class AB hard: Emulates a harder crossover distortion encountered in transistorized amplifiers when driving a higher load.
The extended panel offers a mix knob and an output gain.
Does it sound good? Absolutely. Not just on organs either. I found a lot of using Distortion II on a variety of sources from vocals to guitars to violins to ‘vintage pianos’ and more.
It’s just a simple good sounding plugin. Wish I had it around elsewhere.
Direction Mixer

Direction Mixer is a stereo processor that lets you adjust the balance and panning of a stereo signal, adjust the Mid/Side characteristics of a stereo signal, or to decode a Mid/Side Signal.
In LR mode a value of 0 is Mono, 1 is full stereo, and 2 delays one of the signals (often called the Haas Effect). The direction knob adjusts the balance of the signal from center->side at 90° to L/R being swapped at 180°.
In MS mode it decodes the center channel to ‘Mid’ and the uncorrelated L/R information in to a single ‘Side’ signal. The spread value increases the side signal amplitude, and the direction knob works similar to the LR mode, except the mid and side signals are moved instead of L/R.
The signal can be split in to high/low bands that can be individually moved around. This also means that you can use Direction Mixer like an elliptical filter, which means that you can make low frequencies mono. Of course you can simply pan those frequencies or adjust a stereo signal as you wish too.
Direction Mixer is a surprisingly useful effect for dealing with Stereo Signals, and many DAWs seem to be missing such a simple but useful effect. Once again though, it’s nothing special so I’m saying that it’s sufficient.
EDIT Logic 10.4 - Logic 10.4 added the split feature. This does make it particularly useful, and Direction Mixer has been upgraded to a ‘Fantastic’ effect.
Ensemble
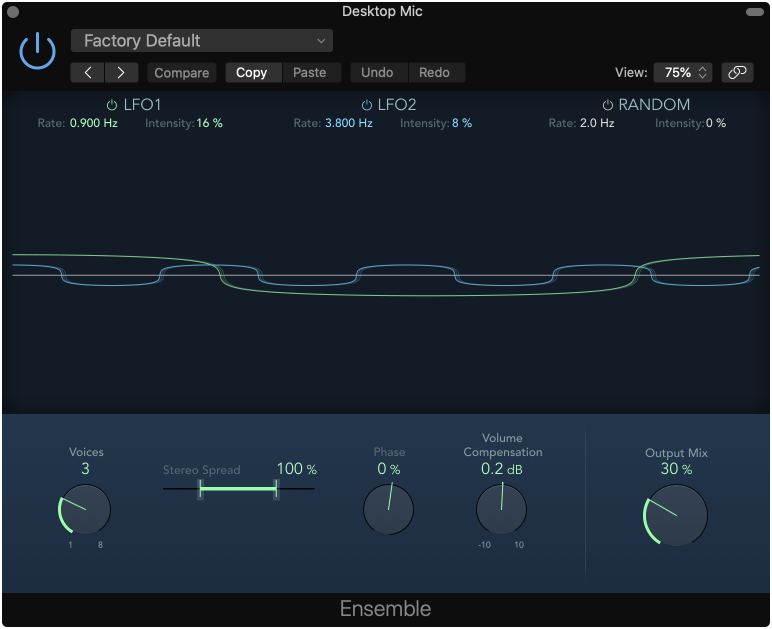
Ensemble clones the signal in to n number of voices. These voices are pitch modulated by a combination of 2 sine LFOs and 1 random LFO with variable relative phase. The voices then can be spread across the stereo field.
Despite all of the parameters, it’s a simple plugin that does one thing well. It’s great on vocals and synthesizers, especially pads.
I am partial to the ensemble chorus in another DAW, but this is still a useful effect that is rare to see in other products. Despite not having used this type of effect much in the past, I already have begun to want it elsewhere.
Enveloper

10.4 - NOT VECTORIZED
Enveloper is a transient processor. It’s similar to a compressor except a compressor acts on the whole signal, while the Enveloper works on the part of the signal that violates the threshold.
Enveloper has the parameters that you’d expect from a compressor like Threshold, Attack time, Release Time, Output level and Lookahead (as was explained before).
Enveloper has 2 unique parameters on top of its already unique processing method. Attack gain (to the left) and release gain (to the right). These parameters allow you to adjust the amount of attack and amount of release on the signal. These parameters let you do some fairly extreme things to the transient of a signal, which makes this processor particularly useful on percussive material.
This is a useful transient processor that seems to compete favourably with some of the medium-range third-party processors on the market.
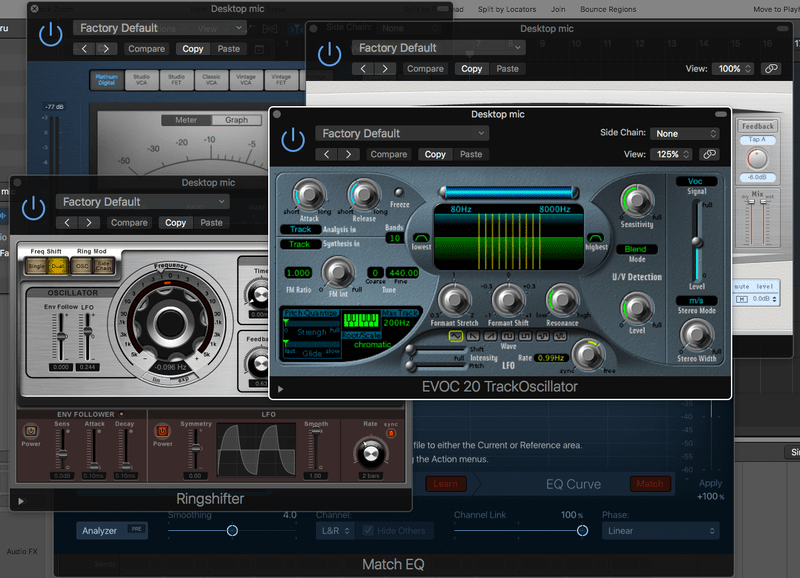
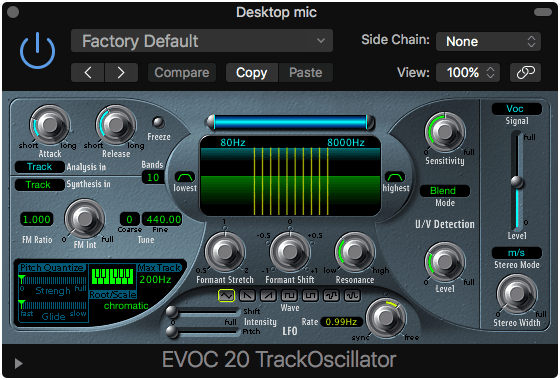
EVOC 20 TrackOscillator
10.4 - NOT VECTORIZED
A vocoder. Not only a vocoder, but one with a pitch tracking modulation signal.
EVOC 20 has controls that allow you to adjust the speed of the input tracking. The input can analysis signal can be frozen, and you can use a sidechained signal. The sidechain means that the signal that is tracked is different from what it’s acting on. Important for those vocal-like synth leads.
The signal used to modulate the input signal can either be the signal itself, a sidechained input, or the oscillator. When using the tracking oscillator is used it provides 2 sine wave oscillators that are frequency modulated to create a variety of waveforms depending on the FM % and the FM Int value (see the manual for more info). The oscillators can be constrained to certain pitches by enabling or disabling them on the keyboard graphic. For the classic ‘Vocoder’ effect you generally want ‘Synthesis In’ set to Osc.
Like EVOC 20 Filterbank, you have a bank of between 5 and 20 formant filters. The filters can be spread, shifted and modulated by the LFO below.
A unique feature is the U/V (unvoiced/voiced) section. This detects when an ‘Unvoiced’ signal is present and changes how the processing is done to use one of 3 modes: Noise, Noise + Synth or blend. Successful use of EVOC 20 TrackOscillator often depends on skillful use of this parameter.
The output mode lets you audition the Vocoder effect, Synthesized signal or the Analysis signal. There’s also stereo spread with stereo->stereo mode and mono->stereo mode.
As a vocoder EVOC 20 TrackOscillator is what I think most people expect. Once you grasp the signal flow, it’s possible to get a wide variety of classic vocoder sounds. Due to the ability to use sidechained analysis and/or Synthesis signals, even more creative effects are possible. I’ve had a great deal of fun vocoding a pad by a lead with some heavy formant filters engaged. Organic vocal-like sounds are easy.
EVOC 20 TrackOscillator gets vocoding right by making it fairly easy to acheive classic sounds, while still allowing for some creative freedom. I’d buy it.
Flanger
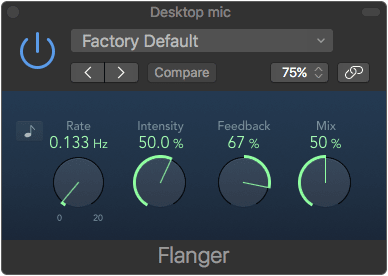
A flanger is just mixing two signals together and time-warping one of them.
Logic’s flanger has a feedback, which allows you to route the result signal back in to the input. With positive values the ‘holes’ in the effect get more pronounced, with negative values they become less pronounced.
It’s a very simple effect, and it works.
I/O
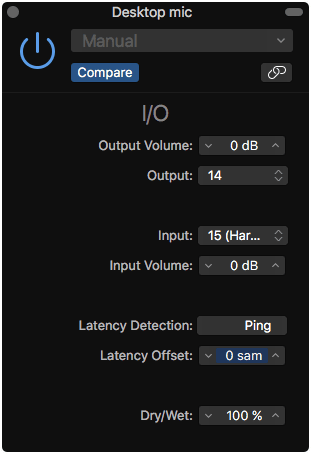
I/O is not very aptly named. I/O is how you insert hardware effects in to your signal chain. I/O lets you send audio via a physical output to a device (with variable gain!), and receive the audio back in (with variable gain!).
It has automatic latency compensation and it can figure out the total latency of the round trip by pressing the ‘Ping’ button.
A neat feature is that it can mid/side encode the signal before sending it out for processing, which can make for some interesting ways of utilizing outboard effects.
A major feature is that I/O uses your ‘I/O Labels’ that you setup in the Mix->I/O Labels window. This makes finding and assigning the correct routing much easier if you are organized and have your device properly labeled inside of Logic.
This is easily the nicest hardware insert effect that I’ve used overall.
Linear Phase EQ
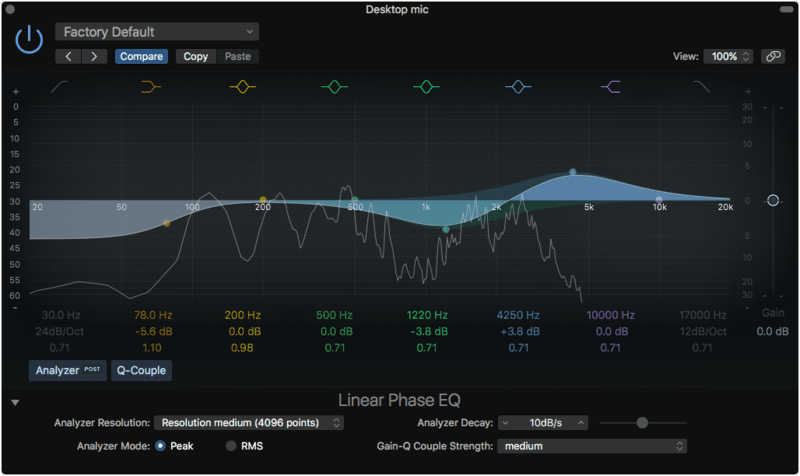
Liner Phase EQ is like Channel EQ in every way except one; it’s linear phase.
As far as I can tell via analysis, Channel EQ is a minimum phase EQ. This video offers a better explanation than what I care to provide here regarding the differences between minimum phase and linear phase EQs. This is especially so since you need to hear the differences, if you can, to fully understand the value.
The main value of Linear Phase EQ is that it can be used when parallel processing. Parallel processing is when you clone a signal, process it, and combine it with the original. Channel EQ changes the relative phase of the constituent frequencies in the signal, which means that when you combine that with the original there will be phase cancellations that can sound unpleasant. The same processing done with Linear Phase EQ will not have this issue.
All of the points about Channel-Eq apply.
Match EQ
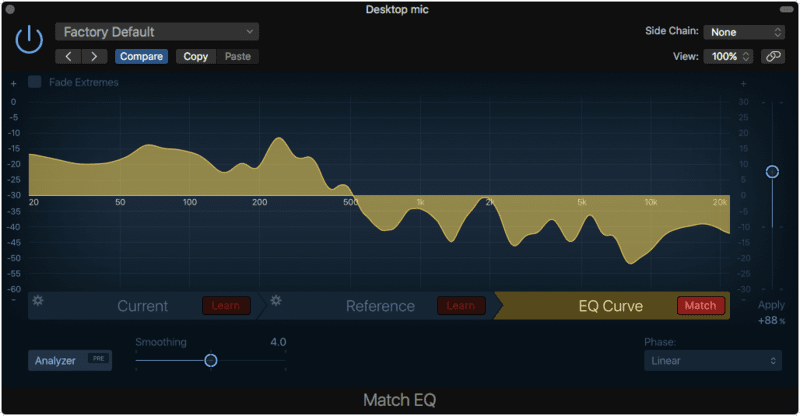
Match EQ is a way that you can easily match the spectral contour of one signal with another. This won’t help you emulate things like harmonic spread and decay, distortion, stereo spread, and other factors that greatly influence sound… but if you have two similar type sounds that you need to sound more similar, it’s fantastic. A great example is for dialogue replacement or matching guitar recordings done at different dates.
Operating Match EQ is simple. You can either analyze the current track by hitting play and clicking ‘Learn’, or you can drop an audio file on the ‘Current’ tab and Match EQ will analyze it. Then you follow the same process for the reference track (the thing that you are matching too). When you’re done just click EQ Curve Match. Match EQ will create an EQ curve that will match the spectral balance of your ‘Current’ to your ‘Reference’. Awesome.
The granularity of the matching can be adjusted with the ‘Smoothing’ parameter, and the matched EQ curve can be scaled by the ‘Apply’ slider. The curve can even be inverted by using negative ‘Apply’ values, which will emphasize the differences between the two sounds rather than attempt to blend them.
The resulting filter can either be Linear Phase or minimum phase/minimum phase+zero latency.
I covered why and how I use spectrum matching in another post, so check that out.
Match EQ is a fabulous addition to Logic, or any DAW. The scaling, smoothing and drag&drop analysis help set it apart from even some of the better 3rd-party plugins out there.
MultiMeter
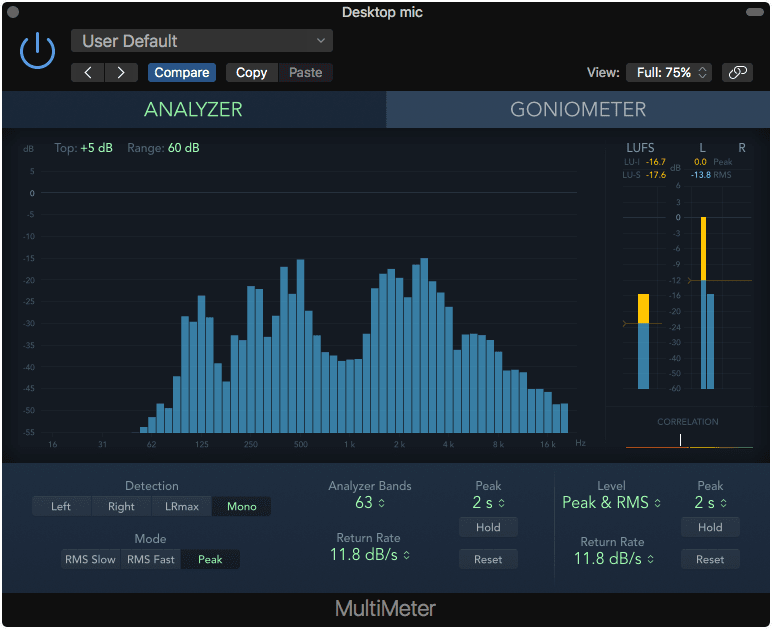
Multimeter maybe isn’t what you expect, but it is a great thing to have in Logic.
The analyzer window gives you a 31 or 63 1/3rd octave analyzer. This differs from the more conventional FFT style analyzer in that it is effectively ‘zero latency’, but the relative phase (and timing across the spectrum) is smeared. For most musical signals I feel this is the superior analyzer method.
The analyzer can detect L/R, the maximum value between L/R or the sum of L/R. The display can show a fast RMS, slow RMS or peak. The decay rate of the bands is configurable and there are peak holds so can see the time-limited (or infinite) peak of the measurement.
There is also a goniometer mode which shows you the relative phase between the Left and Right channels as a Lissajous plot. The goniometer has peak hold and an autogain feature so that the plot fills up the whole area nicely.
On the right side there is a correlation meter, LUFS meter, peak and RMS meters.
Multimeter has nearly everything you need from a meter for music. For film and broadcast you very likely will at least one of the free meters that I mentioned before.
Despite the shortcoming, this is still a fantastic meter that puts most other DAW meters to shame.
Noise Gate
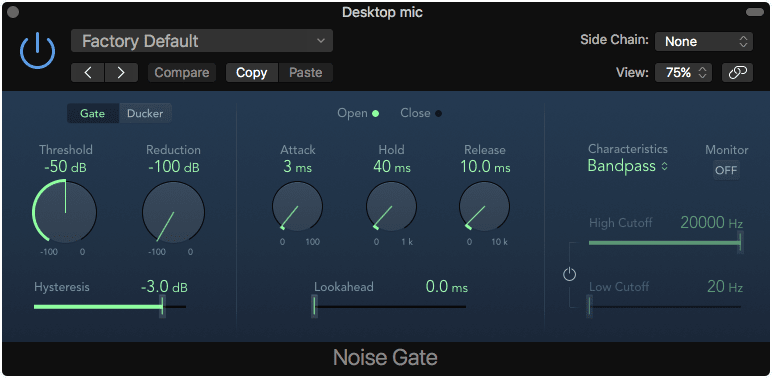
Noise gate is a dynamics processor that reduces the audio to a set amount when it is below the threshold. There is also an optional ducking mode, which I’ll explain later.
Noise Gate has basically all of the features that you want from a noise gate: attack, hold, release, lookahead, a decent sidechain filter and hysteresis. Hysteresis is an important parameter that basically gives the noise gate a ‘memory’ so that it doesn’t quickly open/close on low-frequency signals that may bounce around the threshold. Hysteresis says, “Don’t turn off the gate until the signal passes this secondary threshold.”
There’s an optional ducking mode that allows the Noise Gate to accept a sidechain signal. The main input signal is turned down when the sidechain signal is present, then turned back up. The difference between using Noise Gate and something like sidechaining Compressor for this is that Noise Gate passes the sidechain signal to the output and Compressor does not.
Noise Gate is a simple plugin that any recordist will use. I’m happy with it’s functionality.
Phase Distortion
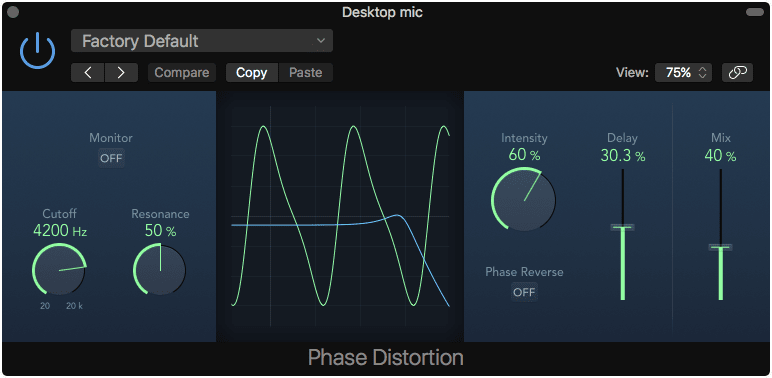
Phase distortion is an interesting plugin. Phase distortion is essentially a flanger where the modulation signal is the input signal itself. This creates a rather weird and unfamiliar sound.
There is a resonant lowpass filter that applies to the input. From there the intensity of the effect is controllable along with the maximum amount of delay that occurs (which is modulated by the amplitude of the input signal).
The end result is a unique and fun distortion effect. I’d pay $5 for it.
PhatFX
A long time ago in an audio world far far away, there was an effect called CamelPhat. Apple then purchased Camel Audio and there was much sadness until Alchemy was released, but CamelPhat was still missing.
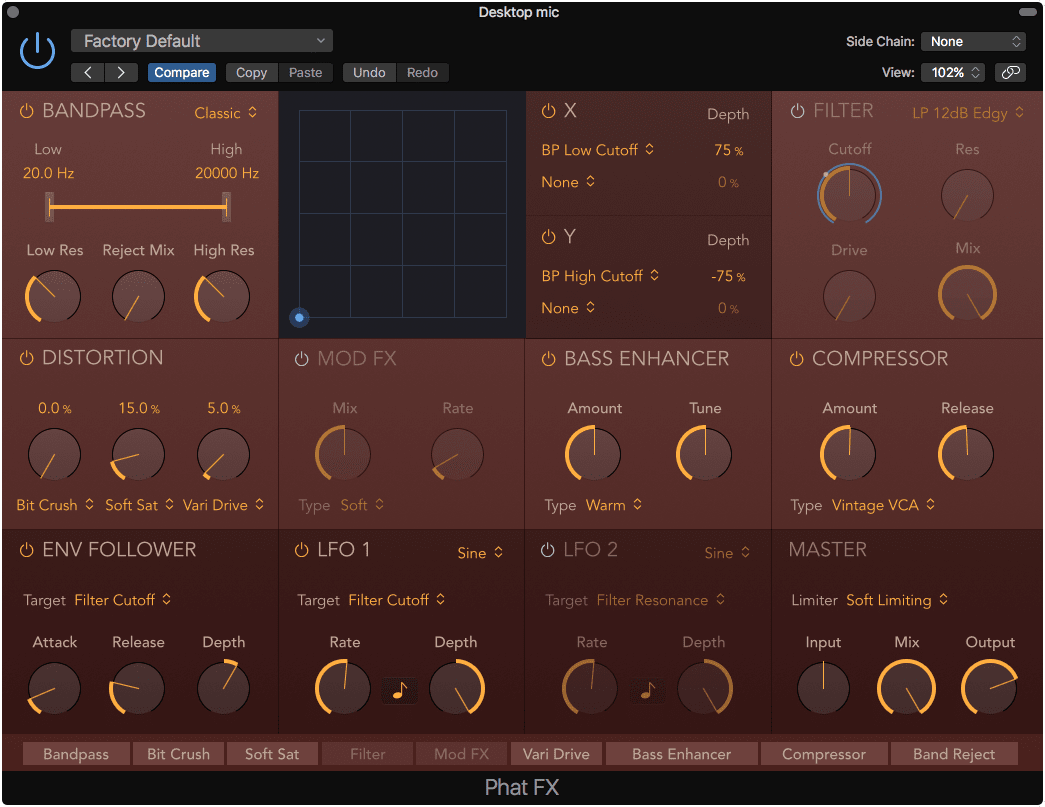
Logic 10.4 brings “new” effect called PhatFX which is basically a new version of CamelPhat, but much better. PhatFX is a multi-effect with 9 effects and an assignable XY panel. The effects run in the order listed at the bottom of the GUI, but those little boxes can be dragged around to re-order them. Here’s what’s included:
- Bandpass - A filter that allows the selected frequencies to pass and nothing else. The high/low pass filters have resonance and the signal that’s filtered out can optionally be mixed back in as much as you want.
- XY Panel - The X and Y axes each can control the value of 2 parameters. The amount of this control, called depth, can have a positively or negatively correlated influence on the parameter. The X/Y values can be assigned to MIDI for easy control.
- Filter - filter offers HP/BP/LP filters with 8 modes each. There’s also selections for 3 types of comb filters, notch and peaking filters. Along with the filters there’s a ring modulator and extra distortions that can be used here. If you don’t need a filter, you can use this module as an extra distortion module.
- Distortion - 11 types of distortion cascaded 3 times.
- Mod FX - chorus like effects, 4 types.
- Bass enhancer - 4 types of bass enhancement.
- Compressor - 9 types of compression with the modes from Compressor included, though without all of the modes
- Modulation - 3 modulators that can be assigned to effects parameters. The amount of modulation is shown on the controller as a blue ring with a grey dot. Look at the ‘Filter Cutoff’ in the image above to see what the indicator looks like.
- Envelope follower - this takes the amplitude of the incoming signal and uses it as a modulator.
- LFO 1 - an LFO with sine, triange, ramp up/down, square, random hold and random glide modes. Can be synced to project tempo
- LFO 2 - another LFO like above.
- Master - 3 mode limiter with input/output gain controls for the whole effect and wet/dry mix.
So that’s a lot of stuff. Do you need to use all of that stuff? No. That’s the beauty of it! You can turn on or off as much as you want.
Do you want to just compress with very simple controls? Use the compressor. Do you want a selection of fun distortion modes? Just distort. Do you want some crazy filter modulation? Just enable the filter and use the modulators.
Personally I’m enamoured with the distortion modes provided when used in conjunction with the envelope follower. You can use the envelope follower to dynamically control the amount of distortion more dependent on the incoming volume than normal. You can also use this to mellow out the distortion on really loud parts, so it sounds gritty on softer parts but doesn’t become overbearing on louder parts (use the envelope follower with a negative depth!).
PhatFX is pretty awesome, and fun. In the last 24 hours I’ve found quite a few uses for it, including using it with ChromaVerb on an Aux to create some very lush reverb sounds.
Ringshifter
10.4 - NOT VECTORIZED
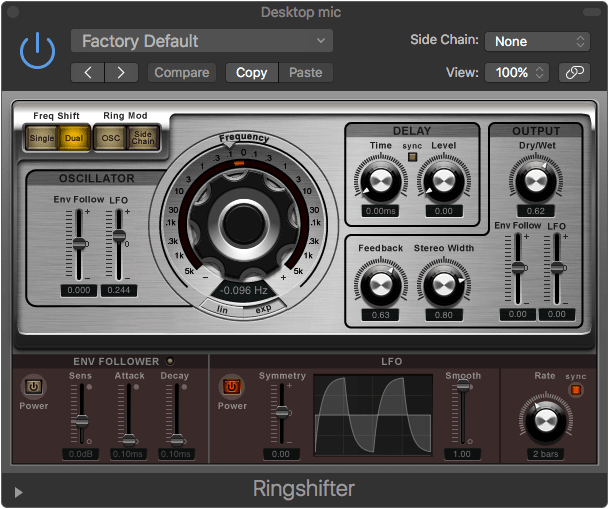
Ringshift is a ring modulation and frequency shifting plugin plugin with some extra bonus features.
First what frequency shifting is compared to pitch shifting. Pitch shifting is a multiplicative action. If you pitch shift a signal with a 400hz and 1000hz sine by 1 octave, then the result is a 800hz and 2000hz signal. They are both doubled. Pitch shifting adjusts both signals by a fixed amount. A 400hz and 1000hz signal pitch shifted by 50hz would result in a 450hz signal and a 1050hz signal. The result sounds rather ugly since it’s inharmonic.
Ringshift has a normal frequency shifting mode, and a ‘Dual’ mode that shifts the right signal in the opposite direction. The frequency is selectable on that weird knob, with the knob’s values being set to either linear or exponential values.
The ring modulation modes either use an oscillator or a sidechained signal’s amplitude to modulate the incoming signal. The ring modulator modulator frequency can be varied by an envelope follower or a potentially assymetrical LFO. The amount of modulation is controlled to the left of that weird knob, and the modulation values can be inverted.
There is a simple delay that uses the ringmod/frequency shifter in its feedback loop which is controlled by the ‘level’ knob. That means that each successive delay gets messed up more and more. The arrow in the lower left opens an extended panel that gives you a high/low pass for the delay, which is rather helpful when working with some of the crazy sounds you can get out of it.
The entire effect can be fedback into itself and the dry/wet mix can be modulated by the envelope follower and LFO.
Ringshifter IS FUN. My goodness it. is. fun.. I would buy this in a heartbeat. You can get all sorts of crazy fun effects with it, and even some ‘normally usable’ subtle effects.
Rotor Cabinet
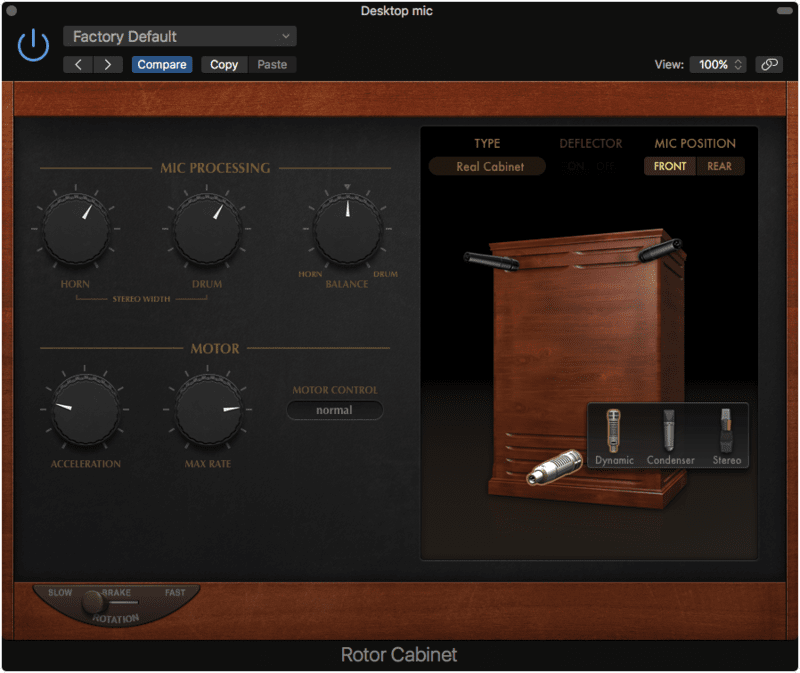
Rotor Cabinet mimics a leslie speaker. It has a number of modes that can be used with the horn deflector on or off:
- Wood - Leslie 122 or 147 model.
- Proline - a Leslie 760 model.
- Single - a Leslie 825 model.
- Split - splits the bass/treble rotors to left/right
- Wood & Horn IR - Uses an IR of the Leslie 122 model (as far as I can tell) on top of the ‘Wood’ model.
- Proline & Horn IR - Uses an IR of the Leslie 760 model (as far as I can tell) on top of the ‘Wood’ model.
- Split & Horn - Same as the split mode, but with an IR
There’s also multiple motor modes:
- Normal - both motors move the same.
- Inverse - the bass moves faster.
- 910 - the bass doesn’t move at all.
- Sync - both the rotors are synced to the same speed.
The acceleration and top speed of the rotors are controllable. How the enclosure is mic’d can be controlled with distance, angle and the balance between the treble and bass sections. The ‘Real Cabinet’ mode gives you control over the specific mics used for the horn and drum. Obviously the speed can be controlled between slow/fast and stopped. This can be automated to get that speed-up and slow-down effect of the motors moving.
Is this the definitive Leslie emulation? I don’t know. Is it a lot of fun? Yes. Does it sound fantastic? Yes.
Space Designer
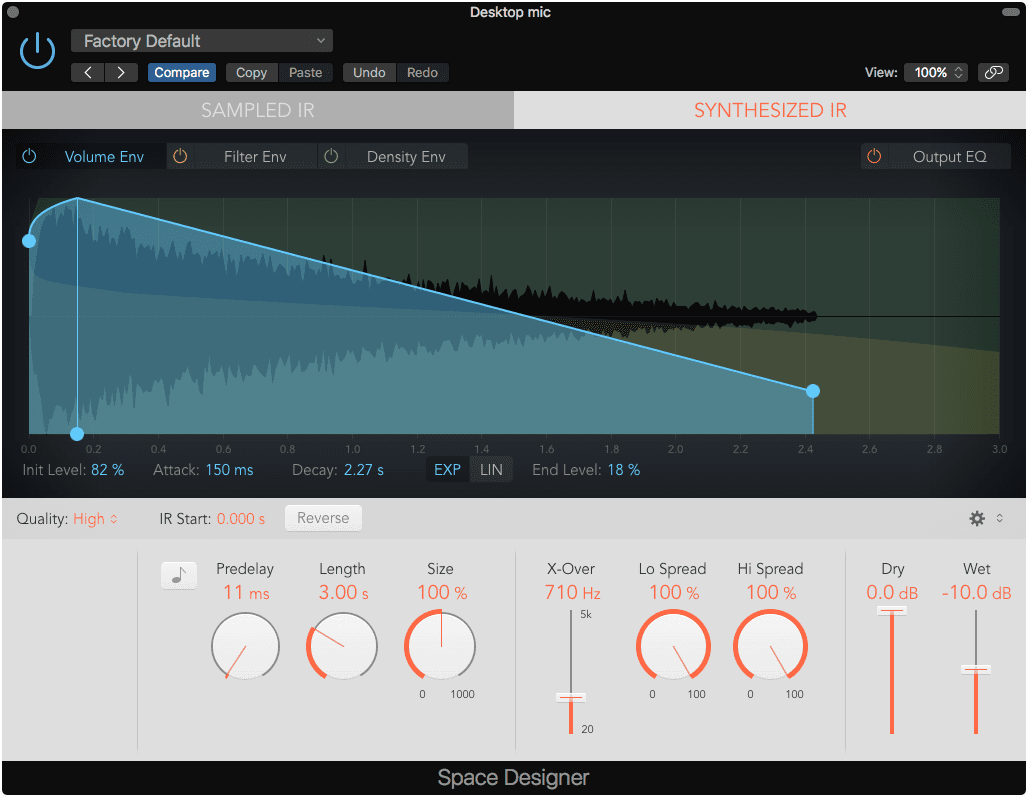
Space Designer is a great reverb. This is a convolution reverb with a bunch of parameters to help you liven up those impulses.
One of the most important things is that Logic optionally comes with a bunch of impulses, and Space Designer has a mode that allows you to synthesize your own.
For loaded and synthesized impulses you can adjust the Volume and Filter envelopes, 4 band-EQ and reverse the impulse. The envelopes are all controllable with bezier curves. The impulse can be resampled to decrease its pitch and length.
The synthesized impulse has its own density graph with bezier curves.
Of course like any reverb there are dry/wet controls and pre-delay. A unique feature is the ‘definition’ control that allows the IR to be trimmed, which allows for less CPU use and potentially a less diffuse sound.
I’ve said less about Space Designer than I have about other plugins, but that’s because I want to communicate how relatively simple it is before I say how powerful it is. The world of reverb is at your fingertips here. With the exception of certain heavily modulated digital reverbs or highly complex physical reverbs, you can emulate most anything. Rooms are especially well modeled with Space Designer.
Creativity here is quite possible though. Using aux sends to post-process multiple parallel Space Designer patches can yield wonderful sounds that are only really possible due to the flexibility and density of the patches you can create with Space Designer.
There are some better convolution plugins on the market, but there aren’t any better ones in a DAW.
EDIT Logic 10.4 - Space Designer just got a new GUI and it’s wonderful. Make sure that you enable bezier handles in the gear menu on the middle right.
I also discovered something that I was not aware of before: The impulse design utility
Impulse Design Utility
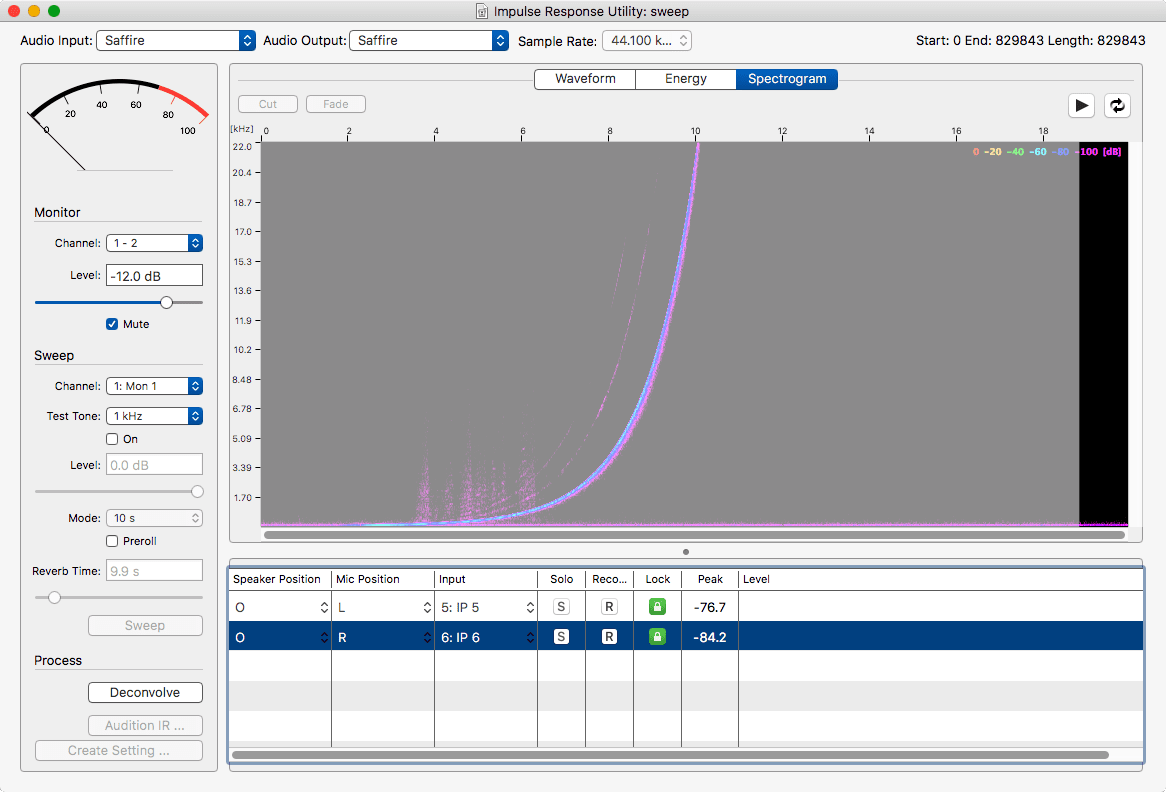
In the ‘Sampled IR’ mode you can click the sample name in the top center and select ‘Open IR Utility…’. This brings up the Impulse Response Utility.
This application allows you to easily record and deconvolve your own accurate IRs. The process is fairly simple:
- Create a new a new n-channel impulse.
- Set your input/output settings as you want
- Set the reverb time and mode settings. Preroll gives you time to run out of the room if you need ;)
- Set up your inputs in the bottom panel.
- Click the ‘R’ in the input panel to enable inputs for recording.
- Click ‘Sweep’.
- Wait for the sweep to end.
- Click ‘Deconvolve’. This creates your impulse by essentially removing the sweep.
Now you can either create your Space Designer setting, or use the Audition window to test it out.
A quite useful tool.
StepFX
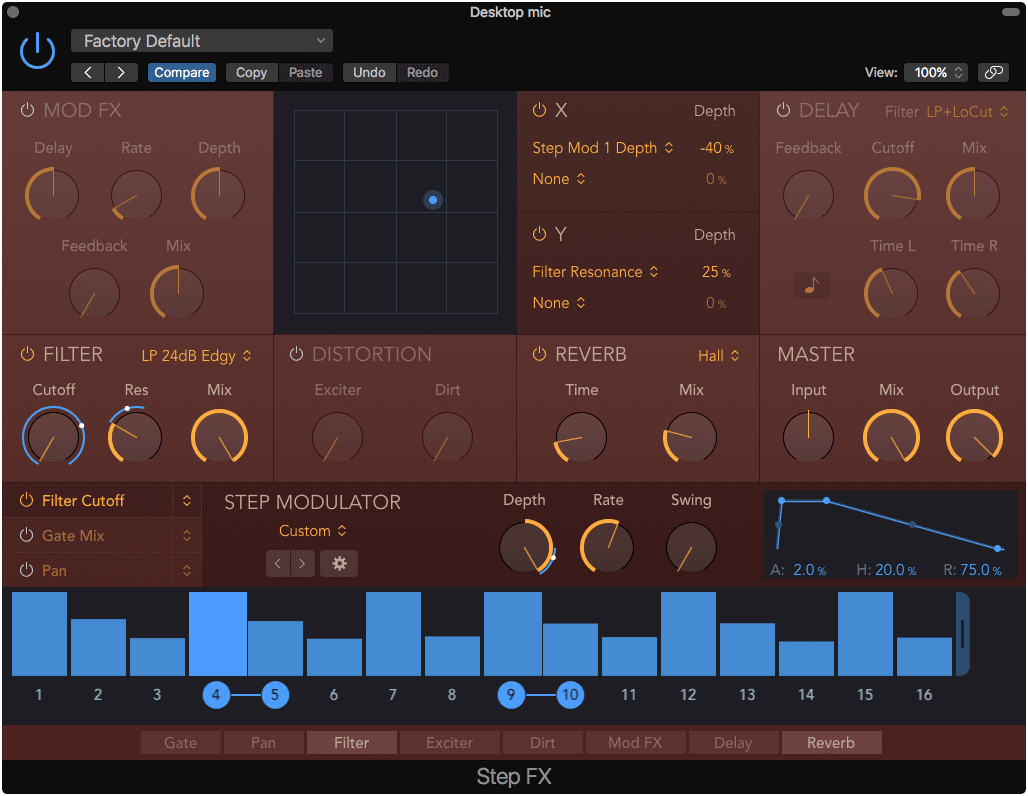
From the ashes of Camel Audio rises another new Logic Effect. StepFX is a new version of CamelSpace. It’s a sequencable multi-effect.
StepFX has 9 sections:
- Mod FX - a chorus effect.
- XY Panel - The X and Y axes each can control the value of 2 parameters. The amount of this control, called depth, can have a positively or negatively correlated influence on the parameter. The X/Y values can be assigned to MIDI for easy control.
- Delay - A delay with individual L/R control, tempo sync, and 4 filter types to act on the fedback signal.
- Filter - filter offers HP/BP/LP filters with 8 modes each. There’s also selections for 3 types of comb filters, notch and peaking filters. Along with the filters there’s a ring modulator and extra distortions that can be used here. If you don’t need a filter, you can use this module as an extra distortion module.
- Distortion - an exciter and ‘Dirt’ distortion.
- Reverb - a simple 9 mode reverb, one of which is ‘Reverse’
- Master - Input/Output gain with mix.
- Gate - a simple gate. No panel for this, it’s accessible as a one of the modulatable parameters as ‘Gate’ (remove signal on a step) or ‘Gate add’ (default to gated and open up on a step)
- Pan - L/R panning. No panel for this, it’s accessible as one of the modulable parameters as ‘Pan’
There’s one more panel: The Step Modulator. This is where the fun happens. There are 3 sequencers with up to 128(!!) steps each (drag the handle on the right of the rightmost step to add/remove steps). Steps can be enabled or disable by clicking their number. By default the steps are segmented, meaning that they turn on/off the parameter every single step, which makes a cool choppy sound sometimes. You can link steps by clicking the bar between the numbers that’s visible when you hover over it.
The steps have an adjustable envelope to change how the effect parameter is moved during the step time. There’s a global depth control, rate control and swing. Swing gives you that groovy galloping-like feel. There’s also an neat selection of preset step patterns under ‘Step Modulator’. You can quickly pull of different preset patterns or save your own for later recall (rather useful).
Just like PhatFX, the order of the modules is adjustable at the bottom.
StepFX is just plain fun. If you are a classical musician you may think that this is only for people doing crazy new modern genres with pre-sequenced effects, but no… it’s more useful than that. Subtle use of StepFX can be the difference between the sound of a virtual performer sitting in place statically playing, or blissfully interacting with their environment or instrument in a nearly inaudible way. It’s great on drum grooves to accent the offbeat a little more with some distortion, or perhaps to add your own subtle ghost-notes to a laid-back drum groove with the delay module.
StepFX is a creative tool that I’m sure you won’t use very often, but it’s nice to have when it’s there. This certainly falls in to the category of ‘things that I never knew I wanted’. It’s fantastic though.
Stereo Spread
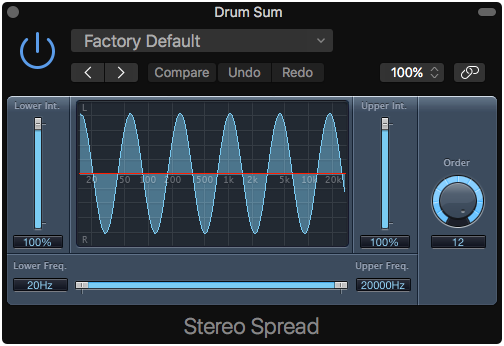
10.4 - NOT VECTORIZED
Stereo spread is a unique plugin. It allows you to spread the frequency range of the signal in alternating bands. The idea is that this is a subtle way to enhance the width of a stereo signal.
You control the upper and lower intensity and the lower/upper range of the effect. The number of bands is selectable with the ‘Order’ knob.
Does this really work though? Yep. It does. It’s quite an interesting sound too. When used lightly I’ve found that it’s great on complex signals that need a bit more width. I have a feeling that this is a real sleeper in the Logic arsenal. I want this in my other DAWs.
Surround Compressor
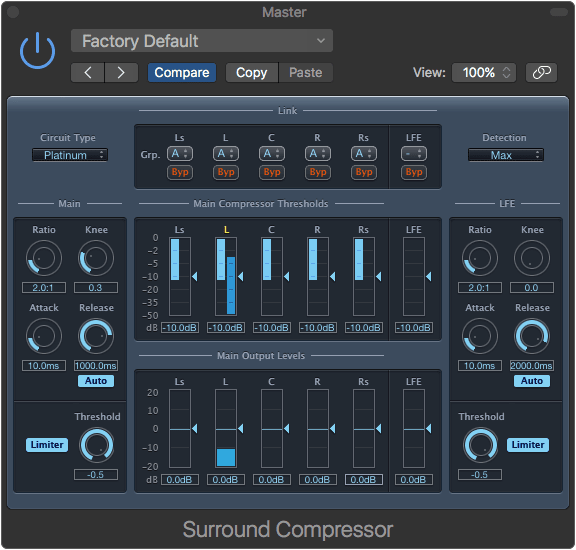
10.4 - NOT VECTORIZED
A surround compressor. This gives you the capabilities of Compressor in an uglier surround version.
I don’t work with surround much at all, but this is definitely up to par with Compressor. Must have.
Tape Delay
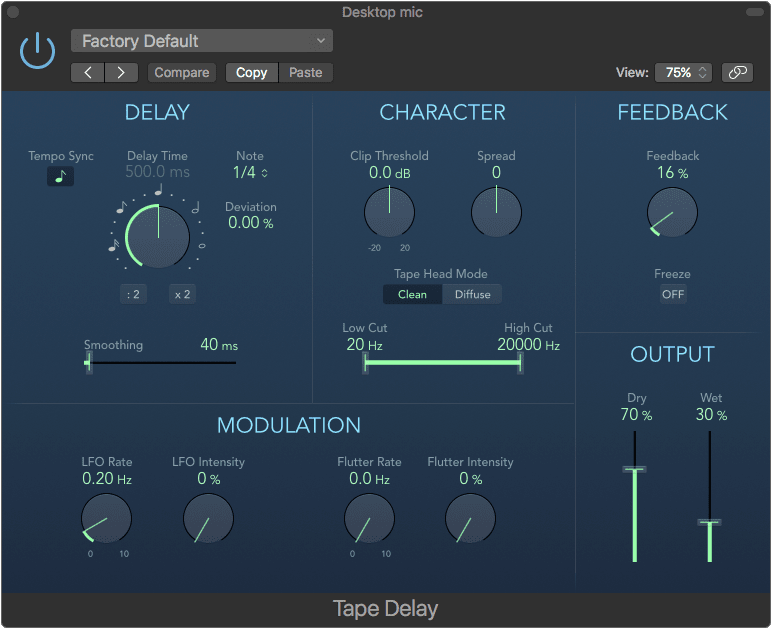
Tape delay is like Stereo Delay except as a tape machine style delay.
There is a normal delay module with a modulation section that includes delay time modulation by the LFO parameters and flutter which simulates the motors of the tape machine not moving at consistent speeds.
The real coolness here is the ‘Character’ section. This is where the tape emulation occurs. The Tape Head modes change the location of the tape head, the clip threshold affects when the tape saturation kicks in, and the low/high cuts do as you’d expect. The tape saturation builds with each successive loop through the delay’s feedback which makes for a mellow delay sound.
Tape Delay is an excellent sounding delay, even if it doesn’t sound exactly like a tape delay.
EXTRA
A trick you can use is to turn delay sync off and set the delay time to 0ms. Crank the wet signal up and now you have a tape simulation plugin! It actually sounds pretty cool and tapey. More dirty cassette-tape like than high-fidelity 16/24 track tape, but that’s fine. It’s fun.
It almost makes up for the lack of an actual tape simulation in Logic.
Test Oscillator
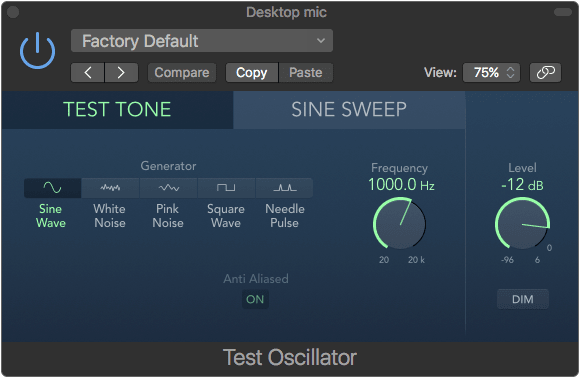
Test Oscillator is something I’ve become very familiar with lately.
The test one mode outputs a sine, square or needle pulse of the determined frequency or white/pink noise. The test tones are optionally (?) anti-aliased.
The Sine Sweep mode outputs a sine that sweeps over the determined time with either a linear or logarithmic increase. The start and end frequencies are configurable. The sweep can be triggered to sweep a single time or continuously wrap around.
There’s a very helpful ‘Dim’ button to reduce the output level by -18dbFS as well. Thank goodness.
I love this thing. It’s useful for certain effects (like sidechaining a gate on a low-frequency sine and having that triggered by a kick drum to add some beef), and it’s sufficient for most testing purposes. I wish every DAW had something like this at minimum.
Vintage Console EQ
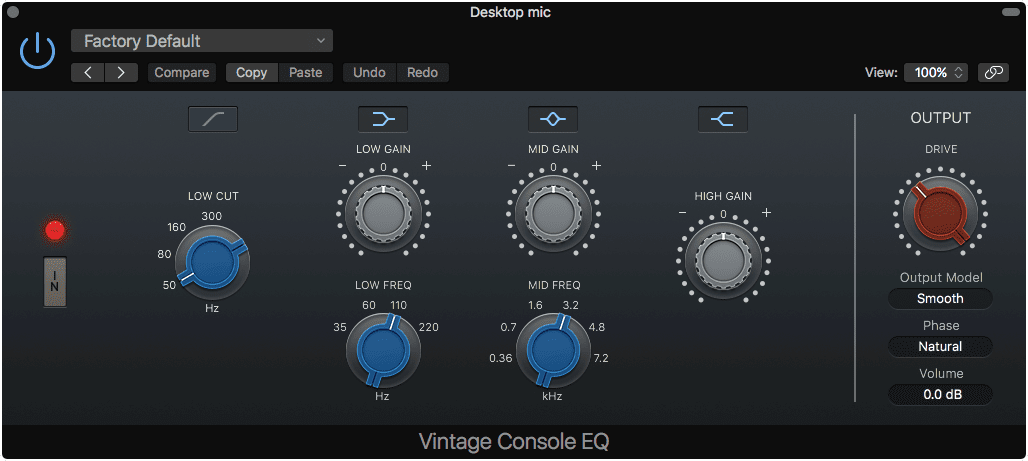
Vintage Console EQ is an EQ that’s inspired by the 1073 in the Neve A88 console. It has parametric bands with a low shelf, high shelf and high pass. You can select the output stage of the Console EQ, the Graphic EQ or the Tube EQ, which is a nice touch. You can also select between Natural and Linear Phase modes, which is weird. The original is not linear phase.
Does this EQ sound like an original Neve 1073? Not exactly, no. Does it work similarly? Yes.
Simply as a saturation box it’s a fantastic device in the ‘Smooth’ output model. Engaged on the track with no EQ active gives you some nice harmonic colouration. The output drive can be increased to give you some really dirty sounds.
As an EQ it’s not the most precise processor. The low cut is only 18db/oct, the Q of the mid gain is quite wide and so is the low shelf. Used as a tone shaping device it works great. Fantastic even.
Vintage Graphic EQ
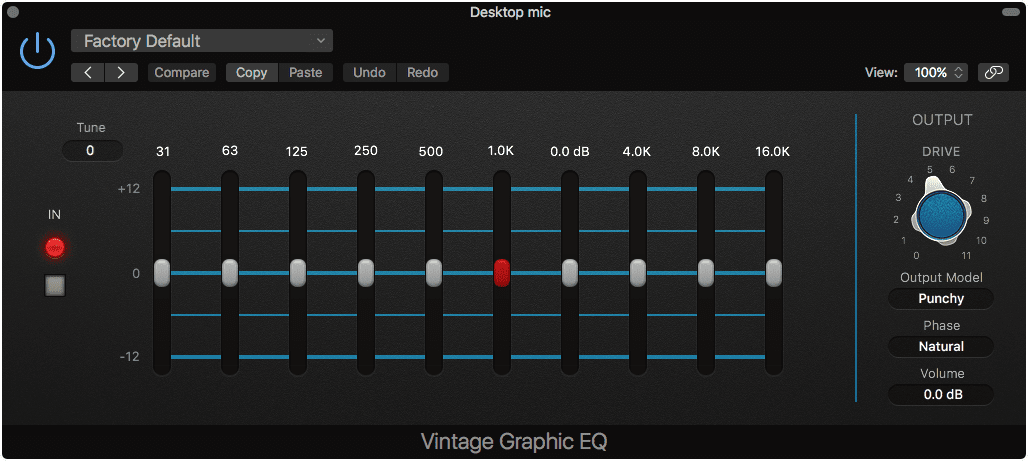
This is Apple’s interpretation of the API 560 EQ. It’s a 10-band graphical equalizer. Interestingly you can adjust the center frequency of each of the bands by changing the ‘tune’ control in the upper left, which is not something that’s normally present on 560 emulations. You can select the output stage of the Console EQ, the Graphic EQ or the Tube EQ.
This sounds pretty close to the API 560 in its default state. The ‘Punchy’ output model isn’t very aggressive, and honestly I’m not sure why it’s called ‘punchy’. I wouldn’t consider the original API 560 as a ‘punchy’ device, nor does this sound as such. The harmonic content does change considerably in contour as the level of the input signal changes, but in my testing with various sources I really didn’t get a ‘punchy’ feel. Despite what I feel is a misnaming of the mode, it does sound very good.
The tune box allows you to change the center frequencies of the bands, which I assume is something people would really enjoy, but I found it near useless. A big charm of the original API 560 was the selection of frequencies and being stuck to them. I approached this feature with an open mind and at best I found it useful for reducing some errant resonances, but the width of the filters really isn’t narrow enough for such duties anyway.
It’s barely fantastic, but it’s still useful and there’s some nostalgia present for certain.
Vintage Tube EQ
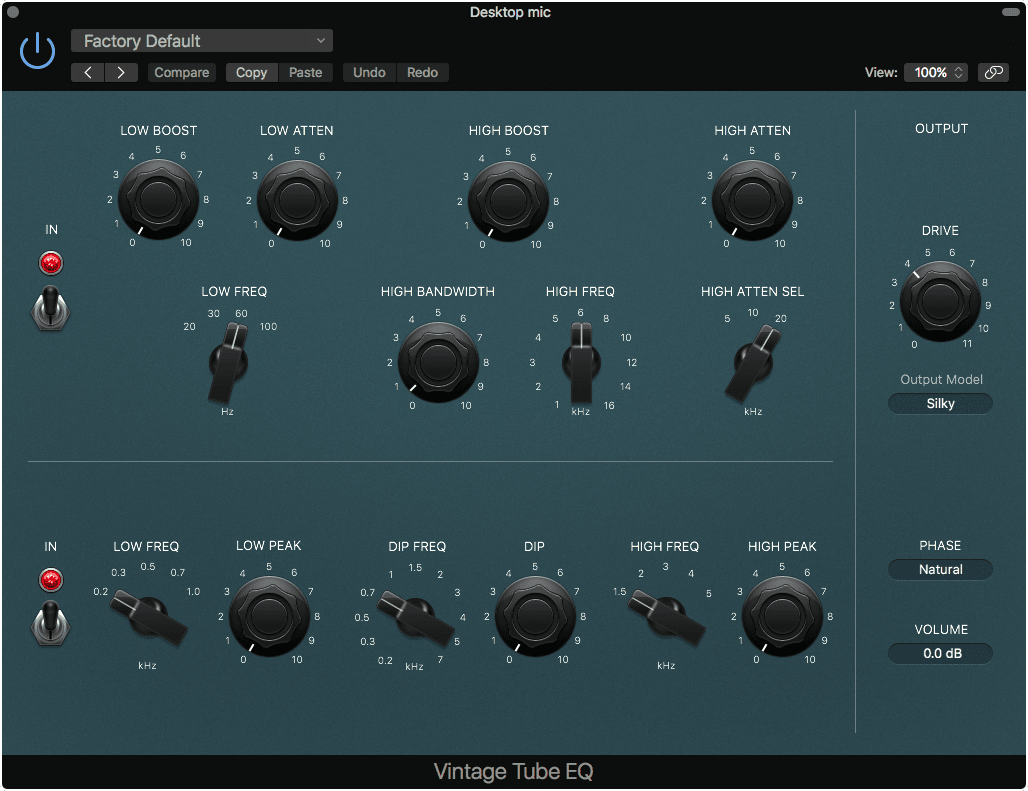
The Pultec passive equalizer is legendary. The Vintage Tube EQ combines the MEQ-5 with an EQP-1A. This is simple EQ with 2 shelves on top, and a unique ‘low’ and ‘high’ peak filter with a cut-only midrange filter. You can select the output stage of the Console EQ, the Graphic EQ or the Tube EQ. You can also select between Natural and Linear Phase modes, which is weird. The original is not linear phase.
Does this sound exactly like a Pultec EQ? I have only used one a single time in the past, so I can’t say for certain. Does it sound good? Very.
The Pultec EQs have a reputation for being easy to operate and get reliably good sounding sonic sculpting out of with minimal effort. Vintage Tube EQ does not fail here. The ‘Silky’ output mode lives up to its name and provides a light saturation with a strong 3rd harmonic component.
This is probably my favorite of the Vintage Collection EQs. It’s just so easy to make things sound ‘Better’ with it. Of the 3 EQs, this is probably the least useful as a saturation box, but the most useful as an EQ.
I want this in other DAWs.
Sufficient Effects
Amp Designer
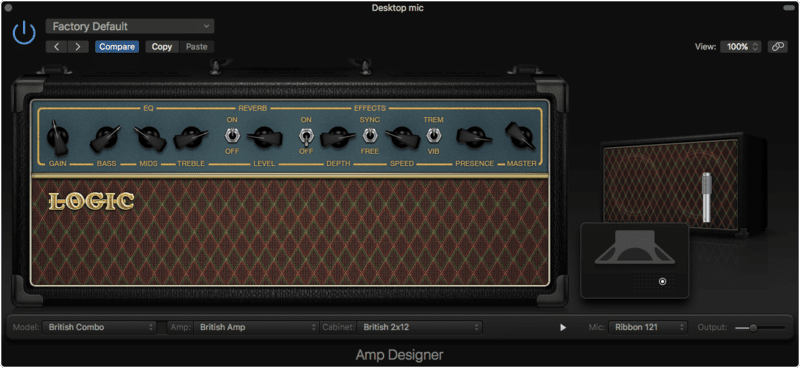
Logic’s Amp Designer is a guitar amp simulator. It includes a large number of models, cabinets and mics which I’ve listed below.
Soundwise Amp Designer sounds great. While it has more content than Ampire, I think that Ampire generally edges it out on sound and ease of use.
Amp Designer follows a somewhat semi-modular approach in terms of emulating a guitar setup. There is not an integrated tuner. There is not an integrated cabinet impulse response loader. There is no integrated effects beyond what the emulated amp classically would provide. Logic does provide a tuner (on every channel in smart controls!) and pedals, but no explicit cabinet IR loader (though you can use Space Designer for this).
Despite the semi-modular nature of the guitar environment, Amp Designer does include a number of preset ‘amps’ under the ‘Model’ menu. These are simply combinations of amps and cabinets seemingly intended to emulate a classic setup. I can’t say that I’m particularly impressed with the authenticity of these setups, but authenticity isn’t everything. For the most part they all yield usable tones in the context of what you might expect for that ‘model’.
All of the amps have a reverb and an optionally syncable tremolo. I suspect a lot of people would balk at the idea of using a Mesa Boogie Dual Rectifier with an integrated Reverb and Tremolo, but that’s exactly what you can do with the ‘Modern American Head’ model.
The integrated Reverb and Tremolo brings us to another point. Many of the amps that are being model have unique features such as multiple independent channels, scoop modes, brightness switches, multiple overdrive modes etc… The emulated amps have none of these for the most part. If you expect to load up the ‘Large Blackface Amp’ model and explore the various tones you can get from simply changing inputs on a Fender Twin, then you’re out of luck.
The mic section is interesting. Rather than allowing you to select from a preset cabinet-and-mic combination, you can hover your mouse over the amp to get a mic placement window. From there you can move the mic in 2 dimensions relative to the center of the cone. I found this to be a surprisingly accurate representation of how moving a mic works on a real guitar. It is disappointing though that you can’t tilt the mic and that the distance you can move it away from the amp is rather limited.
A major gripe I have with Amp Designer is that there’s no input gain features beyond a simple ‘gain’ knob. Probably the most important thing to getting a good tone through an amp simulator is that your input gain matches what the emulation expects. Every good third-party amp simulation has this capability, often with some feature that makes it easy to obtain proper levels. This notable exclusion does make it difficult to try to use Amp Designer to get what you could call ‘authentic tones’. I’m not a tone-chaser, and I firmly believe in using whatever method is necessary to get the sound in your head, but often there is a known starting point and the beginning of that quest is input gain settings.
Most all of these issues are forgivable, except the weak input gain section, unless you’re a purist. I’ve put Amp Designer in the ‘Sufficient’ section as it does provide a wide range of usable guitar sounds, but falls flat when you really want to explore beyond a cursory idea of what the real version of the amp can offer you. For that matter, I think that Amp Designer offers a quality of sound, like what I feel Ampire does, that would make up for these deficiencies.
Amps
- Small Tweed Amp
- Large Tweed Amp
- Mini Tweed Amp
- Large Blackface Amp
- Silverface Amp
- Mini Blackface Amp
- Small Brownface Amp
- Blues Blaster Amp
- Vintage British Head
- Modern British Head
- Brown Head
- British Blues Amp
- Modern American Head
- Studio Amp
- British Amp
- Small British Amp
- Boutique British Amp
- Sunshine Head
- Small Sunshine Amp
- Stadium Head
- Stadium Amp
- Boutique Retro Amp
- High Octane Head
- Turbo Head
- Pawnshop Amp
- Transparent Preamp
Cabs
- Tweed 1x12
- Tweed 4x10
- Tweed 1x10
- Blackface 4x10
- Silverface 2x12
- Blackface 1x10
- Brownface 1x12
- Brownface 1x15
- Vintage British 4x12
- Modern British 4x12
- Brown 4x12
- British Blues 2x12
- Modern American 4x12
- Studio 1x12
- British 2x12
- British 1x12
- Boutique British 2x12
- Sunshine 4x12
- Sunshine 1x12
- Stadium 4x12
- Stadium 2x12
- Boutique Retro 2x12
- High Octane 4x12
- Turbo 4x12
- Pawnshop 1x8
- Direct
Mics
- Condenser 87
- Condenser 414
- Dynamic 20
- Dynamic 57
- Dynamic 421
- Dynamic 609
- Ribbon 121
AutoFilter
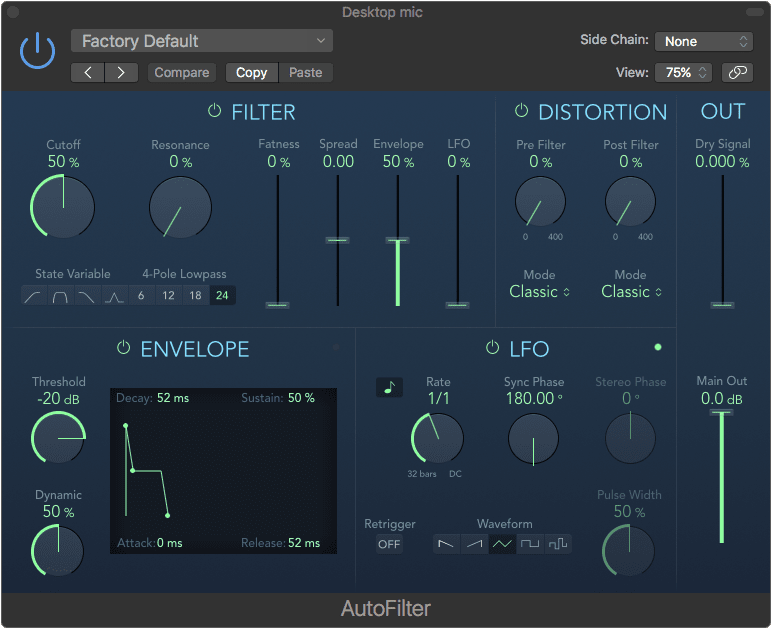
Autofilter is a filter that moves. Exciting right? The filter’s frequency is modulated by either an envelope or an LFO.
The filter itself has the typical low/band/high pass and peak modes as 1-4 pole filters. The typical cutoff frequency and resonance knobs are there as well. There’s sliders to control how much influence the Envelope and LFO have on the filter’s cutoff frequency. There’s a ‘spread’ slider that adds a subtle stereo effect to the filter. The ‘fatness’ slider is rather neat. ‘Fatness’ only works with the low-pass filter mode with resonance turned up, where it increases the gain of the frequencies below the cutoff to compensate for the somewhat brittle sound a highly resonant filter can impart on the signal.
There’s 3 distortion modes: Classic/Tube/Scream. The distortion can be applied before and/or after the filter by a variable amount.
The fun part of an auto filter is the parts that make the filter do things:
- Envelope - The envelope considers the incoming audio, and when that passes the threshold it acts. From there the filter is modulated by the envelope that you can design in the box next to it. The ‘Dynamic’ knob controls how much modulation occurs in response to the threshold being violated.
- LFO - The LFO modulates the filter by a waveform of your choice, two sawtooths, triangle, rectange (with pulse width) and random. The rate of movement can be synced to tempo, and when sync is on you can adjust which part of the waveform happens on the downbeat via the ‘Sync Phase’ knob. On a stereo signal the LFOs controlling the left and right signal can be offset with the ‘Stereo Phase’ Knobs.
- Notably, the LFO can be retriggered when the Envelope’s threshold is violated if the ‘Retrigger’ mode is turned on.
All in all, the autofilter sounds excellent. It would be nice if there was more flexible routing, perhaps more flexible modulation options and more filter modes but for the majority of ‘autofilter’ needs it’s great.
Despite the fact that I think Autofilter is a decent autofilter, there’s many third-party options that great surpass the capabilities and range of sounds offered by Autofilter. Given the relatively low cost of comparable options on the market, and the fact that some other DAWs include nicer autofilters, I’ve placed this in the ‘Sufficient’ category.
Bitcrusher
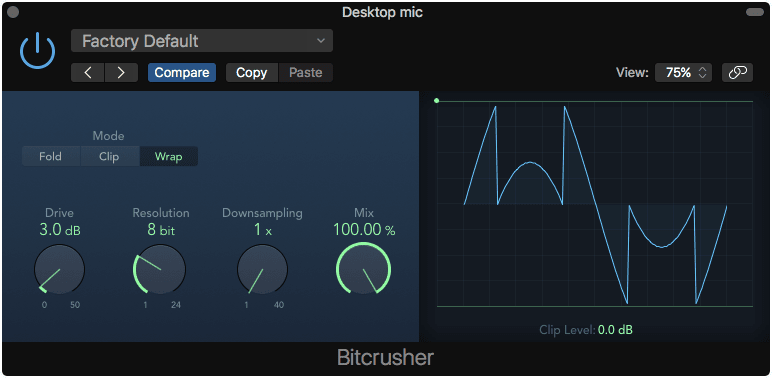
Bitcrusher is exactly that. It truncates the samples of the audio stream, but it also has an integrated clipper and downsampler.
The primary function of the bitcrusher is to simply truncate the least significant bits of the audio stream, which simply adds digital noise to the signal. For every 1-bit you cutoff, you add ~6.02dbFS of digital quantization noise.
Bitcrusher also has an integrated clipper with 3 modes.
- Fold - mirrors the data that’s clipped at the clipping point. This gives a ‘digital’ sound that’s about moderately destructive.
- Clip - Clip simply lops off the tops of the signal at the clipping threshold. This is the least destructive sounding mode.
- Wrap - This takes the cut off portion of the signal and restarts it from the ‘center’ of the signal. This is by far the most digital sounding and destructive mode.
The amount of clipping can be controlled with either the boost knob, or by grabbing the green dot above the waveform view.
Bitcrusher lacks some cool modulation options of third party bitcrushers, and it doesn’t attempt to model the digitizing sound of any specific old devices. If you need just a simple ‘digital sound’, then it’s more than enough. If you’re looking for a special digitized sound then it likely won’t satisfy you.
There’s nothing wrong with bitcrusher, but compared to third-party products and other DAW’s offerings, it’s not particularly spectacular.
Chorus
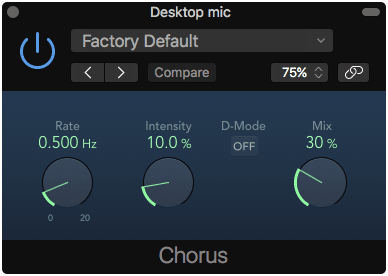
A very simple chorus plugin. This is nothing more than a delay with a modulated delay time. If you put it on a stereo track then you can access the ‘D-Mode’ which appears to emulate the venerable Roland Dimension D chorus.
Despite the limited but self-descriptive parameter set, Chorus is a decent chorus plugin that sounds quite good in D-mode. You can certainly find much better choruses out there, but this is sufficient for most uses.
Clip Distortion
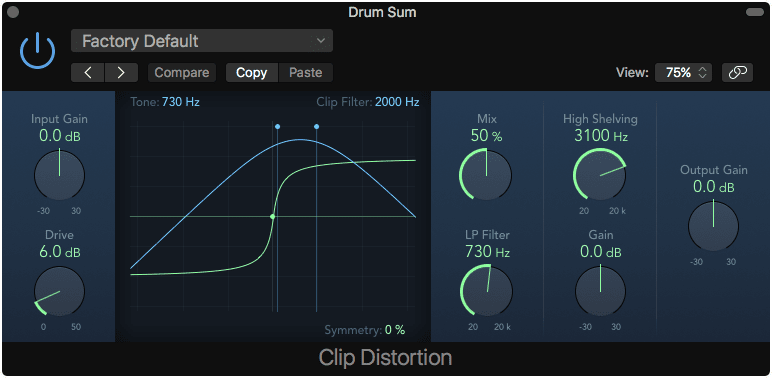
Clip distortion is a simple waveshaper. It maps the amplitude of incoming samples to outgoing samples based upon a defined curve.
The drive knob controls how drastic the effect is, basically the shape of the waveshaping curve. On top of the waveshaper display is a set of blue dots. The leftmost dot is a highpass filter that’s applied before the clipping and the right most is a lowpass that’s applied after the clipping.
After the signal is recombined, the signal is subject to yet another lowpass and a high shelf. There are pre-effect and post-effect gains with a mix knob.
There is an ‘Symmetry’ parameter at the bottom right of the graph that lets you change how symmetrically the waveshaping is applied to positive and negative sample values, which results in the addition of even harmonics
The effect is not oversampled, so there is a lot of aliasing present in the signal. Given that Apple is willing to allow the Channel EQ to incur a 0.3ms latency for 2x oversampling, I would think they’d spring for something similar here. It does help quite a bit.
Clip distortion is sufficient though. Used gently it can offer some subtle grit to a signal, and if you’re really smashing it then I doubt you’re worried too much about the purity of your signal.
Adaptive Limiter
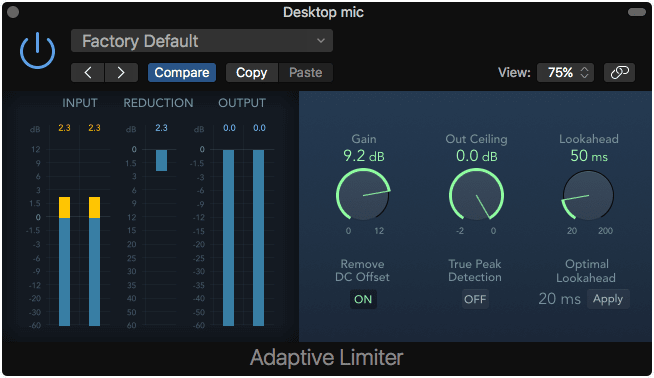
Adaptive limiter is a Brickwall limiter which is generally used for final processing.
Adaptive limiter sounds fine. It won’t give you extreme volumes or exceptional transparency like many third party plugins can. Despite that it does offer true-peak limiting, which allows the limiter to deal with Intersample Peaks. Intersample peaks can cause issues with certain lossy encoding mechanisms and low-quality digital playback devices, so it’s an important feature to have in a modern Limiter.
An interesting feature is the ‘Optimal Lookhead’ parameter. Lookahead causes the plugin to delay the signal internally so it can practically see in to the future. This functionality lets it react to peaks in a more transparent and accurate manner. Adaptive Limiter analyzes the incoming audio and tries to figure out the optimal lookahead value. Seems like a gimmick to me, especially considering how minimal the lookahead value affects the audio when limiting to the expected loud levels of modern productions.
It’s nothing fancy, but it’s not broken, and it works.
Correlation Meter

The correlation meter is very simple. It tells you how well correlated the left and right channels are in the incoming signal. It has both a bar that shows the RMS change over time and the current value.
- +1 - both channels are perfectly correlated. A ‘mono’ signal.
- 0 - about 50% correlation. This will show if there’s only signal in one channel or if they’re 90° out of phase. This is usually hard panning to the left or right.
- -1 - the two channels have inverted polarity compared to each other. This sounds very wide, but will disappear when the channels are summed to mono.
The correlation meter has an expanded panel to let you change its response time.
A nice meter, but nothing to write home about.
DeEsser

10.4 - NOT VECTORIZED
A de-esser is a processor that allows you to deal with sibilance. The classic way to do this is to use a compressor with a sidechain, exaggerate the ~5-10k range in the compressor, and allow the compressor to attenuate the entire signal when that frequency is present.
DeEsser works differently. It’s what’s called a ‘Dynamic Equalizer’. It takes the input signal and monitors a frequency range. When that frequency range is active enough, then it enacts an EQ band to dynamically cut in a specific range. So this causes DeEsser to act on the problem frequency when it’s a problem, and not affect the whole signal.
DeEsser in Logic allows you to unlink what it listens to and what it acts on, which is a valuable feature. You can independently set the Detector frequency (what it reacts to) and the Suppressor frequency (what it acts on). This allows you to tune the DeEsser to extreme sibilance, but act on it in a gentler way or even accentuate it by suppressing lower frequencies.
DeEsser has a smoothing parameter which controls how quickly it acts, however I found that almost invariably I liked it set around 10ms.
The DeEsser isn’t only valuable on vocals though. It can be used on a wide variety of sources like reverb sends, overheads, squeeky acoustic guitars and more. I’d have this in the ‘Fantastic’ category except for two glaring oversights:
- You can not change the detector/suppressor frequencies below 1,200hz. That greatly limits its usefulness as a generalized processor
- The GUI is old, not resizable and a tad bit ugly.
As a DeEsser, it’s more than sufficient, but I feel like they missed out on an opportunity to make something special.
Distortion
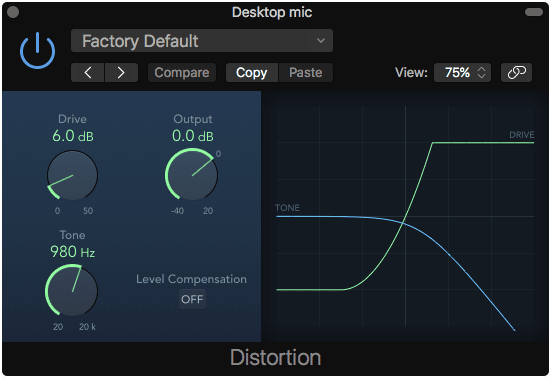
Distortion is a simple distortion intended to emulate the sound of BJT distortion. Perhaps a more common name would be ‘Solid State distortion’, like you’d get from a 70s/80s home stereo amplifier or a cheap pawn shop guitar amp.
It’s a very simple plugin that lacks oversampling, but that’s mostly irrelevant. It sounds like transistor distortion, and that’s all it aims to do.
Down Mixer
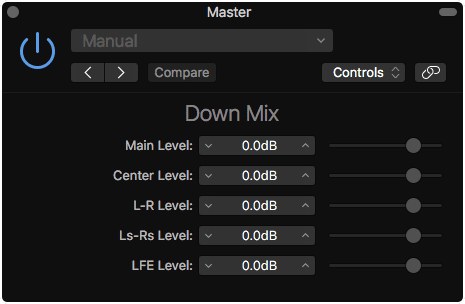
Down mixer is a simple plugin to collapse the channels of a Surround Mix to Stereo.
It works pretty well. It appears to be largely automatic, and I do not have sufficient knowledge about Surround downmixing to evaluate it further, so I have placed it in the ‘Sufficient’ Category.
Echo
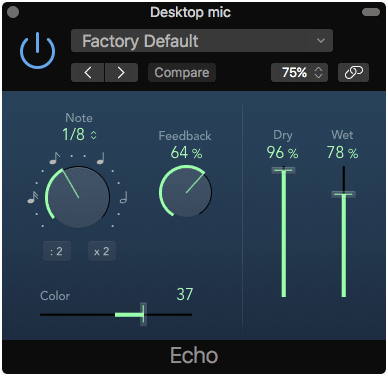
This is a 1 tap delay with feedback. It’s syncable to tempo and has a very simple high/low filter.
It works.
Fuzz-Wah
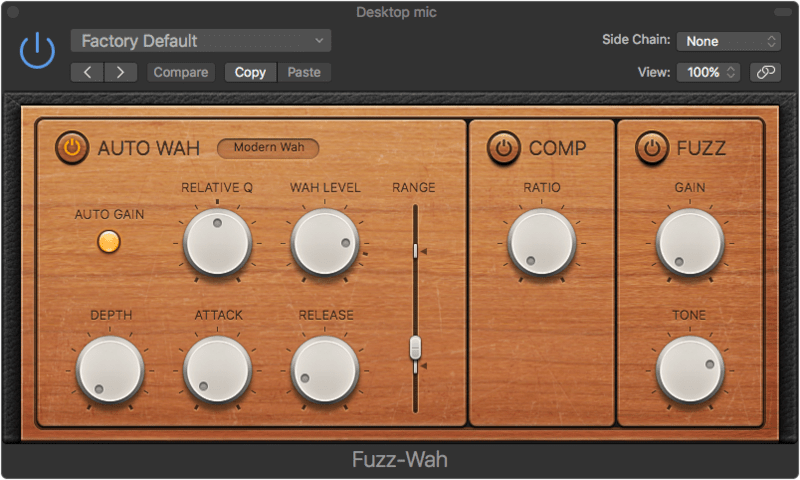
The Fuzz-Wah is a Wah Pedal effect. At its core it’s nothing more than a variable peak filter with a compressor and a fuzz section.
Fuzz-Wah has a number of modes that offer a variety of sounds:
- Classic Wah: This setting mimics the sound of a popular wah pedal with a slight peak characteristic.
- Retro Wah: This setting mimics the sound of a popular vintage wah pedal.
- Modern Wah: This setting mimics the sound of a distortion wah pedal with a constant Q(uality) Factor setting. The Q determines the resonant characteristics. Low Q values affect a wider frequency range, resulting in softer resonances. High Q values affect a narrower frequency range, resulting in more pronounced emphasis.
- Opto Wah 1: This setting mimics the sound of a distortion wah pedal with a constant Q(uality) Factor setting.
- Opto Wah 2: This setting mimics the sound of a distortion wah pedal with a constant Q(uality) Factor setting.
- Resonant LP: In this mode, the Wah works as a resonance-capable lowpass filter. At the minimum pedal position, only low frequencies can pass.
- Resonant HP: In this mode, the Wah works as a resonance-capable highpass filter. At the maximum pedal position, only high frequencies can pass.
- Peak: In this mode, the Wah works as a peak (bell) filter. Frequencies close to the cutoff frequency are emphasized.
The compressor is a one-knob affair, and the fuzz section has just a gain and tone knob. The filter range can be adjusted for both min/max using the white sliders on the pedal position parameter.
Ideally you would map the ‘Pedal Position’ parameter to MIDI foot controller like what you’d find on the right side of a Roland FC-300. Fuzz-Wah has an Auto Wah mode that uses the amplitude envelope of the input signal to modulate the filter frequency.
Fuzz-Wah sounds great. The Fuzz portion of it is relatively weak, but as a cohesive unit it’s a good shortcut to that early-70s fuzzed wah sound. If you’re a purist then this won’t hit the right buttons for you. If you’re really looking to get an authentic Wah or Fuzz sound then it’s not going to enthuse you much either. However, if you just want a quick way to tap in to that style of sound it’s an excellent stand-in.
Limiter

Limiter is basically the little brother of Adaptive Limiter. It’s a compressor with an infinitely high ratio.
The ‘Precision’ mode offers true peak limiting, and the Legacy mode offers a soft knee. The soft knee causes the compression to happen gradually as it approaches the threshold, which is a less aggressive sound.
I have found limiter to be useful on highly dynamic sources that generally need to be reigned in. Vocals and bass guitar are common culprits. I naturally rather grab other options, especially Compressor in the Vintage Opto mode, but Limiter does a sufficient job when more rigid limiting is necessary.
Modulation Delay
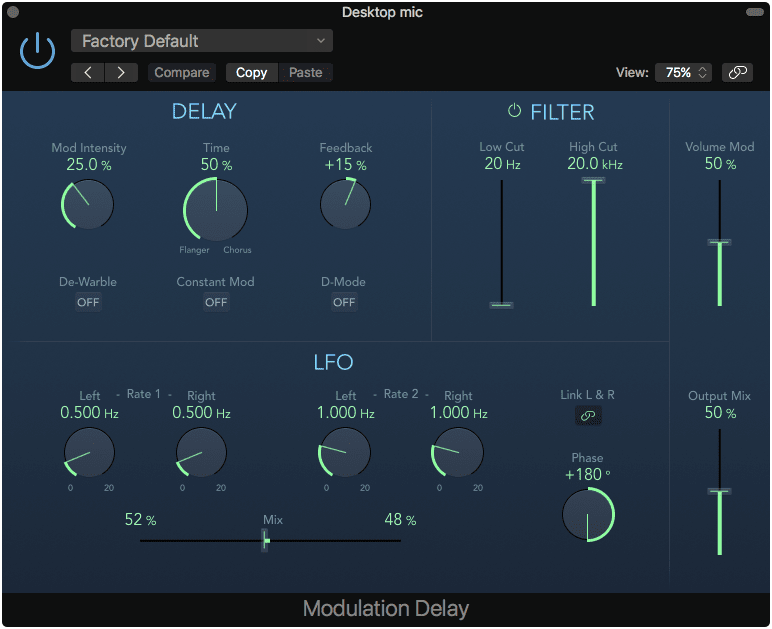
Modulation Delay is what the Chorus and Flanger plugins should be.
It’s a single tap delay with 2 LFOs for modulating the delay time. On a stereo signal, there’s 4 lfos: 2 for L/R and 2 more for L/R. These 2 sets of LFOs can be blended between. The relative phase of the 2 LFOs can be adjusted to taste. The LFOs also can impart a tremolo (amplitude modulation) effect by turning up the ‘Volume Mod’ slider.
There’s a de-warble switch to get rid of the pitch change when the delay time is modulated. ‘Constant Mod’ keeps the modulation width the same regardless of the depth of the speed of modulation.
There’s a high and low pass filter to help shape the signal a bit.
Modulation Delay is fairly basic, but it is useful. I think it’s preferable over the Flanger plugin 100% of the time at the very least. There are some free and low-cost third-party plugins that surpass this fairly easily though, so I can’t really call it ‘Fantastic’.
Overdrive

Overdrive emulates the sound of FET distortion. This is similar to the Distortion effect, which emulates BJT distortion. FET distortion is another common form of solid state distortion.
Once again, Overdrive is a very simple plugin. It aims to sound like FET distortion, and it does an admiral job. I’ve spent a lot of time messing with FET distortion and Transistor distortion when building guitar pedals, and in my experience it seems like Overdrive is a slightly less accurate emulation, but I could not tell you why. It just sounds off to me.
But still… it works.
Pedalboard
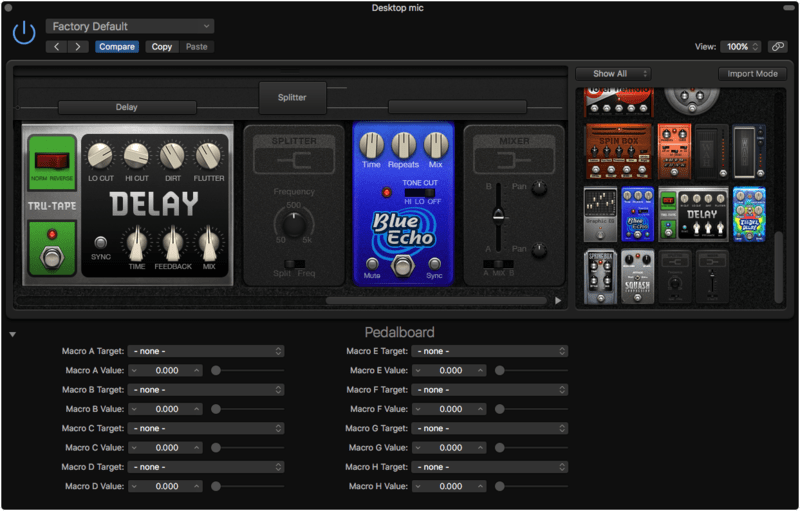
Pedalboard is a bunch of guitar pedals. I’m not going to go through all the pedals, since you can view them in the manual. Largely the pedals sound quite decent, though I once again can’t really say that they are excellent emulations of what they aim to. They mostly ‘get the idea right’.
The place where pedalboard really shines is how you can manage your pedals. Pedal settings are managed easily via the import menu. You can load a preset in to the import window and only grab the pedals that you want from it with their settings intact. I was unable to figure out how you export a single pedal’s setting from a pedalboard though, which is a shame. I don’t see that information in the manual either.
There are splitter and mixer pedals. The splitter allows you to clone the signal, or split it by frequency (with a crossover) and have pedals running in parallel before they eventually reach a mixer pedal. The mixer pedal has a blend control for the A (top) and B (bottom) signal paths. They can be individually panned or solo’d with the A/Mix/B switch.
Mapping parameters using the controller mapping in Logic requires that you first assign the pedal parameter to a ‘Macro Target’, then map your controller to that target value. Since the pedals in the Pedalboard are variable, this is necessary for controller mapping.
A fairly major issue I found is that there’s a very limited number of macro parameters. My own personal pedal board has more than 8 switches to operate. There’s no way (that I can see) to switch presets on a specific Pedalboard instance or to control multiple parameters at once without relying on smart controls. I know it may seem nitpicky to fault Pedalboard for this when the functionality is already built in to Logic, but since there potentially an expectation of mapping Pedalboard to a hardware pedalboard, I expect these features to be present.
Pedalboard is fun, but for a serious effects solution it falls very short. Using it as a casual or a ‘recording only’ solution is sufficient.
p.s. I know that if you’re using this live that you’d probably be using Mainstage instead of Logic, but I know a lot of people that have elaborate MIDI mapped setups for their recording rig. I feel like the absence of a total MIDI mapping solution is certainly an issue.
Phaser
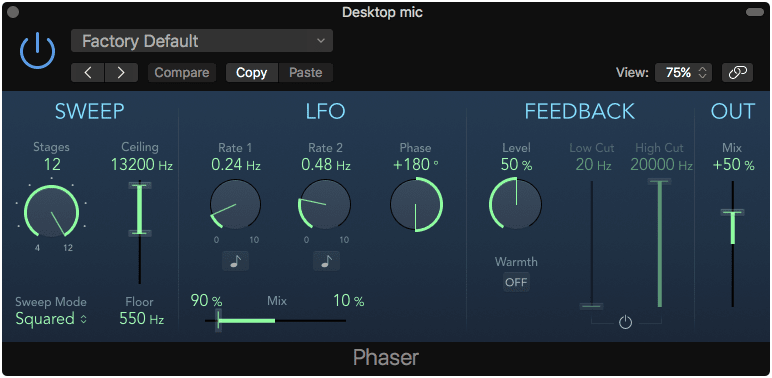
Another phaser effect, but less useless this time.
The ‘Stages’ strangely selects between a number of algorithms on the even numbers, and comb filtering effects on the odd numbers. I suspect this is more due to the number of allpass stages that correspond to various numbers of stages used in classical effects.
The allpass stages are controlled by a blend of 2 LFOs. Optionally the signal coming out of the serial allpass network can be fedback in with an optional high/low pass before the feedback occurs. The ‘Warmth’ button adds some subtle overdrive. Lastly there’s a mix knob to change the wet/dry balance of the output signal.
I love phasers. I think Phaser is pretty cool, but unfortunately because I like phases I’ve also found some cool free/cheap phasers that I think surpass this quite easily. Despite that I think that Phaser is more than sufficient for most phasering requirements.
PlatinumVerb
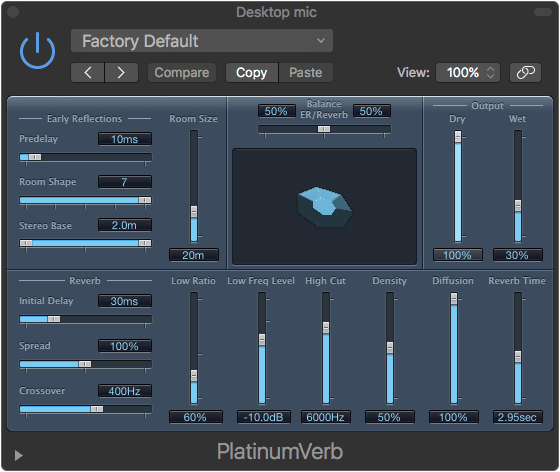
10.4 - NOT VECTORIZED
NOTE - in Logic 10.4, PlatinumVerb was moved to the Legacy plugins folder. I have not reviewed any of the legacy plugins here, but I wrote this when 10.3.3 was the current version. So I am leaving this review here.
PlatinumVerb is Logic’s classic algorithmic reverb. It’s a step or twelve above the sound available from EnVerb, but with added complexity.
PlatinumVerb offers you control over the early reflections and late components of the signal. Early reflections allow you to change the amount of pre-delay (time before the ER is heard), room shape, room size and the stereo base. Stereo base is essentially the wide of the imaginary microphones in the imaginary room.
The late components also have delay and spread. The late section also has controls for the relative amount of low/high frequencies, a low shelf and a high pass. Density and Diffusion control the ‘granularity’ of the tail. Density is essentially the number of echoes, and diffusion is their distribution.
The ER and Reverb (late) signals can be mixed as necessary. I love this feature because I record a lot of music in real rooms, or I’m trying to emulate that sound. That means that focusing on the early reflections is important, as often is emphasizing them. ER balance is a feature I consider a staple of any decent reverb.
PlatinumVerb isn’t the fanciest or most lush sounding reverb available. It doesn’t have many of the tricks that you might expect from a fancy reverb, and there are quite a few very cheap (and some free!) reverbs that very easily surpass what PlatinumVerb offers. It wouldn’t be the end of the world if this is all you had available though. It’s good enough for most things.
Scanner Vibrato
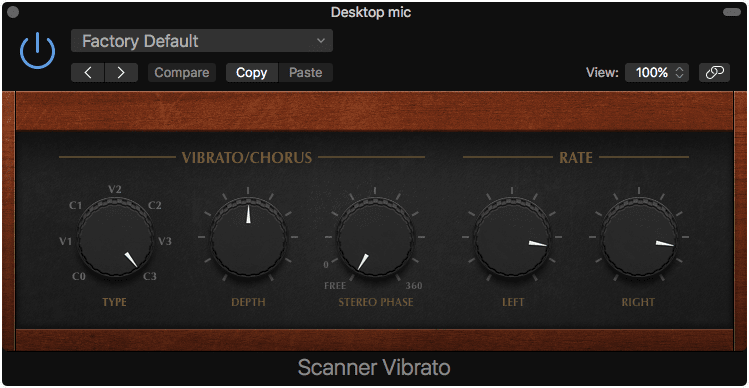
Hammond organ vibrato section and chorus. Someone at Apple really likes Hammond organs.
Scanner Vibrato has 3 types of vibrato and 3 types of chorus. Chorus depth is adjustable as well as the effect’s application independently on the L/R signals. The rate is adjustable for the left and right channels independently.
I’m no Hammond fanatic, but this sounds alright. I spent a lot of time trying it out on organ samples, loops, my own terrible organ playing and it sounded alright. I suspect I’m really not the target audience, so I have to assume that this is sufficient.
SilverVerb
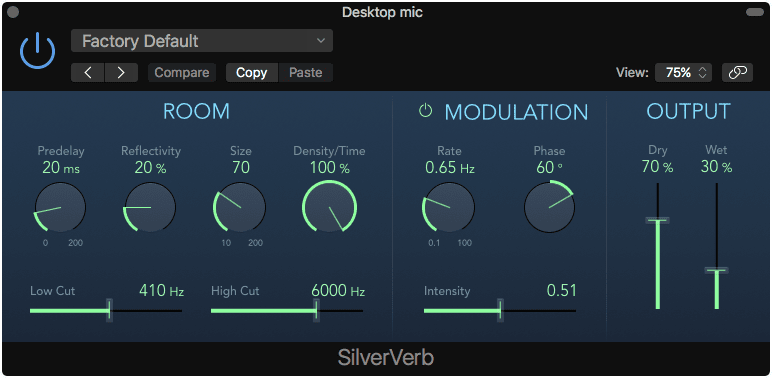
SilverVerb is another simple reverb. It has typical reverb parameters with an interesting ‘Reflectivity’ knob that controls how much the imaginary walls dampen the room.
The reverb also has modulation, which can make it a bit more suitable to sounds that potentially have a lusher reverb expecation.
SilverVerb works ok, and is certainly a better alternative than EnVerb 99.93% of the time.
Stereo Delay
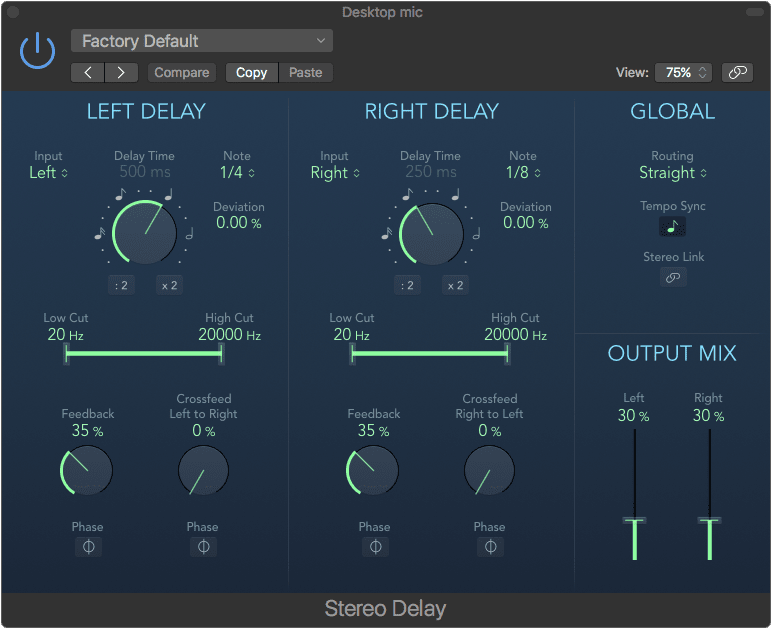
Stereo Delay is a basic delay with independent controls for the 2 channels. The 2 channels can be L/R or L minus R or L plus R (side and mid respectively). The feedback can be crossfed to the opposing channel, optionally polarity inverted.
There are presets for the feedback and crossfeed values, which is useful. The channels can be linked. The delay time has a deviation parameter that lets you scale the parameter by a percentage. Deviation is great for adding some groove to the delayed sound.
Stereo Delay is a simple but effective delay plugin.
SubBass
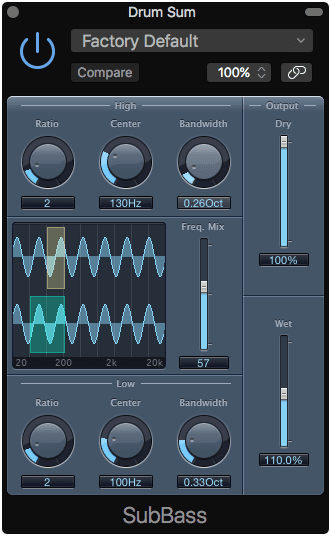
SubBass generates content below the input signal.
There are 2 generators: High and Low. Despite their names, they act identically with the same values. The ratio knob adjust the ratio of the input signal’s frequency to the output, the center controls where the detection occurs and the bandwidth is the bandwidth of that filter.
The 2 generators can be mixed as necessary, and there’s wet/dry controls.
SubBass works rather well. It’s especially useful for beefing up kick drums and creating sub-basses from electronic basses. There are free/cheap subbass synthesizers on the market, some of which work differently (such as triggering a sound instead of synthesizing a sound), but this is plenty sufficient.
Tremolo
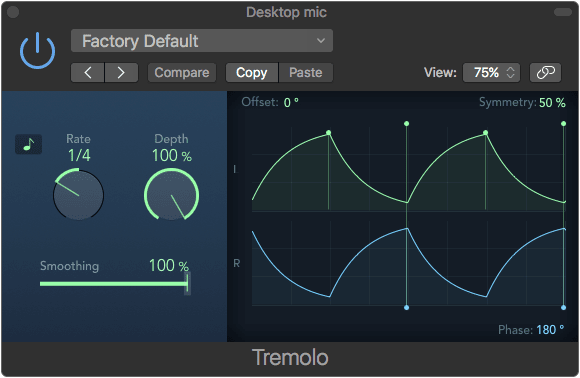
Tremolo is a simple amplitude modulation plugin. It has a variable rate, smoothing of a square wave and symmetry. The phase of the modulation can also be offset.
It’s very simple, and it works.
Vocal Transformer
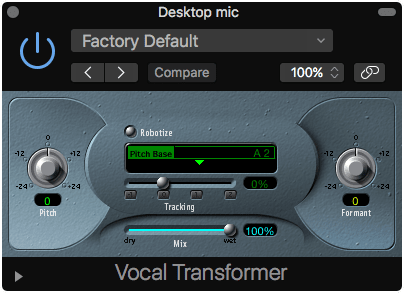
10.4 - NOT VECTORIZED
Vocal Transformer is a simple pitch shifter and formant shifter with a ‘Robotize’ mode.
The ‘Robotize’ mode adds pitch inversions around the pitch base based on the input tracking. So the transformations are based on your distance from the pitch base. The tracking slider changes how far these occur relative to the input distance from the pitch base.
The extended panel (lower left arrow) allows you to change how quickly the robotize effect occurs and the size of the grains that it uses (this is a granular effect after all). The formants menu allows you to select if unvoiced sounds are formant shifted. The unvoiced mode sounds more natural on most non-vocal sources.
Vocal Transformer is another fun processor. It’s limited use except for special effects work or maybe that one weird song on your album.
I wouldn’t go out of my way to pay for anything like this, but it’s nice to have.
Flawed Effects
BPM Counter
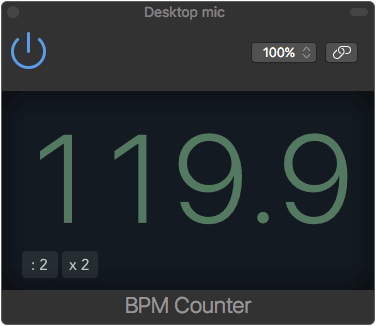
The idea here is that you put BPM Counter on a track, hit play, wait some time, and it tells you the BPM. It doesn’t work very well.
I tried it on about 20 songs from my music library, and it didn’t get a single one right. I had to purposely find some very straight electronic music for it to get close, and even then it was off +/- 0.5bpm, which I don’t think is tolerable.
It’d be nice if there was some sort of interactive functionality to help tune it, but there isn’t. It deserves its place in the ‘Flawed’ section.
EnVerb
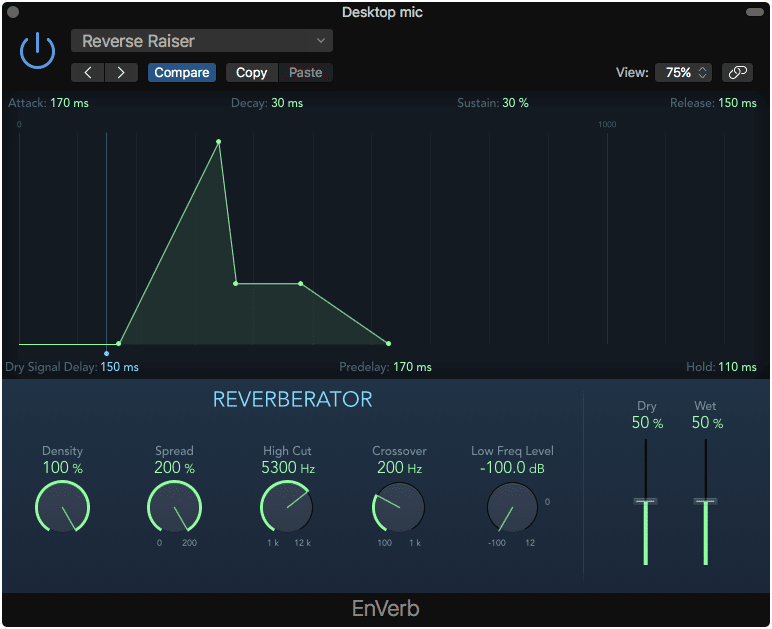
Enverb is a basic reverb where the main feature is the amount of control that you have over the decay stage of the late signal. Another unique feature is the fact that you can delay the dry signal relative to the wet reverb signal.
Enverb appears to be a Schroeder Reverb of some type.
All in all, I could find almost no use for EnVerb. The closest I could find to a decent use for EnVerb was trying to emulate a really cheesy gated 80s snare sound, and even then I was able to do it better with a different reverb in Logic.
I’d just mostly avoid this.
EVOC 20 Filterbank
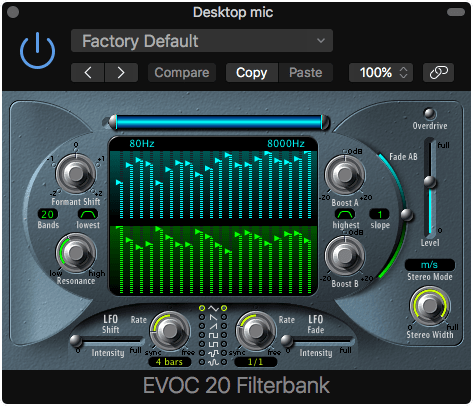
10.4 - NOT VECTORIZED
EVOC 20 Filterbank provides you a series of Formant filters. The audio gets fed in to the Green and Blue filter banks in parallel. You can have between 5 and 20 filters with a 6/12db slope in each bank with the lowest and highest filter being variably a bandpass or shelving filter.
The formant shift amount is manually adjustable or it can be modulated by the LFO on the lower left. The resonance is fixed and not modulatable.
The 2 filter banks can be crossfaded between manually, and that crossfading is modulatable by an LFO. The results of the filters can be stereo spread for an interesting effects too.
The effect is interesting, but is seriously underpowered by the lack of an envelope modulator. Formant filter effects are often most useful when they react to the envelope of the incoming signal, rather than by a fixed LFO. The inclusion of only 2 single LFOs makes this a letdown. Much more interest effects would be possible with more modulation options, and I can’t really think of many situations where another formant filter plugin would not serve you better.
Exciter
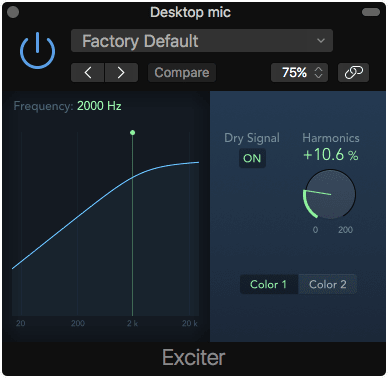
Exciter is a simple distortion module that only targets high frequencies by design. It has 2 modes (Color 1 for even harmonics and Color 2 for odd harmonics), a crossover to determine where the effect begins spectrally, an option to mix in the dry signal, and an amount of the effect.
Exciter works alright, but it aliases like crazy. This is an effect where I find this to be a particularly bothersome side effect, as it adds an audible graininess to the signal. It’s particularly noticeable if you use it on signals that already have a lot of high frequency content like cymbals.
I can’t really say that I find this to be a useful plugin. When used very gently it can be a nice addition, but there’s not a single time that I’d use it over a better third-party alternative.
Expander
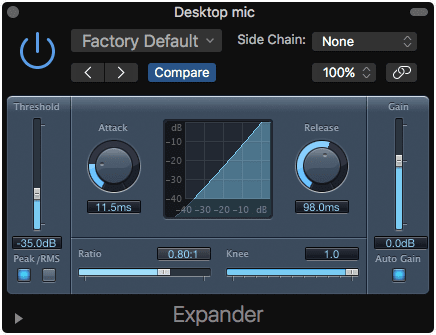
10.4 - NOT VECTORIZED
An expander is basically an upside-down compressor. Rather than reducing the signal when it violates the threshold, an expander raises the gain of the signal when that occurs.
Expander is a very simple expander plugin with the typical controls along with Peak/RMS detection modes and an auto-gain feature that’s not particularly good.
Expanders are relatively rare to use in general production, but when they are necessary I find that they often require a lot of tweaking to get an acceptable sound. Expander lacks most of the functionality that I’d expect from a tweakable expander like: attack/release shapes, hysteresis, range, hold, sidechain features and an integrated limiter.
When I need an expander, this is not what I’d ever reach for.
Gain
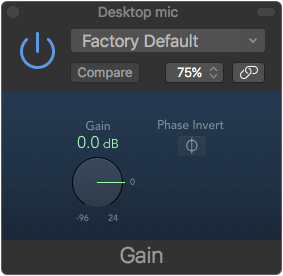
It’s a gain plugin. You can adjust the gain, invert L/R channels independently, adjust stereo balance (on stereo channels), swap channels (on stereo signals) and mono-collapse stereo signals.
I’m a stickler for these things, all of these functions should be available in the mixer. All of these functions should be integral parts of the plugin interfaces. They aren’t.
As far as I’m concerned, the need for this being a plugin is flawed. I treat all DAWs this way, and this is no different.
Level Meter
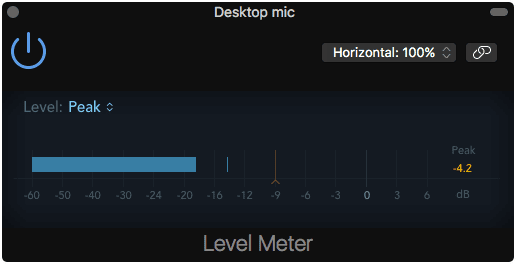
Level meter is a simple level meter with Peak, RMS, Peak+RMS and associate true peak modes.
Level meter does have a little bar that you can easily move to adjust where the ‘warning track’ is on the meter.
Unfortunately this is once again a flawed plugin because it’s not an integral part of the Mixer or channel strip. It also lacks lufs and VU modes, which would make it more useful as inter-process meters.
Loudness Meter
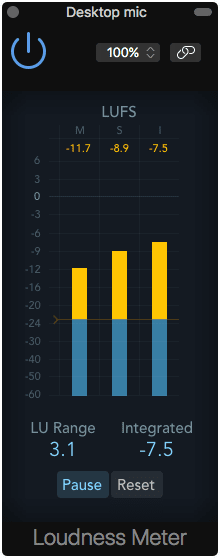
Look! It’s our LUFS meter. Exactly where it shouldn’t be: as a plugin.
LUFS is a hot topic these days with it being used as a part of broadcast standards and as a normalization target for certain online content providers.
Loudness Meter does allow you to set a target as well as starting/pausing measurement (which can be automated). It does lack logging features which are often necessary for broadcast delivery.
The fact that this is a plugin and not integrated with the mixer, as well as the fact that there’s a number of free meters that are better, puts this squarely in the Flawed category.
(free alternatives: Youlean Loudness Meter and TB MvMeter 2)
Microphaser
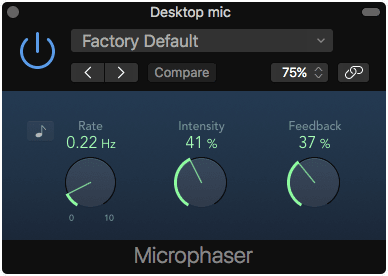
Microphaser is a very simple phaser. There’s really not much to say about it.
There’s a variety of better phasers out there for free or cheap. I really don’t see any reason to use this unless you are lazy. If you are, that’s ok… but if you use Google and a bit of effort you can have a much better effect.
Multichannel Gain
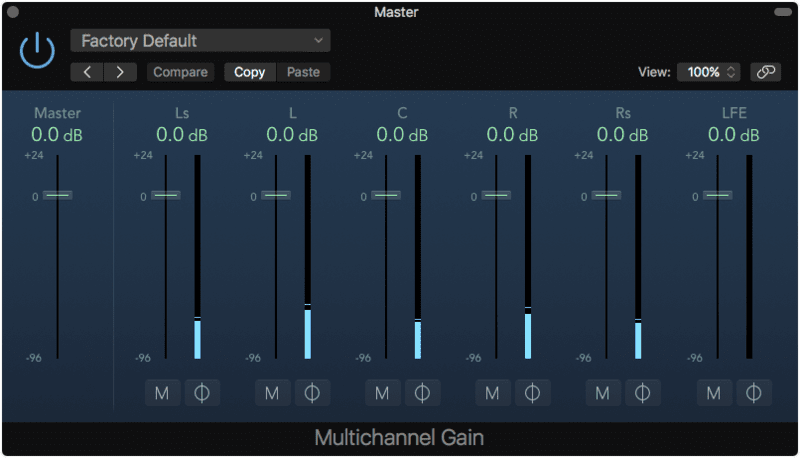
Ok, uhh.. soo…
This lets you adjust the gain, mute and polarity invert parts of a surround signal. Great.
Why isn’t this part of the mixer again? Ugh.
Multipressor
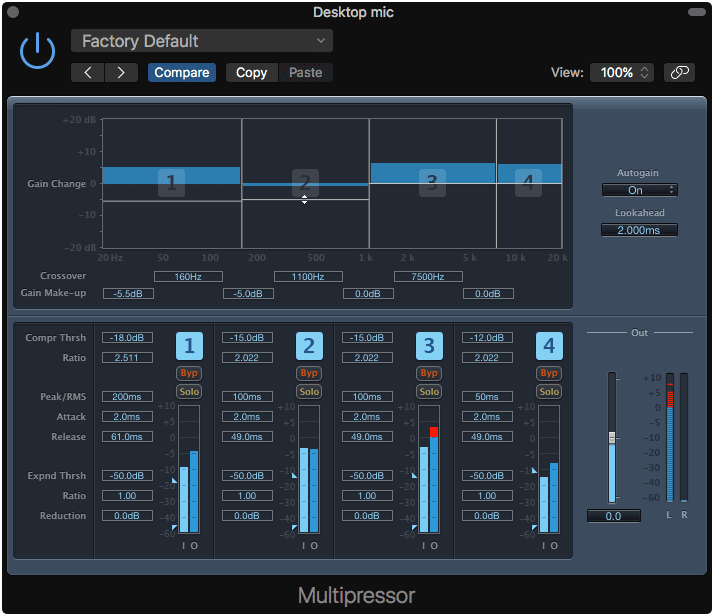
10.4 - NOT VECTORIZED
Multipressor is a multiband compressor. It splits your audio into 4 bands that each have their own compressor/downward expander.
Each of the 4 bands has a variable peak/rms compressor with the normal threshold/ratio/attack/release controls. The band’s frequency edges can be adjusted and make-up gain applied on the graph. All of the bands have mute/solo capabilities as well
A somewhat unique feature is the downward expansion available on each band. Compared to normal expansion, which increases grain above the threshold, a downward expander lowers the gain when the signal is below the threshold. This is basically a noise gate but gentler.
Multipressor has lookahead and an autogain. The autogain is not particularly good, and the lookahead maxes out at 20ms, which can be an issue for compression on some modern ultra-deep basses.
There is no spectrum analyzer, but the gain bands do indicate the amount of compression.
Despite the somewhat unique downward expansion, Multipressor is easily replaced by a number of free or cheap multiband compressors with no loss of quality. I can’t really see much reason to be using this in 2018.
Pitch Correction
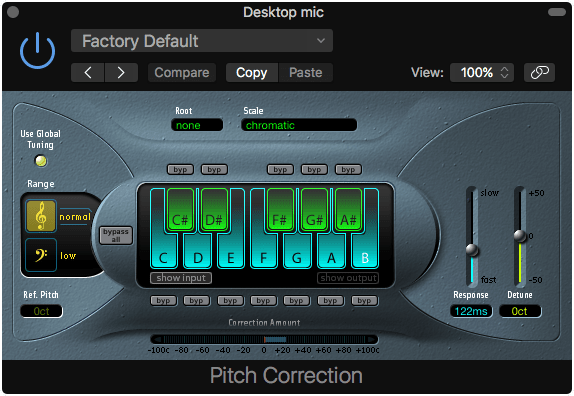
10.4 - NOT VECTORIZED
I’ll say what we all know; this is Logic’s Autotune alternative.
There’s not much to it. You can select the scale to correct to, enable/disable pitch correction destinations, change the response speed and detune the result by +/- 50 cents.
Does it work? Yes. Is it as good as Melodyne or Autotune or… any one of many options? No. No it’s not. It lacks a variety of options for pitch adjustment, scale creation, analysis tuning and more. Even if those were present, the algorithm used still doesn’t sound transparent.
Is it good for making those obviously pitch corrected sounds? Yes!
I’m putting this in the flawed section because Logic’s own Flex Pitch beats it out easily. The only time that you’d use this potentially is for live performance. I think you can do better.
Pitch Shifter
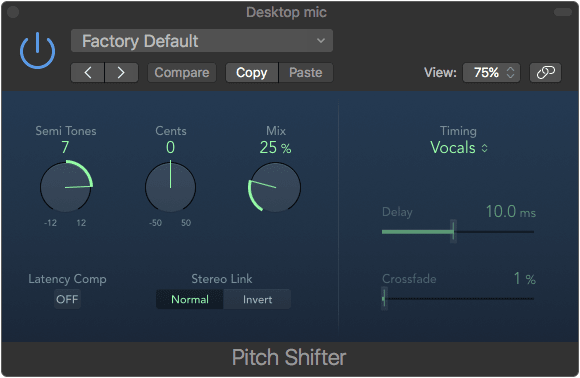
Pitch shifter does what it says on the tin. It shifts the pitch of the incoming signal by a number of semi-tones and cents (percentage of a semi-tone).
There are 5 algorithms:
- Drums - focuses on retaining the timing of the original track.
- Speech - a hybrid between focusing on timing and intonation of the source.
- Vocals - focuses primarily on the intonation of the pitch shifting at the expense of rhythmic accuracy.
- Manual - user manually tunes the delay/crossfade parameters to tune the pitch shifting algorithm.
- Pitch tracking - follows the pitch of the signal.
None of the algorithms seem to sound as good as the integrated flex pitch modes. I can see this as useful for perhaps pitching an aux effect or manually automating a small pitch change on something.
In all of my hours of using Logic, I’ve never really felt the need to use this over other options. It’s not particularly awful, but there’s almost always a more transparent way to pitch shift.
Sample Delay
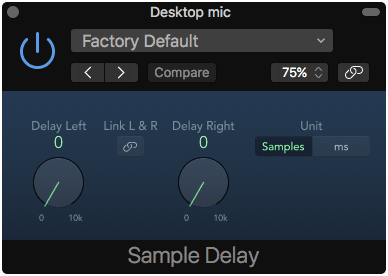
This simply allows you to delay each channel by a set number of samples or milliseconds.
This seems to be missing the most useful feature which is negative values. These are implemented by declaring a compensated delay time to the host, but then not actually delaying the signal. This causes the host to ‘pull back’ the signal in time.
Given that only half the useful functionality is here, it’s flawed.
Single Band EQ
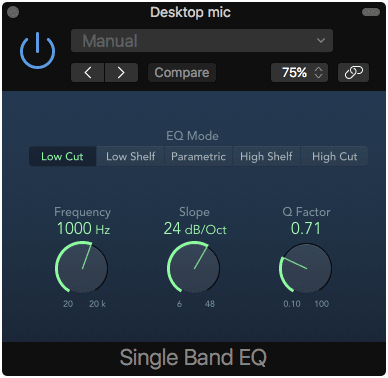
One EQ band. Low/High pass. Low/High shelf or parametric.
Meh. I really find these sorts of plugins annoying, even though I understand their usage. Channel EQ is already integrated in to the mixer and Single Band EQ has limited functionality. I have to give this one a Flawed rating.
Spectral Gate
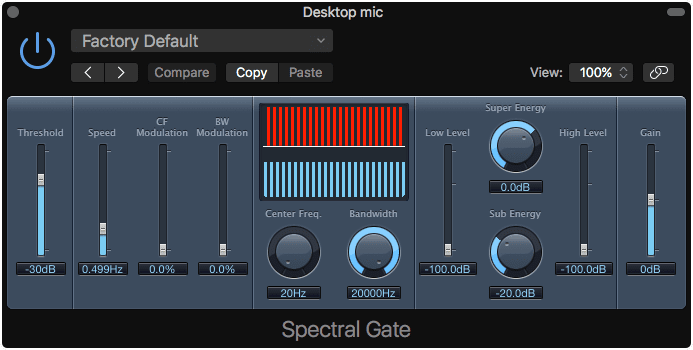
10.4 - NOT VECTORIZED
Spectral Gate is a weird one. It splits your signal in to 2 bands, but only when the threshold parameter is violated. Once that occurs then you can hear the effect of the split frequency being modulated by the CF (center frequency) modulation and BW modulation sliders.
From there you can choose how much of the high band and low band are present, and how much they are mixed with the original signal.
It’s a weird effect. I really don’t know what to say. I’m tempted to call this one flawed because I can find no real good use for it, even in weird creative scenarios, but is that unfair?
I don’t know. It’s in Flawed because I can’t really find any use for it, and it’s really out in left-field.
Spreader
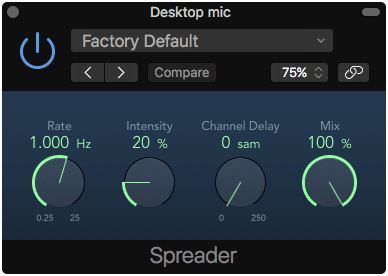
Spreader appears to be a stereo frequency shifter that operates via an LFO.
It sounds pretty awful really. I found some use for it on some long pad synths with very subtle settings, but I think this one is a dud.
Tuner
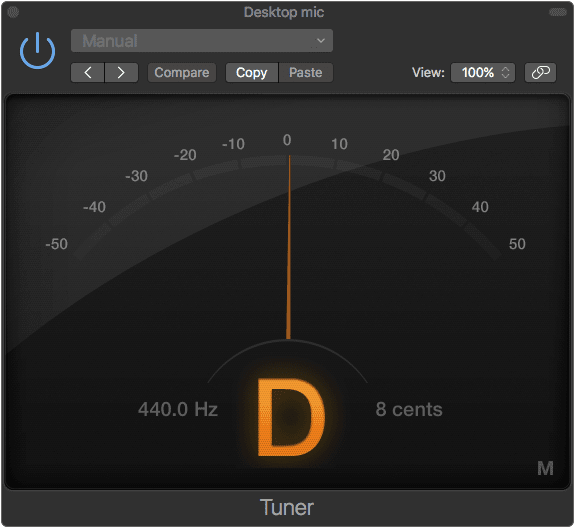
It’s a tuner. It tells you the pitch of the input signal with no parameters except a mute button.
It is not very fast, even though it animates quickly to try ant make you think that it’s fast. It is accurate, but the precision is harmed by how slowly it reacts. It’s very easy to overshoot tuning an instrument because the tuner does not react quickly enough.
Tuner also has issues with instruments that have very complex harmonic content.
It’s a shame that this is available on every channel via smart controls (upper right of the smart controls window). A more configurable, faster tuner with option strobe mode would be much better.
Go google something free, it’s probably better.
Conclusion
Overall rating:
Logic’s included effects are basically the most complete and usable set that I’ve used in any product. There are some notable exceptions like tape processors, tube distortion box, multiband processors, and clever things like containers/patchers/modular environments.
I could really nitpick some of these effects that seem to emulate hardware devices, but due to the very fuzzy claims in the manual and marginally-similar GUIs, I accept that these are effects that are inspired-by rather than attempts to be true models. They are evaluated with that in mind.
For your average music, film or broadcast production though: Logic offers just about everything you need for your average product, and most of it doesn’t suck.
There are DAWs with some way cooler plugins, more clever FX systems, ad-hoc FX writing, exceptional instances of an effect class, but Logic is just a solid set of plugins.
(Honestly, I love Compressor and I’ve probably given Logic’s effects a full 10 points extra just for that. Full disclosure and all.)
Support Me!
This post took 55 hours to research, screenshot, write and edit. If you appreciate the information presented then please consider joining patreon or donating!
