Waveform 11 Pro was announced a few months ago, and I’ve been using it as my “daily driver” for about a month.
I’m going to cover their highlighted features, and I won’t be holding back on the criticism.
This review is only valid for *Waveform 11.0.26**. The team is responsive to feedback and it’s likely that some complaints/criticisms will be rendered invalid over time.
DISCLOSURE - I was given this copy of W11 Pro for free for the purposes of review. If you feel that the review was improperly biased, please leave a comment.
Contents
- Arranger
- Edit Overview
- UI Manager Updates
- Quick Action Bar
- Enhanced Multiple Display Support
- MIDI Tools
- Plugin Sandboxing
- Audio follows Chord track
- New plugins
- The Manual
- Purchasing
- Conclusion
- Meta
Arranger
A lot of DAWs have arrangement adjustment features. They vary from basic “copy this time range to this time range” to “This entire project can be sequenced as a pattern amongst other patterns”.
Waveform’s new arranger track is a variation of “move time selection to…”, but with extras.
There’s a track that contains blocks. You can draw blocks, called arranger clips, to denote a time selection.
Once a clip is present, it acts as a persistent time selection. You can grab a clip and move it, and anything in that time selection, to another spot. If the arranger clip overlaps with another then you can replace the “to” clip, or swap it with the original position of the clip that you’re dragging.
This is a welcome feature for simple block-like arrangements. In that regard it’s better than what’s offered by at least half the DAWs with this feature.
From a wider perspective, the only thing potentially interesting about the base functionality is the “Swap” feature, but there’s a bit more to it, and they nearly got this right… but didn’t hit the mark.
Could be better…
Arranger clips move either everything in that time selection, or the contents of the selected tracks in that time range. It’s nice to move only a subset of tracks as an arrangement adjustment, but I believe it’s missing the following capabilities:
- Select clips - Sometimes I only want to take a few clips on a track, not the entire track for that period of time.
- Select content beyond arranger clip - Let’s face it, not all music is chunks of time that butt against each other. Parts of songs often have elements that extend before and beyond the meat of the section. If you have an outro that needs to overlap with another section then the arranger track is just going to cause pain. There’s no way to select content beyond the arranger clip to move with it.
- Merge - With the ‘track select’ and desired clip select, there needs to be a way to merge the subset with the new whole. Maybe I want to introduce the bass parts from Part A to Part C’? The arranger track currently does not allow you to select the bass tracks from Part A then merge them with Part C’.
- Replace - The current behaviour when moving/copying a section is what’s generally called “Shuffle” mode. If I move an arranger clip and it bisects an audio/midi clip, then the post-bisection material is shuffled after my arranger section. Sometimes you want to ‘move and replace’ everything there. Watch the video above for more.
- Split - Currently when dragging an arranger clip over another one, you can not insert it and split another arranger clip. It’s either replace the full clips or swap the full clips.
- No Overlaps - Moving/Copying an arranger clip always inserts new space so that clip can exist, and pushes everything after it down the timeline. It would be nice to overlap sections when copying or moving. This likely would be available if merge was.
- Linking - While you can select the tracks you want to move with the arranger clip, there is currently way to designate tracks (or clips!) as part of an arranger block. If I want Part A to be just drums and basses, where the melody elements are external to the core arrangement, then I need to manually select the drums and basses (maybe 20 tracks!) each time I use the arranger. If it was possible to assign tracks (or clips!) to an arranger clip then the functionality would be improved tenfold.
- Notably this also requires merge functionality to work.
- Linked Clips - Copying a section unlinks (or does not properly link) clips.
- Sizing - This is surely a complex feature to implement, but the ability to non-destructively resize sections utilizing arranger clips would be incredible.
The feature is better than the functionality of at least 2 other major DAWs, but each time I tried to use it I came away feeling like a few extra days of design work (and probably months of dev work!) may have made this a killer feature.
I understand there are constraints in place in development, but every user I’ve discussed Waveform 11 with has come of with a similar impression: “Wow, the arranger track is great, but…”.
There’s probably more to come in this realm, but I feel that this could have been the sole feature of Waveform 11 and been a knock out hit… if.
Edit Overview

The edit overview is an image of your entire project, horizontally stretched, so that theoretically you can navigate the project easier.
It allows you to do two things currently:
- Move the view of the whole project by dragging that white box around
- Zoom by changing the size of the box (or modifier-dragging)
I find this feature to be strange. Most projects can be easily viewed on the time axis in the main window, or at least in 2-3 screen widths (1/2 to 1/3 of the project on screen at a time).
Viewing all tracks is difficult in nearly every DAW. Once you have more than 16-20 tracks, it can become painful to navigate vertically. The edit view takes this problem and compounds it! The edit overview takes the entire vertical width of your project and squishes it into a tiny little area.
The project in the image has less than 40 tracks and you can see that the edit overview is becoming an illegible mess. At around 60 tracks it’s almost worthless.
I use project overview functions in other DAWs because they give you 2 dimensional control over the view. If you’ve ever worked in image editing software then you’re probably familiar with the hand or pan tool that lets you drag the canvas around. That’s useful. Locking that to a fixed scaling with no vertical adjustment is plain gross.
The funniest thing is that you can pop-out the whole arrangement view and have nothing left in the main window except the project overview… and it sits there in all its tiny glory, not utilizing any of the new space!
There is one redeeming aspect of it: it’s available in the mixer window. Utilizing a single full-screen mixer is one of the few instances where visualizing time is a problem, and the edit overview improves upon this experience for smaller (< 5 minute) projects.
If the edit overview was available in its own window, with controls for vertical zoom, then it would be on par with what other products had in the 90s. For now though… ick :(
UI Manager Updates
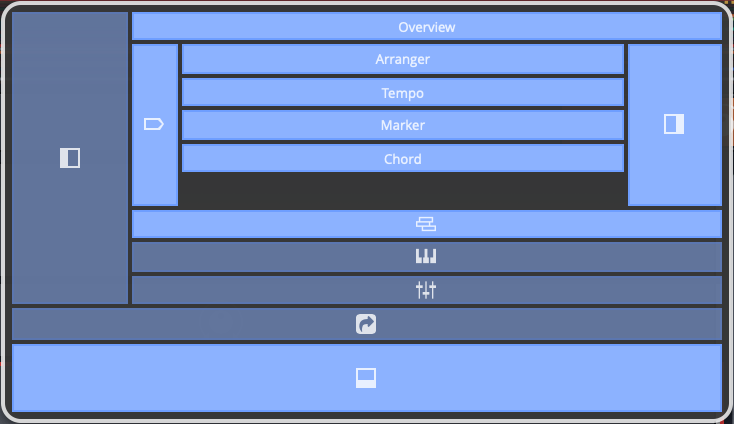
The UI Manager is something I haven’t discussed before, but it’s a button with an eye in the upper right that lets you quickly hide parts of the UI.
V11 added the ability to control the full arranger, edit overview and quick actions bar.
Almost any central window will take up the full screen if the arranger is hidden except for the edit overview. Would be nice though ;)
Custom layouts
Waveform has a fairly simple GUI Layout, but there are workflows where sometimes you want to see only the mixer or only the MIDI editor, or the arranger and sample browser etc…
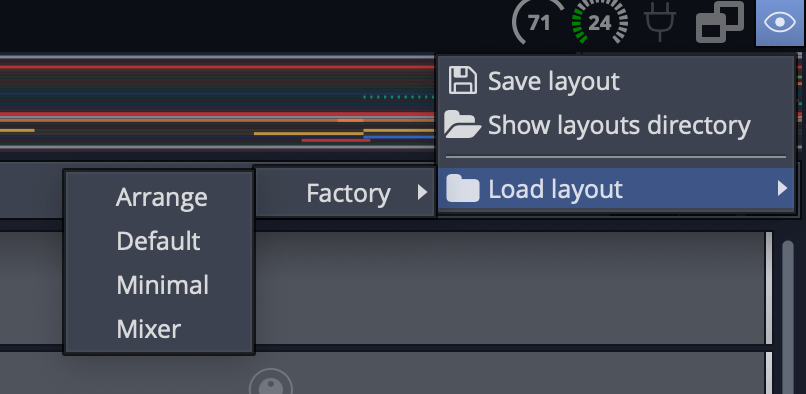
Layouts allow you to save those views. Whatever you can setup in the UI Manager can be saved as a recallable view preset.
This feature works, but it’s a usability disaster. You can’t assign layouts to a hotkey, and loading a layout requires navigating THREE to FOUR layers. Click on the layouts button, then go 1-3 (delayed) sub-menus down.
In the time it takes to load a layout, I can use the UI Manager or quick action bar to setup what I want.
The recall isn’t fab either. It doesn’t remember the “popout” behaviour of some windows, it doesn’t recall the positions of windows, and it doesn’t recall the displays windows are on.
I spent an hour with this feature trying to figure out how to make it work for me. It was consistently a bigger hassle than manually setting up what I wanted quickly.
Hotkeys, Allow Quick Action Bar use, improve menu delays.
Quick Action Bar
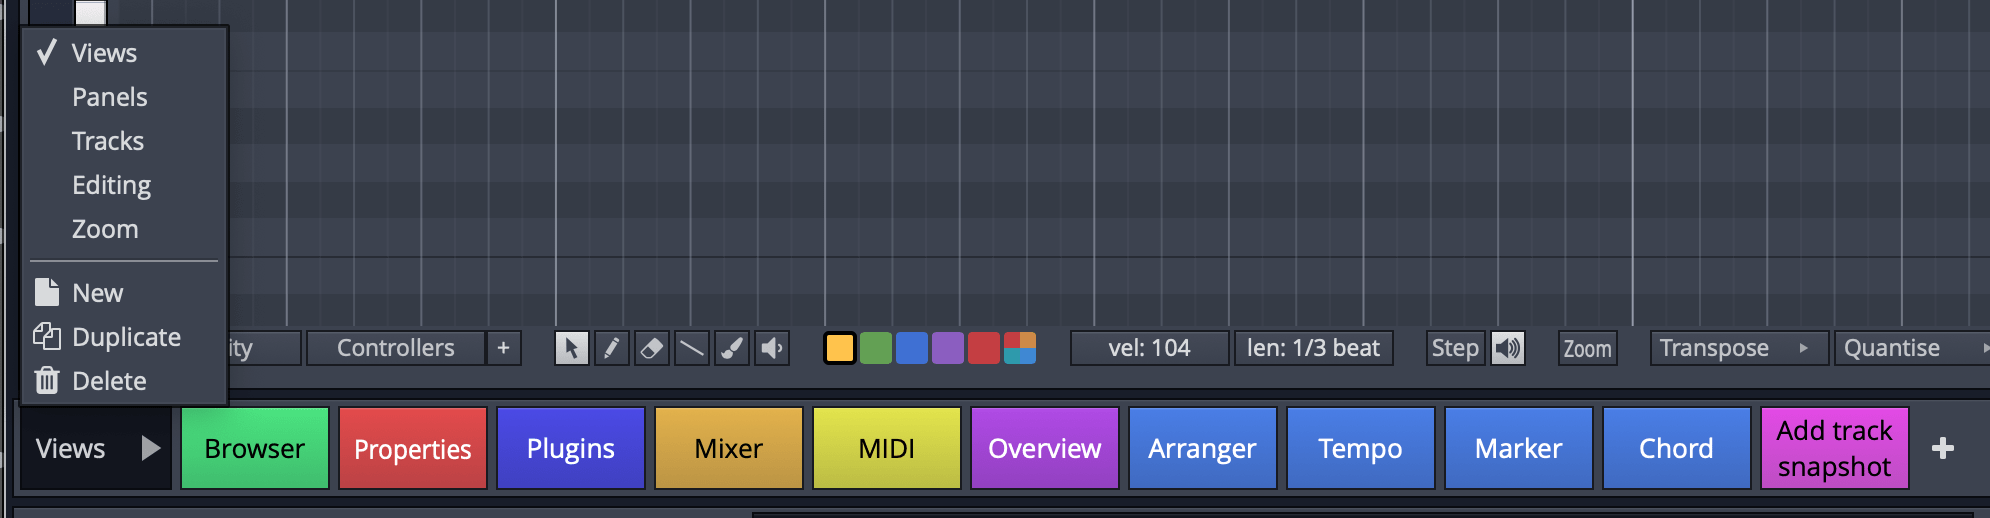
Assign functions to a button, put buttons on bar, put bar on interface.
It’s nice.
Combined with Waveform’s scriptable (using JS) macros, you can do some interesting things with a single click. (The macro scipting is poorly documented though, beware.)
(Would be nicer if I could recall layouts with actions.)
Quick Action Window
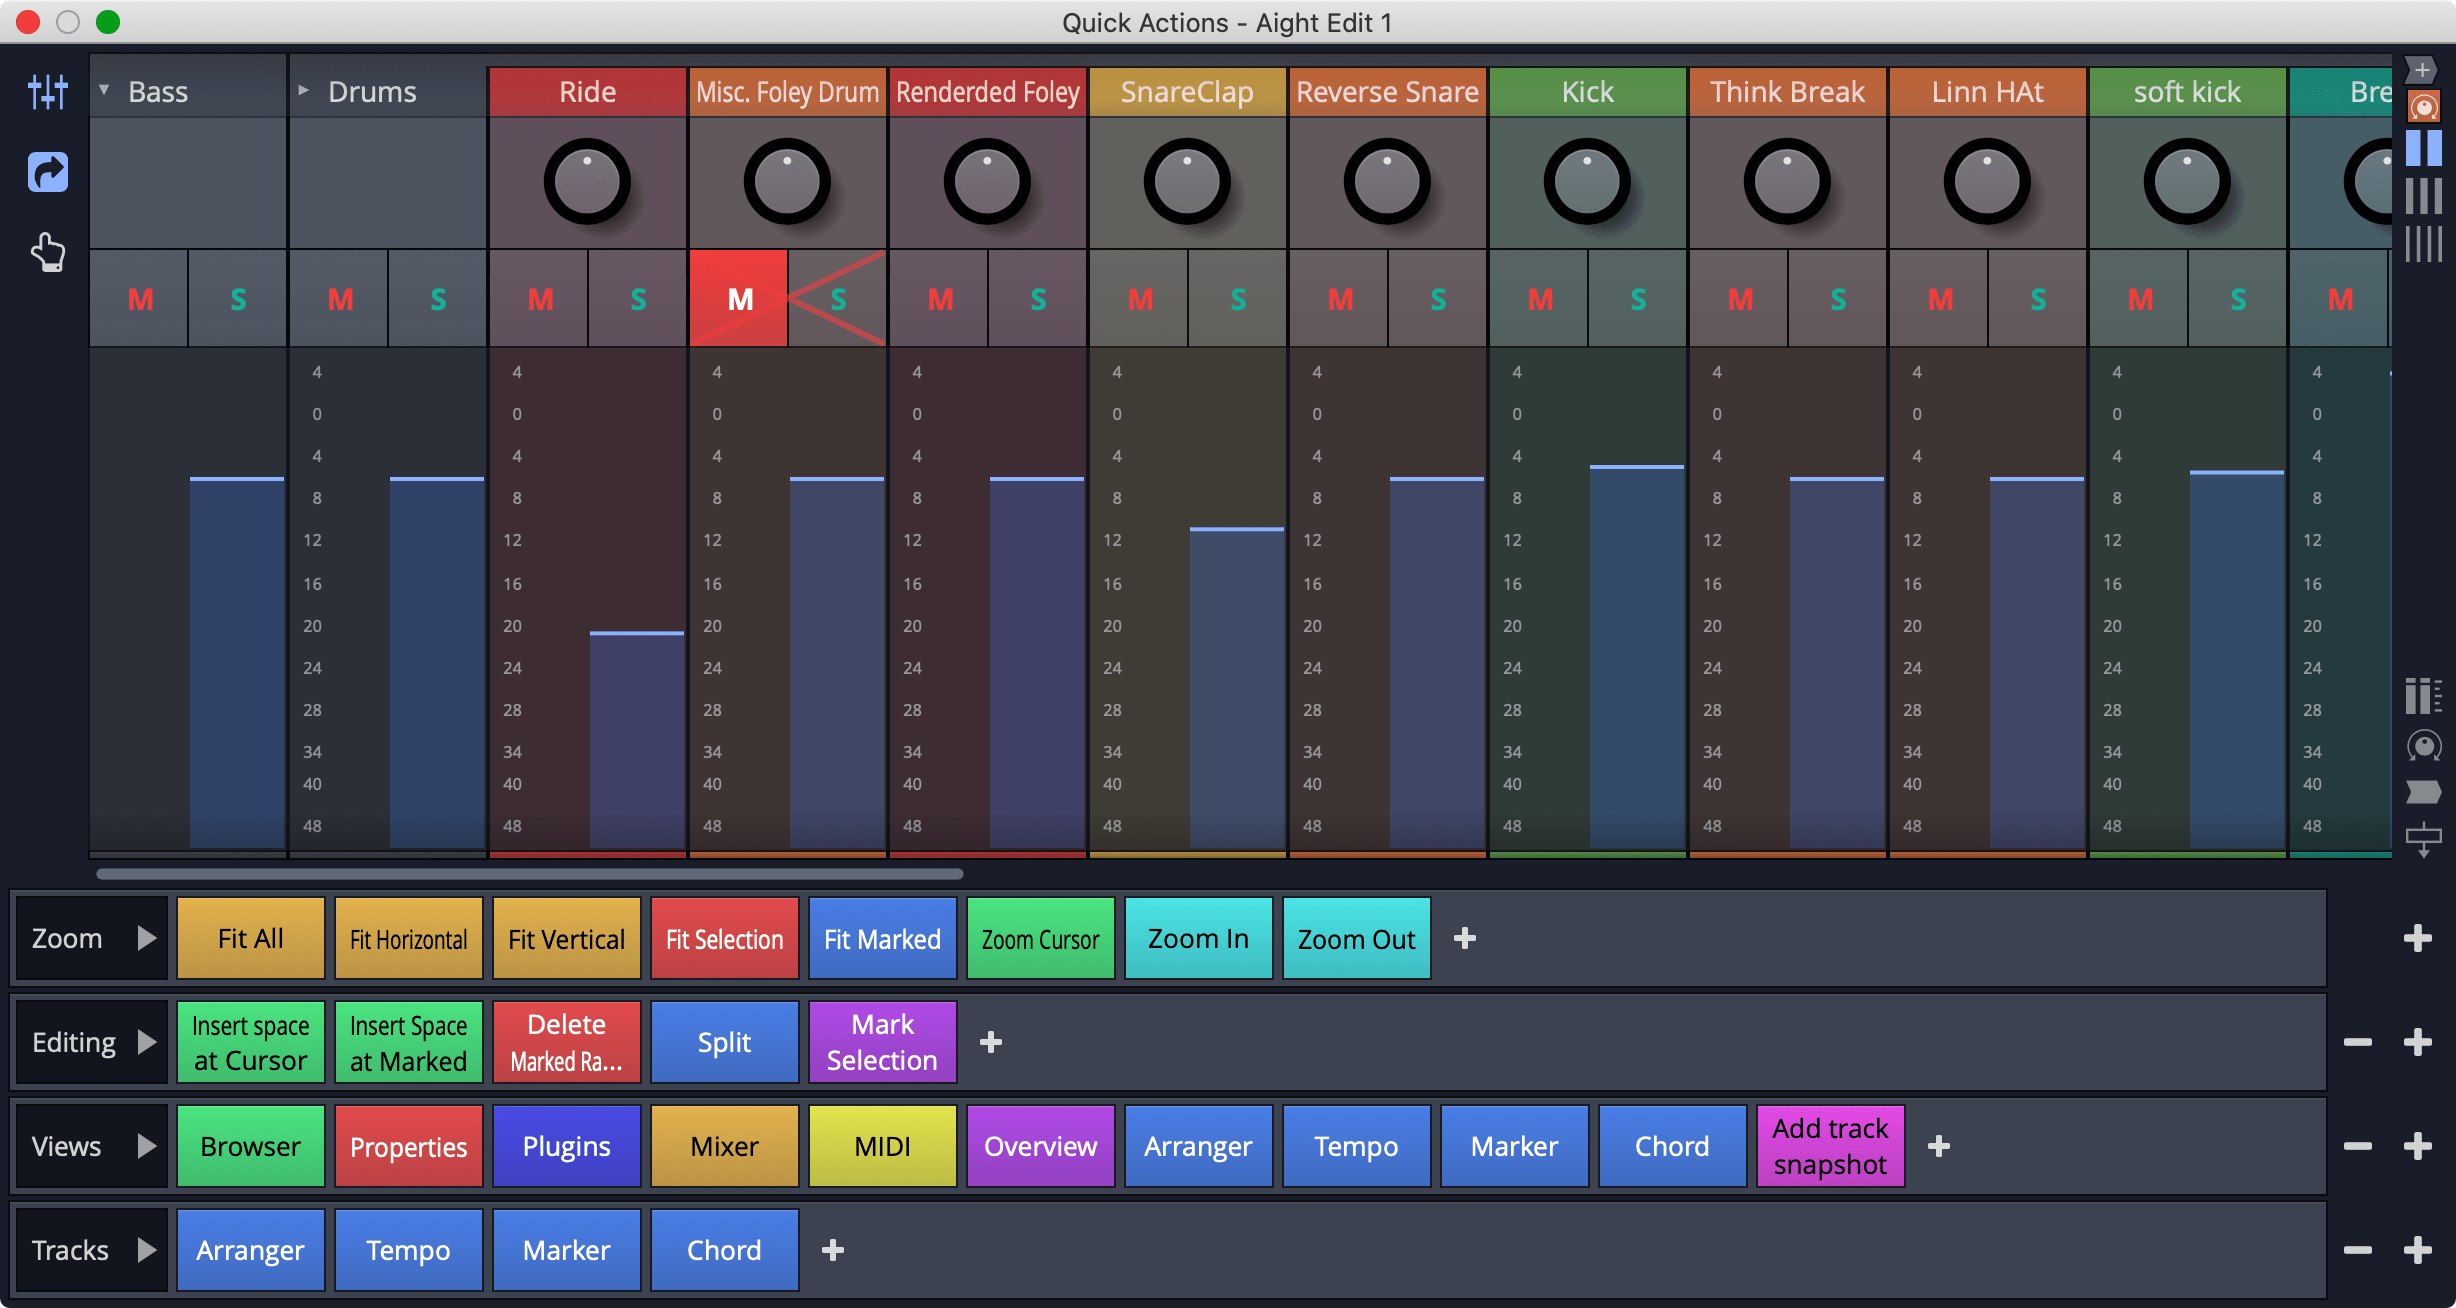
The quick action window is its own window with a mixer, or with a number of quick action bars.
You can size the buttons larger and throw on a touch screen for a brilliant experience.
This is the first DAW I’ve seen that has done something with secondary touchscreen displays that isn’t a gimmick or clip launcher (coughgimmickcough). I set my iPad Pro under my screen and having a mixer and shortcuts available at all times was fantastic.
I can’t be all positive though:
- Layouts - If you utilize the new layouts feature, any layouts that don’t have the QAW open will cause it to close. So if you want to utilize the QAW sometimes, then you need to keep a duplicate set of layouts with it open. This makes the new layouts feature even more useless.
- Discovery - As far as I’m aware there is only one place on the GUI to launch the QAW: the minimized bottom panel. I use the bottom bar fully extended because it’s the only way to easily access properties of things in the project, so I was unable to find the QAW until I watched a couple videos about it!
- Menus - It’d be nice if you could create custom menus of features, rather than a single button.
Despite these flaws I believe it’s one of the cooler features added. Moving to any other DAW after made me appreciate the QAW even more.
Enhanced Multiple Display Support
I have nothing on this. It was marketed, but it either doesn’t work for me or I don’t understand it.
The layouts function was constantly buggy for me when trying to use multiple displays, some windows were recalled correctly and some were not. Changing my display layout made it go nuts (and I go between 1-4 displays all day long).
Using multiple displays on macOS with Waveform 10 was simple as-is.
MIDI Tools
Waveform already had some MIDI effects, but there’s a new suite included.
I’ll be covering these individually, but the beauty is when they’re combined. Chord Companion->Arp, or Arp->Note Repeater etc…
Don’t forget that many of these controls are modulateable with Waveforms modulation system!
Arpeggiator/Sequencer
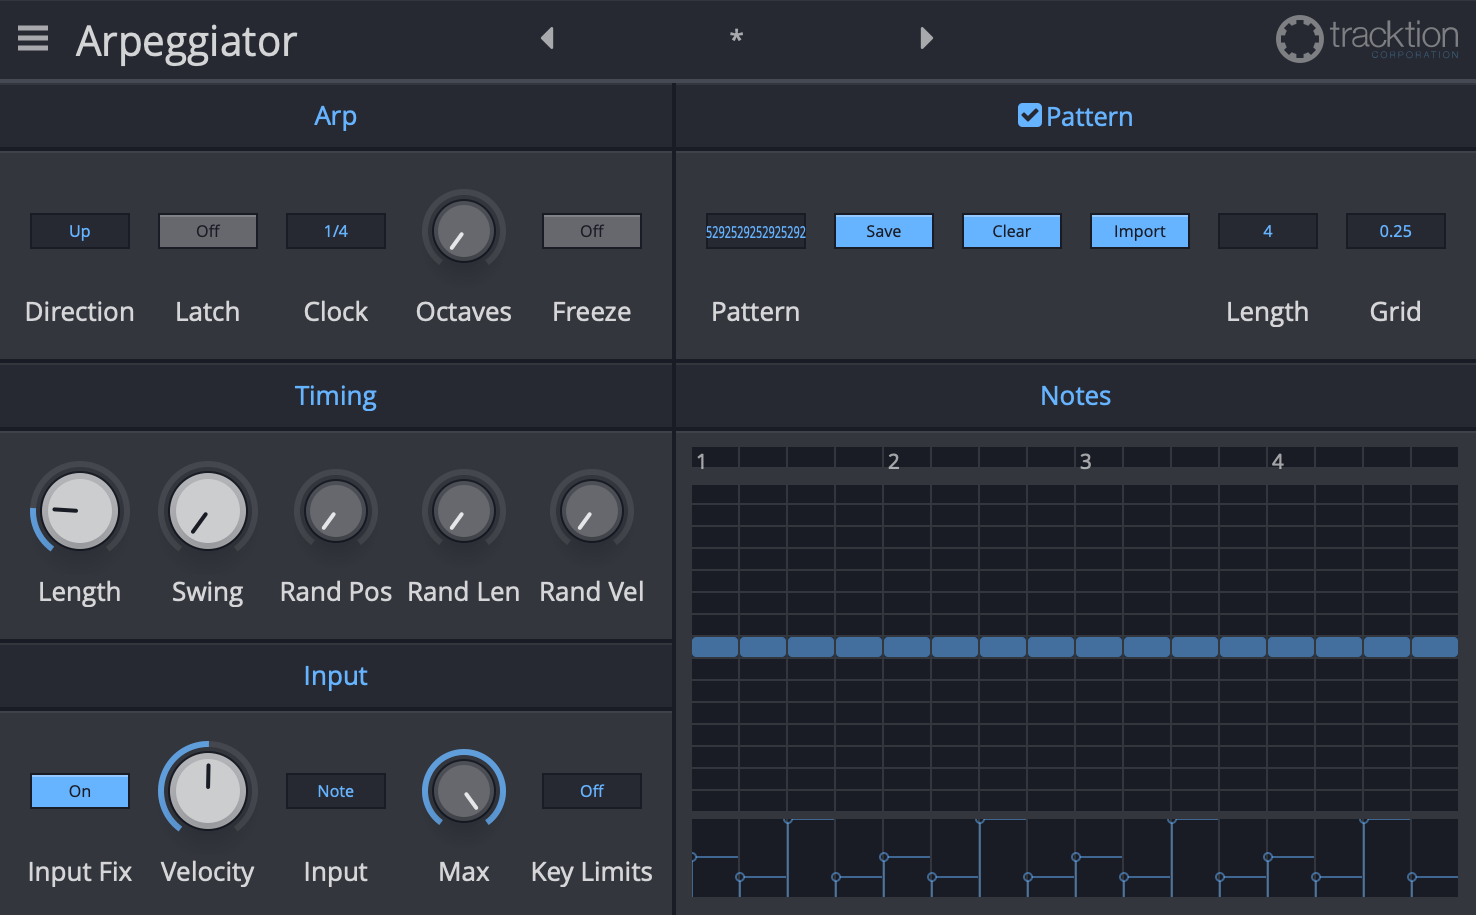
At the outset you’re presented with a fairly simple Arpeggiator that has controls you may expect, plus a velocity fixer, note range constriction and note shuffler (or reorganizer?).
There’s nothing special here… until you hit that unassuming “Pattern” button in the upper right.
Now you have a MIDI note triggered sequencer!
The sequencer allows you to sequence notes over time, on a grid, with a fixed length. The input note will be modified between +7 semitones and -7 semitones and assigned a velocity. Patterns can be up to 32 bars long (!?) with up to 16 divisions per beat.
Patterns can be saved and recalled, and used in other arpeggiators in Waveform.
Notes in the sequencer can overlap, thusly you can sequence chords or complex sub-arpeggiations with variable lengths per note.
You’ll soon learn that I complain a lot about notes getting hung… Arpeggiator is not immune. Note offs get lost occasionally and you either end up with a hanging note, or randomly sustained notes in the arp. It only happens to me when editing in the sequencer, so you need not worry about simple playback.
Cool stuff.
Note Repeater
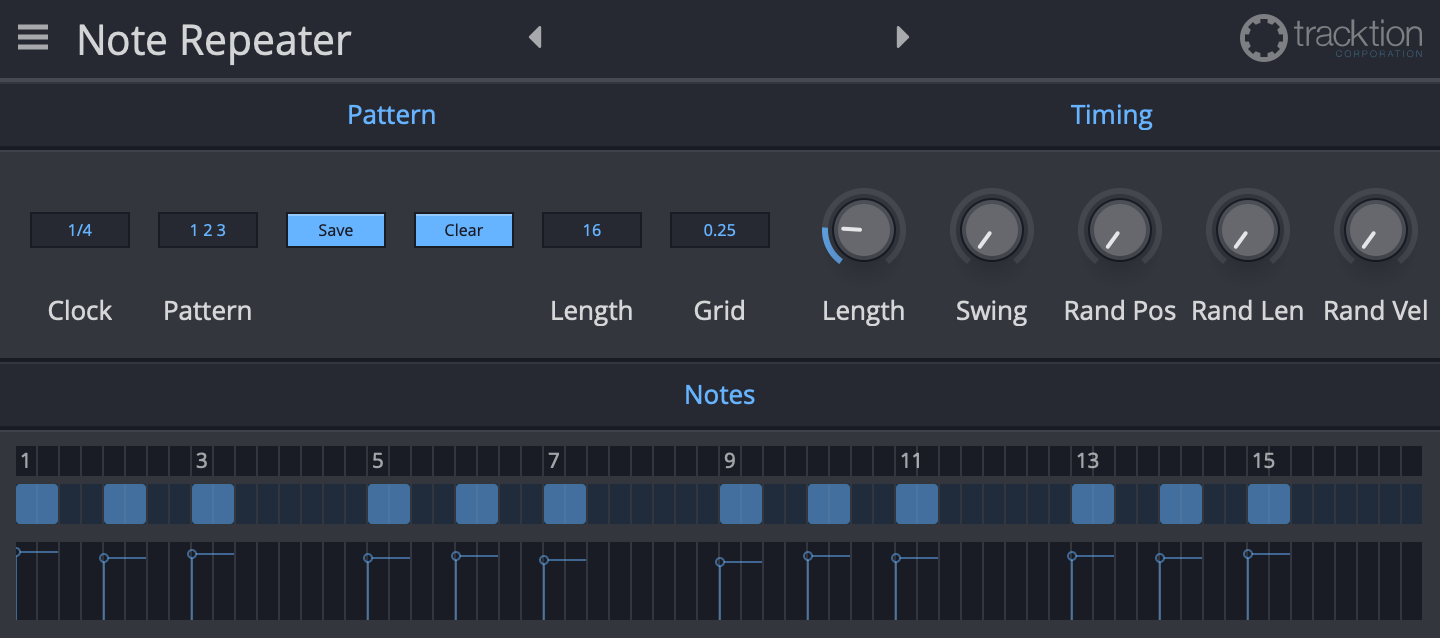
Note Repeater is effectively a sequenced MIDI delay. MIDI input is repeated according to the sequenced pattern at the bottom.
It’s great fun, however like the other new MIDI effects, it’s easy to end up with hung notes when Note Off messages are lost.
I do wish there was a simple echo function with length/decay parameters, but it’s not terribly difficult to create a pattern that simulates the sound of an echo.
Chord Companion
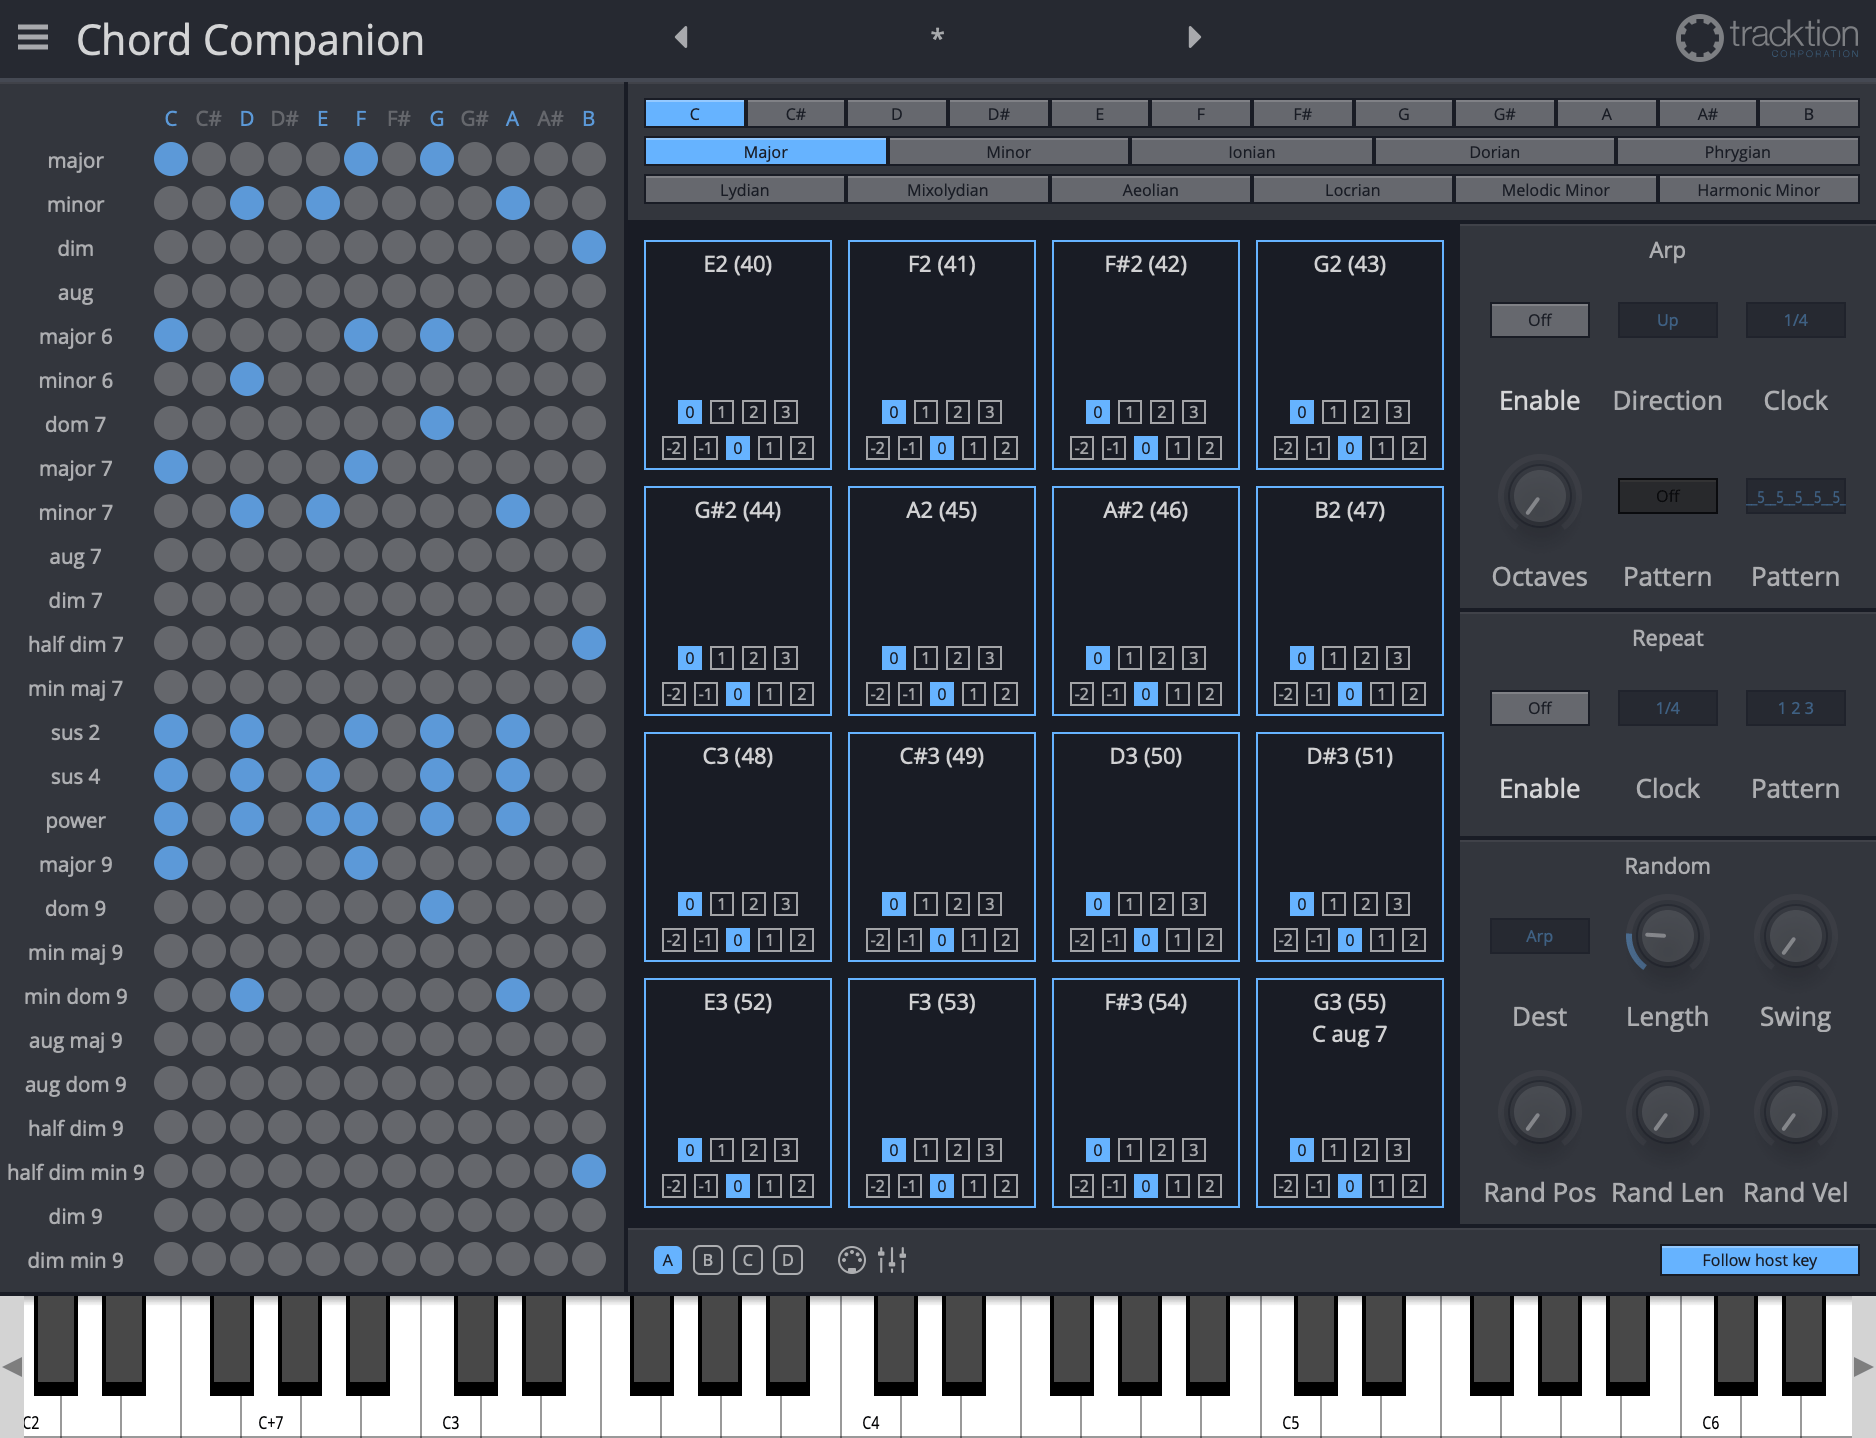
Chord Companion is easily the best “Chording” plugin I’ve seen in a DAW. A simple explanation of the product should be convincing enough:
- Left Panel - The left side is a grid where X is tonality (major/minor/dim etc…) and Y is pitch class. You drag these dots to trigger pads.
- The blue dots indicate which Pitch+Tonality is completely diatonic (consisting of only notes present in the selected scale)
- Problem #1 - It shows pitches rather than numeric values. This isn’t a big deal until you start to use the Follow host key function. An option to show roman numerals for chords would be a welcome improvement.
- Problem #2 - If you assign a C key triggered pad to a C chord, switching the tonic at the top to D will make your C key trigger a D chord. This becomes confusing quick. This once again could be alleviated by displaying in terms of “C key triggers the tonic chord of the current key” (e.g. C = I).
- Top Panel - The top panel lets you select tonic pitch class, and one of the greek modes, harmonic minor or melodic minor.
- It does lack some other mildly common modes, but this is more than sufficient for pop, rock, edm and most basic jazz styles. It would be cool if there was a way to set a mode, add accidentals and potentially change the number of notes.
- Right Panel
- Arp - Simple arpeggiator. Parameters should be self-explanatory except the “Pattern”. Pattern works like the arpeggiator where the number is velocity (1-10), and placement is a note trigger. New patterns can be created in Arpeggiator and utilized in Chord Companion (however you must re-open Chord Companion to see newly saved patterns).
- The arp appears to be latch only. Pressing a key continues the arp even after you let go. If you disable the arp then notes hang :(.
- Repeat - It repeats the chord at a given interval (clock) using a pattern. New patterns can be made (then saved) in Note Repeater then used in Chord Companion (cool! however you must re-open Chord Companion to see newly saved patterns).
- Random - A randomizer that can control the parameters/position of either/both the Arp and Repeat sections.
- Arp - Simple arpeggiator. Parameters should be self-explanatory except the “Pattern”. Pattern works like the arpeggiator where the number is velocity (1-10), and placement is a note trigger. New patterns can be created in Arpeggiator and utilized in Chord Companion (however you must re-open Chord Companion to see newly saved patterns).
- Bottom Panel
- A/B/C/D - 4 layouts of the center 16 pads. Note - No two pads can correspond to the same note, even across pad layouts (A/B/C/D).
- MIDI Icon - This starts at the first pad and assigns the pad’s trigger MIDI Note to the input. After assigning the pad it blinks a few times and automatically waits for input for the next pad. The “current” pad in this mode can be set with a click.
- Mixer Icon (????) - This allows you to save/recall pad layouts. No idea why it’s the icon used elsewhere to indicate “Mixer”.
- Follow host key - This is a perplexing option. Waveform supports key changes in the tempo track, so this will automatically change the tonic relative to all chords. Since the current key depends on the tempo track, the chord companion will change depending on where your play cursor is if you have key changes! This confused me for 30 minutes when I was trying to work out an idea and the pitches were all wrong… I had accidentally clicked the wrong part of the timeline. (Alternative: turn off “Follow host key” when you want to freely experiment).
- Center Panel - This is where the fun happens. The top note is the note that triggers the pad. Underneath that is the chord that is assigned to the pad. You can assign any available chord to any pad. Any pad can correspond to a note.
- Top Number Row - The top row of numbers on the bottom is chord inversions. If you’re not familiar with inversions:
- 0 - No inversion
- 1 - Root up an octave
- 2 - Root and third (or second note) up an octave.
- 3 - Root, third (second note), and fifth (third note) up an octave. For 3 note chords this is equivalent to an octave shift of the whole chord.
- Bottom Number Row - The bottom row of numbers is octave shifts for the full chord.
- Top Number Row - The top row of numbers on the bottom is chord inversions. If you’re not familiar with inversions:
The lack of roman numerals is an issue, but it’s a minor one for basic use. Having to restart the plugin to see new patterns is annoying. Lack of visualization for random parameters is confusing (and is it deterministic or not?). A limited selection of modes drives me batty. Dragging a chord will trigger the chord, sometimes blasting your ears (velocity 102 by default, unchangeable) when you just want to adjust your pads. EVERYTHING IS IN SHARPS, for the love of all that’s good, I don’t understand why companies do this!!!! A# - what is this even. WHAT WHY HOW. I know you guys aren’t this dumb, ugh.
After taking a walk and cooling down (A#… c’mon), I must say that this is a great addition. With a few small changes it could be incredible. For the average musician many of these complaints won’t even be noticed.
MIDI Monitor
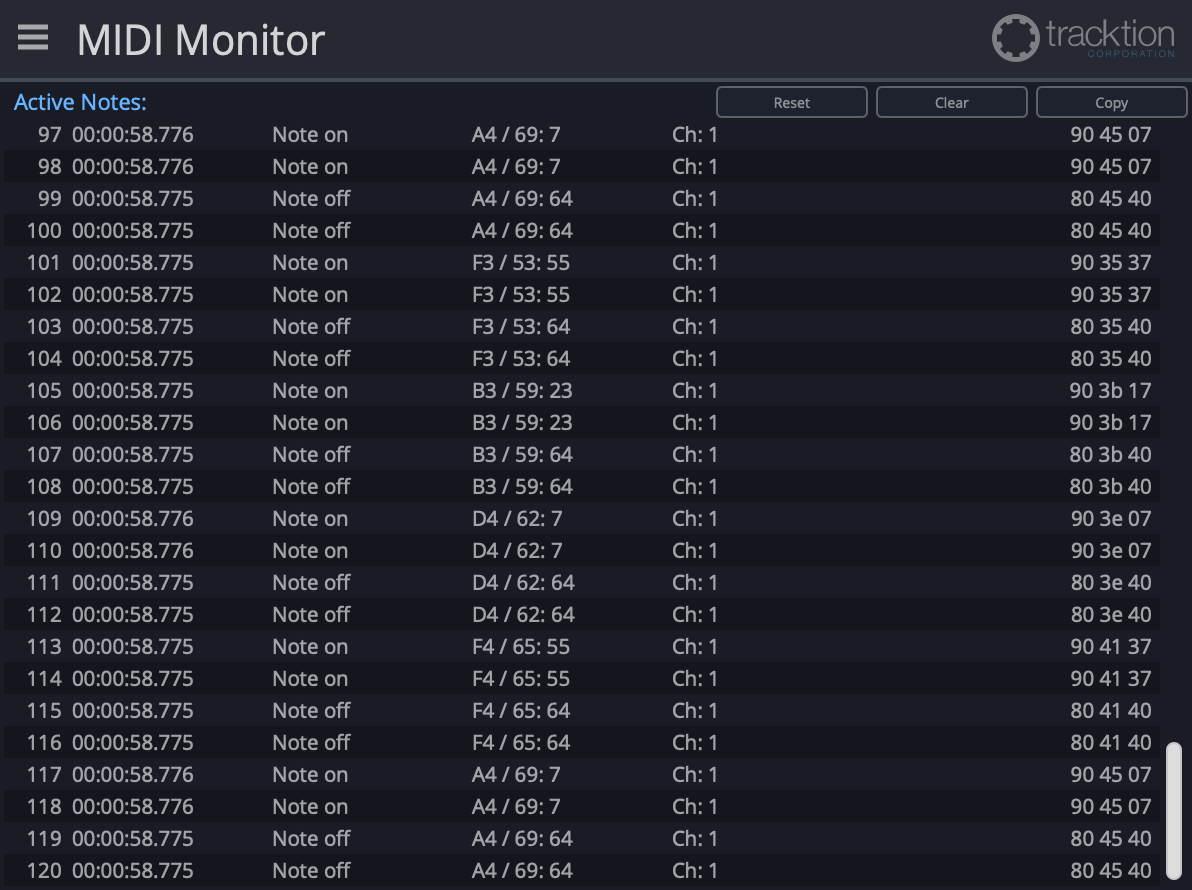
I’m going to assume that you’re reading this in order, so I’ll start by screaming again: EVERYTHING IS IN SHARPS.
It’s your average MIDI Monitor with hex representation of the message (command, param 1, param 2).
MIDI Monitor is a plugin, so you can insert it anywhere to get a view of the MIDI signal at that point. It works after audio effects (picks up the nearest previous MIDI signal), on busses and on the master channel.
The copy button is effectively useless. It copies the entire output. If you’re trying to catch a control message or pitch bend then you’re helpless.
I would like the ability to select multiple messages and copy only those.
Colouring would be nice for specific messages so it can be read easier.
Despite these requests, it exists. It’s better than all but one DAW offers for MIDI monitoring, so it’s a welcome addition.
MIDI Filter

Stare at that GUI. Tell me how it works. I’ll be surprised if you guess.
See those tiny arrows in the lower left and lower right? You drag those to constrain the selection of notes that can play.
You can’t filter specific notes, or multiple ranges of notes.
Worse still is that if you constrain a note that is currently playing (Note on triggered), it will filter all subsequent information such as, hmmm… what’s an important one? NOTE OFF. If you mess with MIDI Filter to try and filter something that’s current sending MIDI then you will be left with a number of hung notes.
Oh, and it’s a working mouse-piano. It’s easy to misclick and trigger MIDI output. Last thing I want to do when I’m trying to filter notes!
How they could improve it:
- Selection - Allow box selection of notes.
- Multiple selection - Allow multiple selections.
- Single selection - Allow filtering of specific notes
- Not a keyboard - I want to FILTER data, not trigger it.
- Colours - Currently it’s light yellow to show what’s constrained. Something like grey or red would be nice.
- Hanging Notes - Choose what is filtered for note messages, or some sane defaults. Almost nobody wants to filter note-ons and not note-offs (unless they want a sustained effect).
- CC and more - Why just notes? Give us a few boxes of common control messages (and the corresponding CC->Box can be changed) so we can filter those. The MIDI filter is designed for “multi-timbral” setups, and this is a core part of that type of work.
I think you know my opinion here.
Notes about Randomness
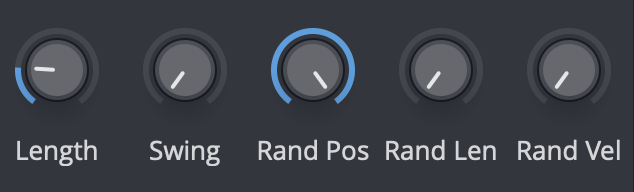
The random parameters have one glaring issue: They are non-deterministic.
The seed used is not user controllable, recallable or repeatable.
If you come upon a randomization that sounds awesome, then you better have been recording it.
A common solution to this is to not randomize the parameters, but to explicitly generate the parameters from a visible and settable seed value. The seed can be randomized. The result is that each playback is identical, but you can randomize how the generation occurs.
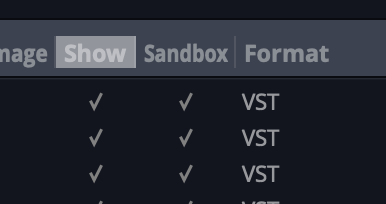
Plugin Sandboxing
Plugins are usually loaded by the host in the same memory space the process uses. This means that through normal means, a plugin is capable of corrupting the software in memory and crashing it.
Plugin sandboxing spawns a new process, and then the host communicates to the process. Now if the plugin crashes the host needs to only deal with lack of communication rather than its own memory blown up. I.E. Pluing can’t crash the host.
Sandboxing carries the downside of introducing some performance loss. Communicating between processes is less efficient (more latent) than simply using the plugin “normally”.
Waveform 11 allows sandboxing, but it’s a bit odd.
Waveform has a single sandbox. All the plugins are thrown over to that sandbox. If one plugin crashes, they all crash.
You read that right. If one plugin crashes, every plugin in your project is taken offline. It doesn’t end there either, any new sandboxed plugins will be disabled until you restart the sandbox process.
I understand the benefit here is that Waveform supposedly won’t crash from an errant plugin, but a single sandbox for all plugins is bewildering. When something crashes you can’t even tell which plugin crashed! Everything goes offline and you’re left scratching your head as to which plugin it was. Maybe it was the last thing you added, or maybe it was what you were looking at, or a plugin crashed due to an automation bug, or some random OGL bug or… who knows!?
The icing on the cake is that I had Waveform crash more times with sandboxing on than with it off, and it caused some plugins to crash more frequently.
Sandboxing is a feature that every DAW needs, and this is listed as a Beta feature. Beta usually implies that it will be improved, and I’m looking forward to when they get this down.
Crash Reporting
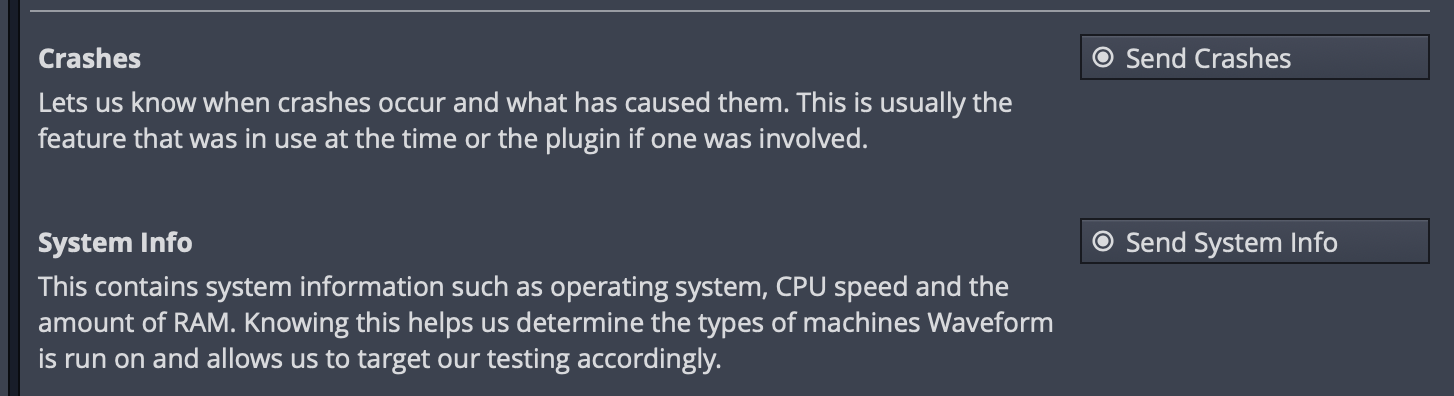
This is a subtle feature. When a product crashes, most OS’s give you a stack dump and/or similar diagnostic information that you can send to the developer.
Let me tell you, that as a developer, those are infuriating to use to debug with sometimes.
Waveform integrates crash reporting in a manner which allows the devs to more closely track down what their code was doing at the time. Essentially the software is keeping track of “user did X”, “plugin did y” and similar. Upon a crash those code paths can be sent to the developer to allow them to narrow down the gremlin hotspots in their codebase.
The usefulness of this feature depends on how much time the devs spend utilizing the information, and their ability to reproduce the crashes. However it’s a step ahead of other DAW development systems where they rely on some less informative methods of determining catastrophic code paths.
Audio follows Chord track
Don’t get too excited, it’s monophonic and simple.
The idea here is that you use Waveform’s (pretty decent) Chord Track to map out your track. Assuming you have a bunch of MIDI in the project and you want your audio and MIDI to change when you change your chord progression, you’d use this…
Except it doesn’t work that way. The Chord Track only controls MIDI pattern generators. It doesn’t change MIDI that you wrote.
The audio version of “Follow Chord Track” is similarly weird and limited.
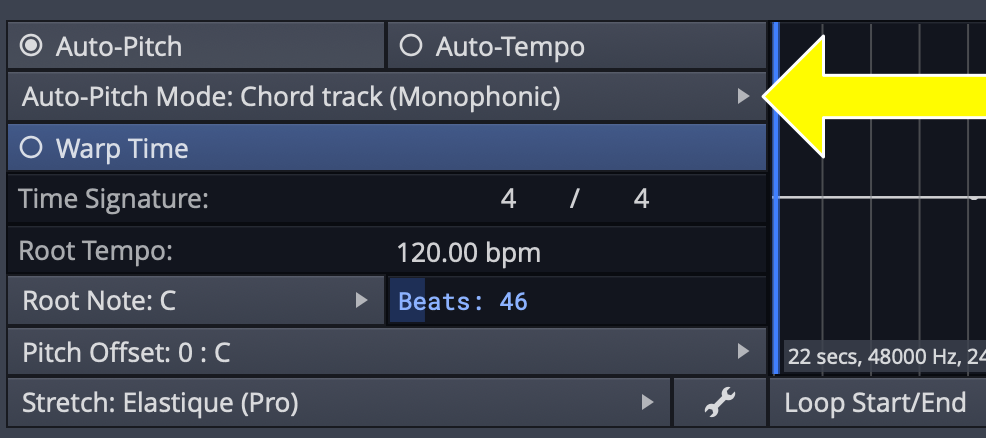
I recorded the notes C then E monophonically and repeated. Then I set the clip to follow the chord track and had the chord track alternate between I and ii. I is C major (C-E-G), and ii is D Minor (D F A). The expectation is that the chord track would recognize that the C->E (major third, for the I) should be transposed to D->F (minor third) on the ii chord. It doesn’t do that. It transposed it to D->F#, a major interval.
It correctly recognized the full step transition of the chord, but did not detect the tonality.
Setting the chord track to I->i (C major to C Minor) didn’t change the pitch of the audio at all. It should have adjusted the audio to C->E and C->E♭.
The feature is a simple pitch shift. The process is:
- Detect the interval between the roots of the chords in the chord track.
- Naively shifts the entire audio for that section by that interval.
- Continue shifting the audio for the duration of the chord block for the duration of that chord block.
This does not “Follow Chord Track”. It follows the distances between roots of the chords in the chord track.
I can’t see use for this other than the most basic arrangements where you’re moving similar tonalities around (minor always to minor, major always to major). The second you want to change a V to a ii, it doesn’t work.
Implementing this feature in a manner that’s useful is quite the undertaking. I don’t want to give the impression of “Oh, what morons, they should have just done this”. However, the inclusion of this feature is odd. I can only imagine it doing more harm than good for the beginner, adding frustration for the intermediate user and totally useless for an advanced user.
New plugins
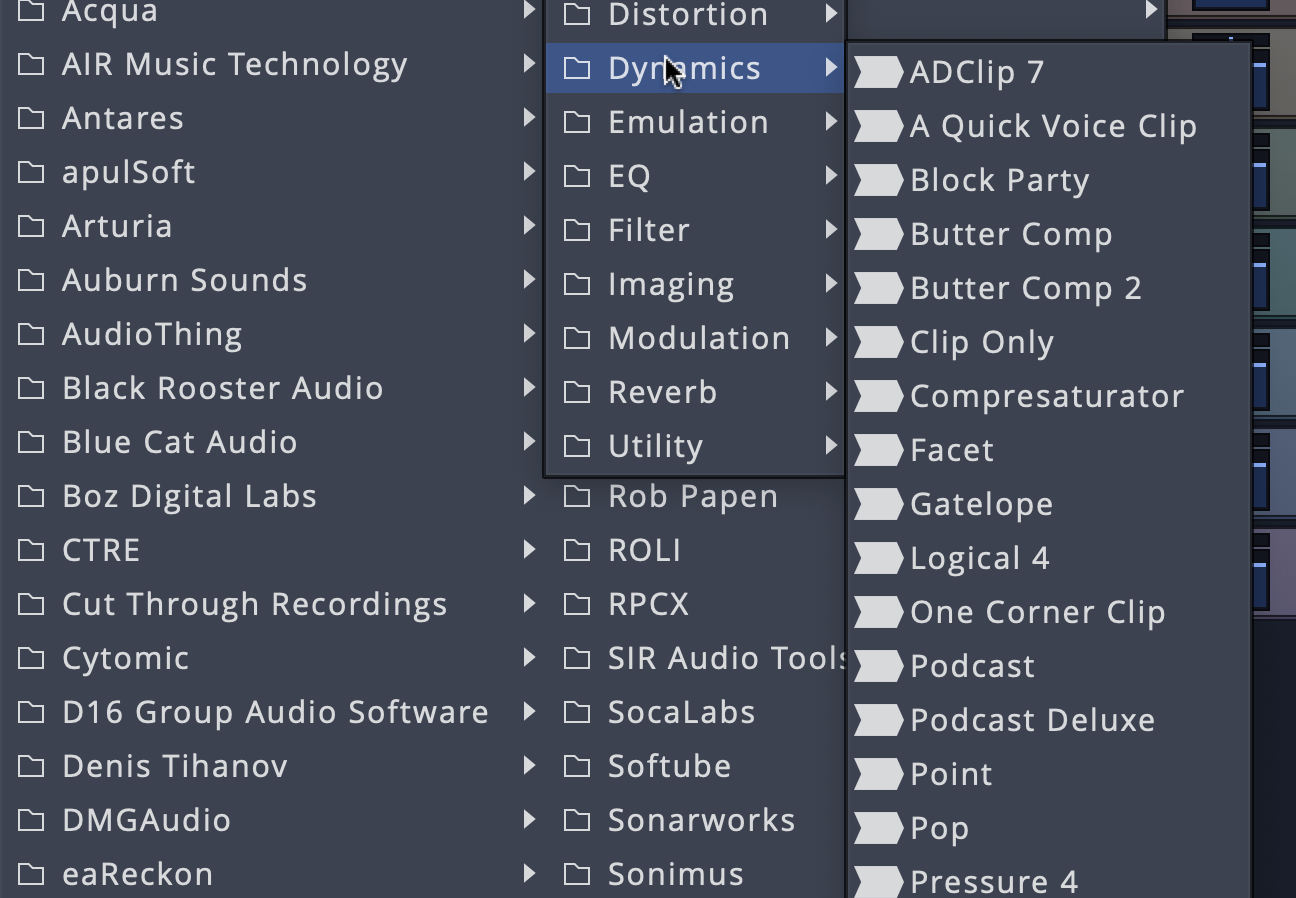
Waveform 11 Pro comes with 100+ new plugins. Apparently they’re all Air Windows (maybe? I didn’t check all of them).
I tried about 2 dozen of them and I was not even remotely impressed. The names are confusing. The parameters are confusing. There’s subtle duplicates of a variety of types of effects. Their interaction with modulation was often poor.
I suppose this integration with Air Windows is just to beef up the marketing hype (“Now with a gazillion effects!”), but it’s not much. Yes, you can probably find a few that are useful, however the time necessary to weed through what’s there is enormous. The tradeoff might be good for users that are high on time and low on funding, but there’s a lot of free plugins that are fantastic and well designed.
Ultra Meh.
The Manual
Waveform 11 Pro did not ship with an updated manual. EXTREMELY ANNOYING.
Purchasing
Trying to buy Waveform is a frustrating experience. It’s either 3 clicks, wading through a frustrating sub-menu, or clicking a thing that doesn’t look like you can click it. Then sccrolling past a media-heavy page to find a difficult to read “Pricing” button, or find one of the other hidden “Pricing” buttons instead of BUY…
Then you have 3 bundles. Now you have to browse through the included products to see which bundle is worth it (or create your own).
So you click buy and of course it takes you to another page. Not a checkout page! A page where you can “Add to Cart”. Now you have to view your cart, then checkout.
Ugh.
Let’s try to upgrade instead.
The “Upgrade” button is grey on grey, and not a button. For some reason I can’t upgrade from my account page?? Click it and of course it buys it… LOL NO.
You’re taken to a page with 9 upgrade options. The “Upgrade” you selected before meant nothing.
Now you have to find the version you want to buy and select the upgrade for the version you have. There’s no indication of what version you have on this page. Being logged in does nothing. The store was happy to let me purchase any upgrade, even if I owned the wrong version or nothing at all.
Let’s try a “Custom Bundle”. You get taken to a different site (the “store”) where you have 24 options with possible discounts of up to $13. Most are around $5 discounts. Wooo, big savings. :\
I was given a copy of W11 Pro for review, and if I feel like I enjoy the product I always purchase it normally. I was split on the value of W11, but the store irritated me so much that I decided it’s not worth using Waveform 11 as it would require using this awful store.
Don’t even get me started on the rest of the website.. They’ve somehow made it worse over time. Their marketing game is fantastic, but they let usability fall far by the wayside.
Conclusion
This review is only valid for *Waveform 11.0.26**. The team is responsive to feedback and it’s likely that some complaints/criticisms will be rendered invalid over time.
Waveform 11 has some cool additions, and some rather strange additions that seem half-baked.
As a DAW Waveform 11 Pro is up there in functionality, and exceeding, the big DAWs for some workflows.
The MIDI Effect plugins are potentially worth the upgrade. The Quick Action Bar/Window is potentially worth it.
The other features need some cooking. Waveform 10 came out similarly “half-baked”, which is why I didn’t review it, and it improved over time.
If there is a similar improvement over time then W11 Pro is absolutely worth it. If you’re a current user then the update presents some ideas that are worth supporting, even if not fully finished (I hope!).
I really do wish they’d do less, and do it better. This is the 3rd version that feels like they thought of some cool ideas then rushed to get basic implementations ready to make headlines for NAMM, then release a month later.
Take any 2 major features here. If they were fully fleshed out to the level of, or exceeding the competition, then the update would be incredible. They fleshed things out somewhat with W10, hopefully it happens again.
If you’re new to Waveform this is absolutely worth checking out (unless you do heavy MIDI or scoring work). Waveform is an incredible product on many levels for the majority of music production workflows.
If you’re a current Waveform user, then you may wish to spend some time with the demo.
Meta
This post took 27 hours to research, write and edit.
