READ - This Review is out of date. I do not suggest viewing it as anything more than a historical artifact. Please check the comments for potential corrections and criticisms.
Ok, you should know by now that I dislike Windows. As such I decided to get this all out of the way as fast as possible.
So what follows is my thoughts on nearly every aspect of Cakewalk. I intentionally left out some parts that I didn't think warrant mention, and I'm certain I missed a few things.
This post is 12,530 words, 71,893 characters and has 118 images/videos. Not to mention all the code I write to create media, extract information, cross-check the manual and other bits. I've spent countless hours (200+ now) digging into the software in the last month, reading the manual, scouring the forums, cross-referencing, etc... If I've made any glaring errors please leave a comment or contact me and I will fix it. If you disagree with my opinions then feel free to let me know and we can discuss it. I'm pliable and can be convinced by a rational well-reasoned argument. I will also update the post.
There's some things shaking up at Bandlab, so this may not be my final post in the series for now, but I intend it to be. My thoughts on Cakewalk as a whole are at the end.
The DAW Chart is updated with Cakewalk as well. As of publishing this, I don't even know what the final score is (that's calculated client side). I avoid looking so I don't subconsciously try to smidge an overall rating ahead of another DAW.
Without further ado let's hop into it.
READ - This Review is out of date. I do not suggest viewing it as anything more than a historical artifact. Please check the comments for potential corrections and criticisms.
Other posts in this series:
Contents
- Video
- General Audio
- Mixing
- MIDI
- Notable Features
- Plugins
- Annoyances
- No underrun alert
- Lost Windows
- Copy and Paste
- Notifications
- Device Alert
- Project Settings
- Analytics
- Buzz Words
- Empty MIDI Clips
- Offline Undo
- Selecting Multiple Tracks
- Even-number starting stereo recording
- Clip based grouping
- Hanging notes
- Cakewalk Application has stopped working
- Help Module
- Weak Metronome
- Cakewalk Projects
- NO MIXER UNDO - Mostly
- Plugin Selection
- Fader Groups are Borked
- Media Browser
- Automation Modes
- No VCAs
- Crossfades
- Zoom Tool
- Conclusion
- Support Me!
Video
Once again no video this week because I was unable to find a satisfactory system for recording/editing video in Windows.
I think I made up for it with the rest of the post...
General Audio
Basic Editing
Basic editing is not a golden star on Cakewalk's report card.
Editing relies on utilizing multiple tools which are presented in layers, there is an edit tool with multiple sub tools, there is a draw tool with multiple sub tools, there is an array stool with multiple sub tools, there is a select tool, there is a move tool and there is a smart tool.
Juggling these tools is not exactly the most efficient of workflows. The smart tool does work, but it does lack a number of features offered by other tools.
If you have ever edited in a DAW that has a keyboard-based editing flow, or a more functional smart tool then utilizing something like Cakewalk's fractured system is not the most pleasant of experiences.
You can get things done that need to be done, but there are other systems for basic audio editing that are designed to work much more efficiently and offer more functionality.
Takes and Comping
Takes and comping in Cakewalk are well implemented. I have used the number of comping systems and I find that Cakewalk's is easy to use and allows enough flexibility to handle most tasks.
One of the things that I enjoy about it is that you can record directly to the take lanes in case you have a take that you need to do overdubs on. This allows you to minimize the number of take lanes, so that you do not have a screen full of takes that you need to scroll up and down to utilize.
There are systems that are more complex and have more features, but those systems tend to be error-prone and get in the way of even more advanced workflows.
Audio Snap
This is what is referred to as warping in other products, but Cakewalk's implementation is somewhat sad.
You simply get some lines drawn on your waveform that you can move around to stretch that portion of audio between the adjacent 'audio snap' lines.
The waveform is not updated in real time, so it can be difficult to know exactly what you were going to get before hand. This is important because the algorithm does not always put the transient marker exactly where it needs to be. In some other products there is no need to move around the markers, since you can see exactly what is happening in real time. When you can see what is happening in real time you can just move the marker to exactly where things need to go and get on with your life.
Look at how Studio One does it:
Doesn't that look so much better? Everything about it is better from a user interaction perspective.
Not only that but you can utilize working across multiple tracks at the same time. So if you wish to move a snare drum hit in a multitrack recording you can do that.
Other products also have fully featured quantization tools that allow you to work with warp markers as if they were MIDI notes, or to transfer of warp markers directly to MIDI.
As far as I know does not have these features.
You can extract 'groove' from the clip. This takes the marker location relative to the grid and lets you apply these timing offsets to other audio tracks or MIDI. Most DAWs have this feature and it's hit or miss. Seems to work ok in Cakewalk.
Asset Management
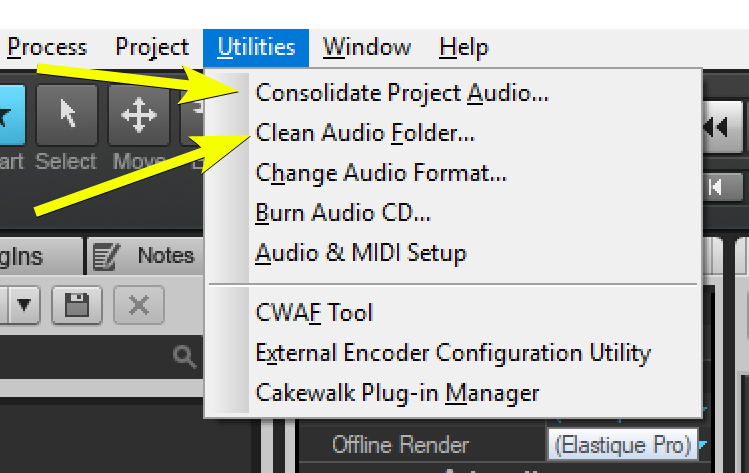
Cakewalk comes with some basic audio asset management tools:
- Consolidate Project - Consolidate takes all of the files referenced that exist outside of the project folder and puts them inside the project folder.
- Clean Audio Folder - Clean removes all audio in the projects audio folder that is not currently referenced in the project.
Drum Replacer
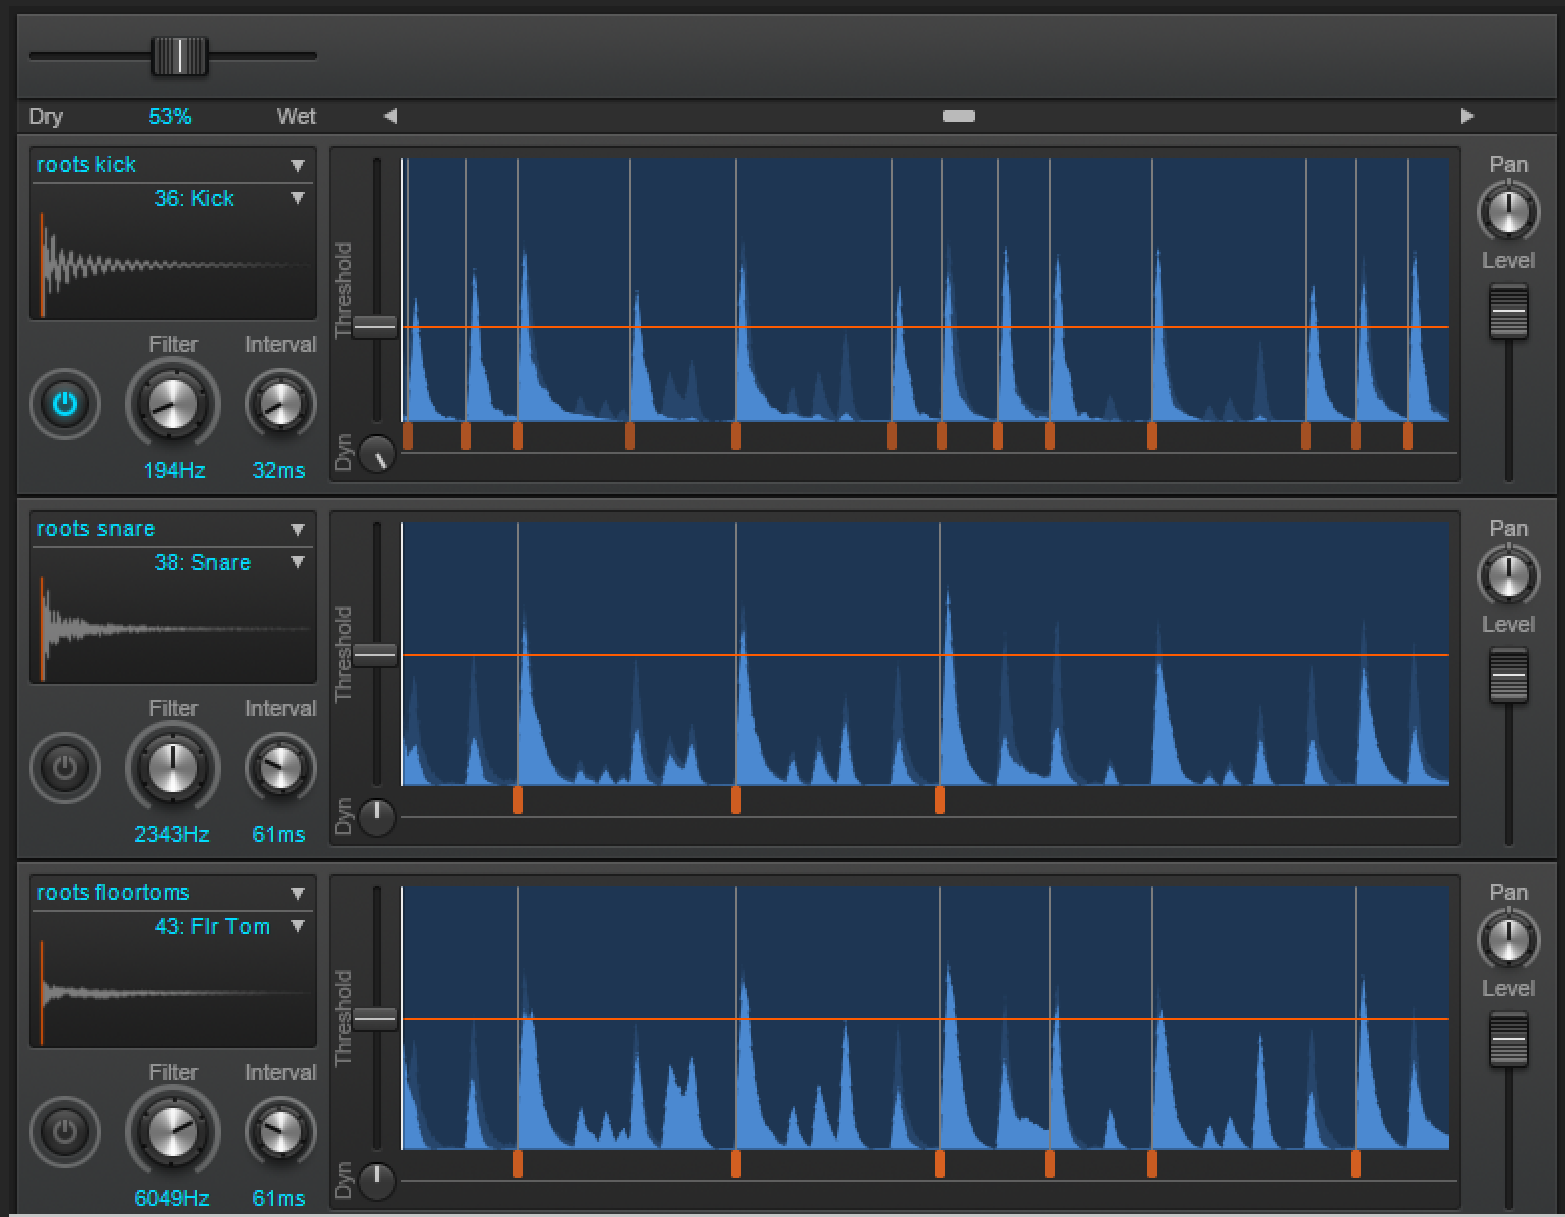
Drum replacer allows you to set a threshold which will cause a sample to be triggered when that threshold is violated by the audio.
As you may expect by the name, this is used to replace drums in drum recordings.
It does have a neat feature that allows you to apply a filter before the detection, and it shows the audio's waveform after the processing.You can also limit how frequently samples can be triggered, which helps with lower frequency sounds that may look like multiple hits to the replacer.
You can add and remove triggers manually. Excellent.
It is also possible to output the triggers to midi so that you can utilize an external software instrument to produce the drum sounds. I find that this workflow is somewhat cumbersome though. Other products simply let you click a button to export a midi track, but drum replacer directly outputs the midi to a synth that is currently in the project. If you want to capture the midi then you need to set up a MIDI loopback and record it.
When working with complex parts is nice to be able to export to MIDI directly and then utilize the plethora of midi editing tools at your disposal to clean up the triggers.
I found that this worked relatively well, particularly when using sound fonts that had multiple velocity levels for a sound, but there were a few issues:
- Does not auto-scroll sometimes.
- Occasionally the sound will de-sync from the recording
- No output to MIDI
- Limited support for sample types (only soundfonts allow multiple velocity)
- Creating your own SFZ files is a pain. There is a utility, but it's something that should not need to exist.
Overall I did find that the workflow works relatively well for doing simple drum emplacement. If you need to work with more complex parts then I would much rather use a different DAW.
VocalSync
Vocalsync is an answer to VocAlign.
The idea is to analyze two pieces of audio and then shift one of them so that it aligns with the source. This is done with an engine similar to audiosnap, so audio is affected only between parts where it needs to be.
I found that it works fairly well, but does not work as well as vocalign or Align takes.
If you're not doing heavy post work, then VocalSync works fine. It's more than enough for musical vocals.
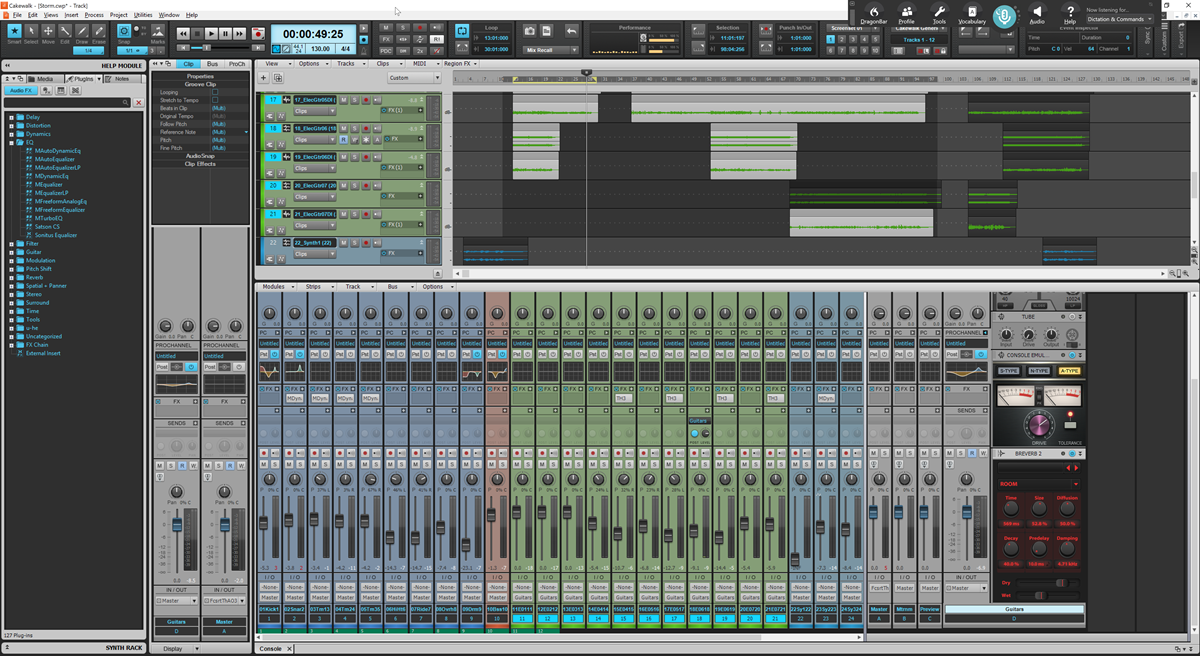
Mixing
Console
The mixing console is what you would expect from digital audio software, it has all the basic features that you would want contained in the mix strips
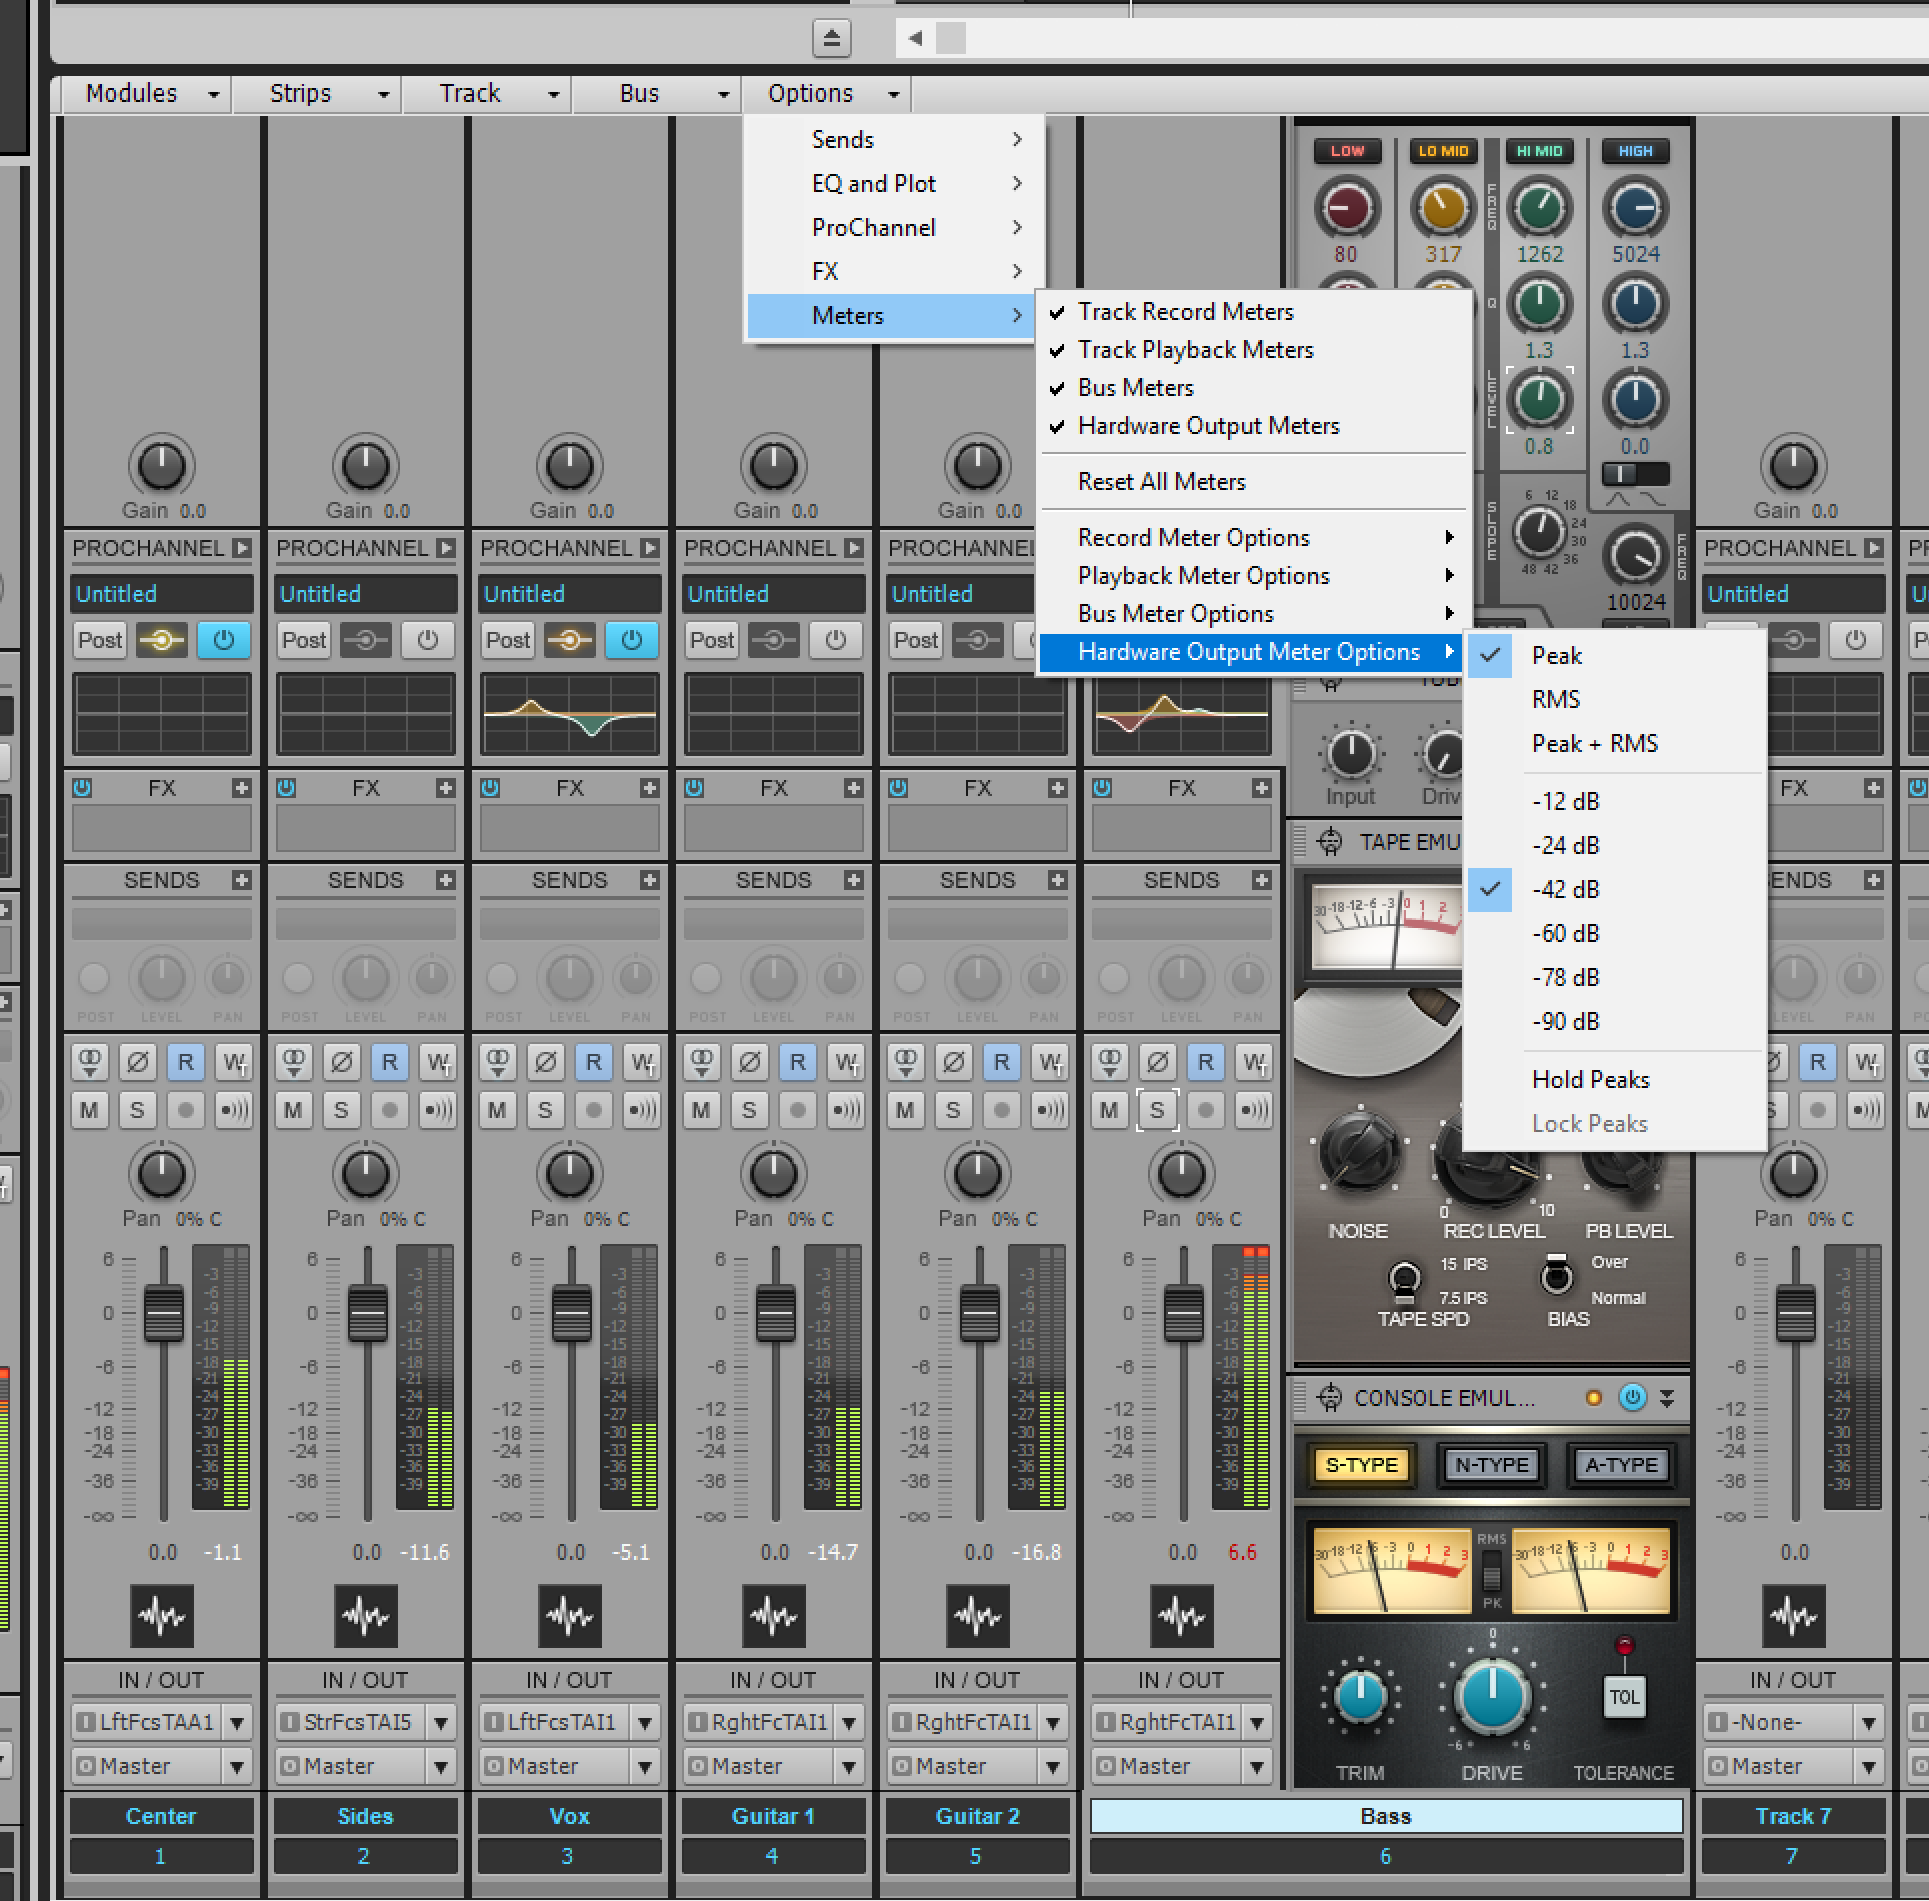
I enjoy that you can adjust the metering specification for the various types of channels. It would be nice if VU and K-System metering was available, but rms is fine enough for most uses.
Another feature that I like is that you can select the range of the meter for each individual channel or for each type of channel. You can only change the lower bound, but wouldn't it be neat if you could change the upper bounds too?
One of the more disappointing things is that there is no navigation system that allows you to quickly find or jump to a specific track, or a type of track. Other products have things like search boxes and/or tree views that make it easy to navigate a large project in the mix console.I worked on a 45 track project in Cakewalk and even that was relatively difficult to move around and without any easy way of finding tracks.
(Utilizing folders only obfuscates information and adds more clicks. They're a great organizational tool, but they are not a navigation tool.)
Send Assistant
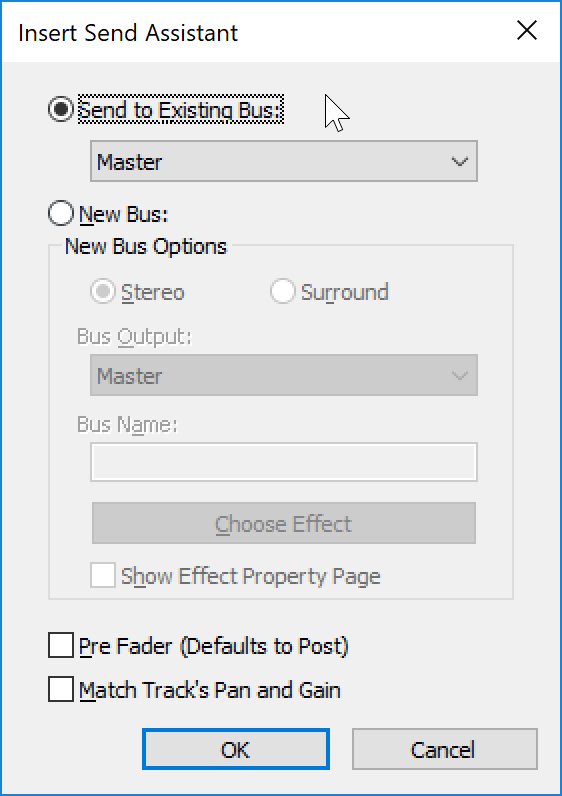
Creating sends is something that most DAWs are not very good at. The act of creating a send is usually ambiguous since there are multiple ways that you may want this to happen and various goals that you may have when creating a send.
Enter the Send Assistant. It offers a dialog that makes it easy to create a send to the destination that you want.
It is also possible to create sends directly from the plus button next to the send. You can create new tracks or utilize existing tracks, and there is this concept of a "patch point".
Patch points allow you to send audio to a bus that can then be used as an input on any other track. Patch points allow you to send audio from any track to any other track.
All in all, creating sends in Cakewalk is an unusually pleasant experience.
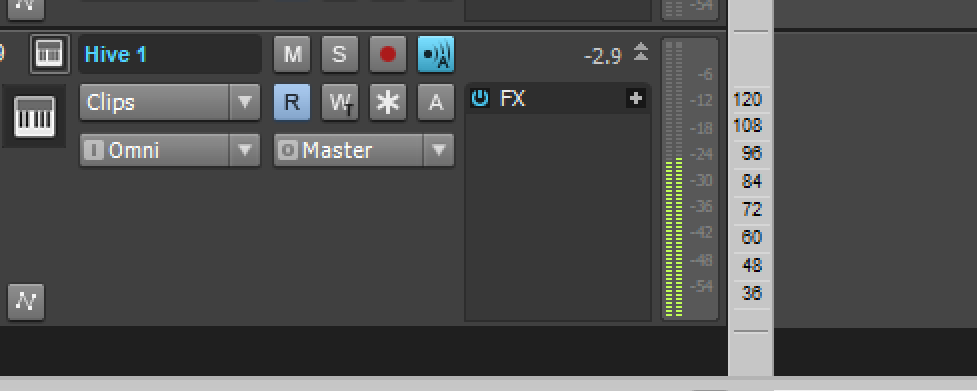
Mix Strip

The mix strip for each channel offers you most of what you'd expect:
- Mono/Stereo
- Polarity Inversion
- Automation modes
- Mute
- Solo
- Record arm
- Input Monitor
- FX
- Sends
- Pans
- Faders
- I/O assignment
It is a bit disappointing that you cannot change the size of the faders, so you end up bound to the relatively small faders you are offered. A neat feature is that you can easily access Pro Channel straight from the mix strip by clicking the pro channel button.
I am not a fan of using menus to remove sends or effects. It is not difficult to add a modifier that allows you to click in effect or a send and remove it. Two clicks and visual recognition of a menu is a poor workflow.
The Mix Strip is also where you can access track options for:
- Track name
- Stretch type - Interestingly online (live) and offline (render) can be selected separately. I'm not sure I'm onboard with the idea of my render sounding different from playback, but I can imagine this being useful on low-end computers.
- Automation mode
- Time Base - This changes how things are moved when you adjust project tempo
- Color
- Description - Notes for your use
You can also access clip properties, which are too numerous to list. Here's some of the notable things:
- Properties
- Snap offset - rather than snapping to the beginning of the clip, you can offset the snap point.
- Automation Read - clips can have automation turned on/off for them.
- Groove Clip - options for Groove Clips. Most options from loop construction besides specific slice points are available here.
- Audio Snap - Here lies the various tools necessary for working with AudioSnap.
- Clip Effects
You can also turn off most of the elements in the mix strip if you find them distracting. I originally didn't find this particularly amazing, but as I began to use it I found that I liked having less clutter when it was possible.
ProChannel
I LOVE ProChannel.
I know that it seems silly, but I love channel strips in mixers in DAWs, and I think that Cakewalk's channel strip is only second to what Steinberg offers in Cubase and Nuendo.
You are given a selection of tools that sound relatively decent and are easy to access for every single channel in your console. They are also fairly CPU friendly.
It appears that before BandLab purchased Cakewalk, Sonar had many more ProChannel modules. I would love to see these added, but I suspect that they will be separated out as purchasable assets to help monetize Cakewalk.
I found one bothersome limitation: you can only have one compressor. This actually caused me to miss the PC4K for a while because the default ProChannel has the PC76 enabled. If the PC76 is in the strip, then the PC4k can't be used and vice versa.
PC76
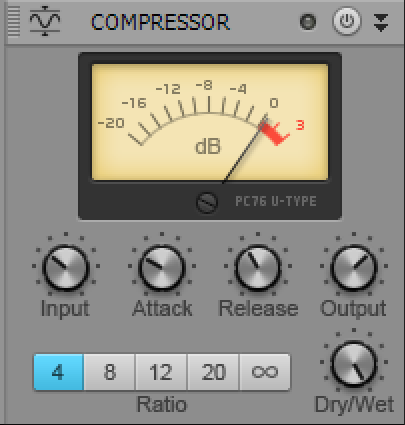
An 1176 style compressor. Fast attack time and that "all buttons in"mode is available as you would expect.
It does not sound exactly like an 1176. I have enjoyed utilizing it when mixing in Cakewalk and I think that it is a great compressor despite its inauthenticity.
PC4K
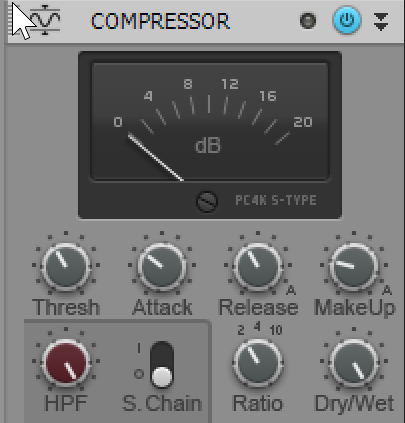
This is the SSL bus style compressor. Legendary compressor sound that is wildly overdone.
I don't think it sounds remotely like a 4k bus compressor. It has a similar compression characteristic, but it's missing the vibe (saturation and the 2:1 ratio isn't right).
It still is an excellent compressor.
(Turn the screw and click the VU-meter. Enjoy the not-so-drab change)
EQ
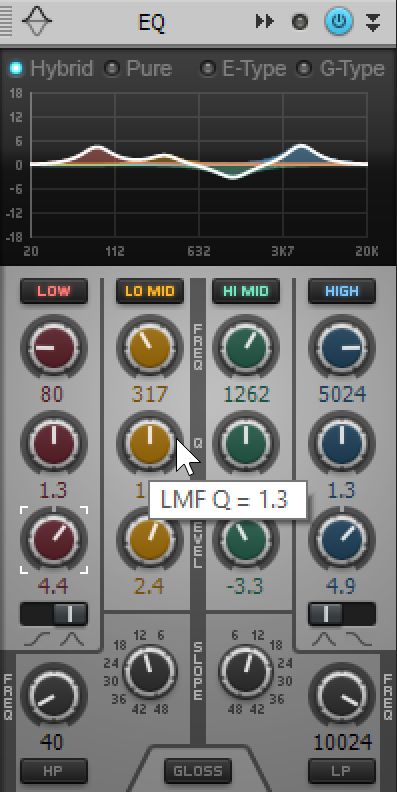
This is an atypical, four band equalizer with a high-pass and low-pass.
There are four modes:
- Hybrid - SSL 400 E-series curves except that when you cut, you get a much sharper constant-q response. "Surgical" when cutting and "broad" when boosting.
- Pure - Symmetrical cuts and boosts that are not constant-q. This gives you a very wide equalizer that is good for broad changes.
- E-Type - SSL4k E-type. A more aggressive sound with that becomes less aggressive with larger gain values. Sharp with small changes, broad with large changes. Your typical constant-q behaviour. (Also my favorite EQ style)
- G-type - Much broader EQ response like the SSL 4000 G-type. Large boosts are similar to the E-type, but smaller boosts are broader.
One of the more interesting things you can do is utilize one of the EQ times (I suggest E-Type to start), and then switch modes to see if you can get a better sound via the curve changes.
I really enjoy using the ProChannel equalizer.
BUT WAIT There's more!
Zoom Interface
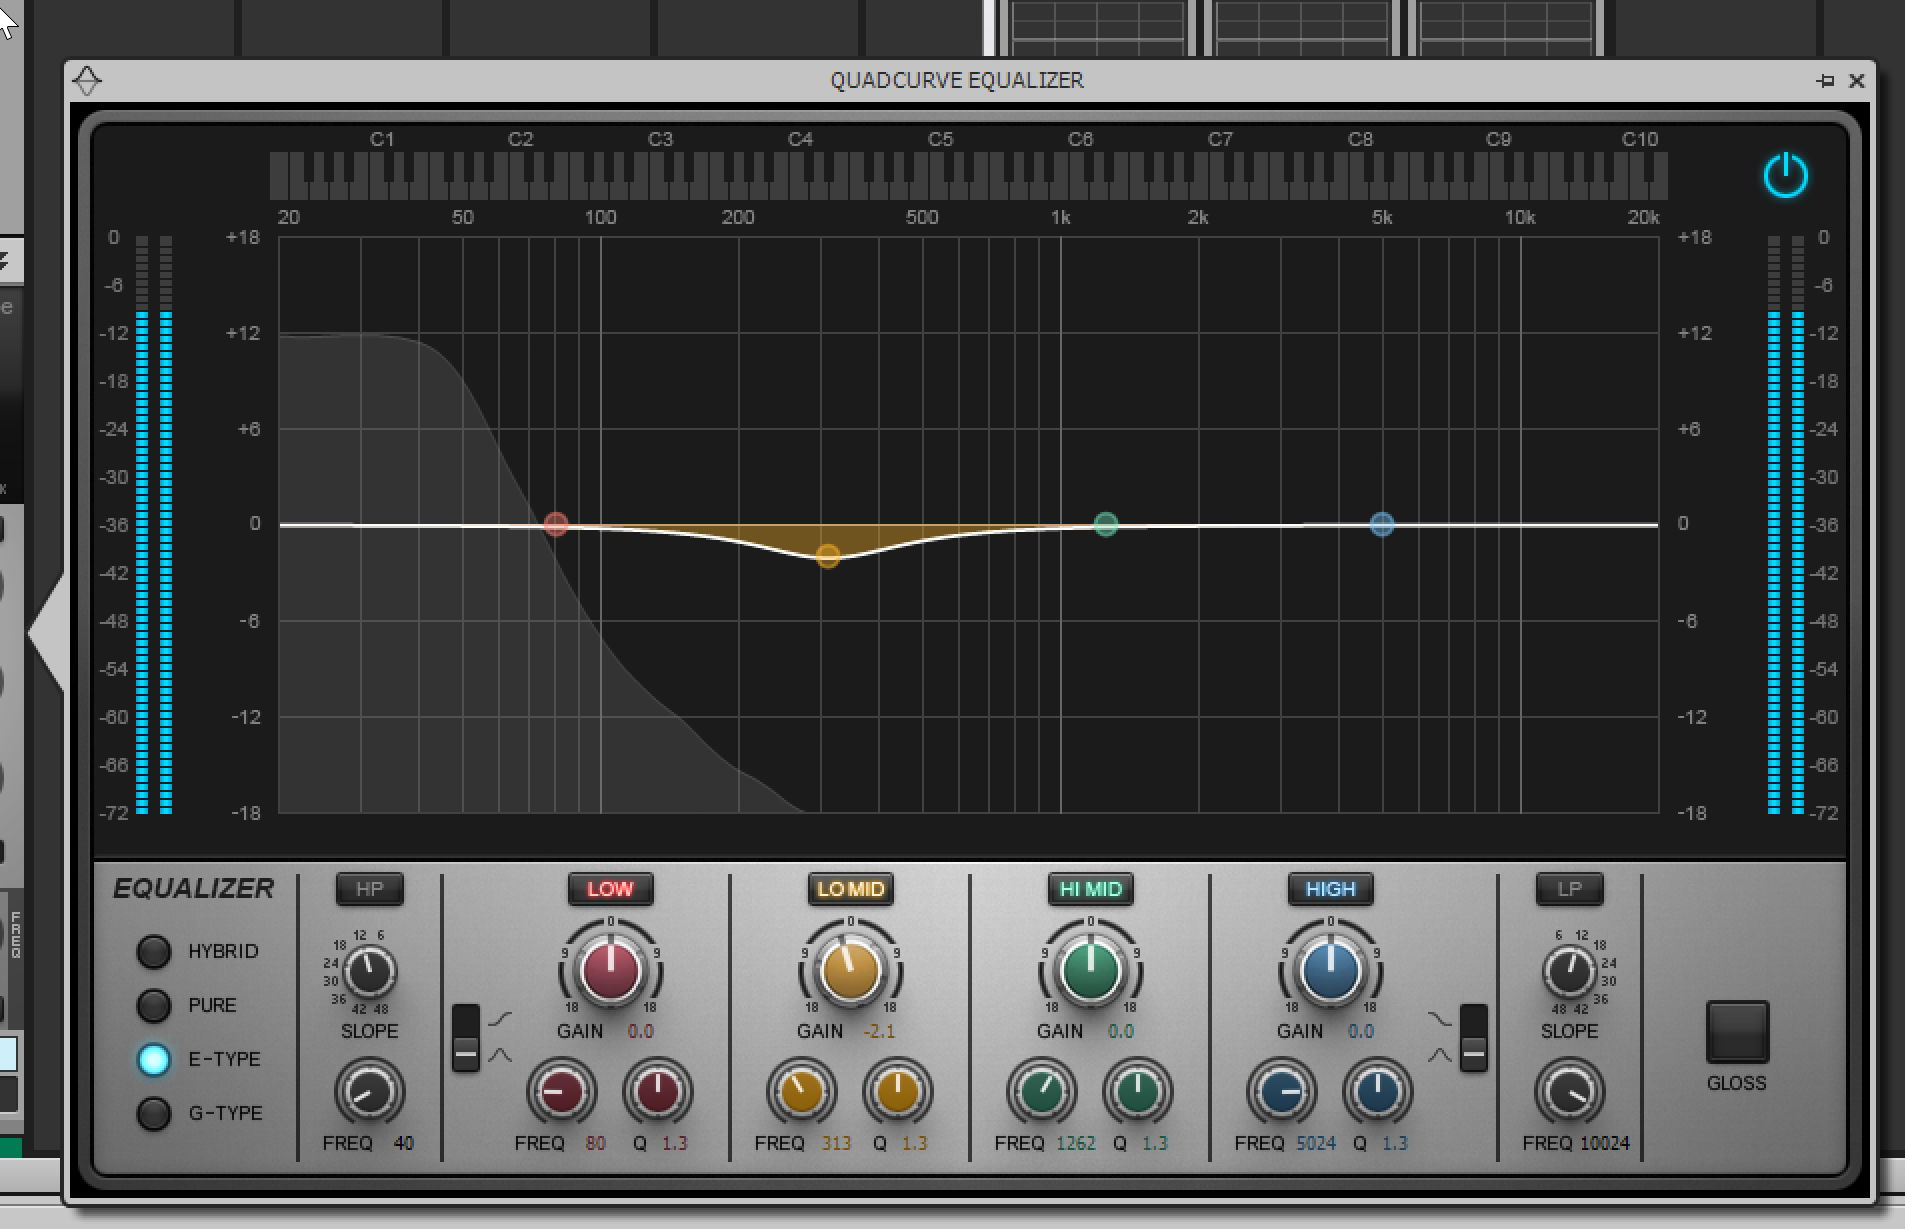
Look at the top of the ProChannel title for the EQ. See those double arrows pointing to the right? That brings up a pretty full EQ window with spectrum analyzer, piano frequency graph and an input meter.
If you've ever wondered what that ridiculous gloss button does...
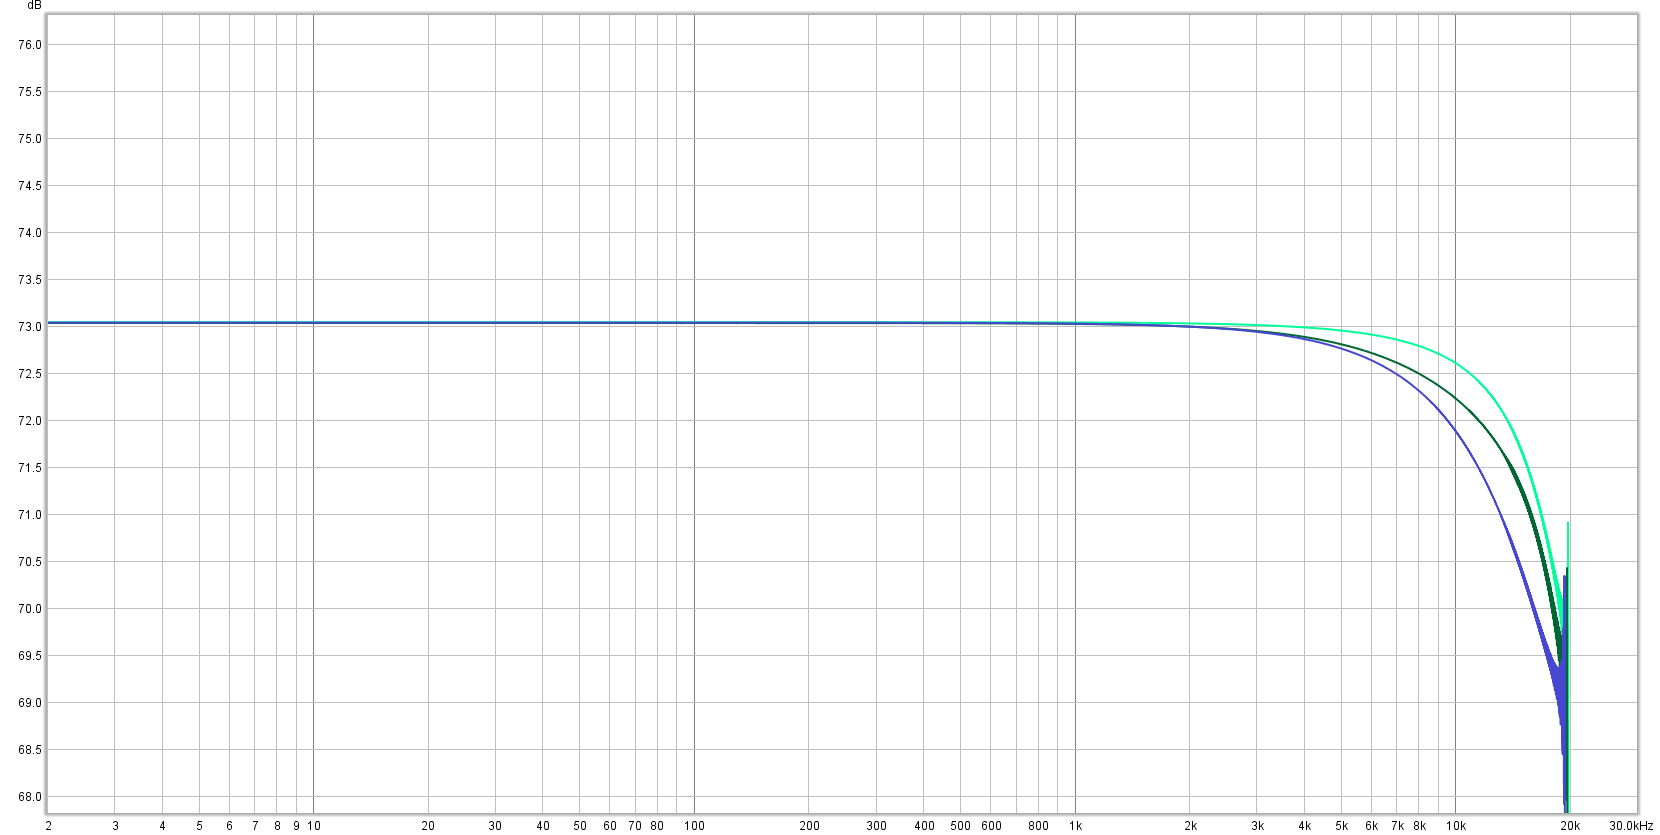
Gloss
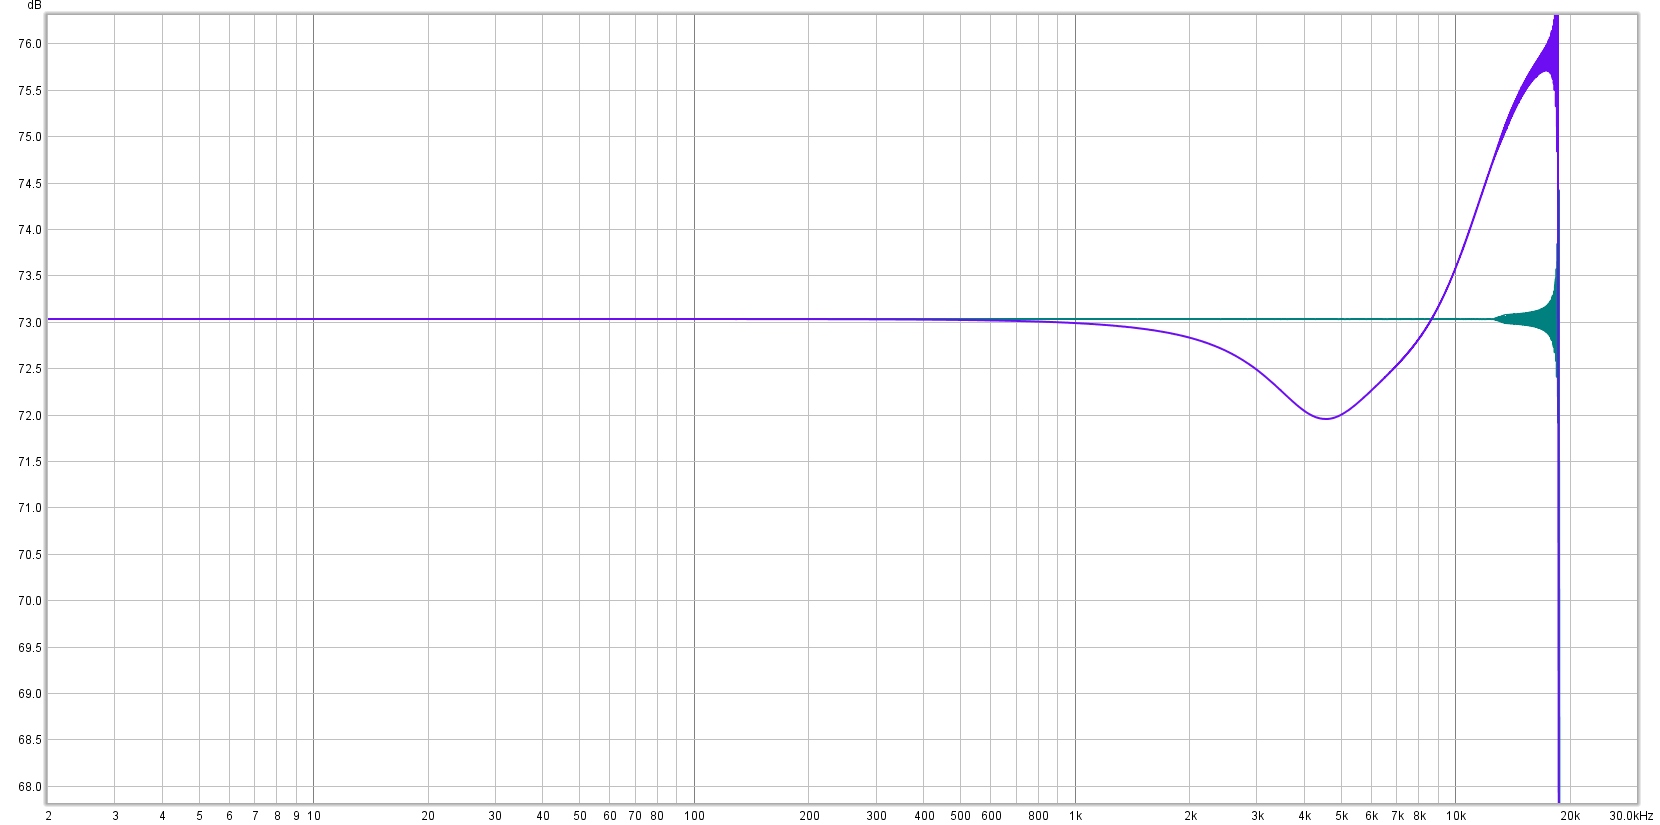
It adds a 3dB boost around 12khz with a 2dB dip at around 4.6khz. There was some slight distortion differences in the measurement, but not enough that I could rule it out as an error of measurement. Phase response is as expected for that filter.
Notably, this is NOT SHOWN in the response graph, which I think is a deceptive design. Presenting a graphic that aims to give you an idea of what the processor is doing, then not showing you what the processor is doing is not very friendly.
Perhaps they just want to hide how simple, and ridiculous, it is?
I found quite a few people on the forum that claimed they couldn't hear it... take from that what you will.
Bug
The low pass display curve is bugged... Watch above and notice how the high pass (filter on the left) transitions smoothly from side to side. The low pass filter has to clear 'bumps' in the graphical display.
Measuring the frequency response shows that the passed audio does not have these bumps in the response.
All 4 of the EQ types have this issue. It's inconsequential, but these little details offer a peek into the development process. It's not that bugs happen, but what type of bugs happen that give you insight.
Tube
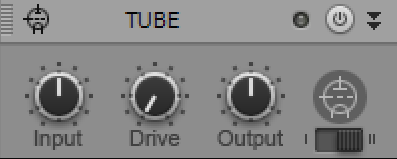
I may not be very popular with this opinion, but I feel that the tube module just sounds farty and unpleasant.
Turning on type II makes this even worse. It gives you a saturation sound that is devoid of any high-end sparkle but has the grit and the low-end that just causes a mix to end up sounding muddy and overly dense.
Saturation Knob
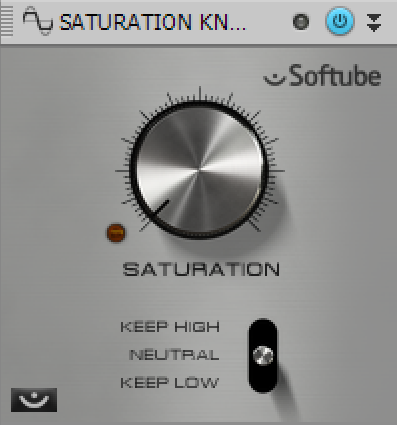
Softube's Saturation Knob (which is free to any DAW users) is available in the ProChannel. I am not the biggest fan of this, but I have heard people use it any pleasing way.
Tape Emulator
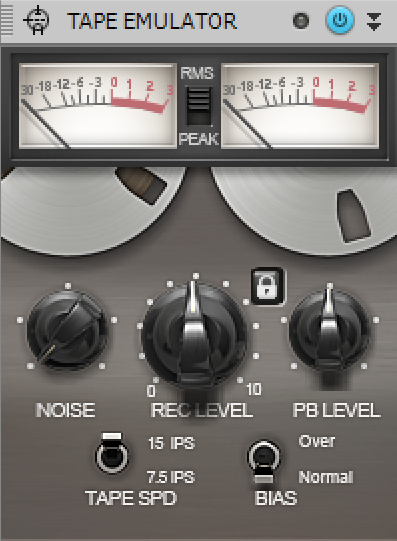
Ahhhh, the ubiquitous love of tape machines. This does not sound like a tape machine though. It sounds like what people think tape machines sound like.
It does sound cool though. I also appreciate the lock knob which inversely links the input level in the output level.
I have had quite a lot of fun putting it on 7.5 IPS and smashing some distant drum mics. Man, that's fun.
I do find it a bit annoying that it has RMS and Peak meters and not VU meters. I suppose that's alright since Cakewalk has RMS metering available for its console meters though.
By the way... why does the tape emulator have a triode tube schematic icon? It clearly doesn't have 'tube like' saturation.
Console Emulation
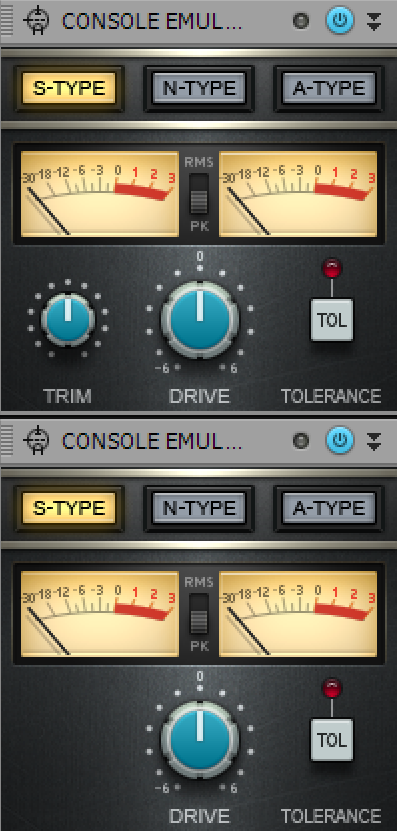
Here you're given channel and bus emulations of 3 famous console styles:
They all sound fantastic and I have been a fan of putting them on nearly every single channel. I particularly like the S-type, which sounds similar to an SSL 4K console. Regardless if the emulation is good I find that it is a cool sound.
It is easy to overuse them though. It would be nice if there was a 'global off' button for the track version at least. As you're building the mix, heavier saturation can sound fantastic, but as the mix grows it adds to the overly-dense high-end that ruins many-a-mix.
(There's that triode tube icon again... these aren't even tube consoles!)
REmatrix Solo
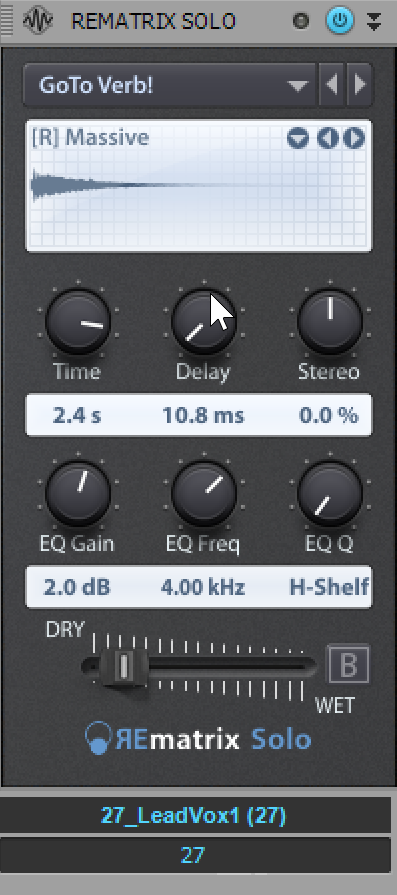
This is your typical convolution reverb, and it is available on every single channel if you want.
It comes with a decent selection of impulses and you can load your own. There is a single EQ band and you can add your own pre-delay.
An alternate use of this is to use it as a guitar cabinet simulator for which it does a reasonable job.
It's nothing exciting but it is still a useful thing to have at your fingertips. Especially so when there's so many free impulse responses out there.
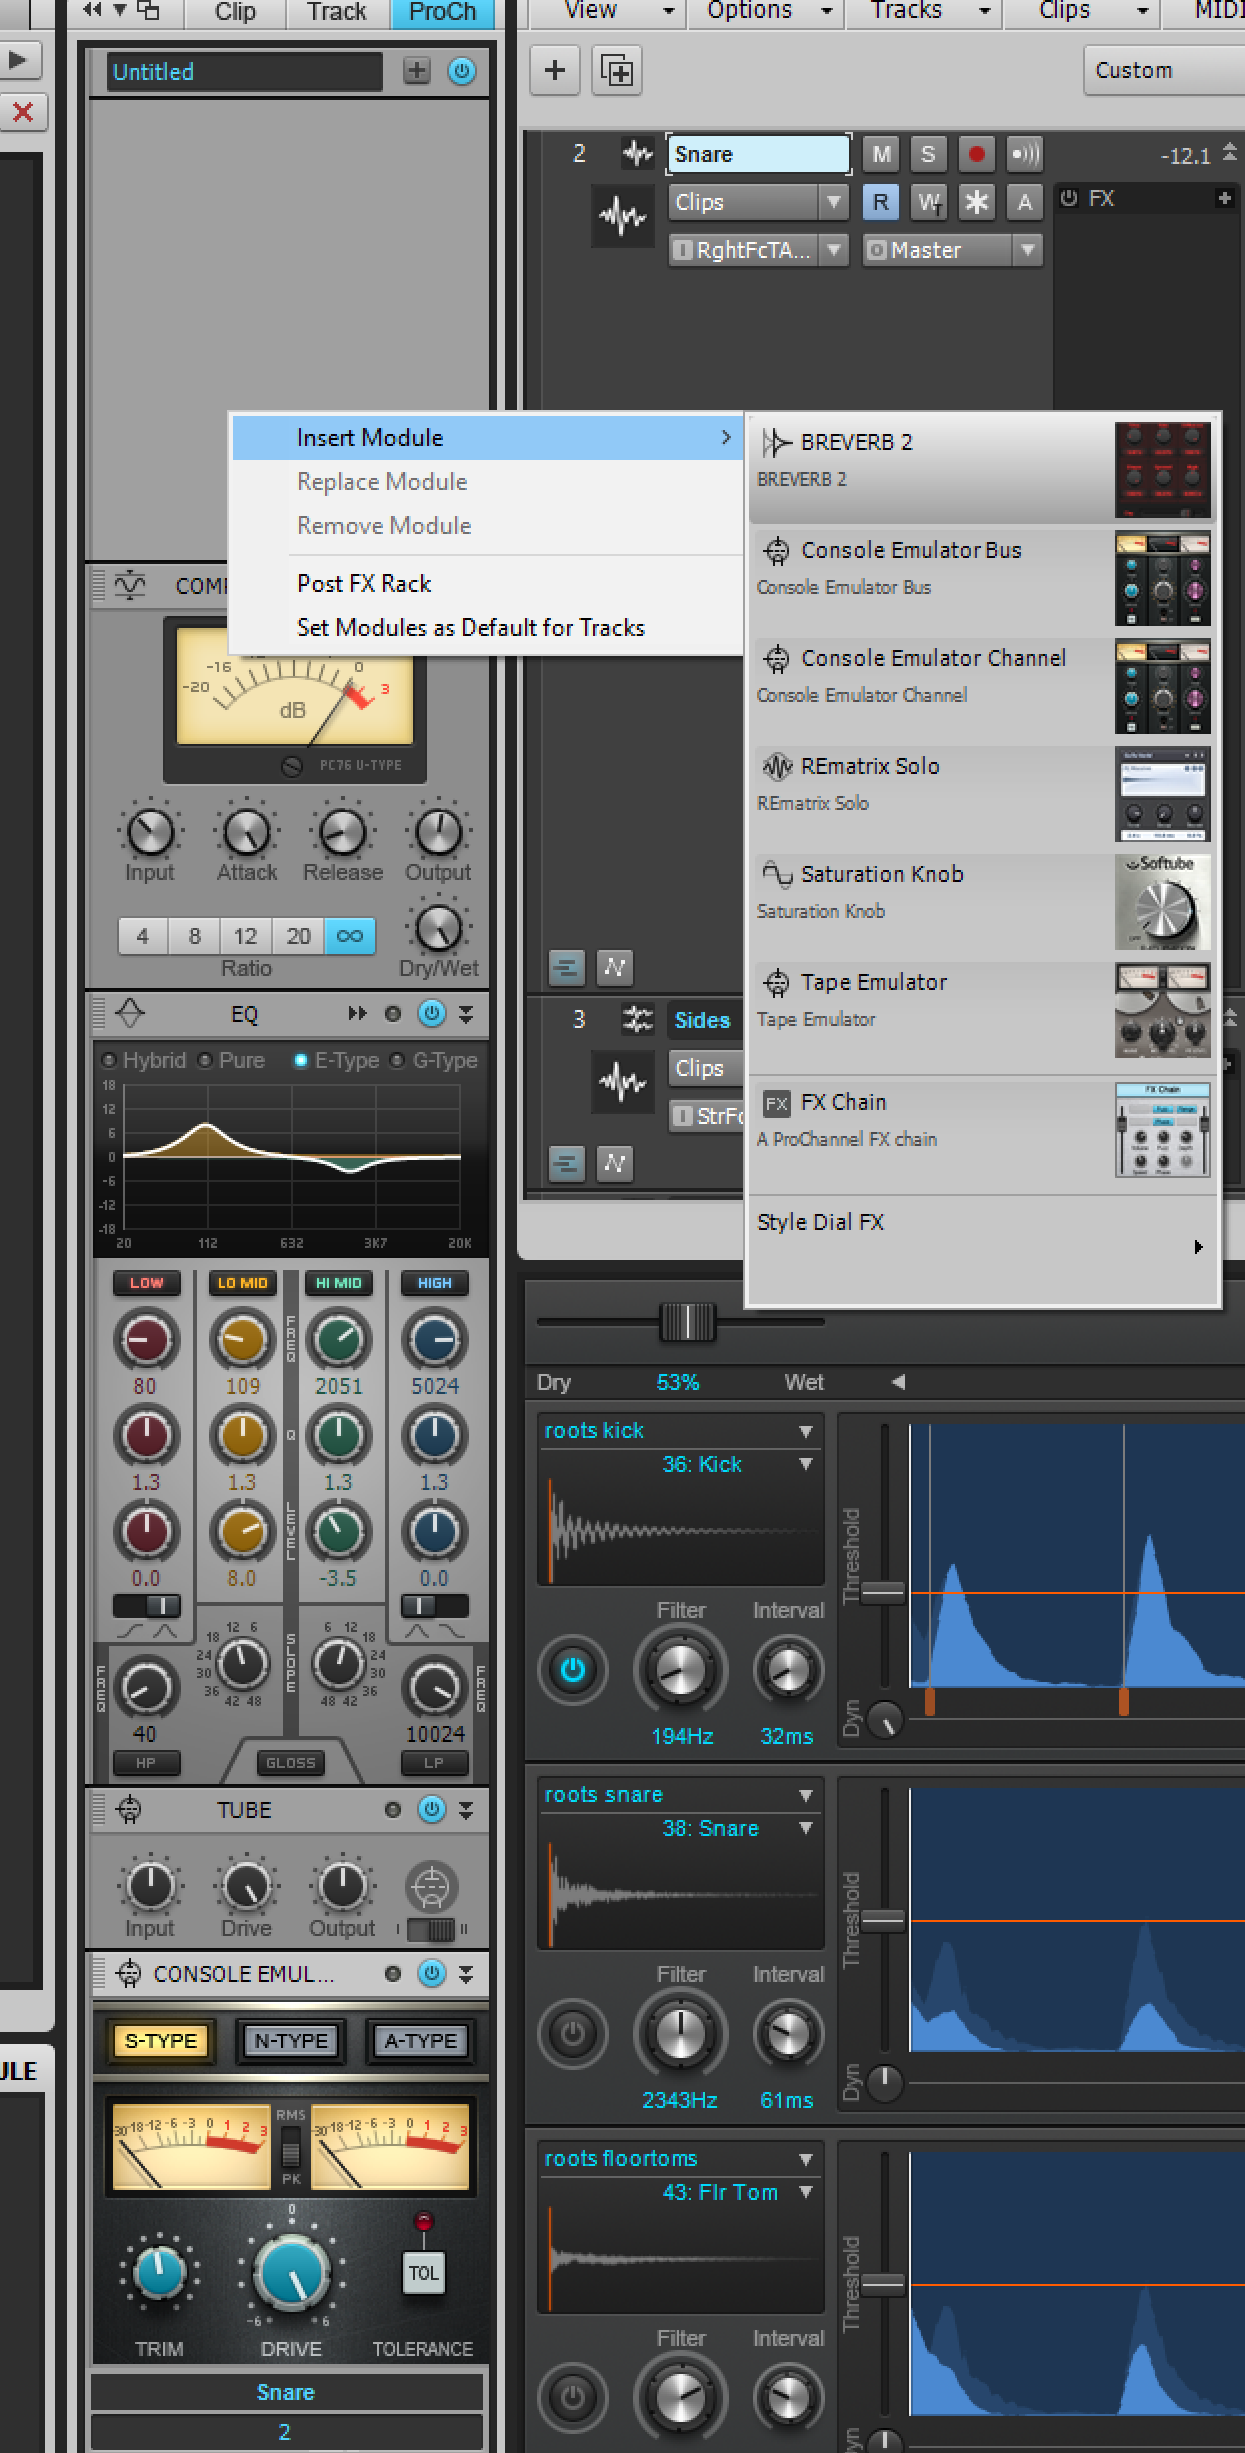
BREVERB 2
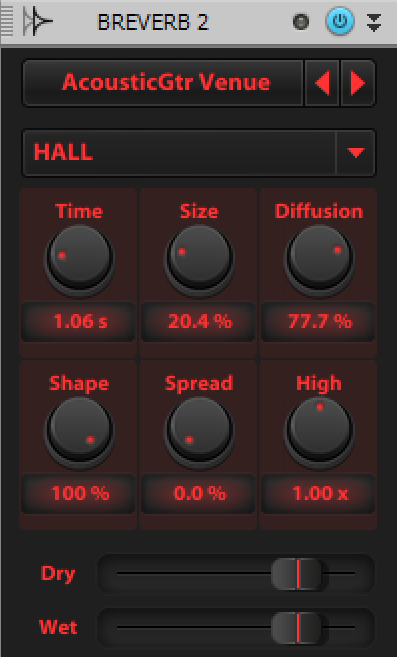
This is an amazing algorithmic reverb that you get for free and get to use on every single channel in your project multiple times (if you're like me and making some crazy mess of shoegaze at 3am).
Joking aside, BREVERB 2 is a great reverb that people happily pay $100+ to own. I think it is a wonderful addition to Cakewalk.
It has the same limitations as the plugin version.
FX Chain
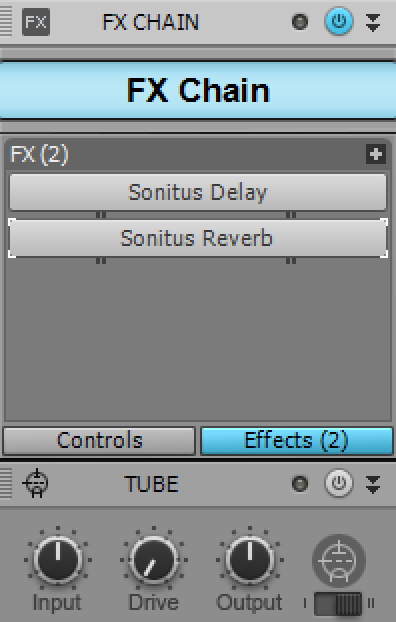
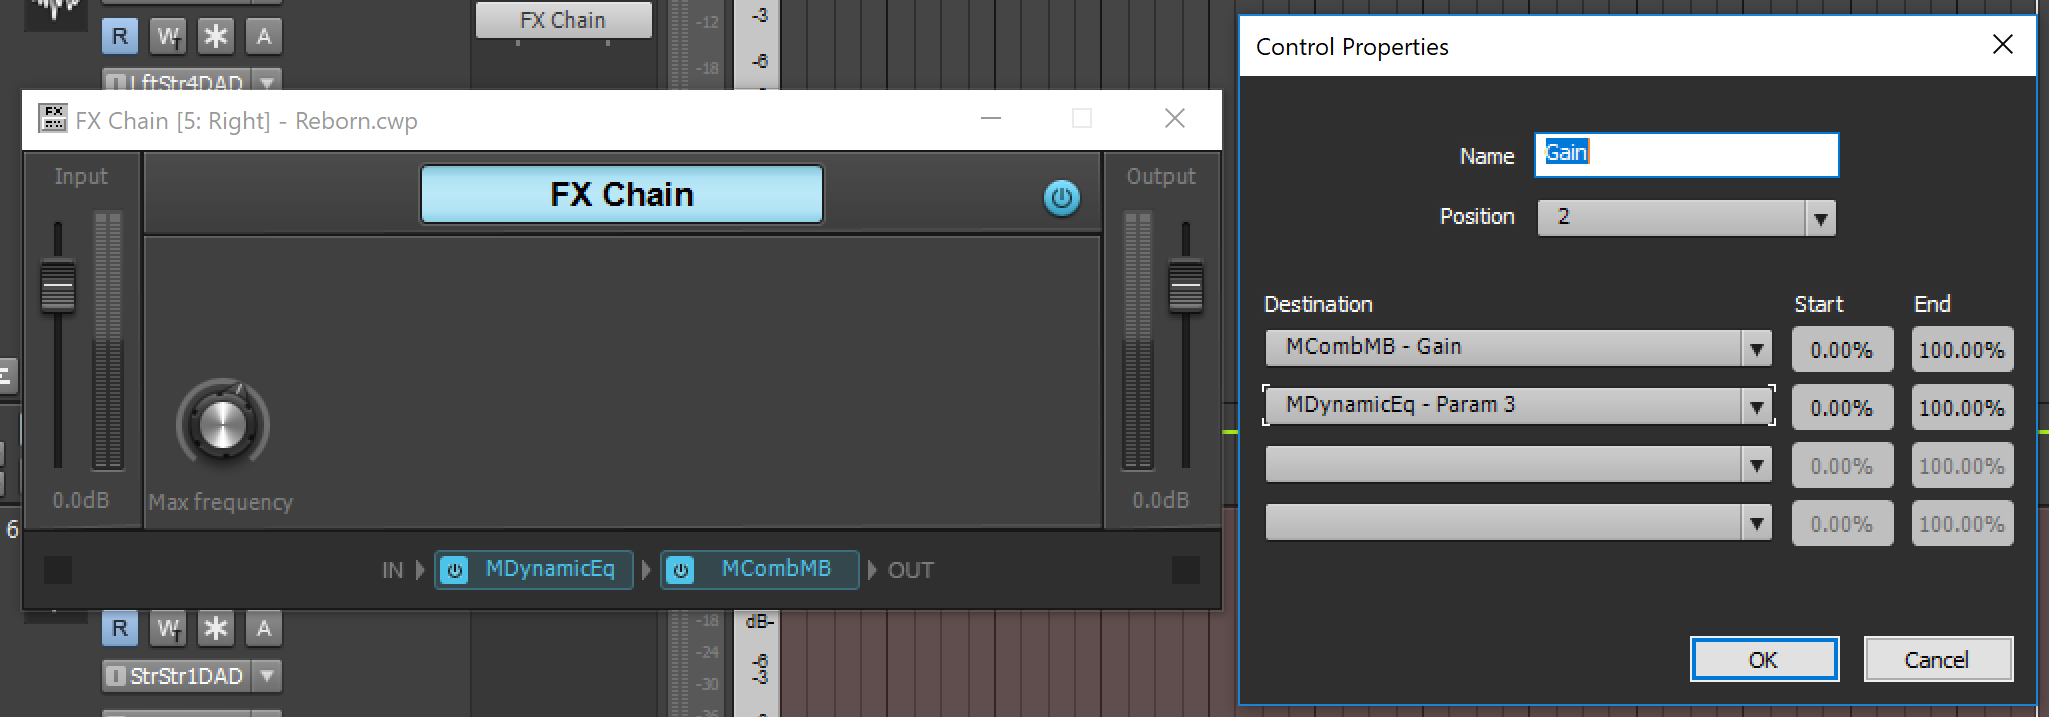
FX chain lets you put plug-in FX in between your ProChannel modules and...
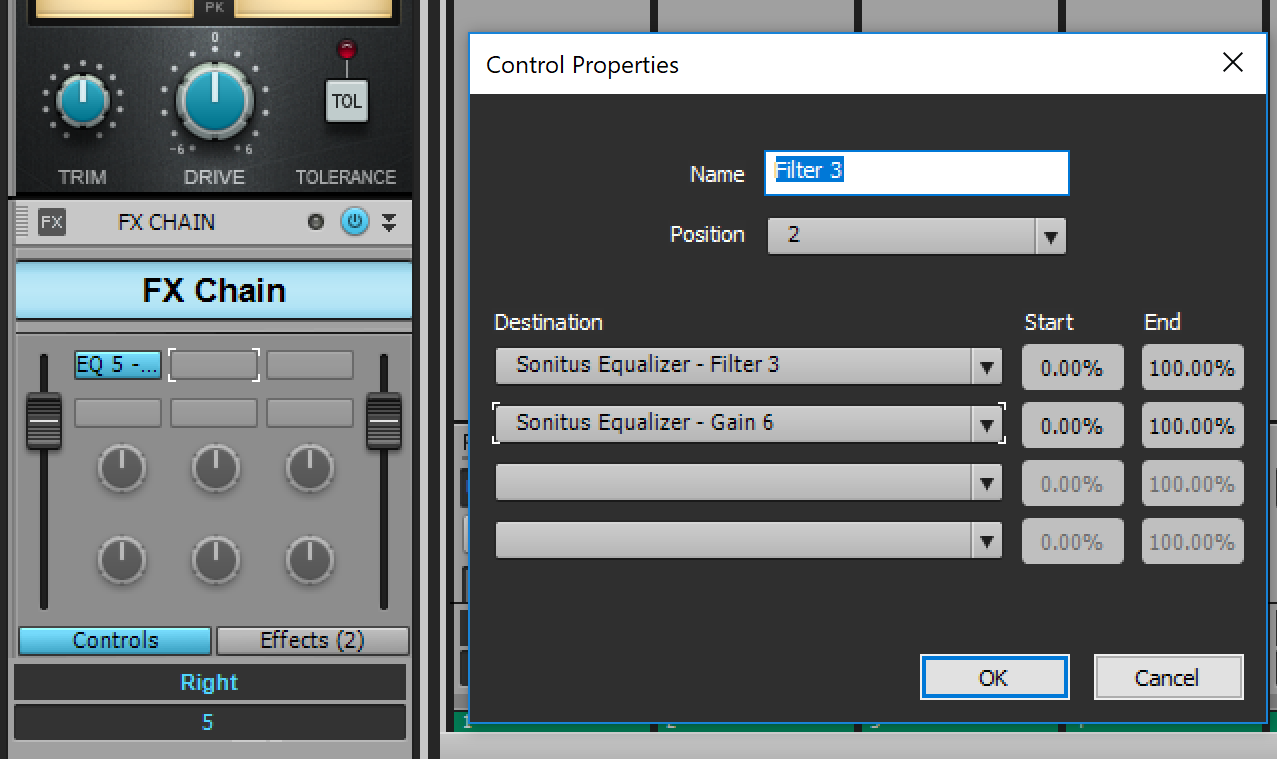
It lets you assign multiple knobs from various plugins to a single control. These controls can be scaled (and inverted). These controls can be automated, allowing you to control multiple plugin parameters (scaled/inverted!) with a single automation line.
Style Dials
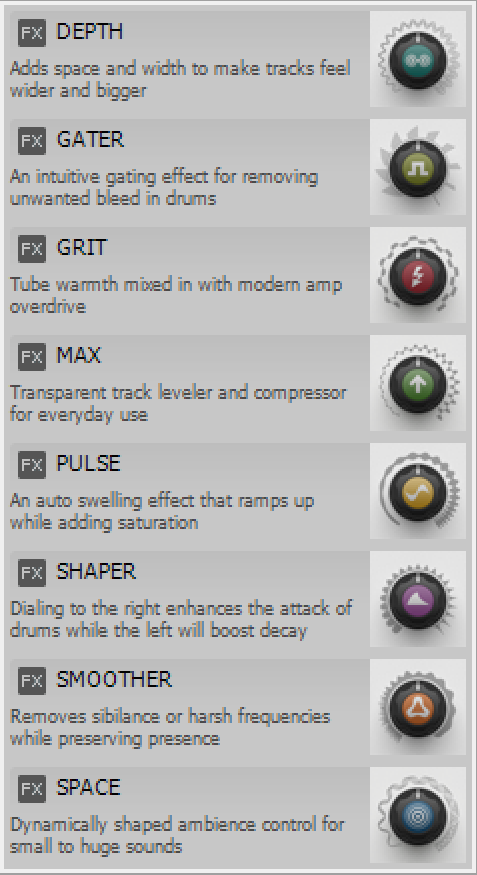
"Style dials" are a silly little concept where you have a single knob that does multiple functions such as:
- Depth - Reverb/delay, very short
- Gater - Gate
- Grit - Distortion, supposedly tubey but... nah. I often wonder if anyone designing these things has actually used high-quality tube equipment before?
- Max - Brickwall Limiter that sounds alright.
- Pulse - Tremolo with distortion?
- Shaper - Transient shaper
- Smoother - De-esser
- Space - Big sounding reverb
I was initially very skeptical of these things, since I'm not a big fan of one knob plug-ins. I eventually came around to it and found that I used "Gater", "Depth" and "Shaper" frequently enough to warrant a positive word about them.
None of these sound particularly bad, and I would imagine that there useful for occasional use. My concern would be that people would overuse these and leave all of their mixes having a very similar sounding "flavor".
Clip Effects
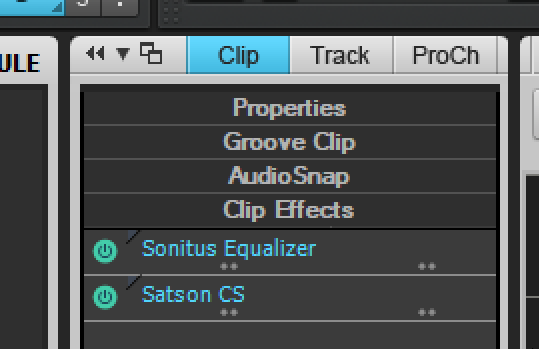
By selecting a clip and opening the clip tab in the Mix Strip you can apply effects directly to clips.
Clip effects allow you to apply effects on a more fine-grained level compared to using track-level effects and trying to automate them for a specific clip.
The downside is that it doesn't appear that you can automate clip-effects at all, so you must be certain that you want that specific process for the entire clip. That's quite the downer that reduces the usefulness of the system.
Plugins
Give all keystrokes to plugins
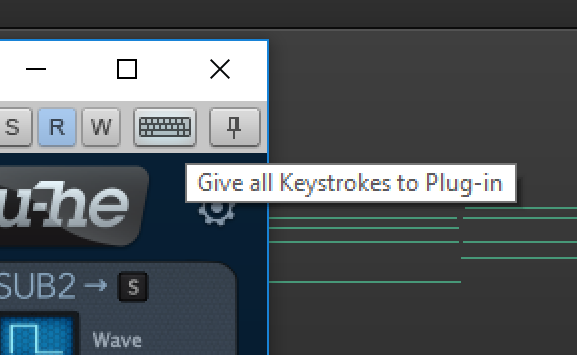
This "feature" is awful. Most other DAWs do this relatively intelligently, but Cakewalk requires that you constantly turn this feature on/off to use typing keyboard input to your plugins, or to Cakewalk itself.
I find myself needing to turn it on/off to type in values in a plugin most frequently.
Markers
I'm sticking this in the mixing section because I use markers most when mixing.
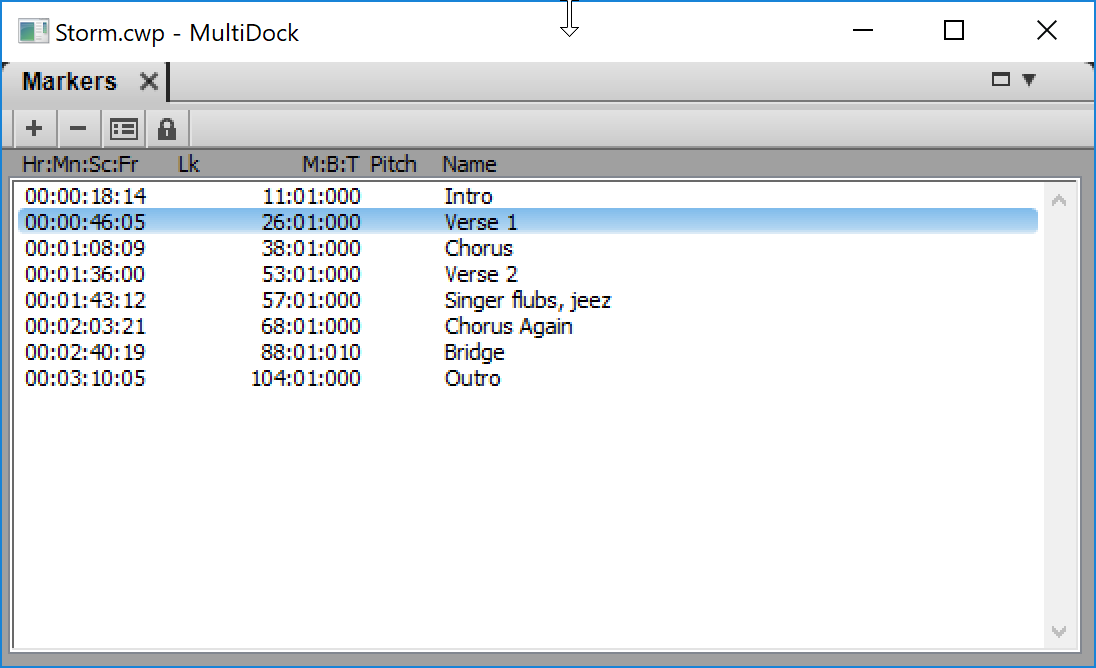
Cakewalk has a fairly basic markers system. You create time based markers so that you can jump to sections. It's possible to set the 'pitch' of a marker for use with groove clips (though I didn't figure out how to utilize that).
I wish there were hotkeys for the first 10 markers at least, because I like to use these functions frequently when working. Marker actions would be nice (make something happen at a marker).
Basic, but necessary feature that's implement at its bare minimum of functionality.
MIDI
Basic Editing
I'm not particularly happy with basic MIDI Editing in Cakewalk. The smart tool's hot regions are small, so changing what the tool does requires hovering over tiny portions of notes.
The editing is tool-based, but the tools are far away in the main control bar and utilize the F-keys by default to switch to various tools. You can use Middle Mouse Click to access a toolbar, but I found this to not be reliable as the tool bar would come up and disappear almost instantly sometimes.
Most of the tools have varying modes, and the default setup is that you need to press the key multiple times to cycle through the various modes and watch what the currently selected tool is! Terrible workflow! It's almost necessary to go and create new shortcuts for the various commonly used tools, or spend your time in "mode-cycle and watch" limbo.
And on some keyboards these tool keys may clash with other functions you utilize with Windows.
MIDI Microscope
This is nothing more than a small magnifying glass.
Cakewalk's MIDI editing controls are quite annoying due to their small size and narrow targets, and this is apparently supposed to alleviate it.
It does not. In fact the two times that I want to use it actually made me feel slightly nauseous. In no way did make it easier to edit midi for me.
Multitrack MIDI Editing
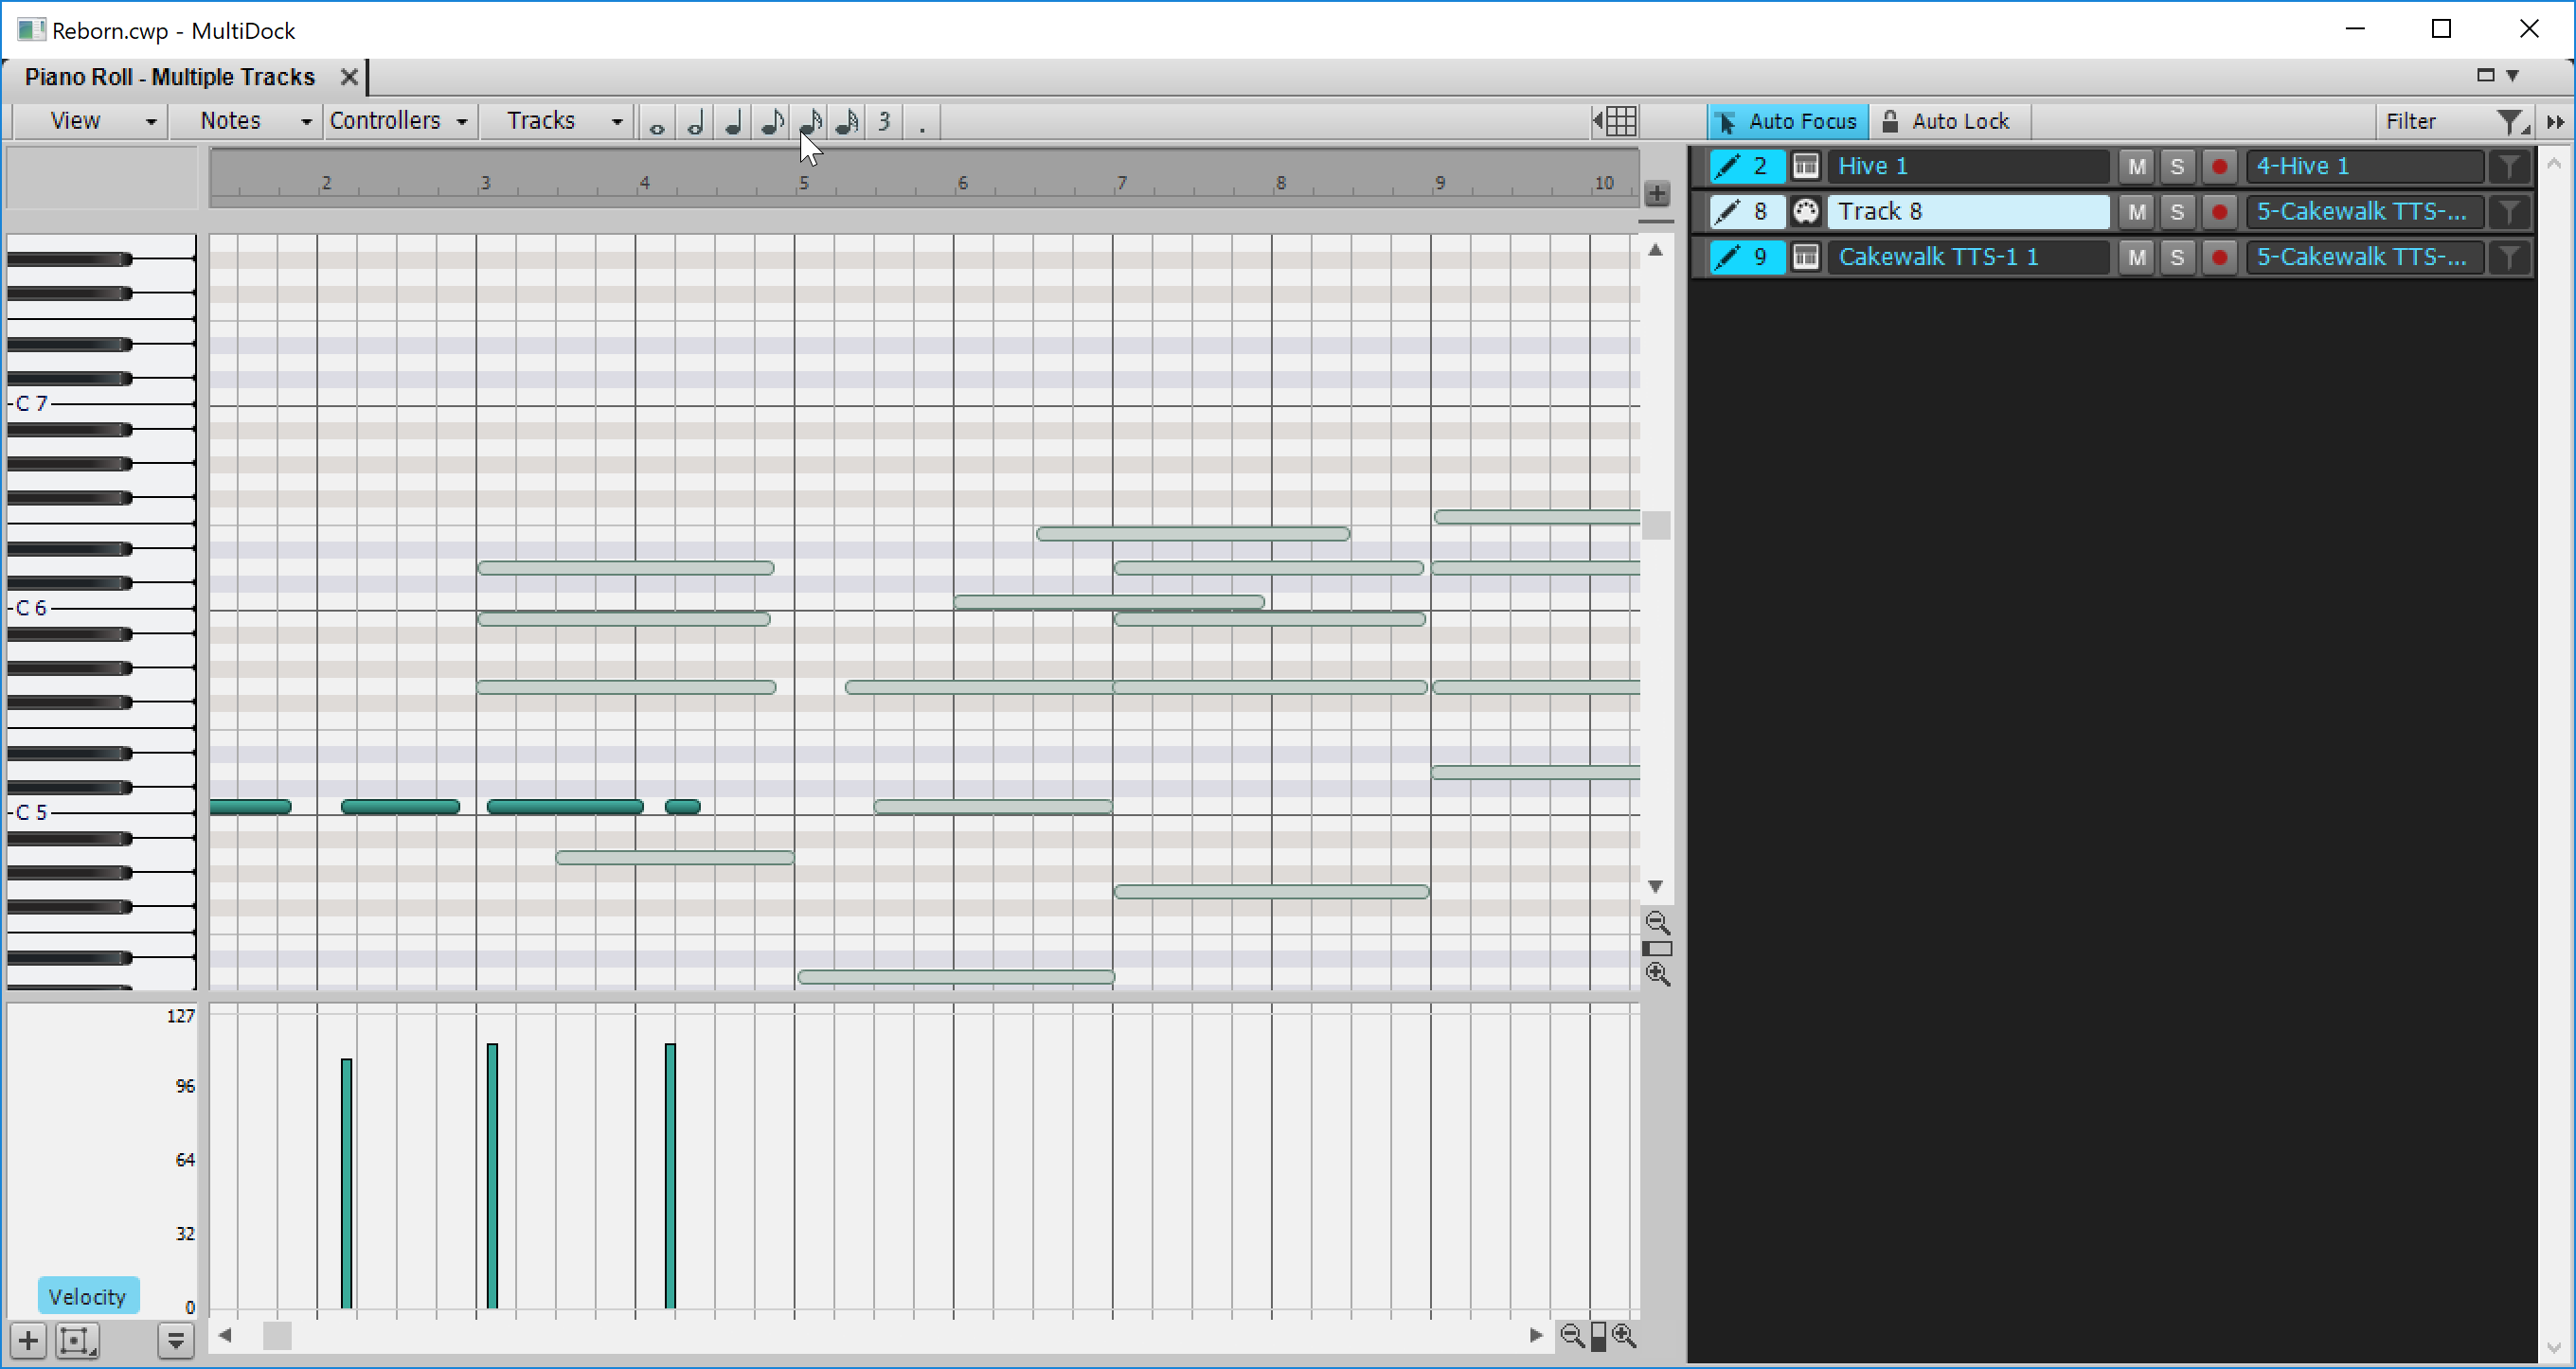
This feature is the ability to view multiple MIDI parts overlaid while editing a single part. With this active you can better create harmonies and work with rhythms in a more natural manner.
I expect this functionality out of any DAW and it's here.
Track Filters
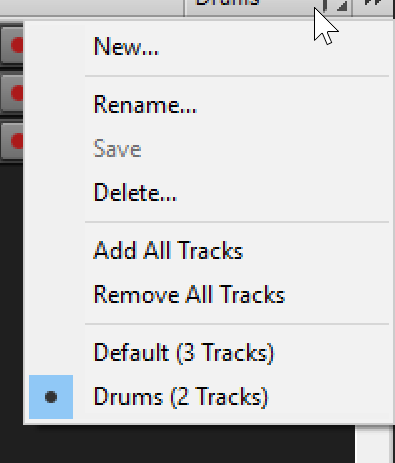
A necessary feature for workflows that utilize a large number of tracks. You can create filters that instantly show only certain sets of tracks.
It's simple and it's easy to setup.
I would still prefer a search feature, but this works alright.
Per clip editors
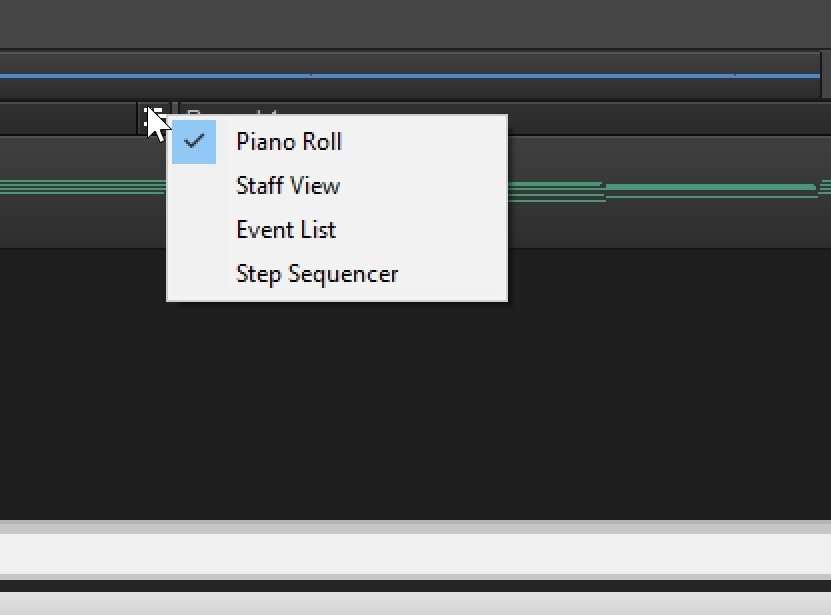
Each MIDI clip can be set to utilize a different MIDI editor view by clicking the icon in the upper right of the Clip.
I think this is actually pretty cool that you can have a preferred type of midi editor per clip. I do think that it is perhaps more complex than it needs to be.
Since a track will normally house a specific instrument, I think it is a reasonable assumption to make that that instrument will always warrant the same type of editor. Having the editor preference set as per clip makes for more clicking and increases the chance of ending up with a clip that is not set up how you want.
This is still a great feature and I wish more audio products would have something like it.
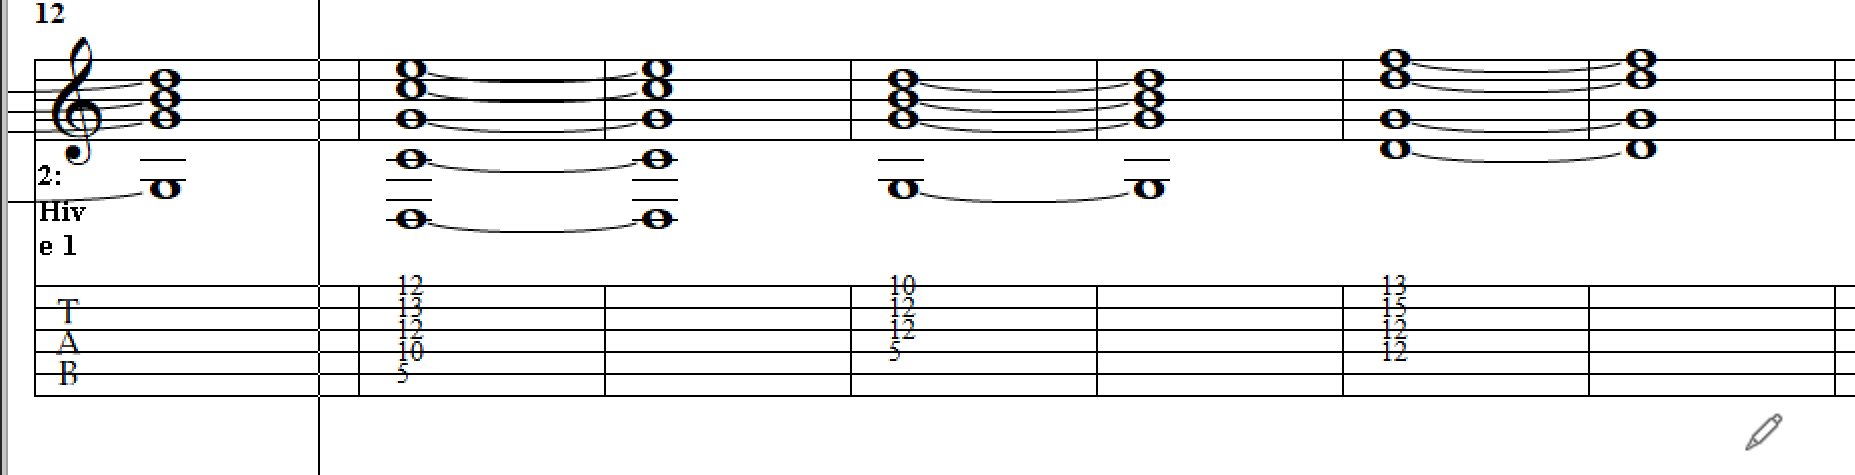
Fret Pane
When using the staff view, a 'fret pane' can be opened to show a guitar fretboard which displays the notes being played at the current time.
I found that it didn't do the best job of creating playable chords. Many times there'd be a note way up or way down the fretboard when it could have been easily moved to an adjacent string so the entire part would be human-playable.
I thought maybe this would be more useful for a "Solo" style part or a lead, but even that created an unplayable mess with anything remotely non-trivial.
I'm really not sure what this feature is supposed to do except confuse people.
Quick Tab
Quick tab is neat, but it's very limited. There's no way that I could find to adjust enharmonic equivalents, add extra notation for performance characteristics, adjust rhythmic display etc...
I tried it with some direct transcriptions I've done in the past and it did an alright job, but the places where there were mistakes were unfixable due to the inflexibility.
Much like the fret pane this seems to be a feature that was added for the sake of being a feature. It's not even remotely usable except for the most basic of uses.
Step Sequencer

This is a step sequencer that allows you to program sounds, usually drums, by clicking blocks that correspond to a place in time.
As far step sequencers go I found this was relatively decent.
Unfortunately the competition is already beginning to leap-frog Cakewalk. Studio One 4's new pattern editor is a good example.
This is still a decent attempt and I would think that most people would appreciate how simple it is to place notes and adjust the velocity. Sometimes having a more functional step sequencer takes away from the essence of the concept: a simple way to enter musical information.
Transform Tool
This allows you to select an area of data and then basically treat it like a bitmap image. You can warp and skew the data by changing the size of the rectangle.
A particularly neat feature is the ability to have a "soft" transform.This mode allows you to select an area that extends slightly outside and inside of the transform rectangle and scales the data at the boundaries to give a smooth transition around the transform box.
A couple other DAWs have a similar feature, but this works well enough.
Pattern Tool
The pattern tool is nothing more than a tool that lets you paste MIDI data (by selecting a file) when you drag your mouse across the MIDI editor.
I am not sure how useful this is, but if there are common rhythms that you use you want to use as a starting point for a track then I'd imagine this could be useful.
MIDI Track Tools

MIDI track tools allow give you ways to transform your incoming MIDI data in real time. Here's what you can do:
- Snap to scale - A decent set of scales is available and non-diatonic notes will be shifted to the scale. There is a scale manager where you can create your own scales.
- Input Quantize - MIDI notes are shifted to the nearest rhythmic value.
- Arpeggiator - An arpeggiator with latch (letting go of keys does not stop the notes). You can also scale the velocity, shift the pitch, add swing (shift offbeats forward) and adjust the duration. Flam (doubling of notes with a slight offset) is there, and creates an interesting textural sound. The arpeggiator comes with 14 different patterns of playback.
- Key - Pitch shift.
- Time - Time shift.
- Bank browser
- Patch selection method (bank selection, cc 0, cc32 or patch 100 offset)
Synth Rack
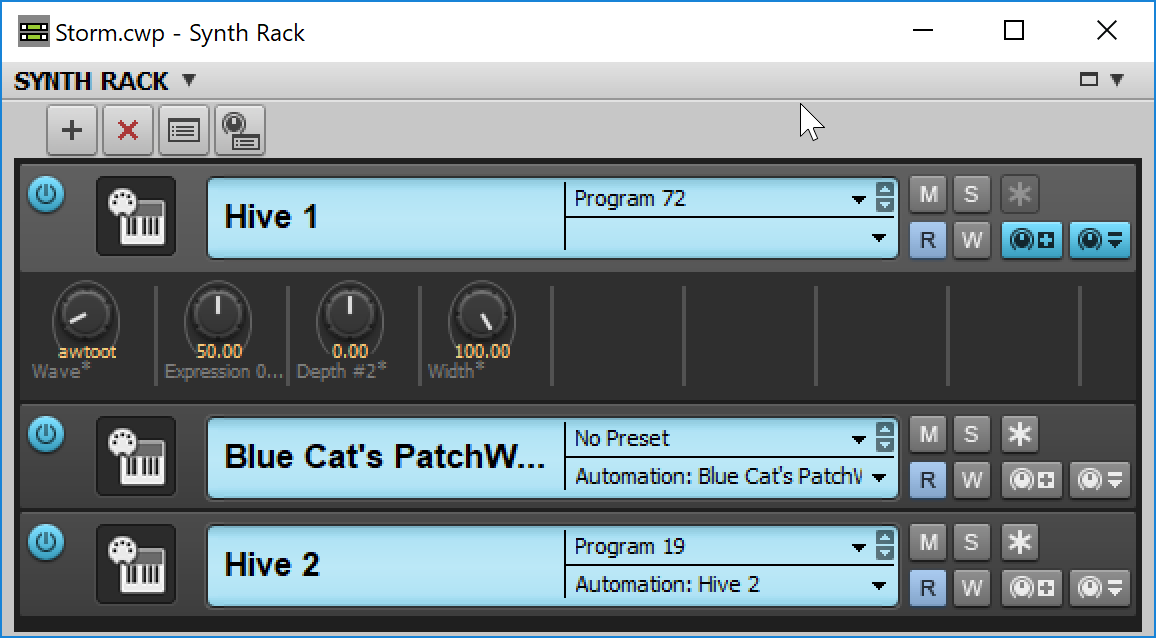
Synths are stored in the 'synth rack'. The plugins are global to the project and you route tracks to them as needed.
It's not an uncommon system, and it has some benefits in terms of CPU/Disk usage. It can be confusing for people that are used to per-track instruments, but I feel that the benefits outweigh the initial confusion.
If you're used to working with hardware, then this should be a familiar system.
If you want to use a MIDI track with a synth, instead of an instrument track, then you need to output the MIDI track to the synth rack slot, create an audio track and set that to take input from the synth and turn input echos on. I found this mildly confusing at first. It's necessary if you want to use MIDI FX though.
Sysex
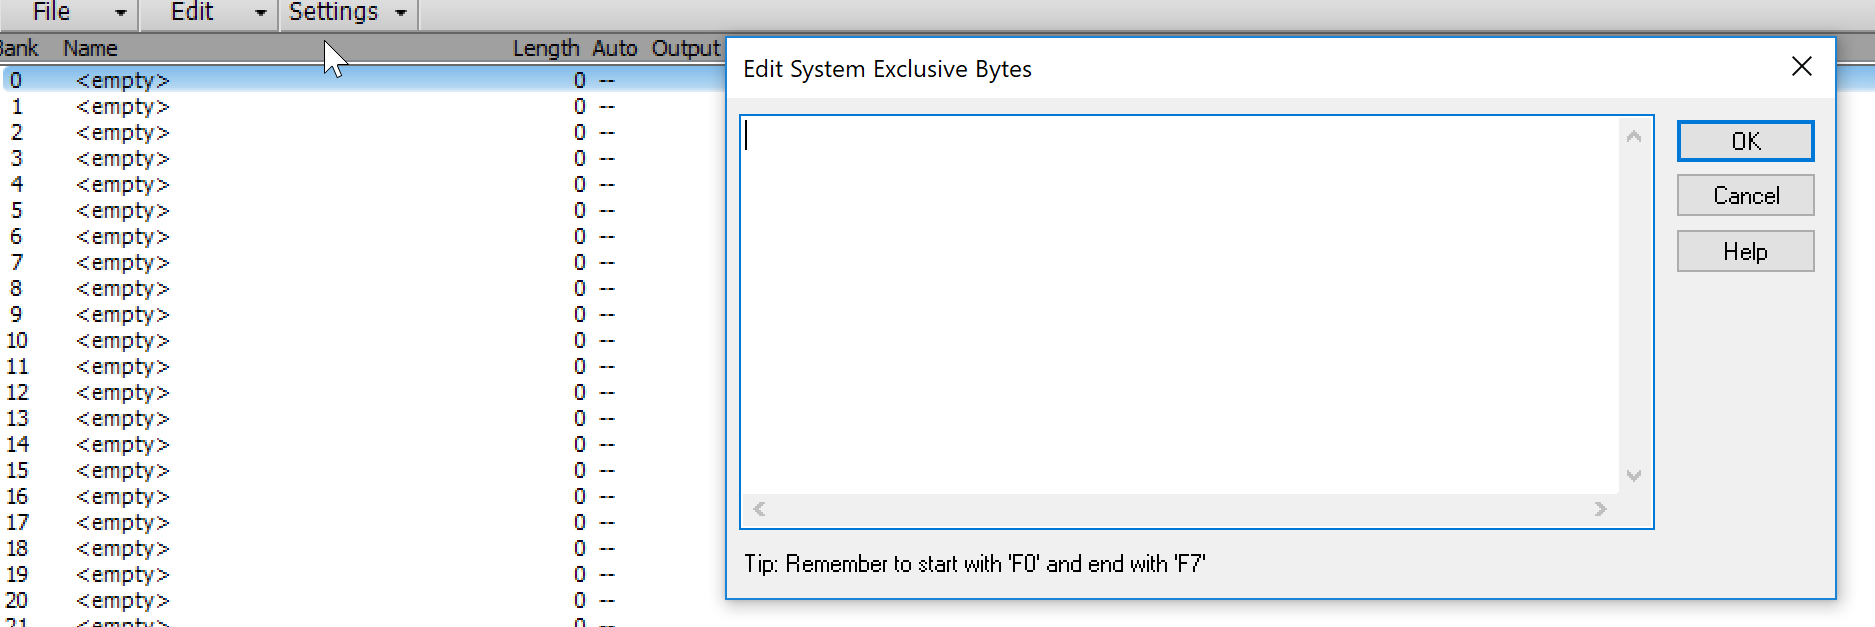
If you have old synths then you know what a pain it is to deal with sysex parameter changes or even firmware updates.
Cakewalk has full sysex support! HOORAY!
Virtual Keyboard
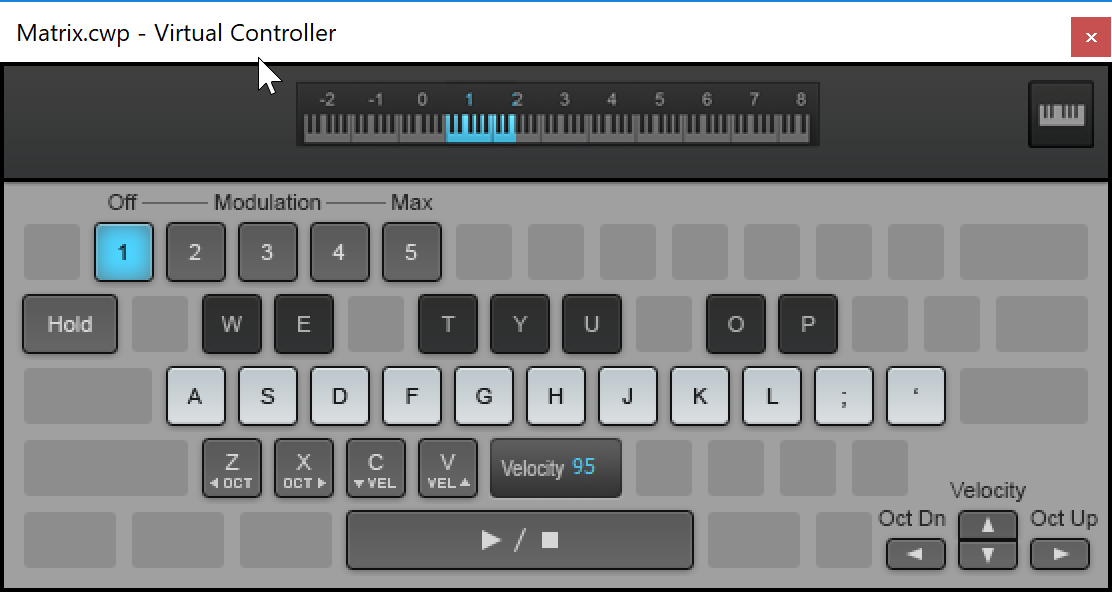
I added this for no other reason than to complain.
It doesn't respect the layout of your keyboard set in the OS! I don't use QWERTY so this feature is utterly useless to me.
It needs to be editable or properly follow the selected layout in the operating system's Region & Language settings.
Notable Features
Matrix View
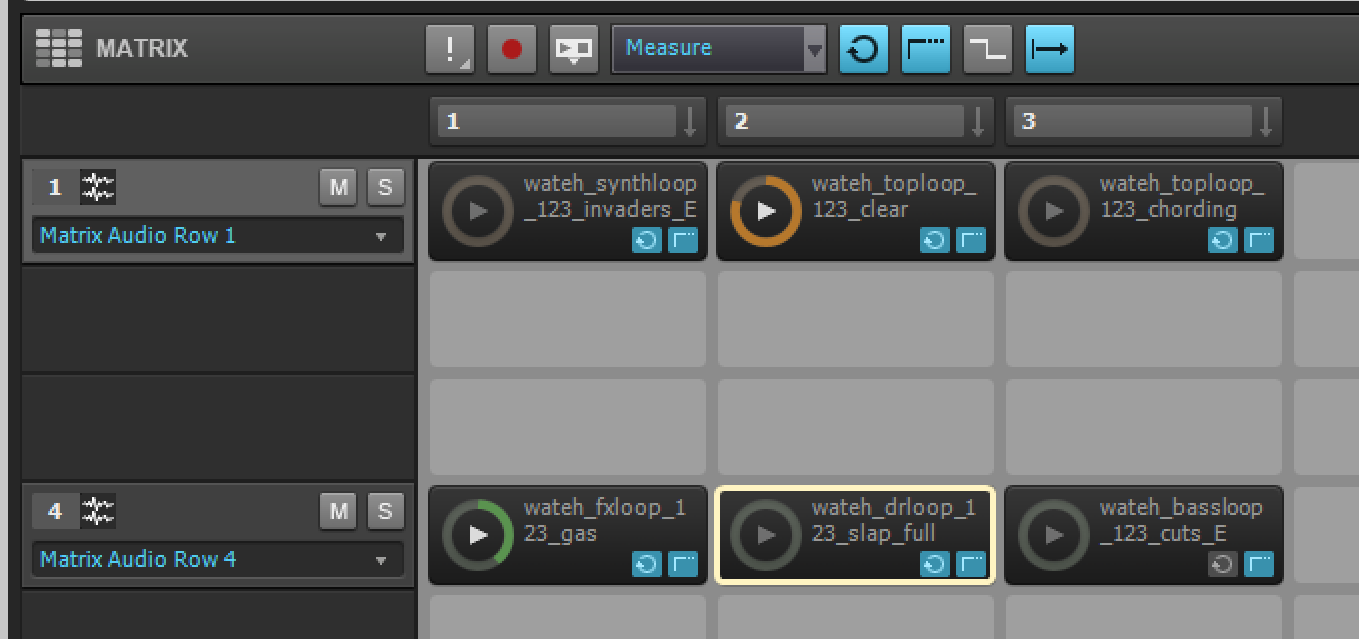
If you know Ableton Live or Bitwig then you are probably familiar with the grid-based music making system.
Cakewalk's is rotated 90 degrees though.
You're given a series of cells. Horizontally are tracks. Vertical presentation is "time".
So multiple tracks can play clips at the same time. A vertical column may have multiple clips playing (in Live and Bitwig, this is a row or "scene").
Each clip can be triggered via MIDI or by pressing the play button, and optionally the start time can be quantized to the nearest next time division. Play can also be 'latched' so that the clip is only active when the mouse or MIDI note is held down.
Each cell is edited through the Loop Construction panel.
Since the tracks in the matrix view are directly related to tracks in the project, you can record a performance in the matrix view, and clips will be written in your track view corresponding to what you heard in the matrix view. This is similar to Bitwig/Live's session record feature.
So you might think that this is a fair drop-in replacement for something like Live or Bitwig. Unfortunately it's not. There's a few core issues in that case:
- No integrated clip editor. The Loop Construction view is nothing like Live/Bitwig's editor. It's severely lacking in this case.
- Audiosnap is also not available to clips easily.
- No automation facilities for clips.
- Track controls missing - Any track related setup must be done in the track view or Mix Strip
- No programmable playback - In Live/Bitwig you can setup follow-actions to craft a procedural playback of clips. This is a fantastic way to work.
- No clip information - Getting information about clips requires switching to multiple other parts of the GUI.
- Controllers - Utilizing this for a Live performance tool is out the window unless you want to spend hours setting up a fragile (project specific) MIDI mapping. Other DAWs have first-party support for various pad-controllers.
- Mixer? - Using the matrix view is frustrating as you end up needing to bounce around to various parts of the GUI to adjust mix components. This is directly integrated into Live and Bitwig's session window.
- Track status - When a row is playing, there is no status for it. Live/Bitwig have a status circle that shows you the current loop-status of the track. This is way easier to utilize than looking around the grid for the currently playing clip
- Media Browser - Knowing metadata about clips is important. Cakewalk's browser is simple and offers little to no data about what you're about to drop in. Search and folder management are also barely existent.
- Bitwig - Bitwig's session view is capable of being directly shown with the main arrangement. Working with this setup is pleasant.
- Switching - Switching to/from the matrix view is painful. It will overlap one of your other docks. You can't have the Console and Matrix view open at the same time for instance.
- Recording - You can't record directly to clips, which removes any last potential serious use for it on the cutting floor.
There's some extra minor issues I won't go into that can be problematic in the Matrix view as well.
I could nearly defend it as a useful feature if you could record to clips and then test out arrangements. As it is, you must record clips to your track view (likely somewhere way to the right of the arrangement) and drag them in. It's a messy workflow.
If you just like to drag and drop loops then maybe it's useful? I hope not many people work that way, except perhaps folks doing bgm for tv.
As a soundboard it fails due to the poor browser.
Matrix view needs a lot of work to be a contender. I imagine that a good deal of time was spent on this feature only to have it set by the wayside.
Load Balancing
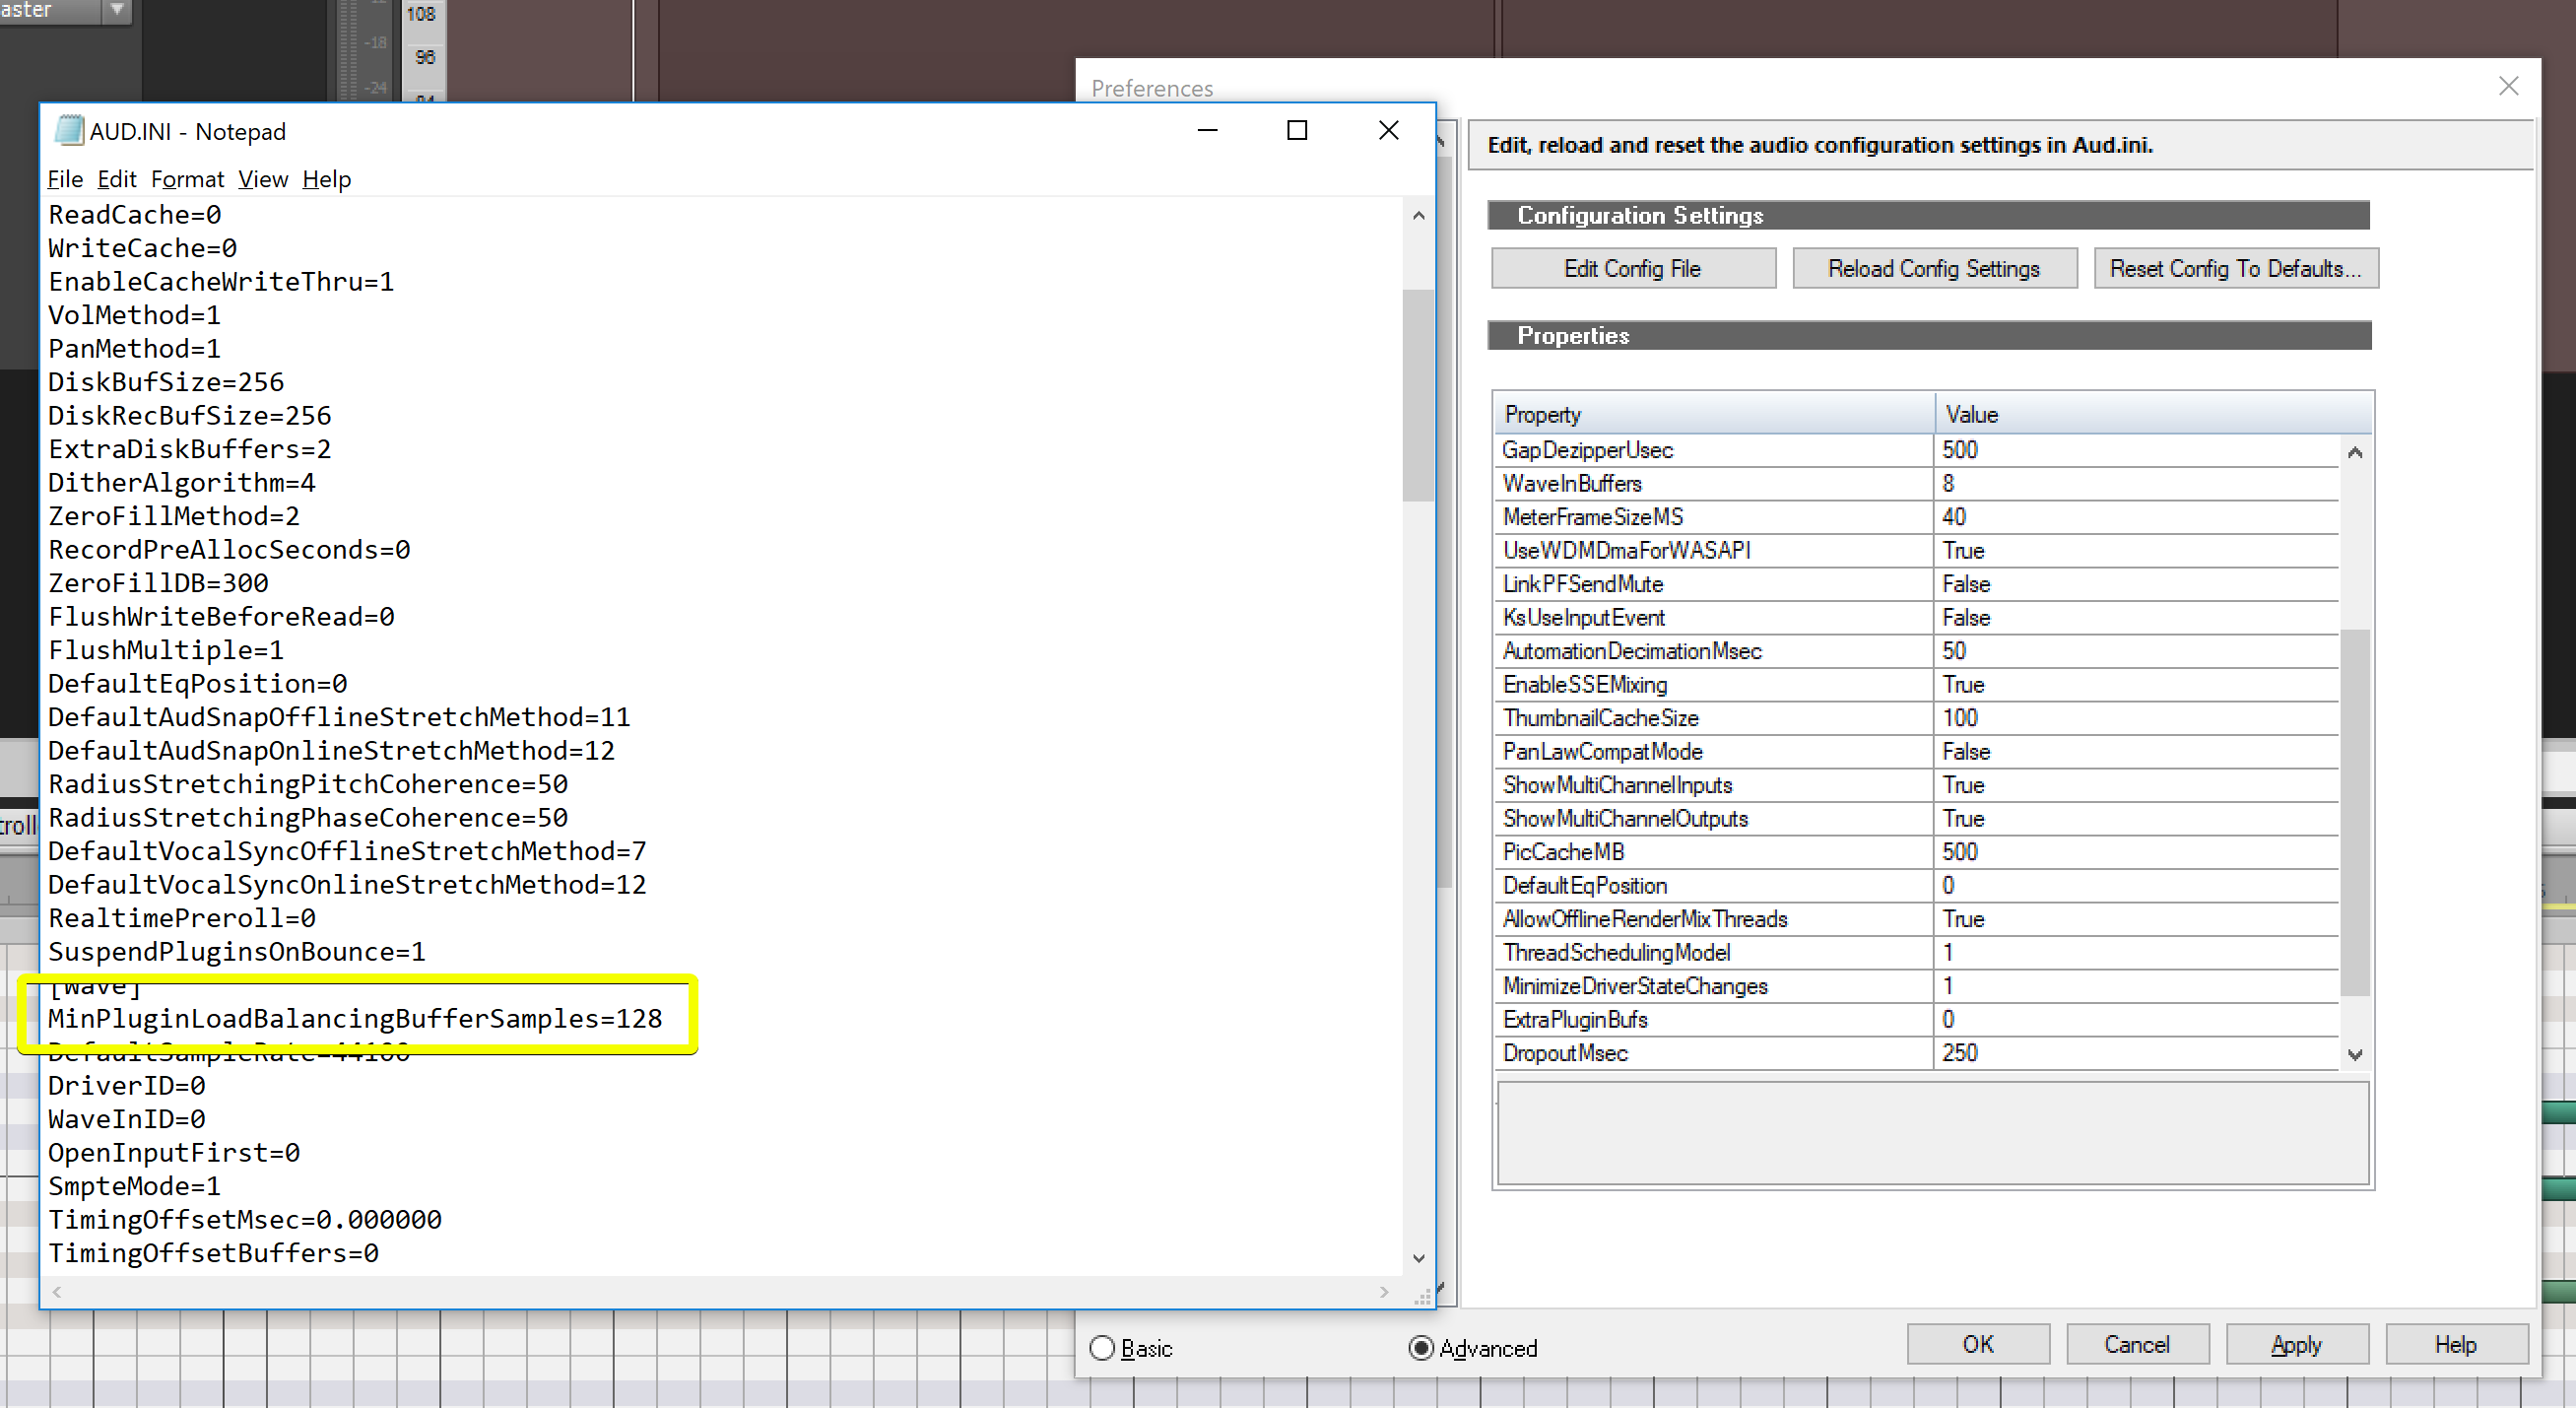
Cakewalk can attempt to balance the load of your project across multiple processors as much as possible, which is a neat feature that surprisingly not many DAWs do (or do well).
When I installed Cakewalk, this feature was disabled, so follow the directions here to get started.
Plugin Upsampling
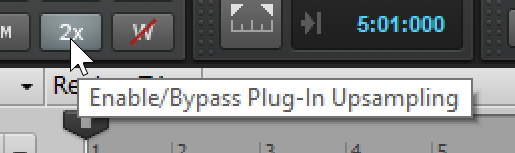
Aliasing is the bane of anyone using digital audio with any sort of non-linear process (such as anything with saturation/distortion).
Cakewalk can upsample the signal pathway for all processes to twice the sample rate. This is sufficient to reduce a significant amount of aliasing and decrease the inharmonic content that may be present from non-linear processes.
There are some caveats though. Your processing load will be doubled (or thereabouts) and there will naturally be changes to your audio from the up/downsampling process. These changes are beyond the scope of this review, but there's no free cake here!
It's important to recognize that ALL plugins will be resampled, including processes that don't require this. This feature would be far more valuable if it was available as a container. Insert a container that oversamples the processes inside it. That way you only need to upsample where it's needed.
If you do want a container-style product then look into Metaplugin. Metaplugin gives you flexibility in routing, dry/wet on every plugin and 4x oversampling per use.
I was tempted to add this as a feature to the DAW-Chart, but since only one DAW supports it, and doesn't do it particularly well, it would just add noise.
Lenses
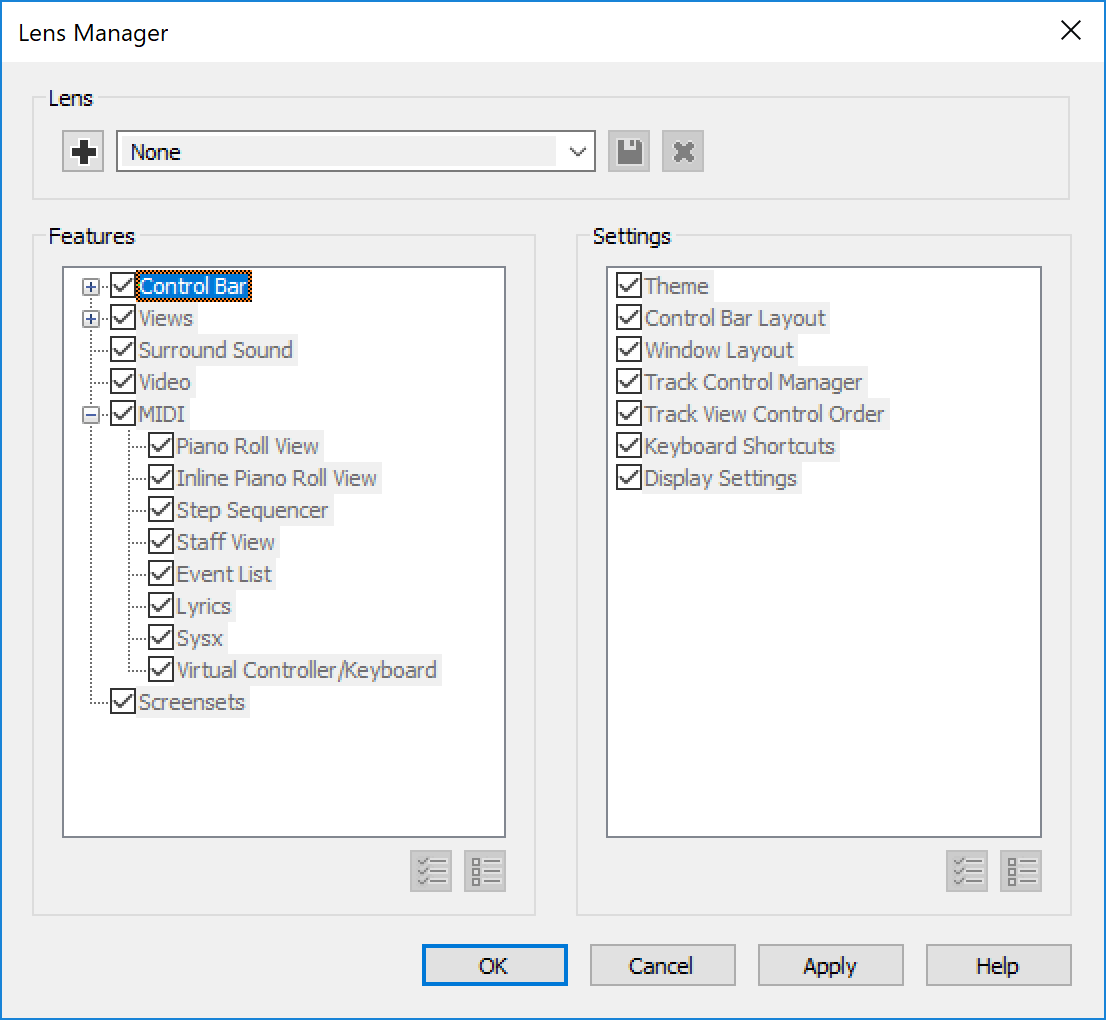
"Lenses" is a marketing buzzword for letting you select what parts of Cakewalk are shown. It changes most aspects of the GUI to remove elements that are unnecessary for a given workflow.
I found this feature to be completely worthless. It's a neat idea, but on my 18-core system with a Radeon Pro Vega 64, changing lenses can take upwards of 20 seconds. The temporal delay isn't the only thing. I found that often when attempting to make my own lenses, things did not stay where I put them.
The lenses feature clashes partially with the screensets feature below as well. Switching to a lense sometimes changed my screen layout, which necessitated switching to the screenset that I already had loaded. Screensets don't load particularly quickly either, so that's yet another delay.
Interesting concept, poor execution. If this loaded near-instantly, I still think that the idea of moving around where important elements are is a poor UX decision. The user should always know where things are! Making that a dynamic process adds unnecessary complexity.
Screensets
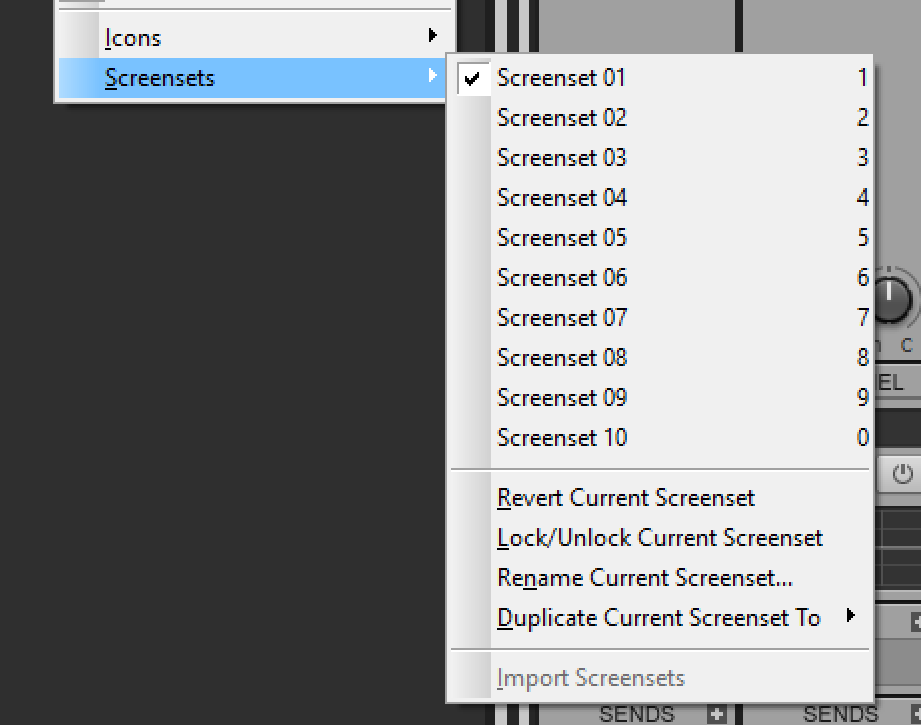
Screensets are a way of saving a window layout. You can take a snapshot of where things are laid out on the screen and recall it later to enable a smoother workflow for a specific task.
Once again, switching screensets is slow and error prone. I found a number of times where things would be docked wrong or where windows would not be 'where I left them'.
More annoyingly, it's 2018 and Cakewalk is slower at switching screensets than Sawstudio was nearly 20 years ago (near instant, even under load). Screenset switching should be instant or it feels like more of a nuisance than a help.
CWAF
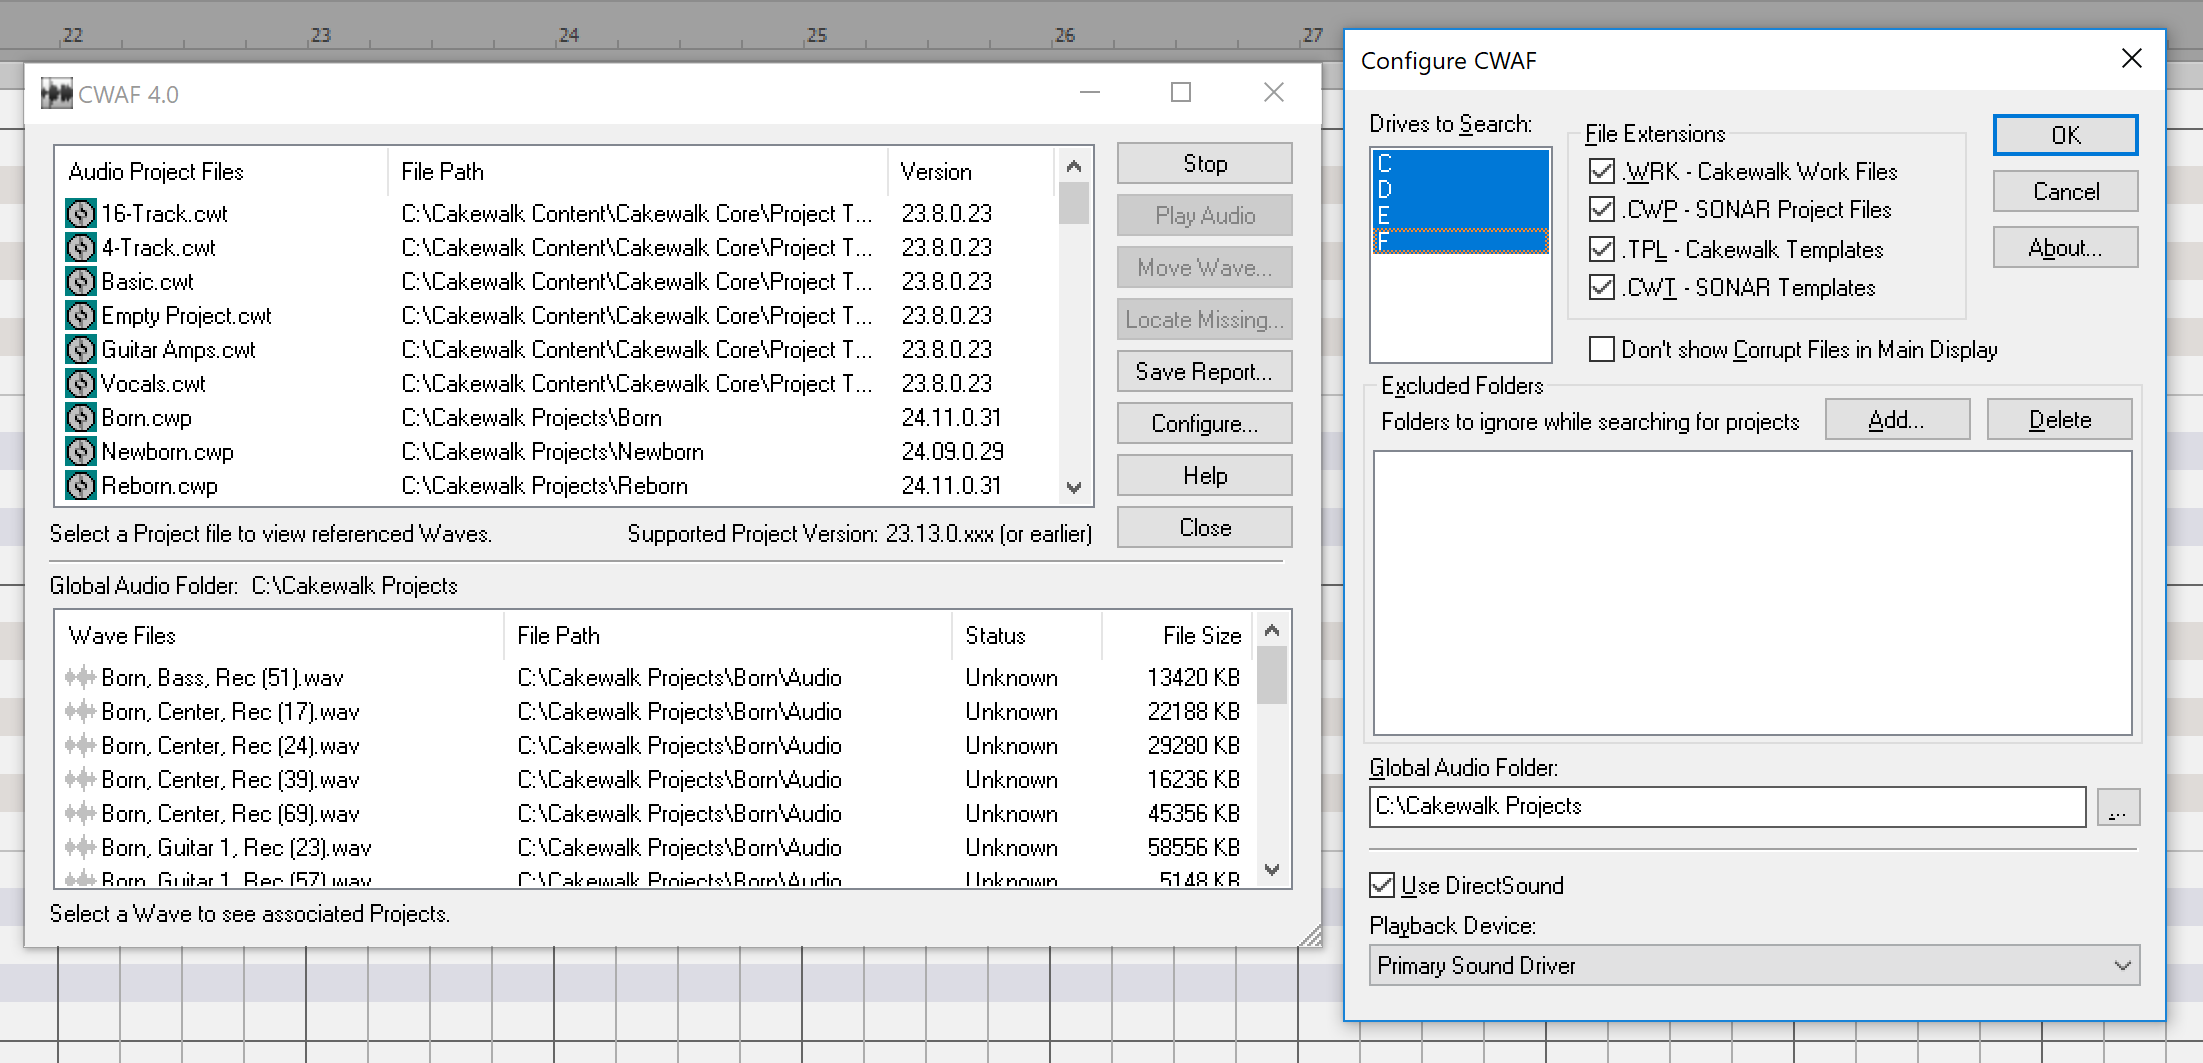
This is the 'find my audio files' type tool. It searches for audio files used in Cakewalk projects.
It has 2 functions that I found mildly useful:
- Move project - it does what it says on the tin.
- Save report - this saves a textual report of what was found so that you can further process the information.
It's not as nice as some other asset management tools in other DAWs, but it is big step above nothing at all.
ACT
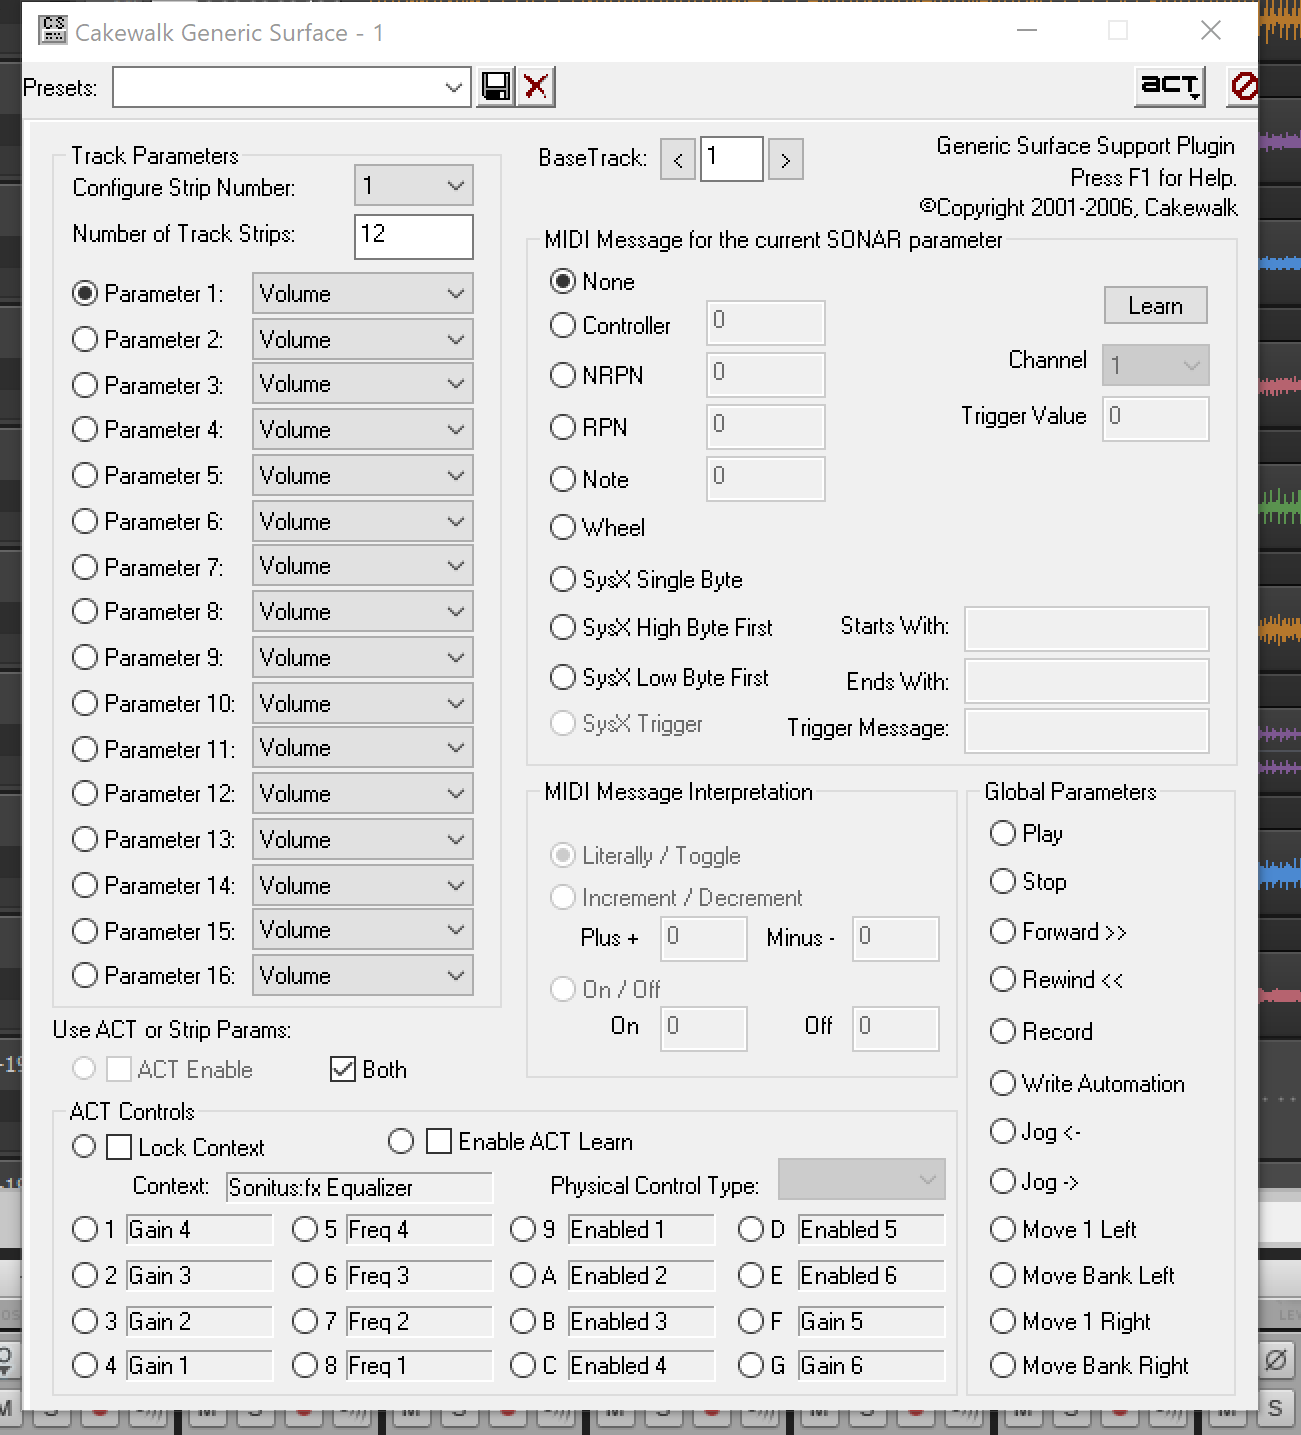
The idea here is that Cakewalk will intelligently map MIDI input to the current context. So you can map your controller to multiple plugins, and the correct mapping will become live on focus.
In practice... it is a pile of garbage.
Not only is it difficult to get working even if you have a device with official mappings, but it's prone to corruption, won't control VST3 plugins and undoing mappings requires use of a third party program that is equally poorly designed and cumbersome to use. (Kudos to the author for doing this though. It's an admirable effort to fix something that shouldn't need fixing.)
I found at least 4 third-party programs that attempt to fix the issues with, or amend the capability of, ACT, yet the authors don't seem to admit that there's issues with the design or function.
Guys, if you have to write software to fix someone else's software... that 'someone else's software' IS RUBBISH. You can spin it however you want, but ACT is fundamentally flawed and functionally broken.
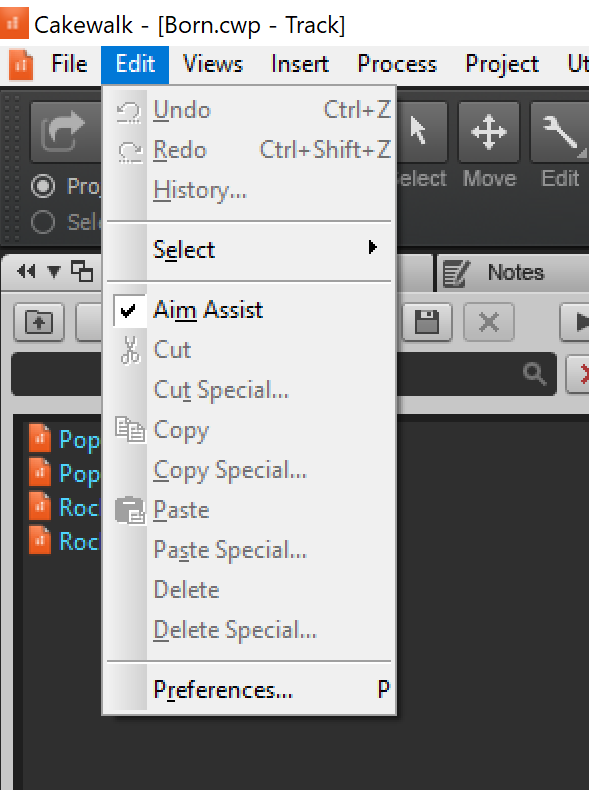
Aim Assist
This is a silly name for a cool feature. It's nothing more than a line that shows your mouse position with a label for the current time.
It's a tiny thing, but this might be one of my favorite features about Cakewalk. It just makes most basic playback/editing actions easier.
Snap Intensity
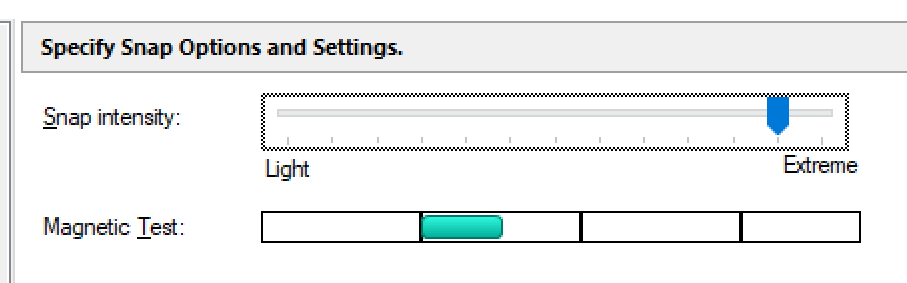
I can't stand how it's not possible to set how close you need to be something for it to 'snap' in other products.
Cakewalk lets you adjust how strong the 'magnet' is when snapping. Not only can you adjust it, but it has a useful widget that allows you to test the feel of the current setting without needing to go back to your project and potentially mess up somethign trying it.
Brilliant feature that's well executed.
I would prefer that this be more accessible. I found myself adjusting this for varying workflows occasionally, and I would have liked it on the Control Bar as well as the preferences window.
Landmark snapping

Cakewalk lets you turn on/off the ability to snap to non-time related events like: markers, transients, current time, MIDI notes, clips and automation nodes.
This makes placing things FAR easier, since music doesn't always happen on the time grid. Excellent feature that not every DAW has caught up with yet.
Mix Recall
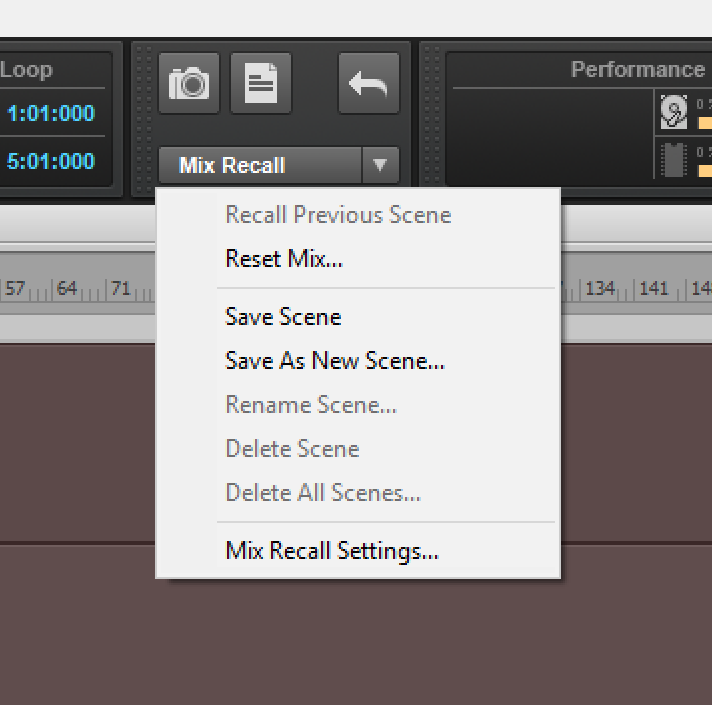
Save your mix, then recall it later. That's as simple as it gets.
Notably this saves and recalls automation!. Other products don't do this correctly which causes some major frustrations.
It appears to handle routing correctly, plugin settings and other mix related things.
Well done.
Keyboard Shortcuts
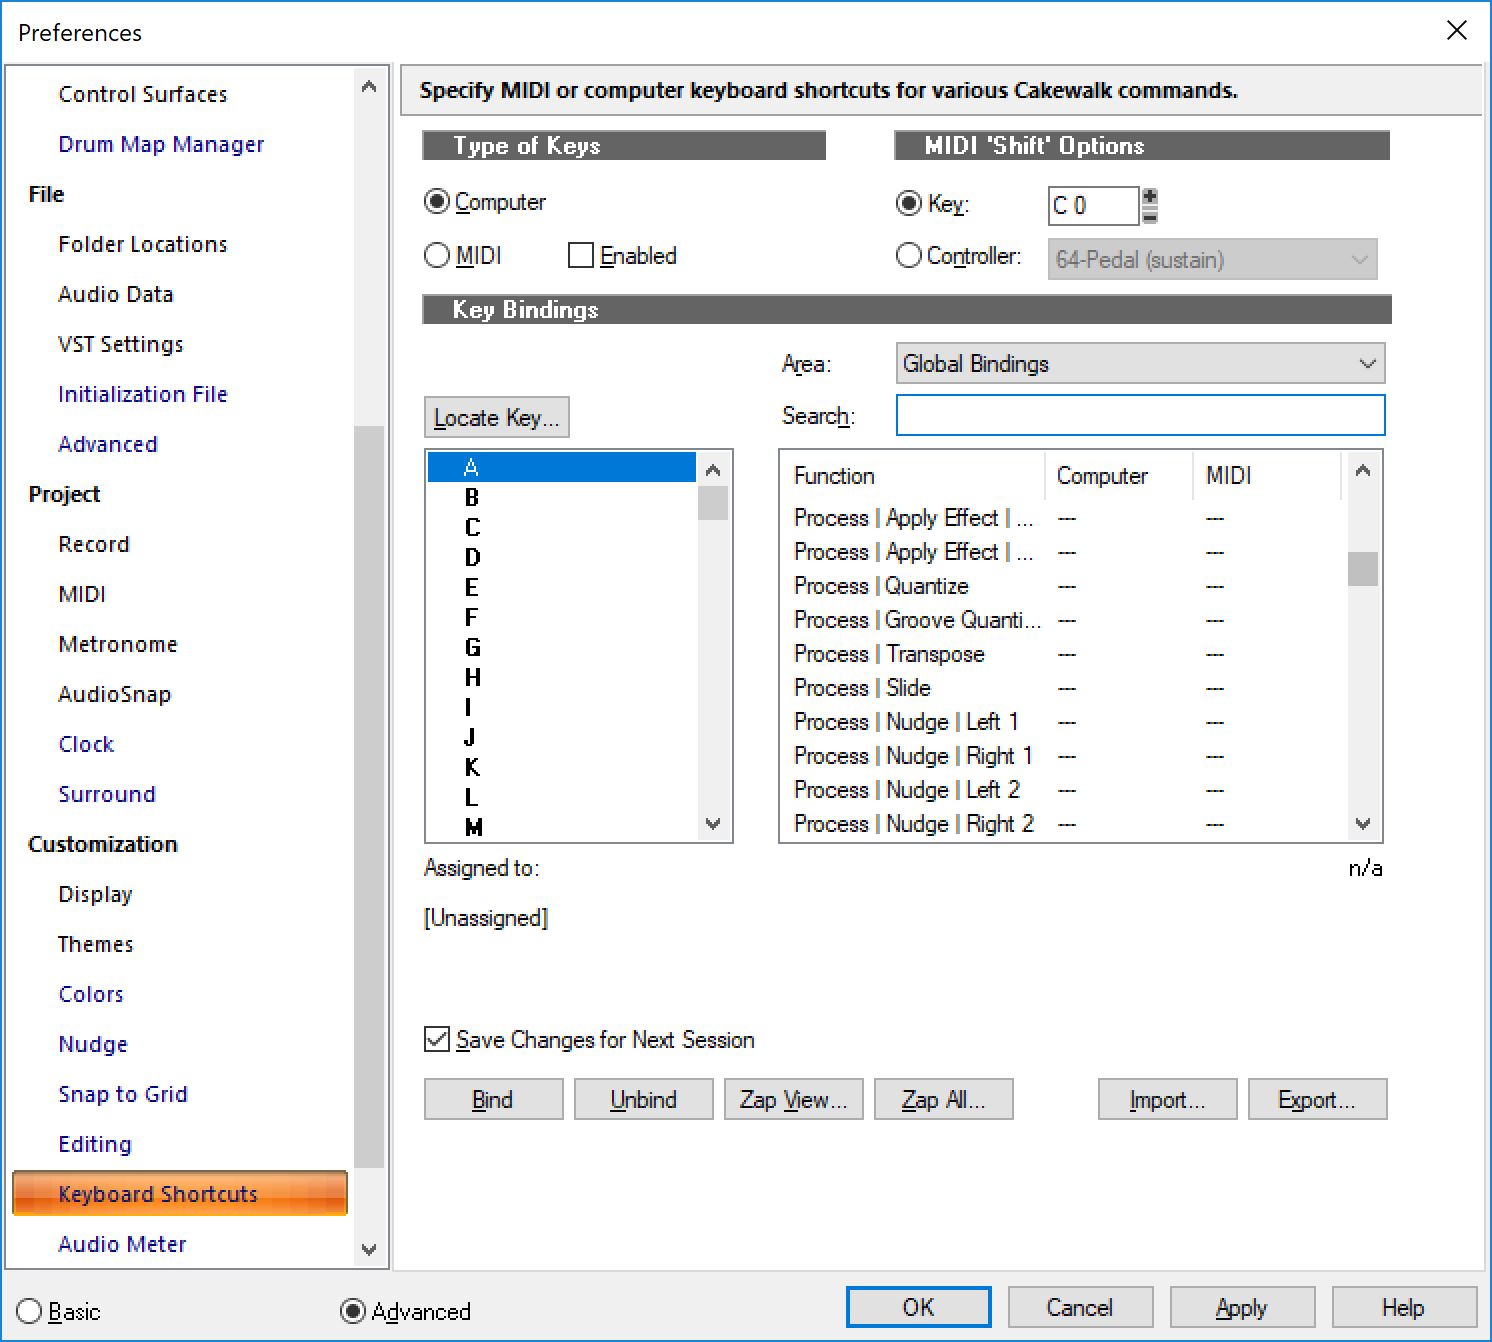
I'm conflicted. Cakewalk's keyboard shortcuts window is conceptually neat, but it's also deeply flawed.
You can search for shortcuts by key or by name, bind to keyboard and MIDI and import/export. There's also a neat feature that lets you use a MIDI "modifier key", so that you can send a MIDI note that allows use of a second layer of utilization. So C1 could do something, and C1 + C2 could do something else.
The issues I have:
- TERRIBLE default bindings - The default bindings are some sort of next level trash. A number of useful functions are unbound, and useful functions (like tools) are bound to overlapping keys.
- Multiple Layers - You cant search just everything. You need to know if your binding is global, console, event list, step sequencer, etc... etc... You're left to browsing 18 sub-layers of shortcuts by hand.
- Slow - the keyboard shortcuts window is slow to load, slow to bind/unbind and slow to switch "areas".
- Corruption - I've had my shortcuts corrupted once, that's more times than I ever want it to happen. I've never had this happen in any other software. I've lost bindings due to my own idiocy, but never had bindings corrupted on save.
The Keyboard Shortcuts window is a necessary feature that's only half-done.
CD Burning
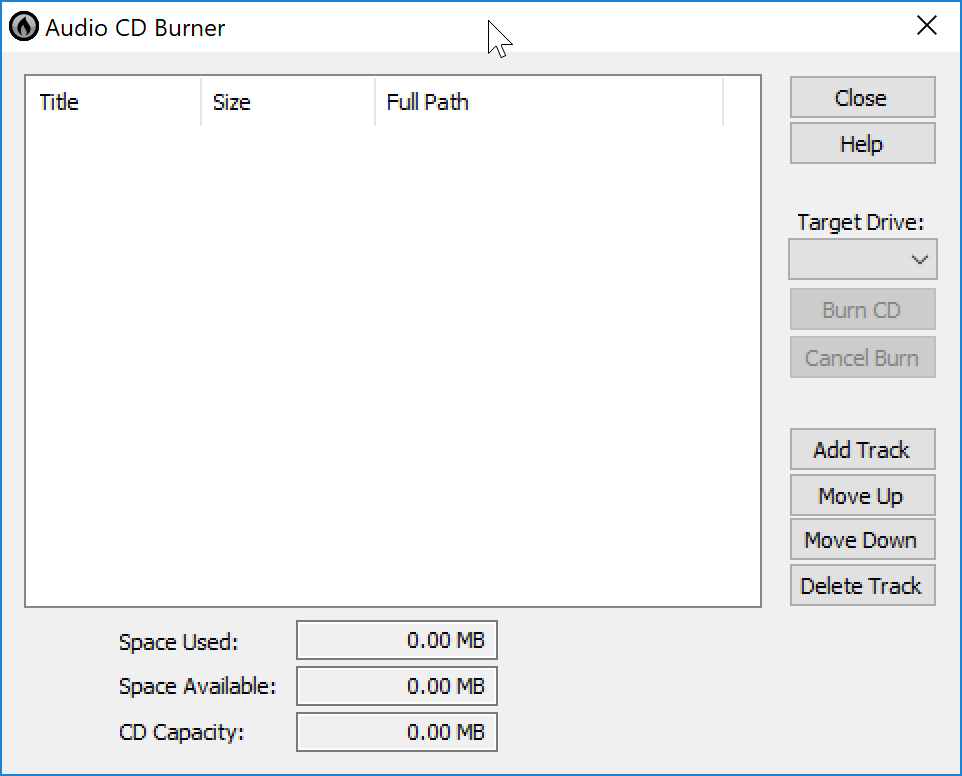
I can't review this because I don't own a cd/dvd drive, let alone a burner. I don't miss CD/DVD drives at all. Good Riddance.
Loop Construction
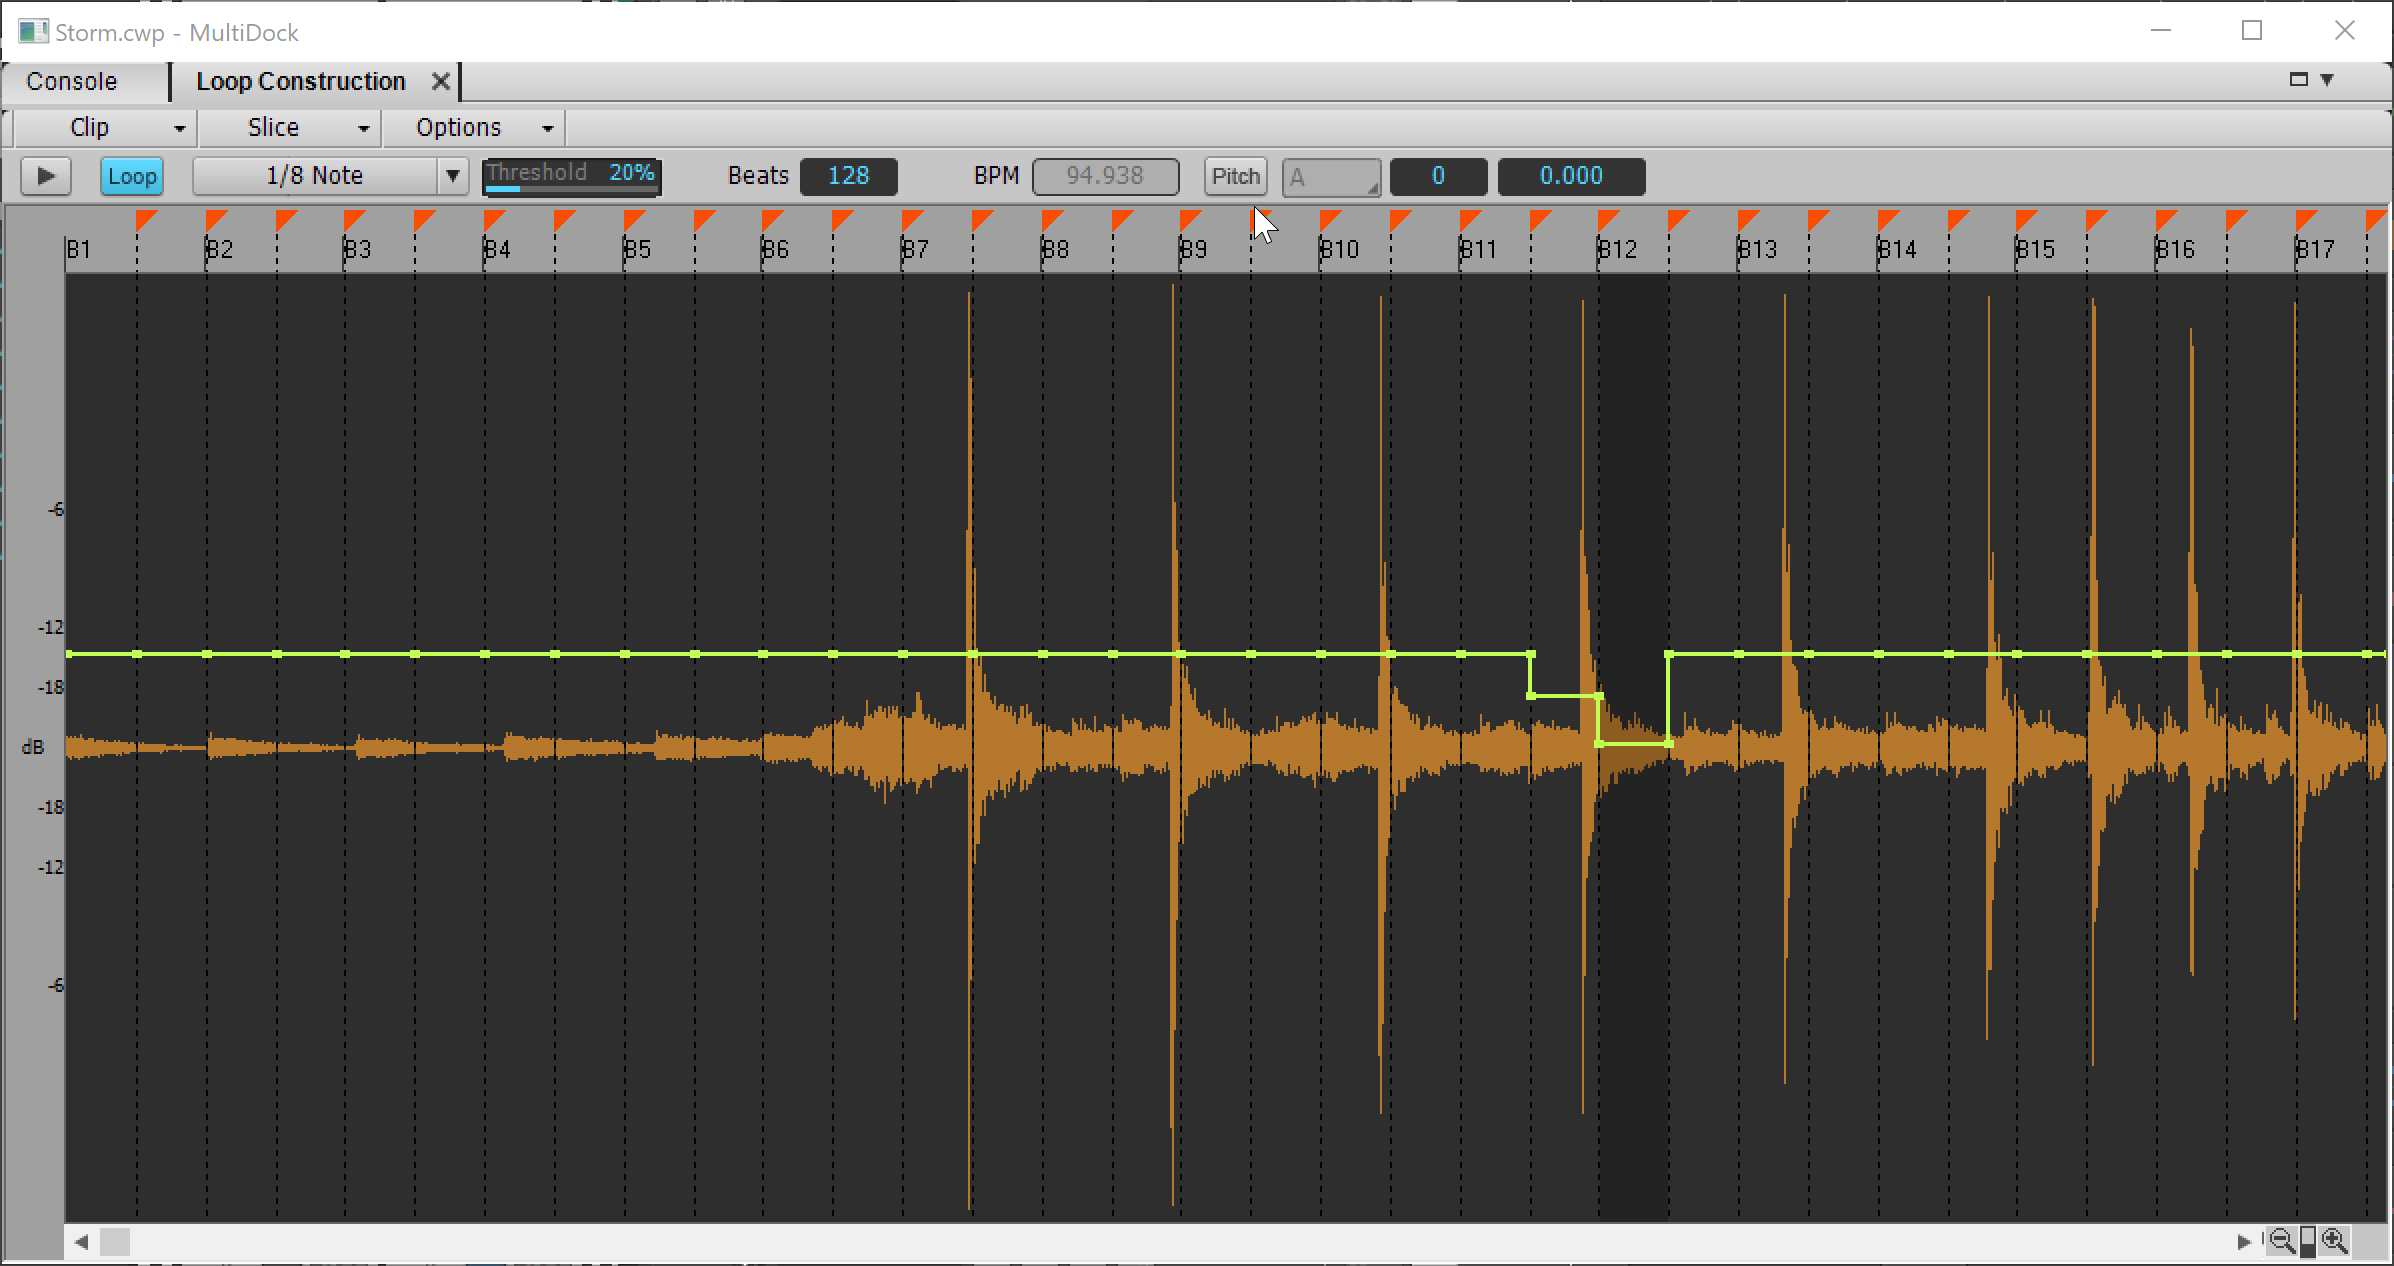
Loop construction is where you create "Groove Clips". They are sliced or stretched so that they can conform to the project tempo. You can edit pitch/pan/gain of the slices as you want as well.
The pitch of a loop can be set so that it transposes (within capability) as well. This data is written to the file so that it can be utilized when using the browser to preview files.
Files that have been groovified are shown with rounded corners in the track view.
It's an interesting tool, but I found that it did a poor job of transient detection and tempo detection unless the file was immaculately recorded and sliced.
I don't know of any product that does this well. Even the original Recycle or Acid have similar issues. Perhaps criticizing loop construction isn't fair since nobody really has done this right yet.
Plugins
Effects
Sonitus Compressor
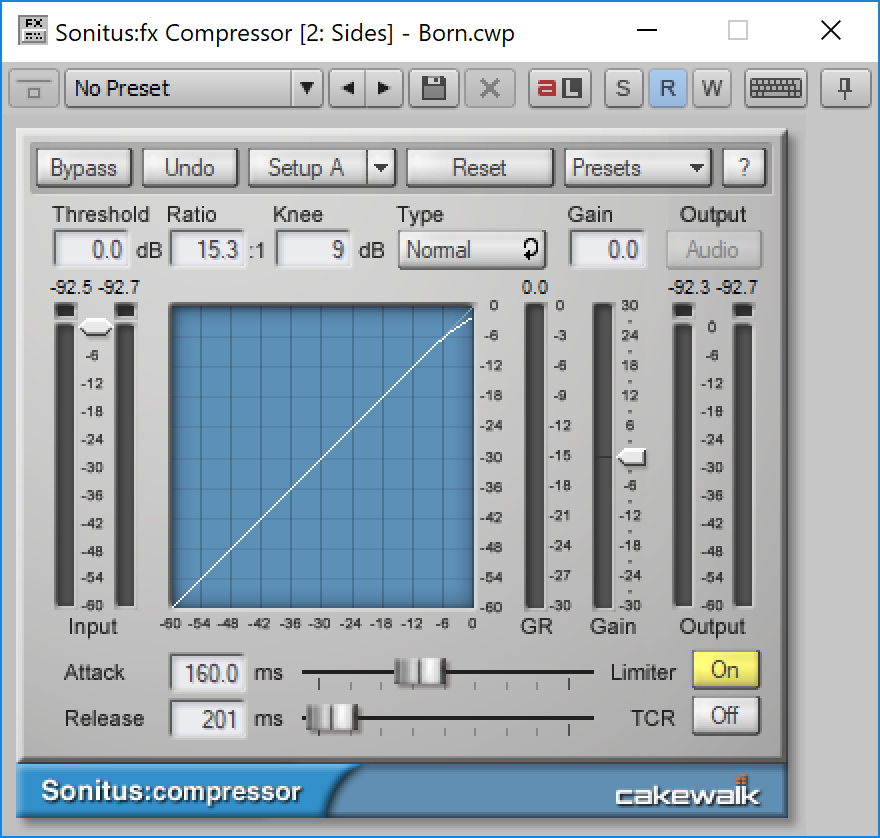
Ahhh my old love. I used to use the Sonitus Compressor obsessively before they were bought out. I still have my original license that I used as a DX plugin.
It's versatile and easy to use. Brilliant plugin back then...
These days with oversampled compressors that have various modes or more technical parameters, it's a bit lacking, but as an included stock plugin I think it's more than sufficient.
Sonitus Delay
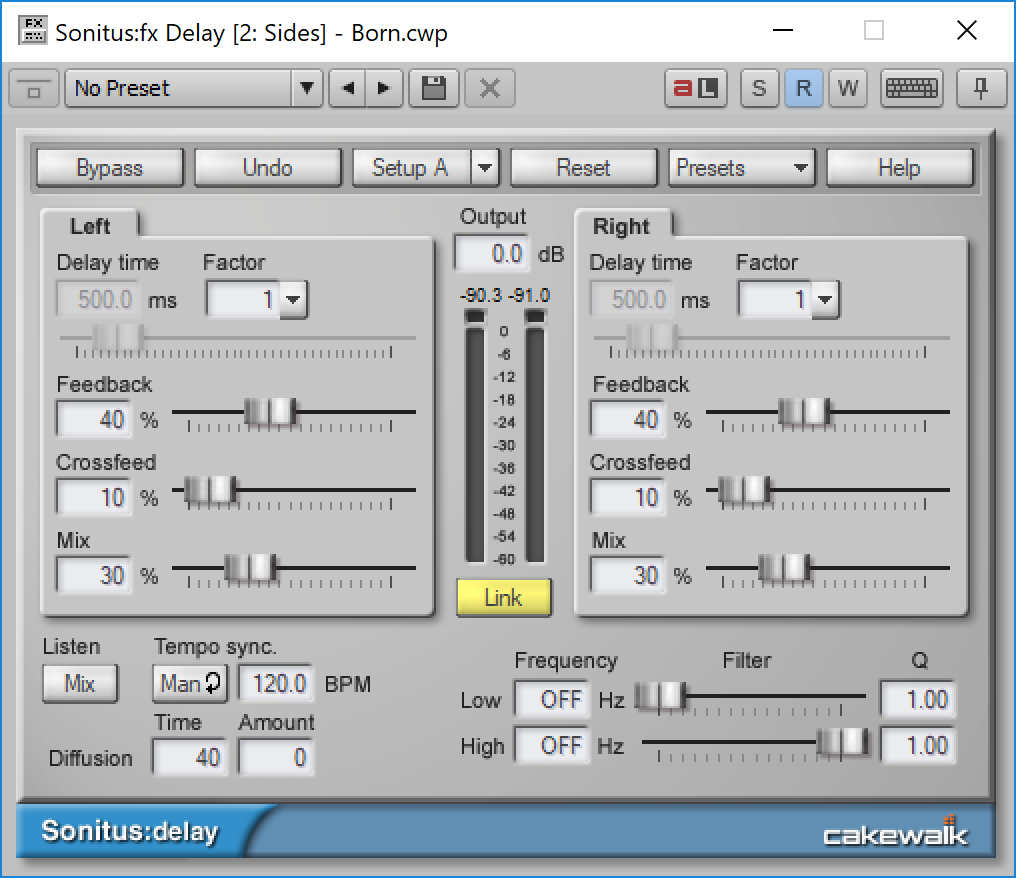
A competent delay. Not much more needs to be said. Nothing fancy here at all.
Sonitus Gate
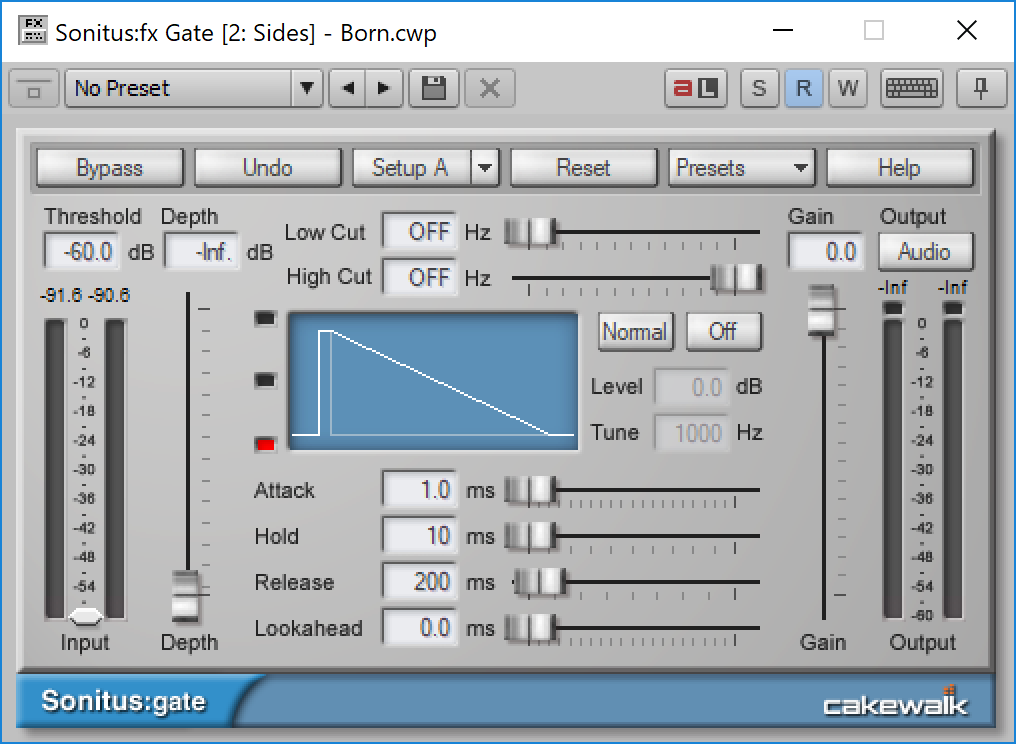
Sonitus Gate is a simple gate that is easily surpassed by other free options on the market. I see no reason to use it other than nostalgia.
The envelope characteristics lead to less natural results than you can get with other products.
Sonitus Multiband
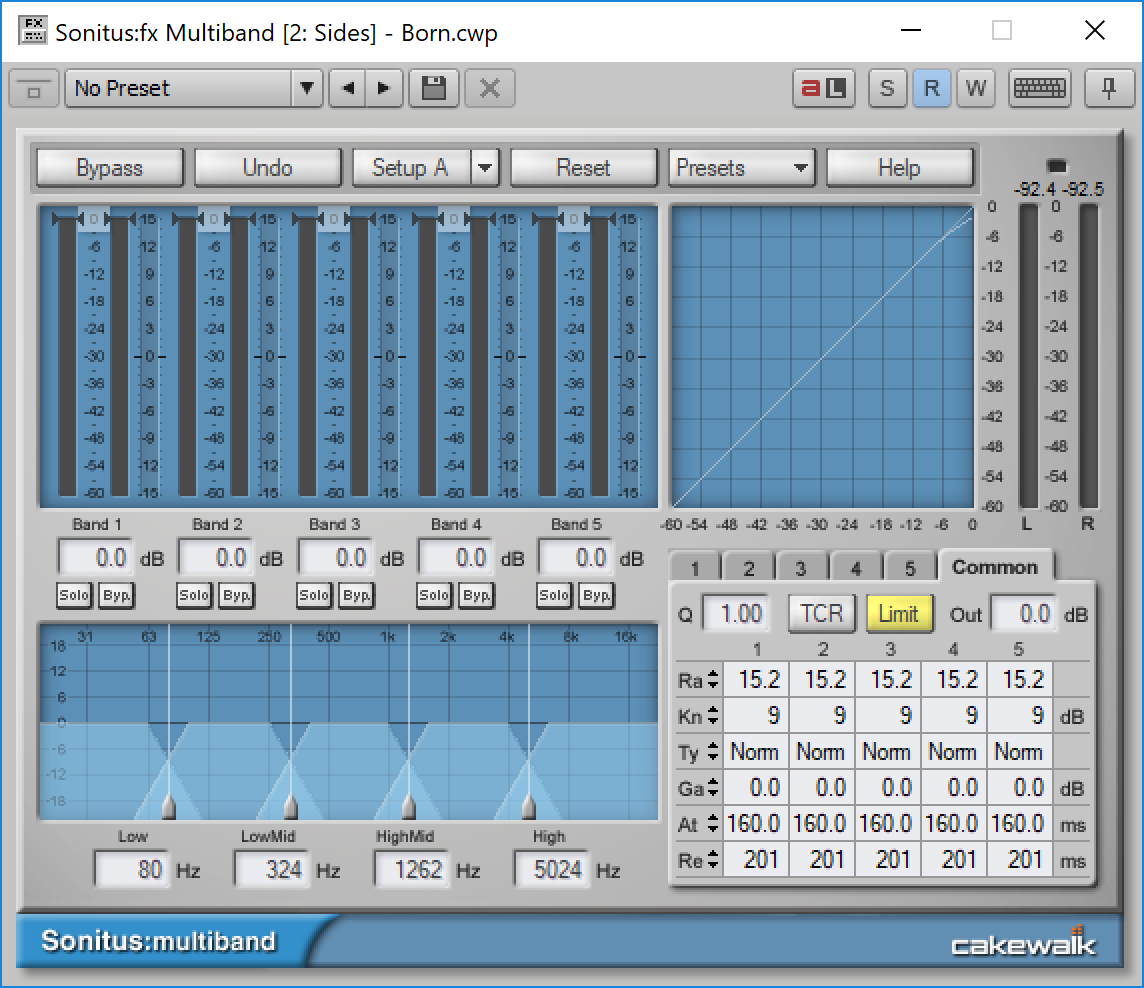
A difficult to use multiband compressor that's once again surpassed by free and cheap options elsewhere in nearly every facet.
Sonitus Equalizer
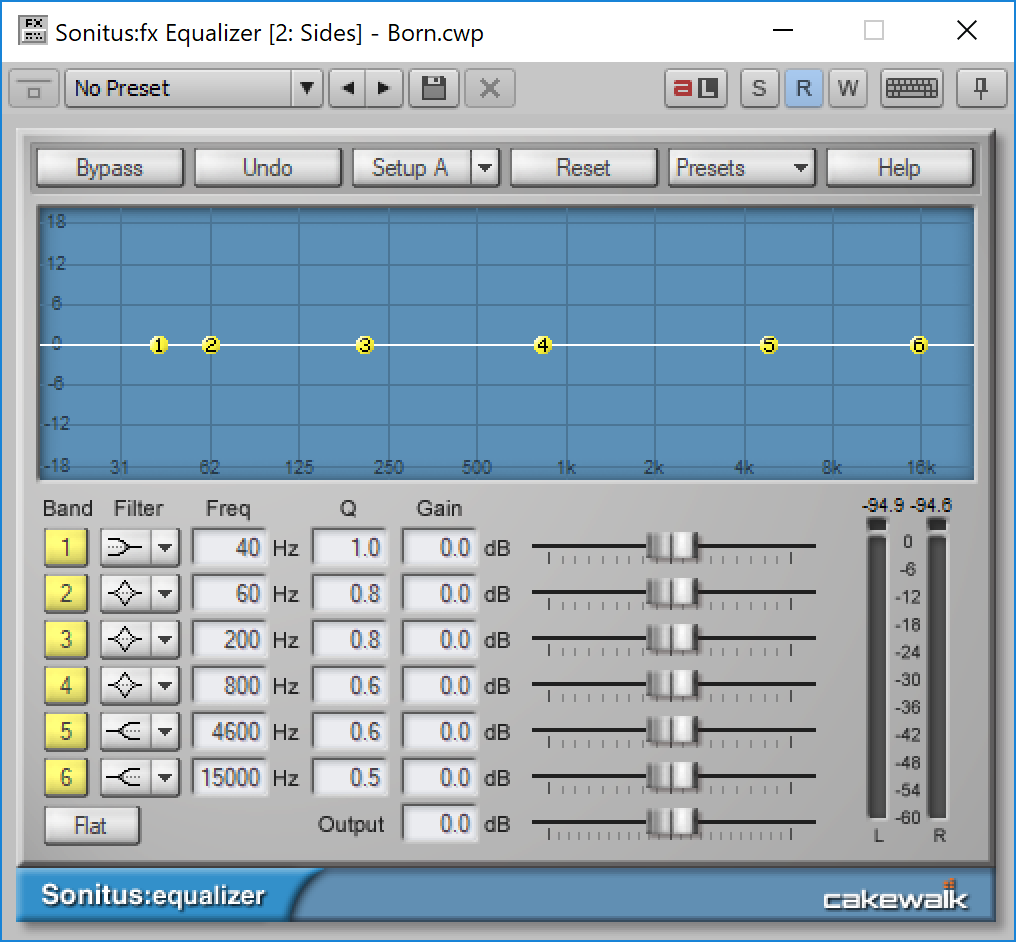
Simple 6 band biquad equalizer. Bleh.
Sonitus WahWah
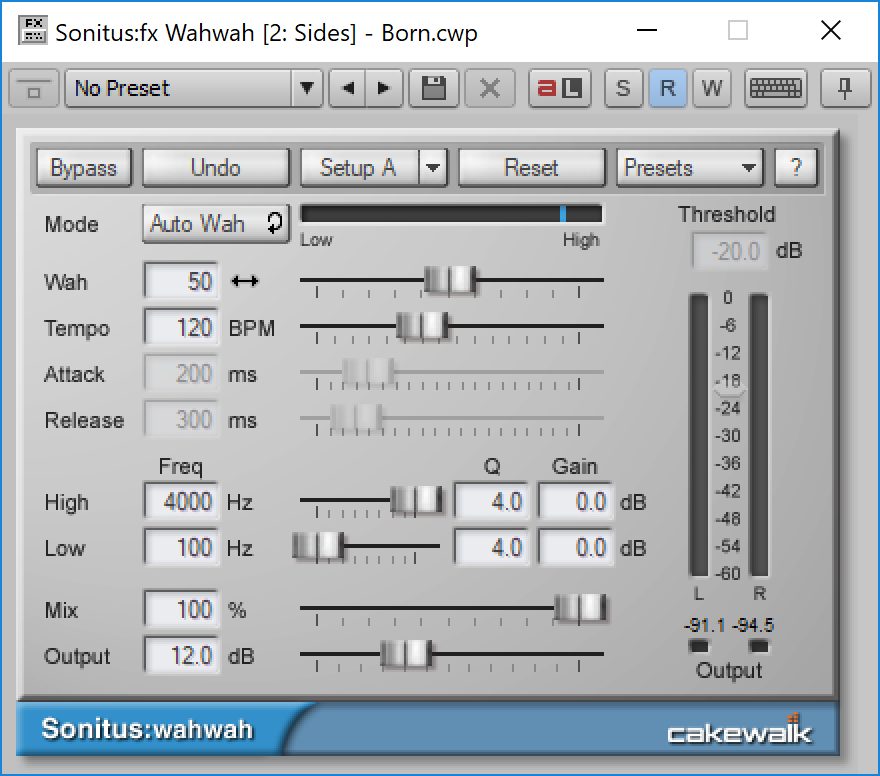
Grainy sounding wahwah with an autowah setting that doesn't react as sharply as I want it to.
Sonitus Modulator
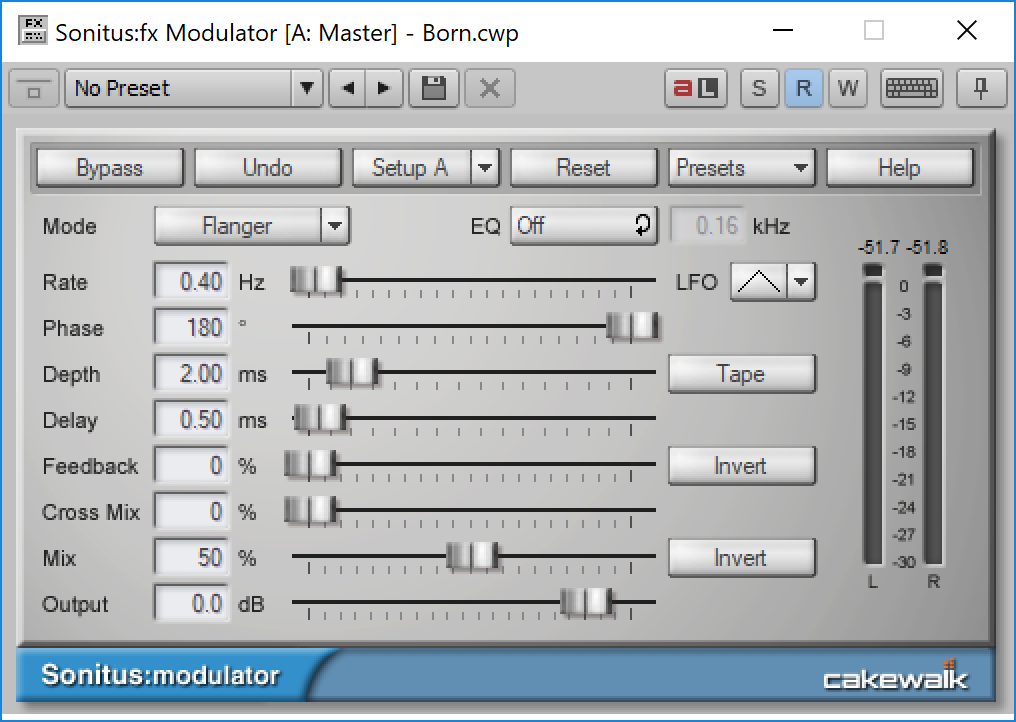
Flanger, Phaser, Chorus, Tremolo. Simple versions of each. Nothing exciting except for the tape mode in the flanger which gives you more extreme sounding flange.
Sonitus Phase

Now this is a cool inclusion. I don't know of any other DAW that comes with a product like this. Phase rotation with both IIR and FIR options. You can rotate the phase of your audio to deal with cancellation issues that crop up when multi-micing sources.
Cool.
Sonitus Reverb
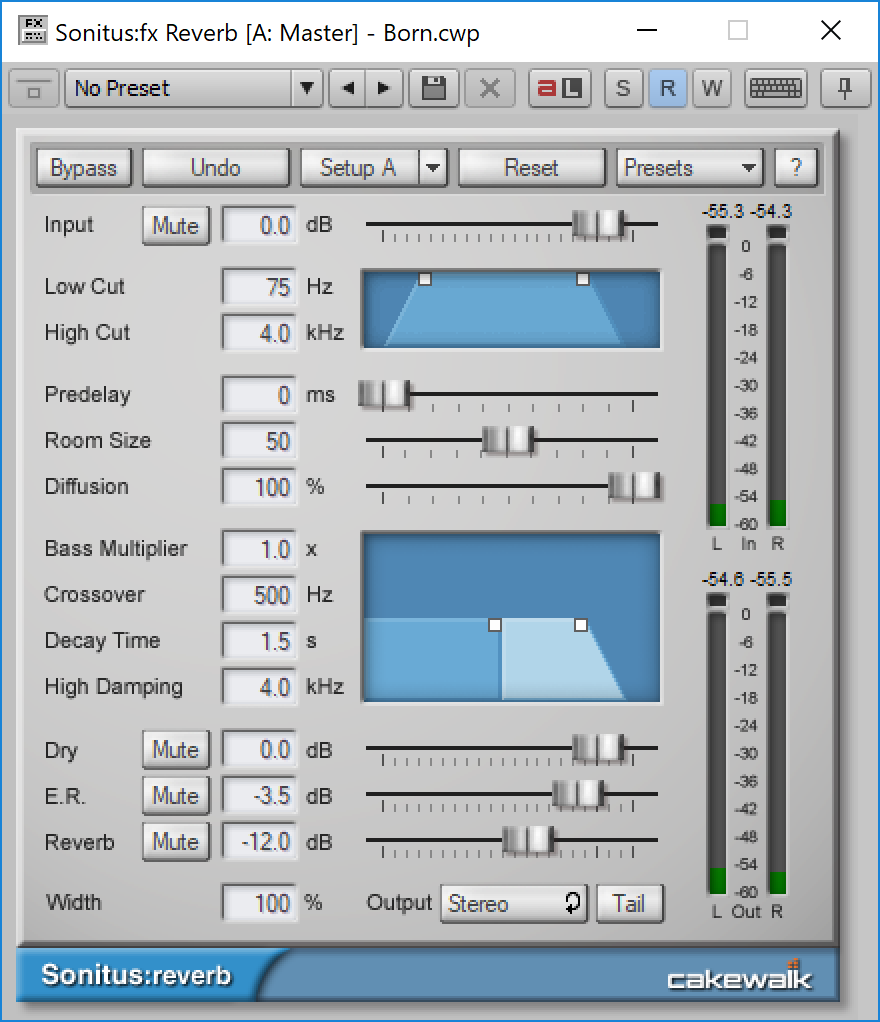
Sounds exactly like I remember: thin. No thanks.
Sonitus Surround
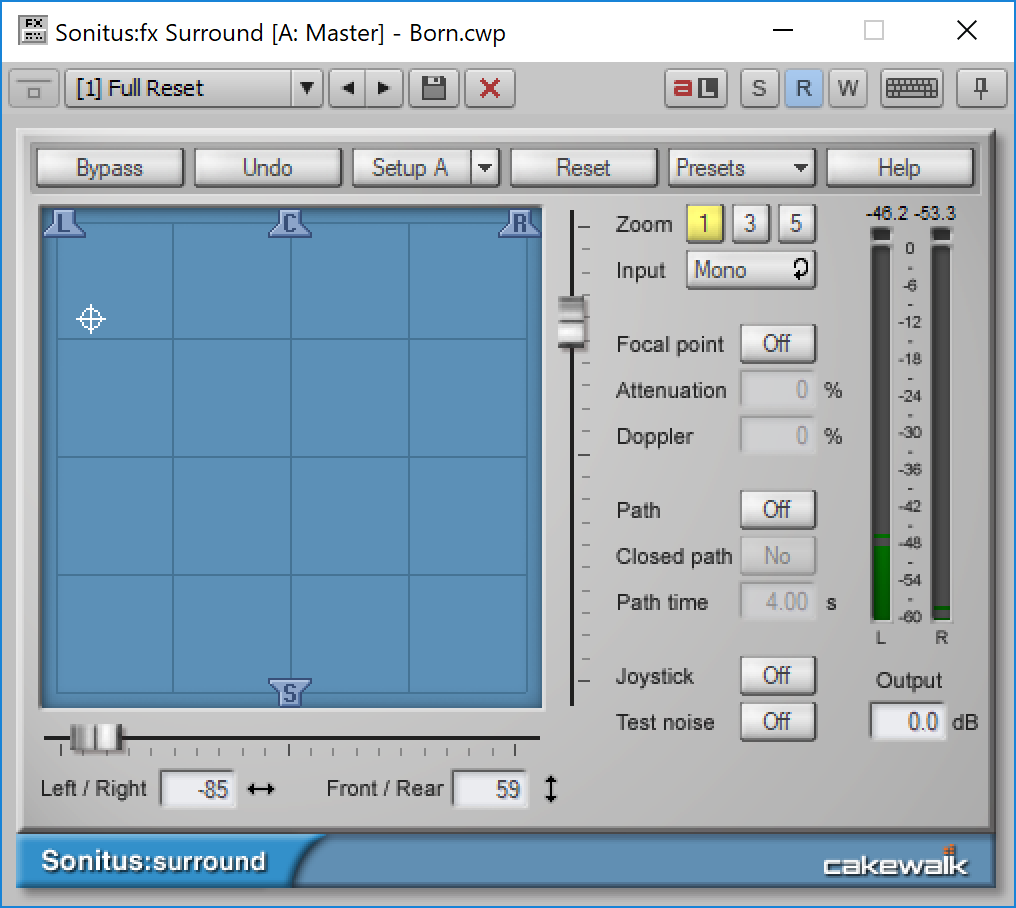
I don't use surround, so I have nothing to say.
Sonitus Surround Comp
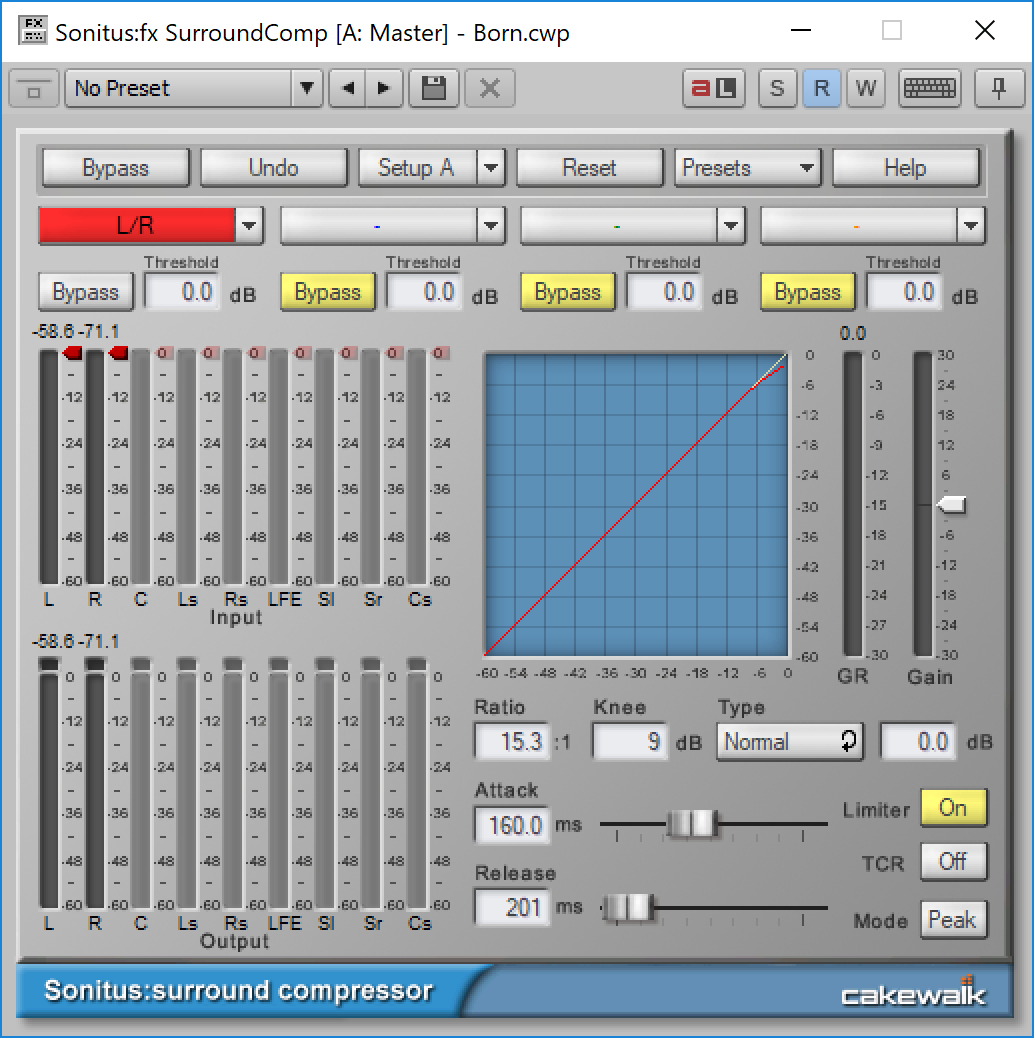
I don't use surround, so I have nothing to say.
BREVERB 2

Fantastic reverb plugin that could warrant its own reverb. The Cakewalk version is missing some "spaces" and presets (obviously), but the Hall and Room modes alone are perfectly fine for most uses.
There's also fewer parameters for adjustment. Each of the modes is missing 2-3 parameter panels, with some knobs missing on each panel.
It doesn't really matter. It's an awesome inclusion, and probably the best included Reverb along with Apple's new Chromaverb. It's not as fun to watch as Chromaverb though :)
TH3
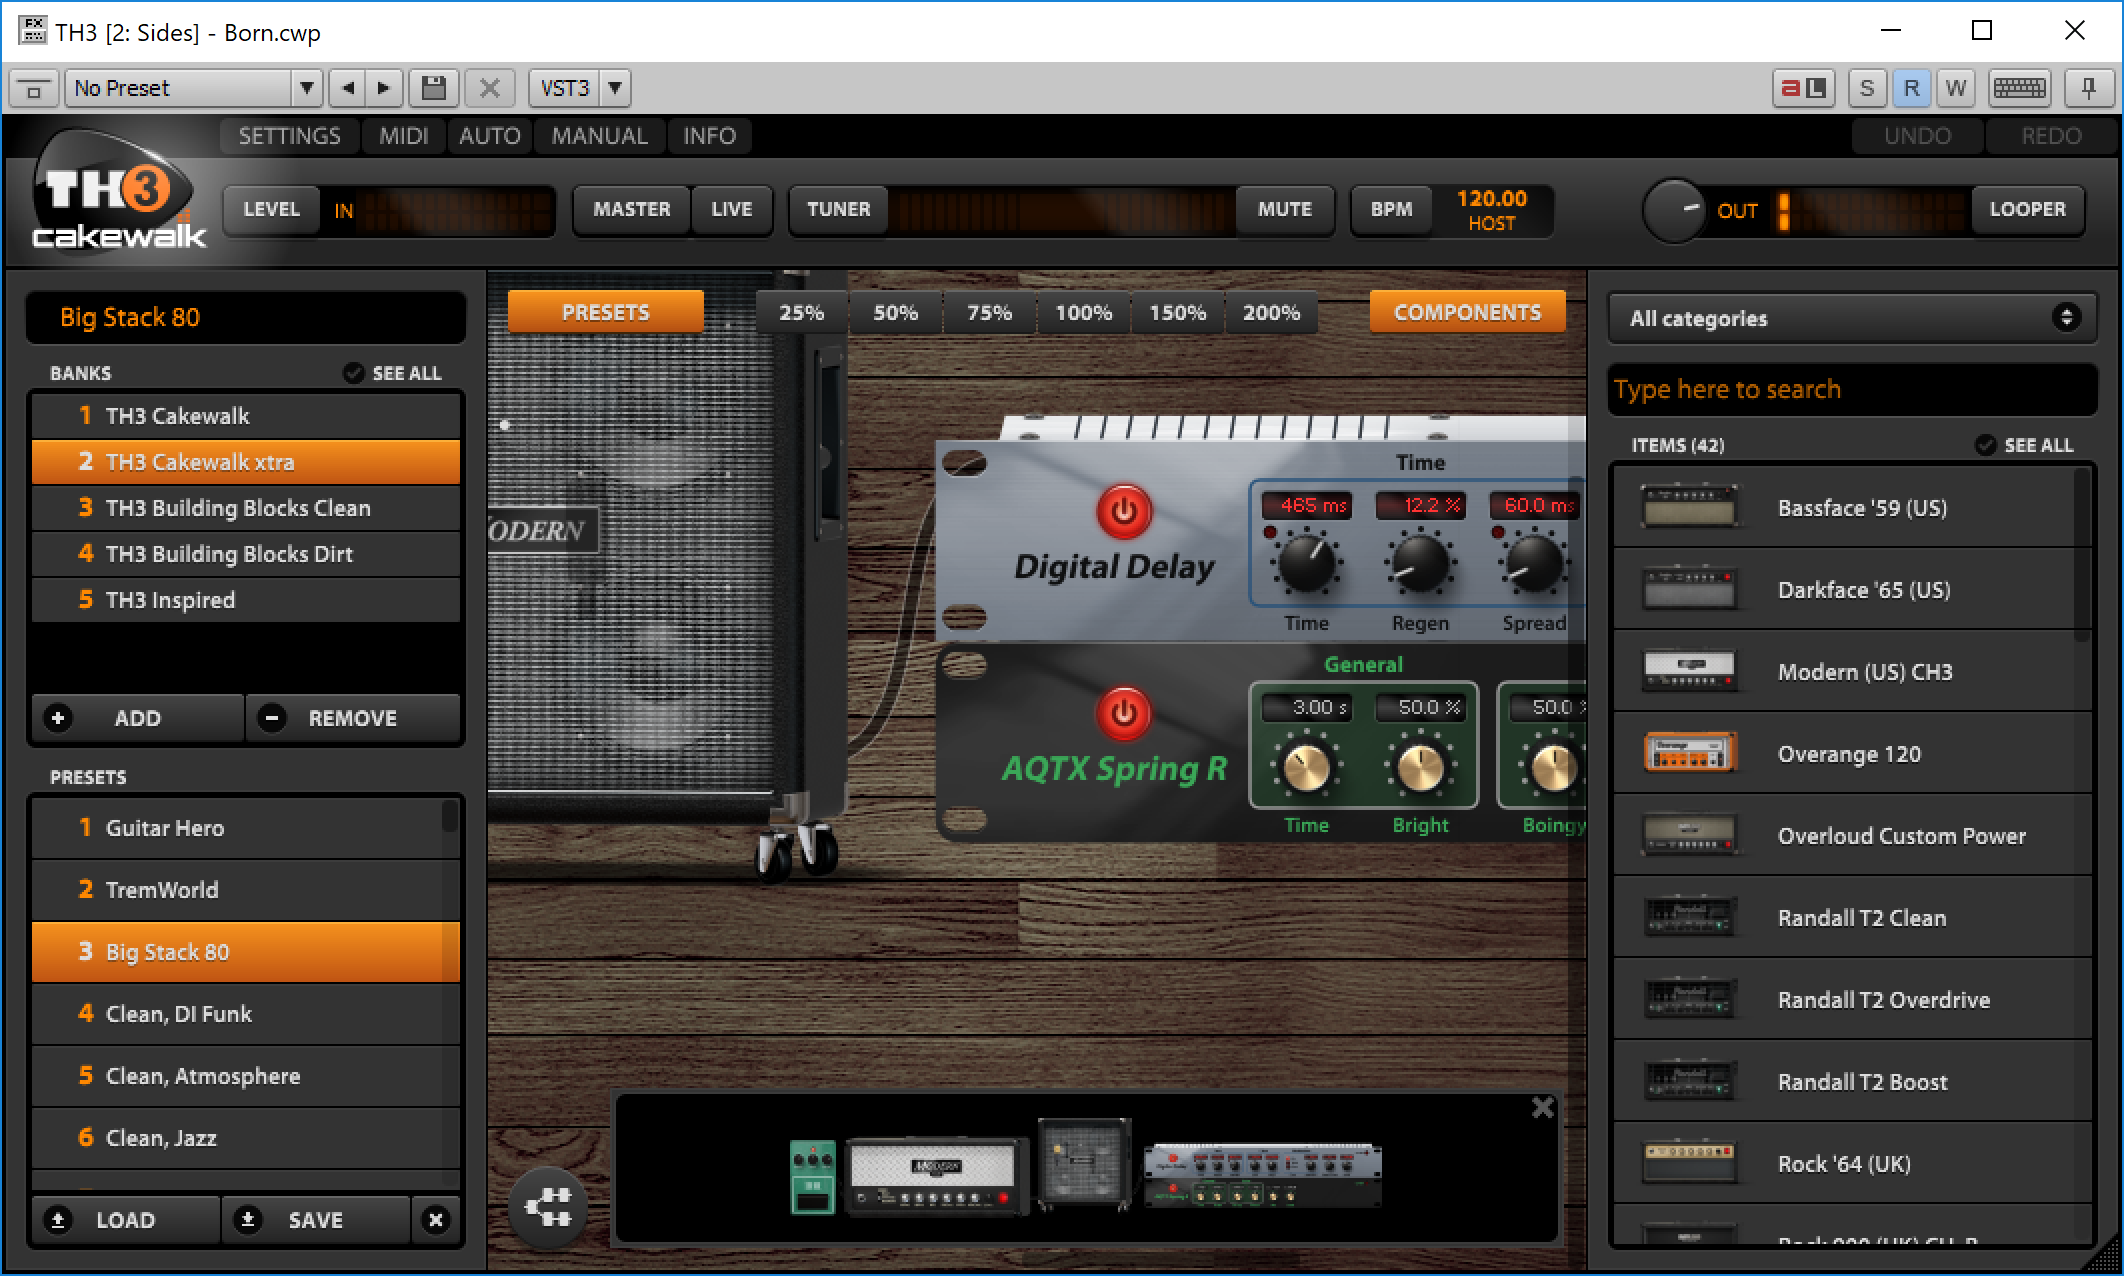
Alright, I might get some hate here, but I dislike TH3. I really dislike it. All of the models sound too forward, the presets are far too loud, and browsing your 'components' is a pain. The Fender models in particular sound completely wrong to me, and I have most of those represented in my studio to compare with.
The Cakewalk version is missing components as expected, but it's not much of a loss. It's like losing that McDonalds receipt that you were going to throw away anyways.
It's almost a downside that TH3 is included. It's a neat idea, but... not a fan.
Boost 11
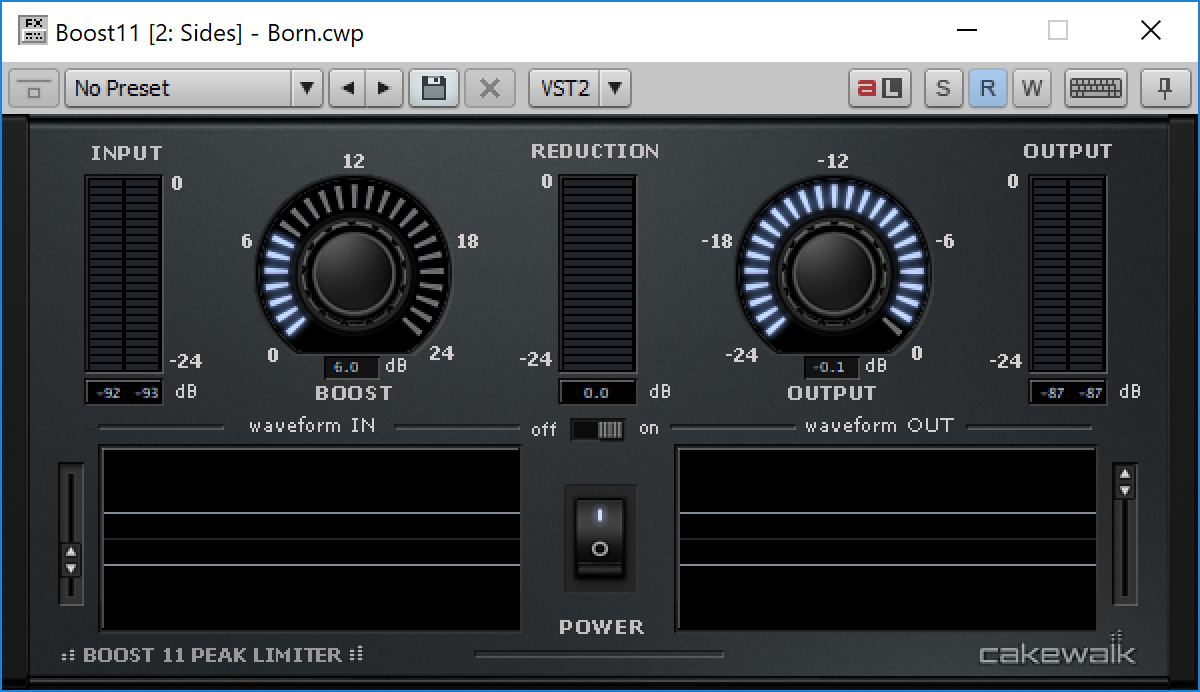
Eh. It's a brickwall limiter that doesn't sound too bad. If you're looking for those disgustingly loud -4LUFS levels then this won't get you there. Sensible target loudnesses are easily acquired with Boost 11.
I think most folks that want aggressive loudness enhancements will be better served by third-party products no matter what.
FX Chain
It's just like the ProChannel FXChain except it can be inserted into a plugin chain.
There are more knob/button slots available and...
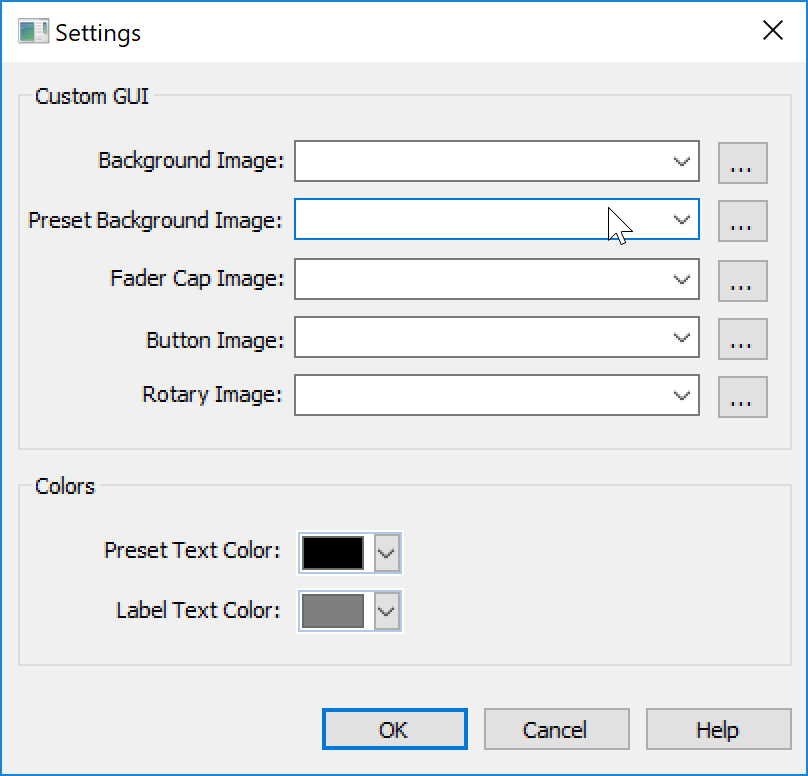
You can customize the look of the panel to create your own custom FX controllers.
Useful tool to have. My wishes are that it allowed parallel routing and had modulation.
External Insert

This is how you insert external gear into your signal chain. It uses Cakewalk's normal outdated "L/R" stereo (for many devices, if not all).
Sending audio out and back into your Interface incurs a delay. You can click the delay button at the top to try to ping through the devices and get an automatic delay value so the external insert will compensate that.
I found that this automatic compensation did not do a good job. It was usually off by 50+ samples, which is more than plenty to notice issues with multi-tracked sources (two mics on the same source, one becoming delayed). I checked this with a scope and was able to verify the correct timing within 1 sample, and the External Insert never got it right.
The interface is woefully outdated, it's difficult to use due to the I/O naming, and the automatic compensation is wrong. Oh bother.
Instruments
SI-Bass Guitar
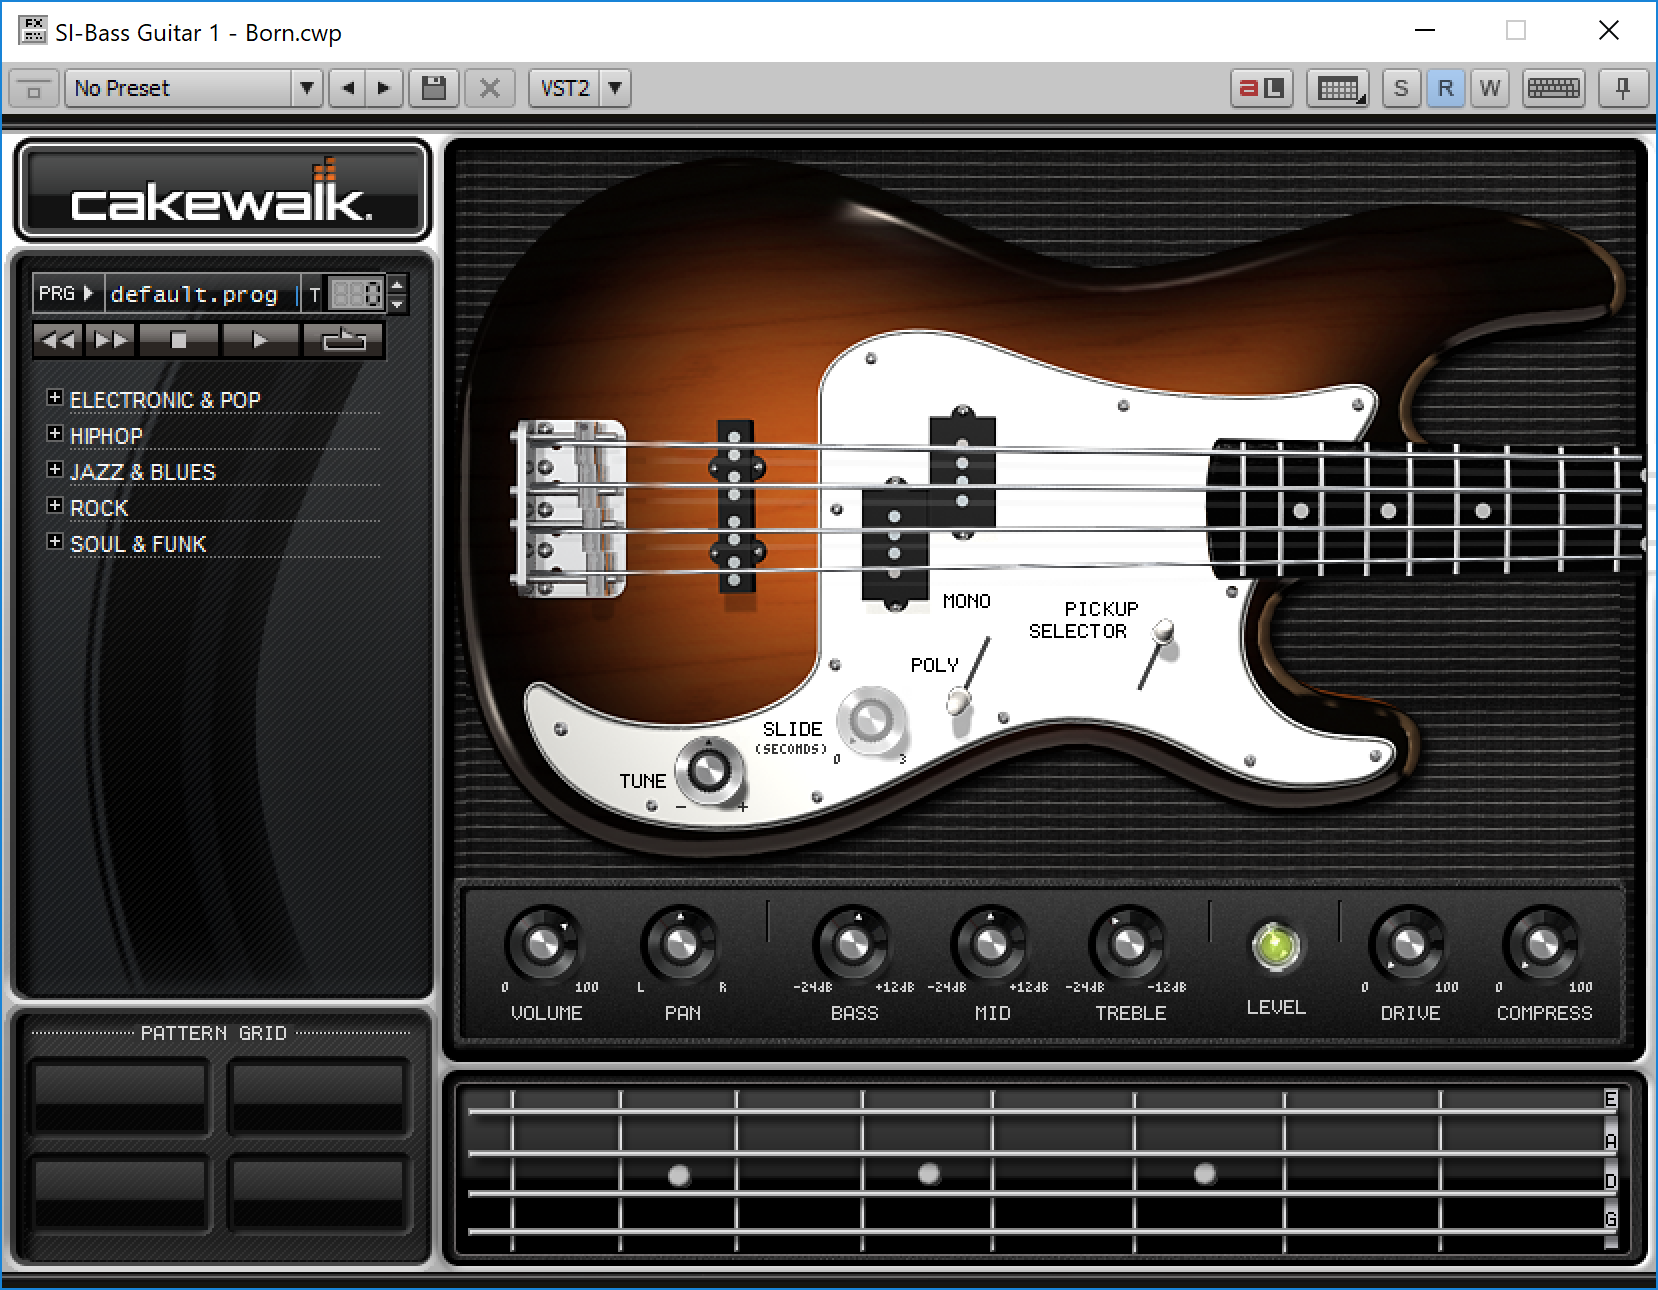
Ahahahahahahahahahahahahahahahahahahahahahahah
...
hahahahahahahahahah
Bass guitar. Nope. Not even close.
SI-Drum Kit
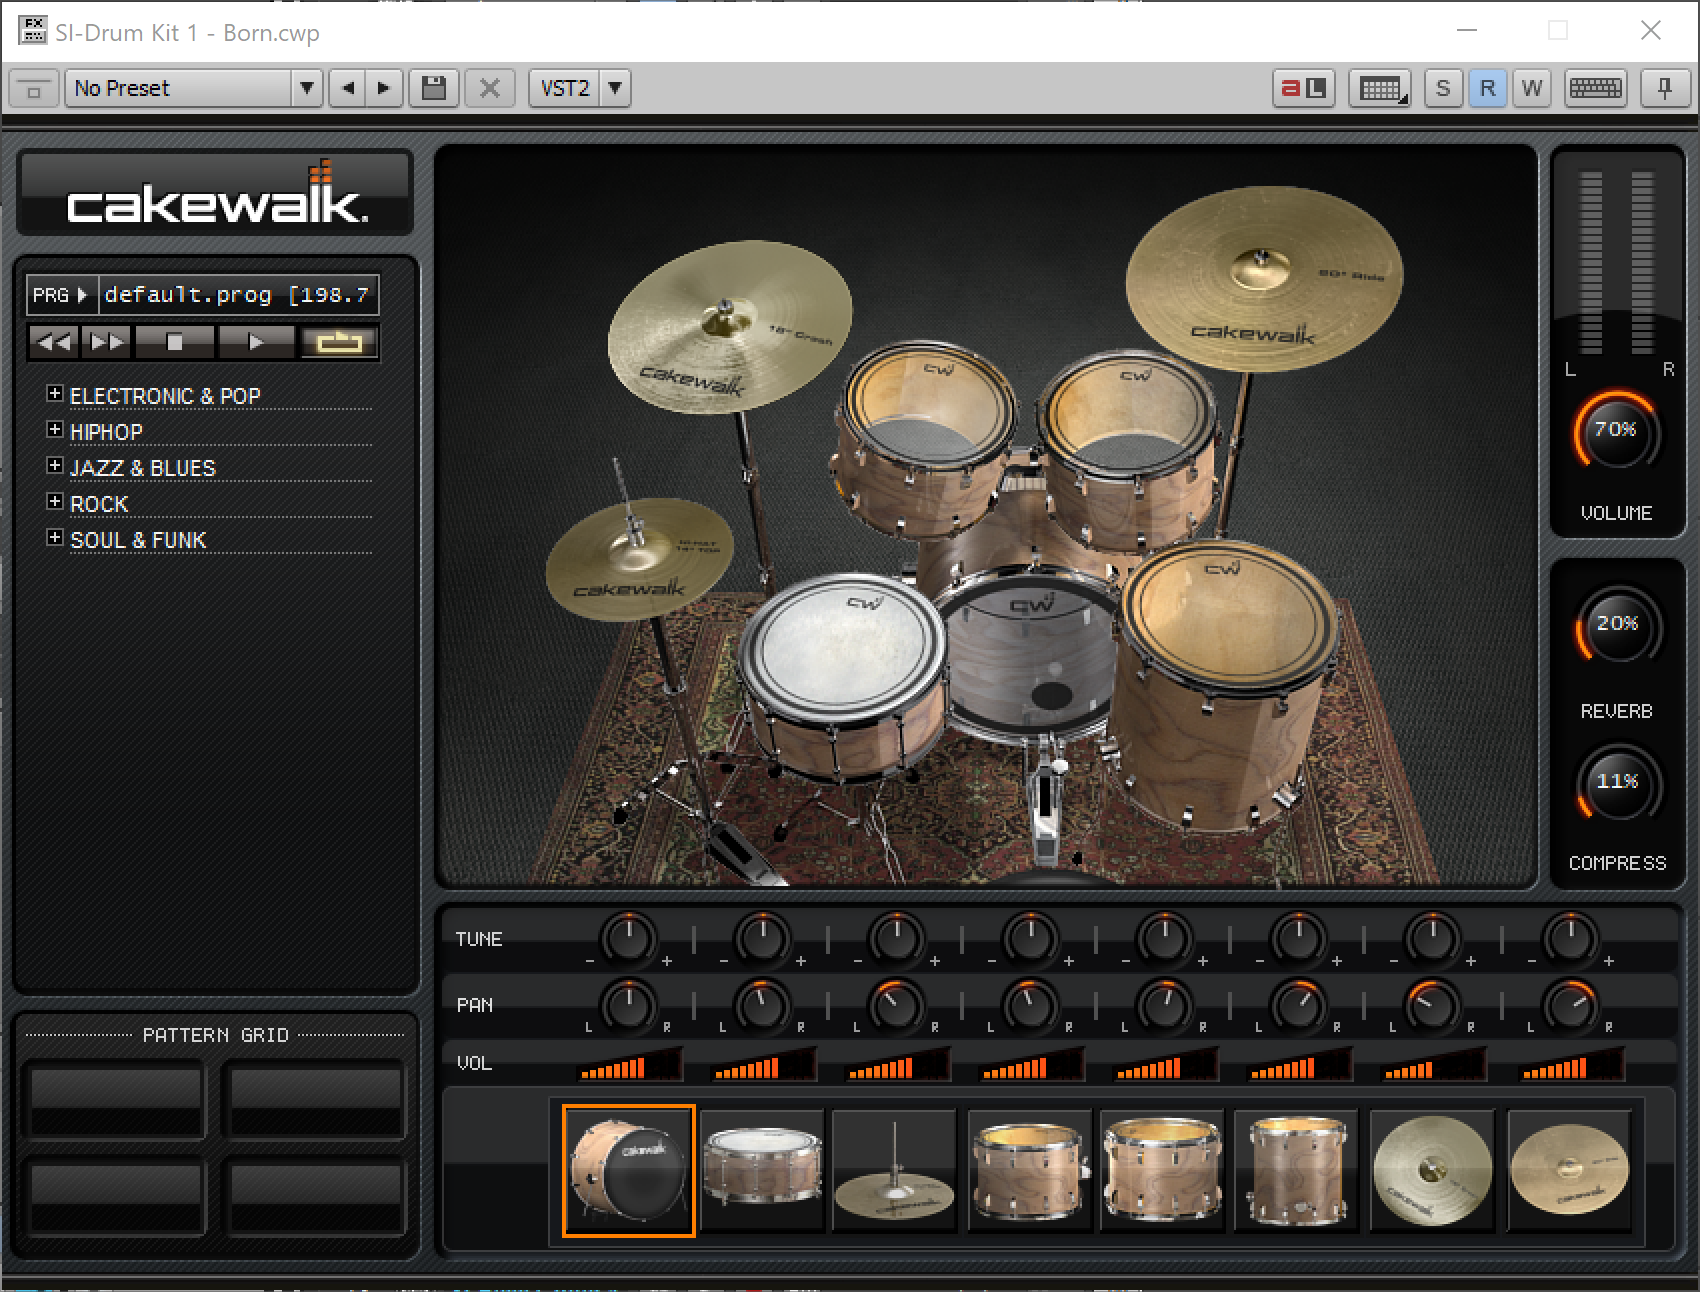
It goes well with the bass guitar!
SI-Electric Piano
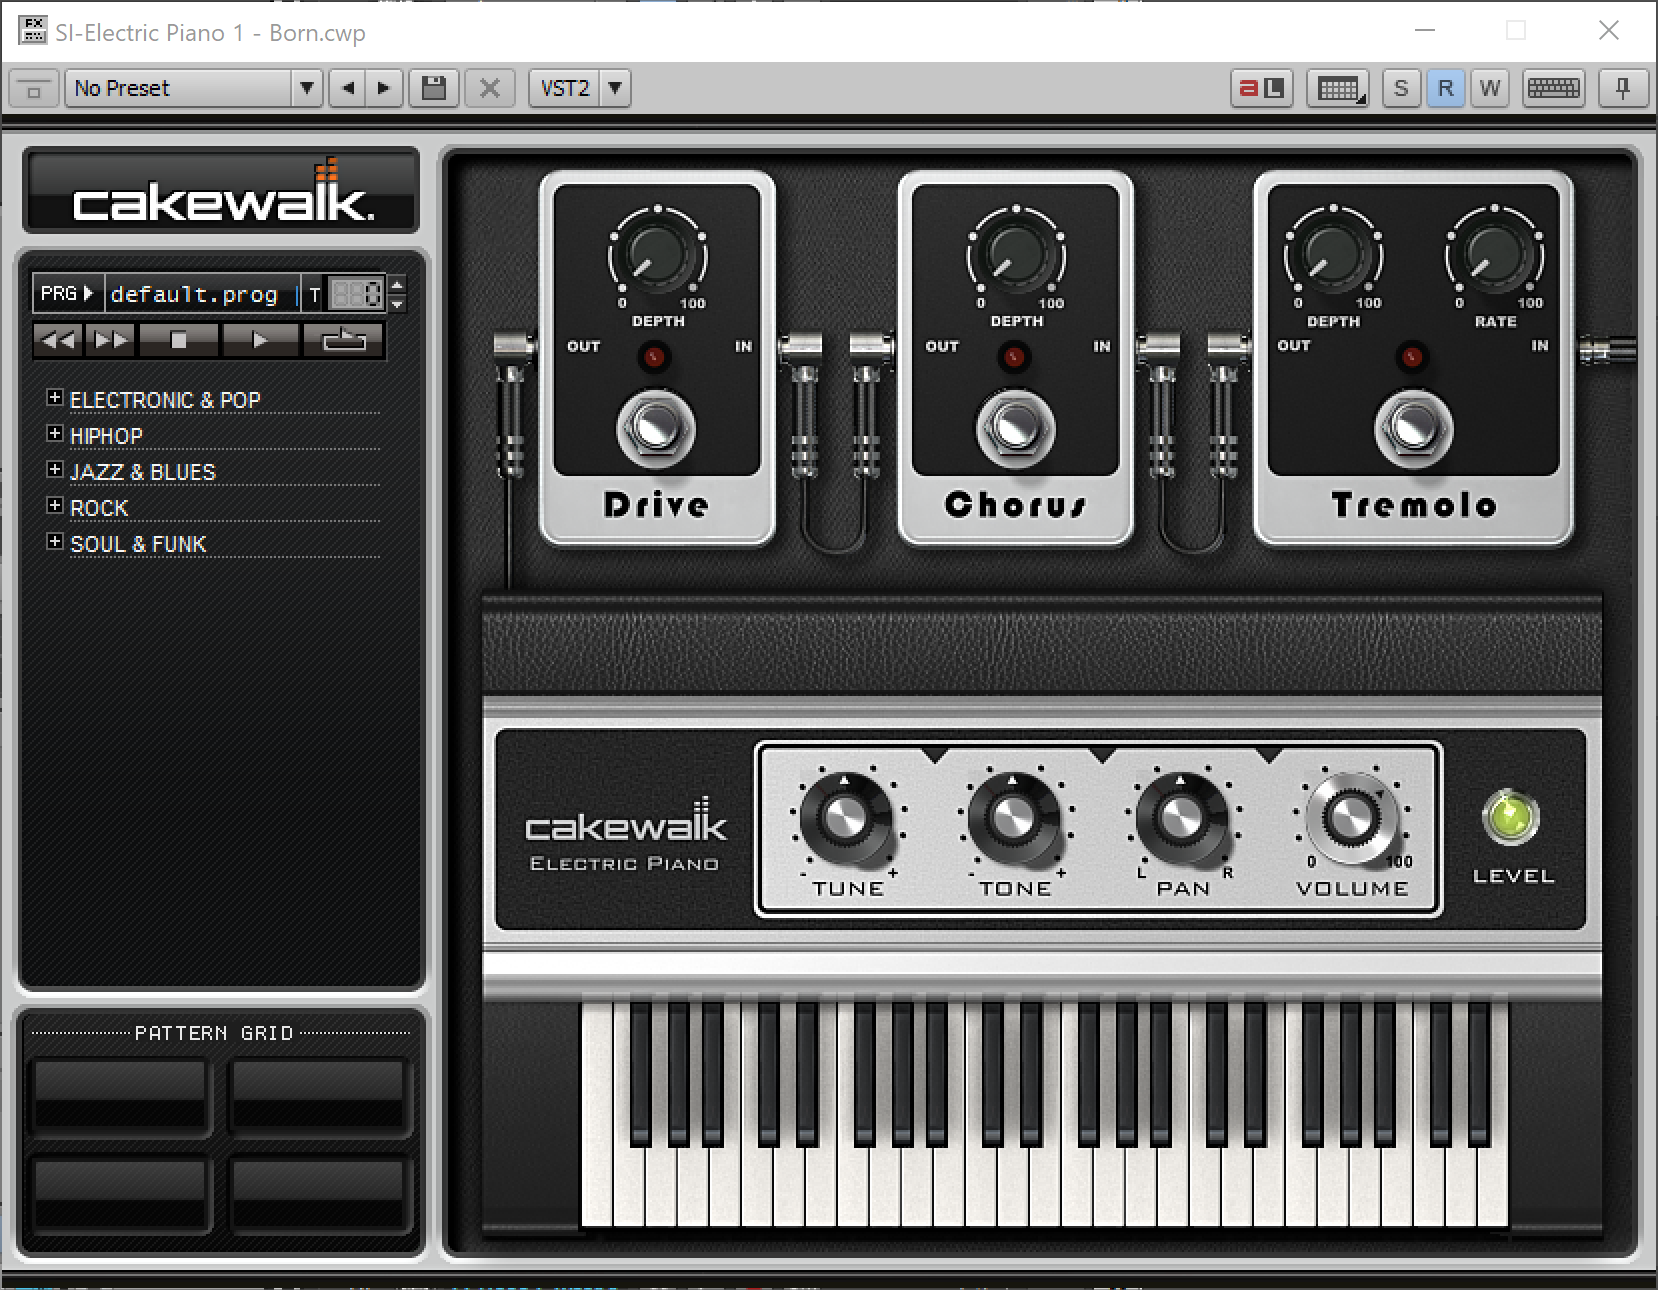
Electric piano is a simple instrument that can be emulated fairly well with samples and some post-processing. Yet this sounds dull and lifeless.
Difficult to mess up, but there it is.
SI-String Section
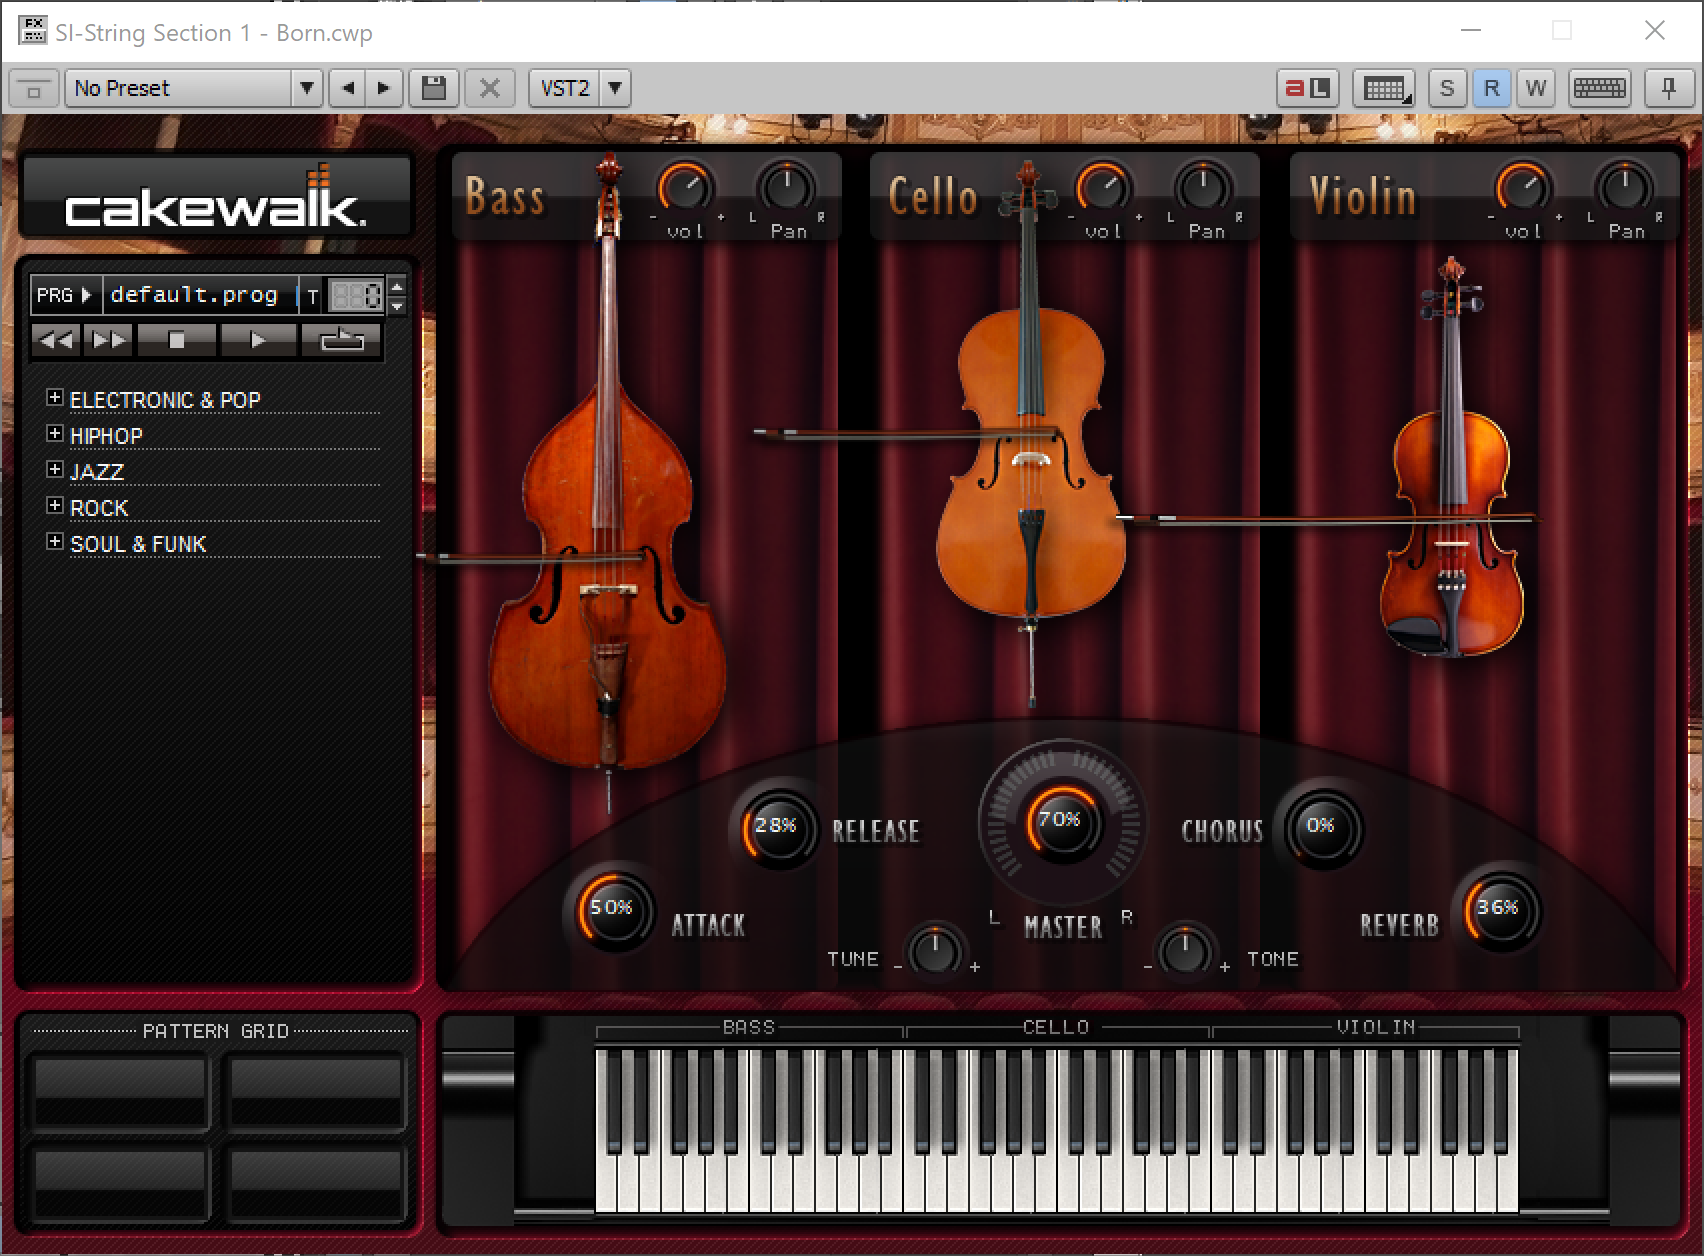
A string section for your 'bass' and 'drums'.
TTS-1
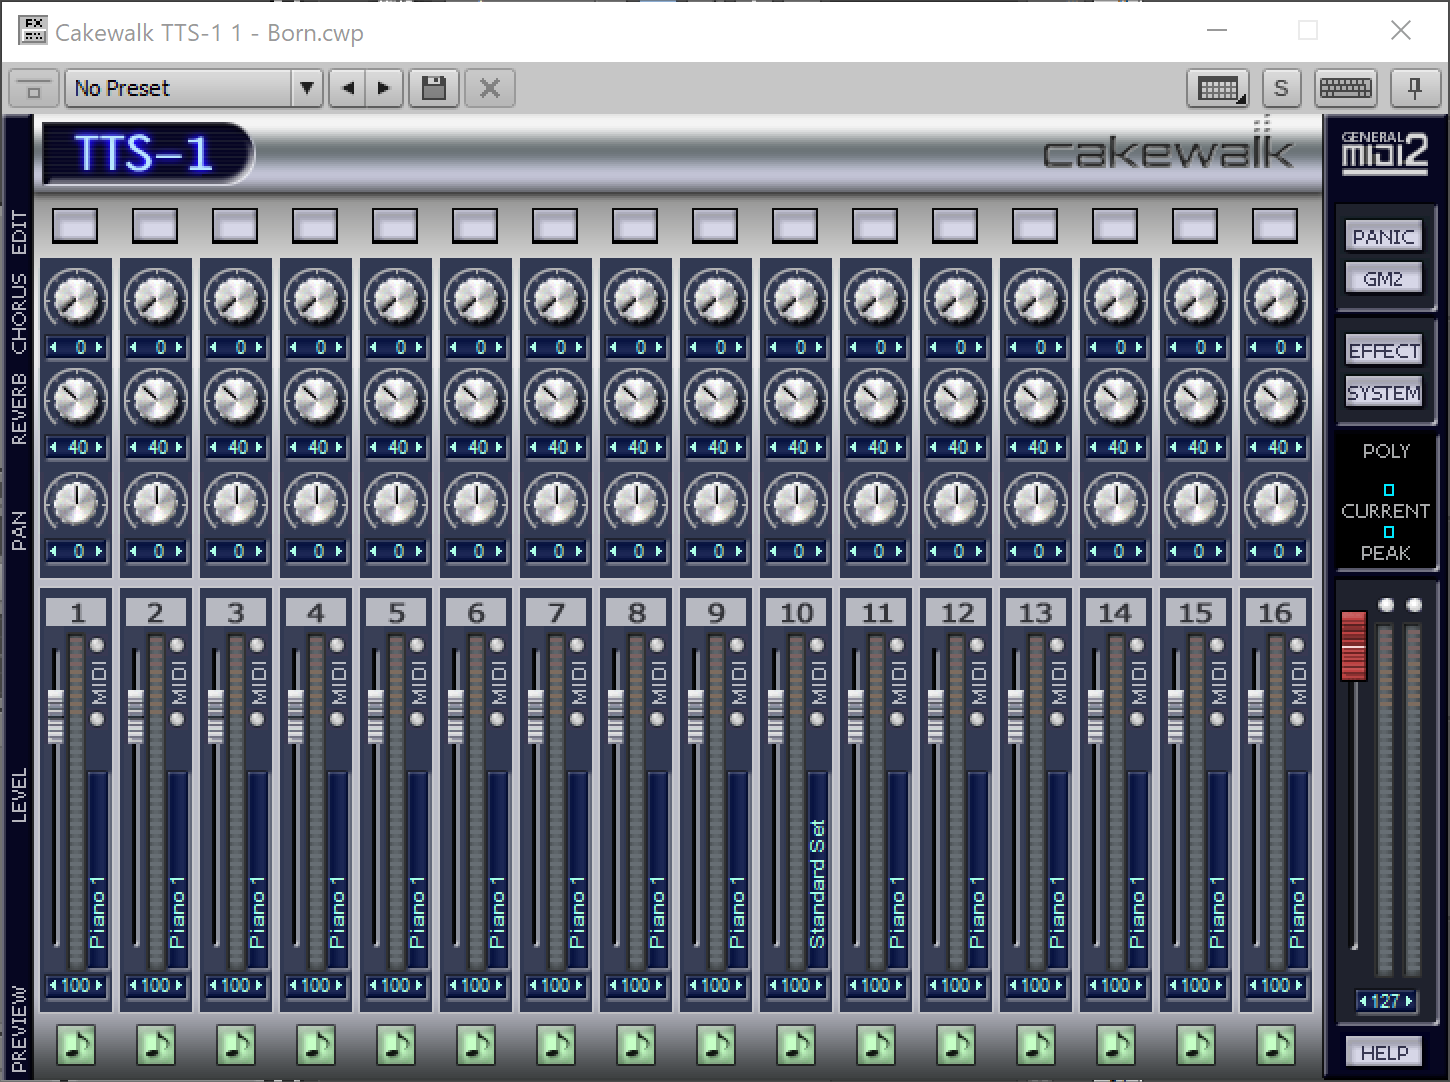
This is not meant to sound good. It's a general midi synthesizer and it does a fantastic job. You have a whole host of standard instruments and configuration options.
It most certainly doesn't sound good, but it does exactly what it's aiming to do. That's admirable and I'm sure many people have a use for it.
MIDI FX
A note that these only work on MIDI tracks it seems. I was unable to figure out how to use them on instrument tracks. So as far as I know this necessitates a workaround as described in the synth rack section to use these with software instruments.
Arpeggiator
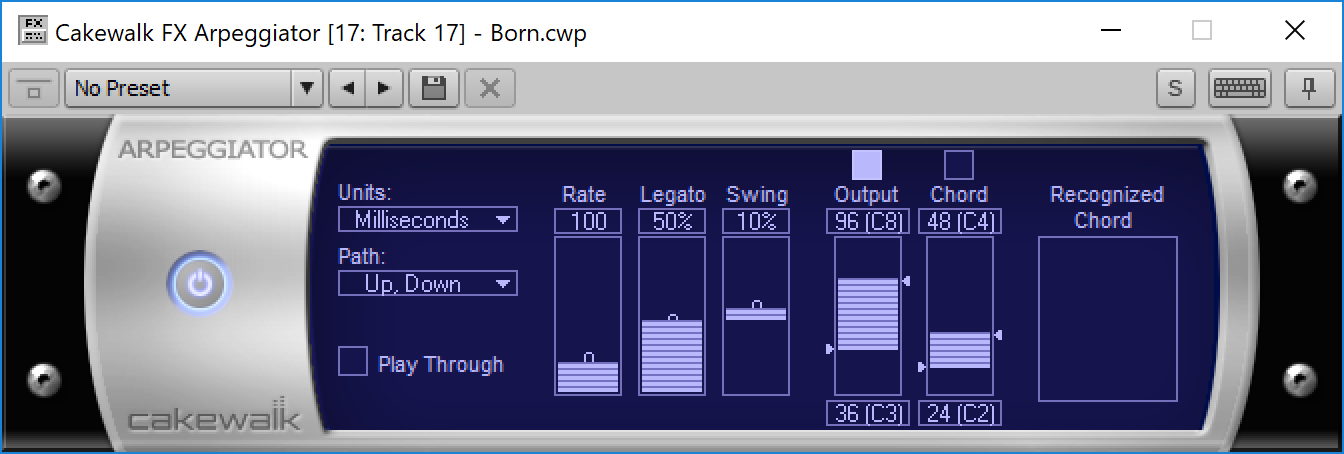
A cheesy looking arpeggiator with few options, 4 patterns and difficult to use parameters.
The built in arpeggiator is much better
Chord Analyzer
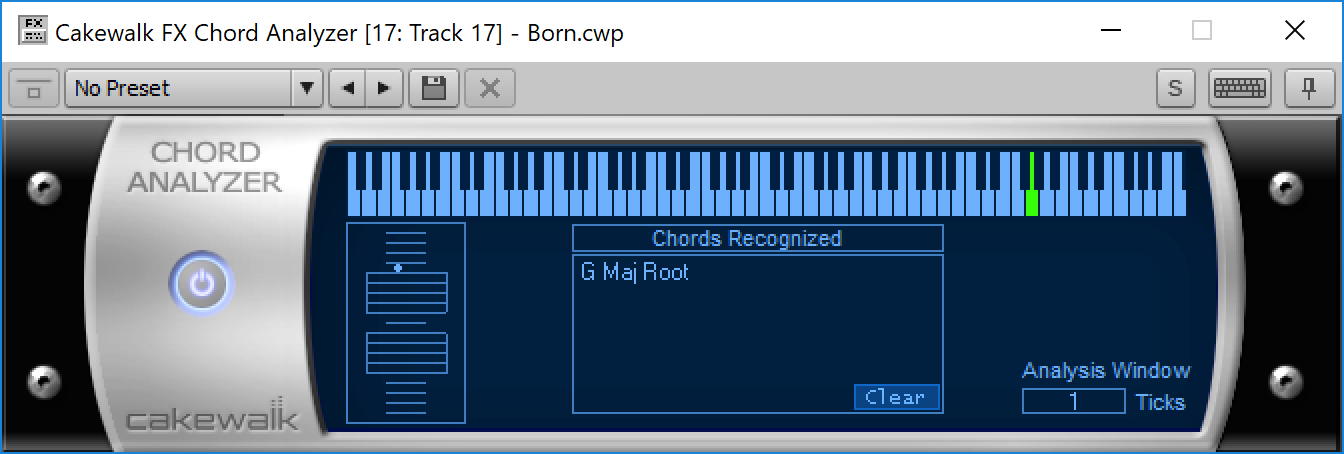
Not very good at its only job. A second inversion Emin chord shows up as G#min+5 1st inversion... most inversions come out wrong! What's the point of this if it can't get inversions correct?
Echo Delay

A simple MIDI delay that adds midi notes to the stream like a delay or echo.
It can increase/decrease the pitch of subsequent echos to create a cool sparkly or droney sound. Pretty fun.
MIDI Event Filter
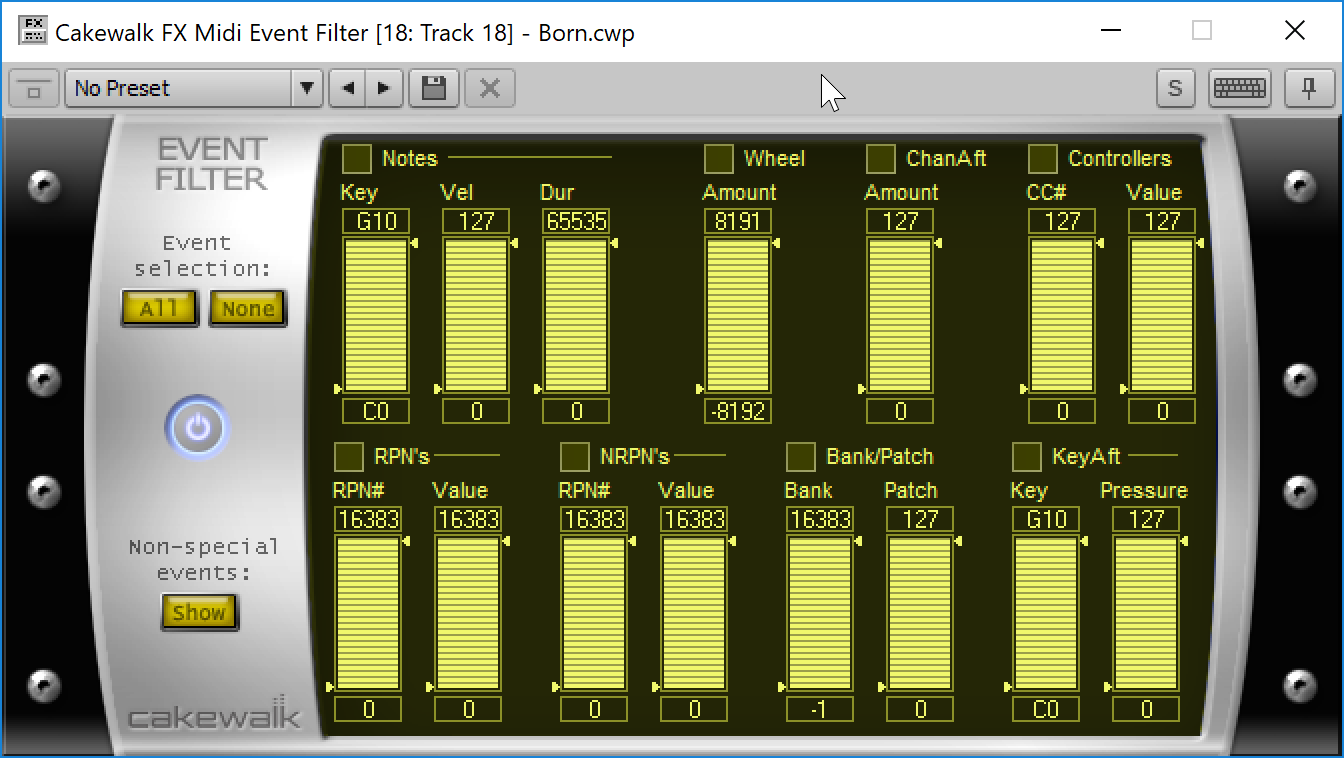
You can filter most MIDI events here, including RPN/NRPN, clock and aftertouch. Unfortunately you're limited to one of each type of event. So you may end up needing a handful of MIDI event filters to get the job done.
Surprisingly there's no log to show you what's going in/out, which is essential to a utility like this.
Quantize
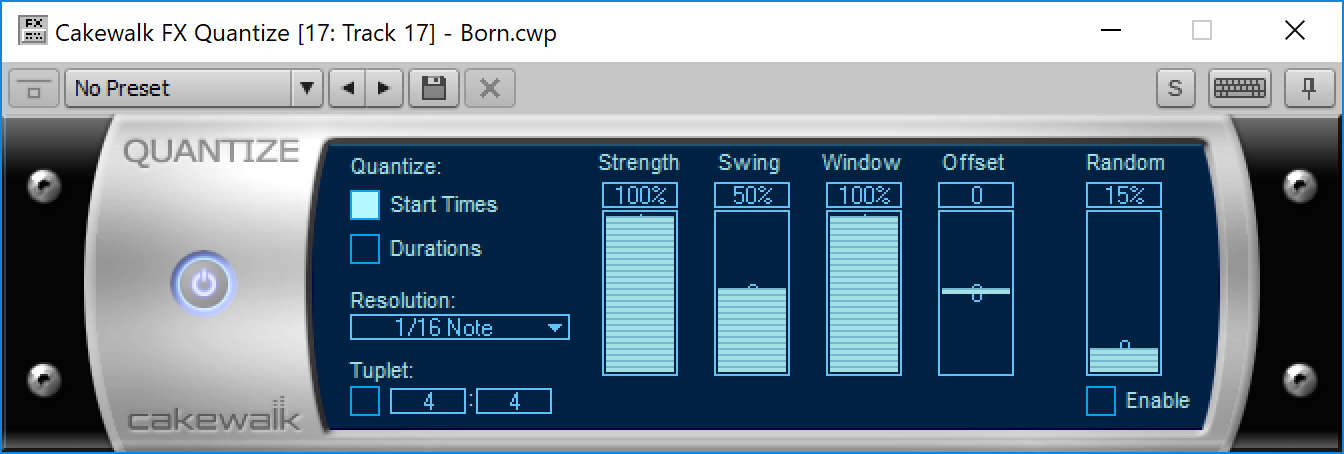
Quantizes notes in both directions. Useful, quick and non-destructive.
Transpose
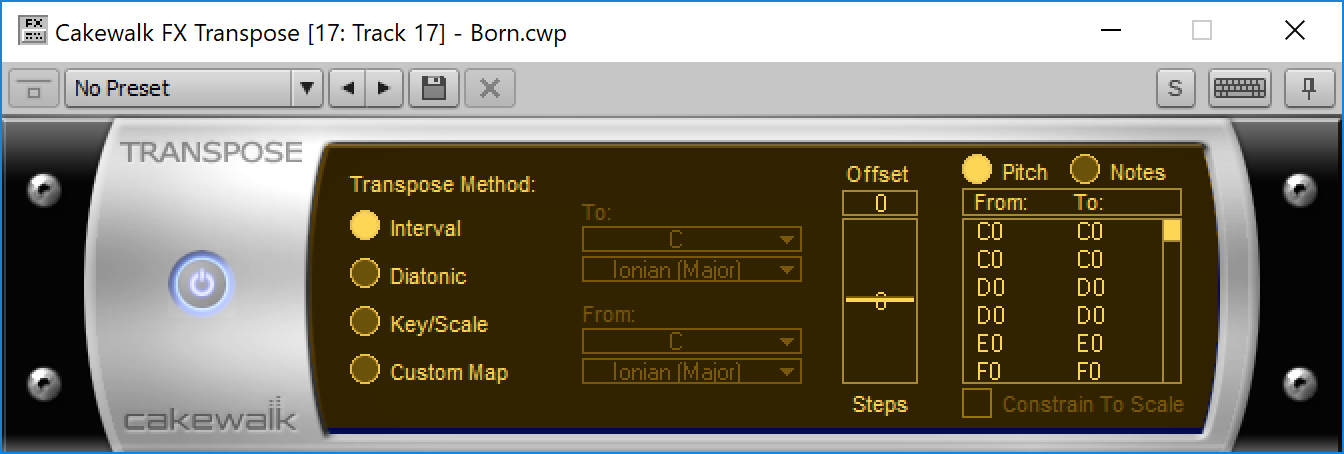
A proper transpose plugin that does more than just pitch shifting. It can transpose keys/scales and allows custom transpositions. There's more that could be done here, but compared to what other DAWs offer, this is great.
Velocity

MIDI Velocity scaling, re-writing, limiting, randomization and changing.
It's a dynamics processor for MIDI notes. It works well.
Annoyances
No underrun alert
No picture here, because it doesn't exist!
If you want to know if/when a glitch has happened in your audio then you're out of luck until you listen to the playback.
Total workflow killer to need to double-check every single recording in case Windows has decided to have a seizure.
Lost Windows
It's easy to 'lose' a window in the background with no way to get it back.
No way to screenshot it because the window is gone until you start moving things around to find it. Incredibly frustrating.
Copy and Paste
I wasn't able to catch this one because it's so random: sometimes copy and paste just gets corrupted. You get extra points or missing data or it simply won't work. Sometimes undo fixes it, sometimes I had to restart Cakewalk.
Notifications
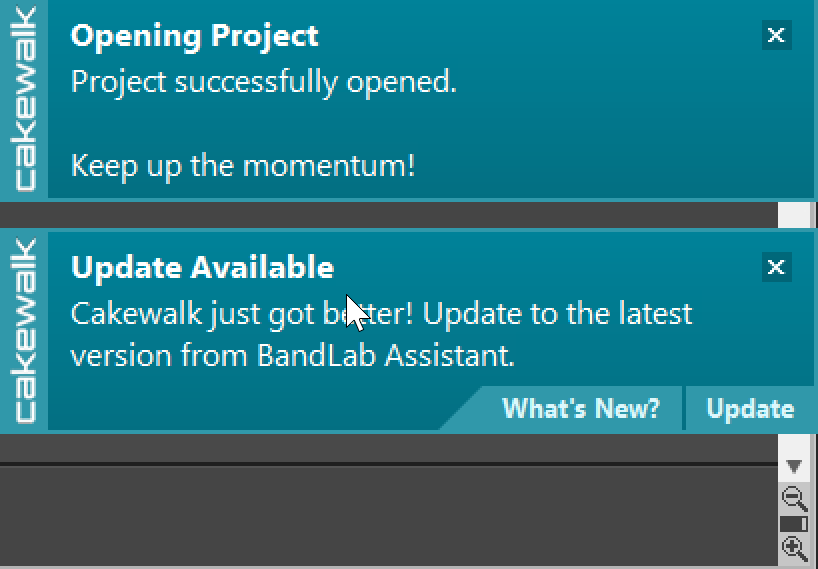
You can turn these off, but they're on by default and almost totally useless.
Device Alert
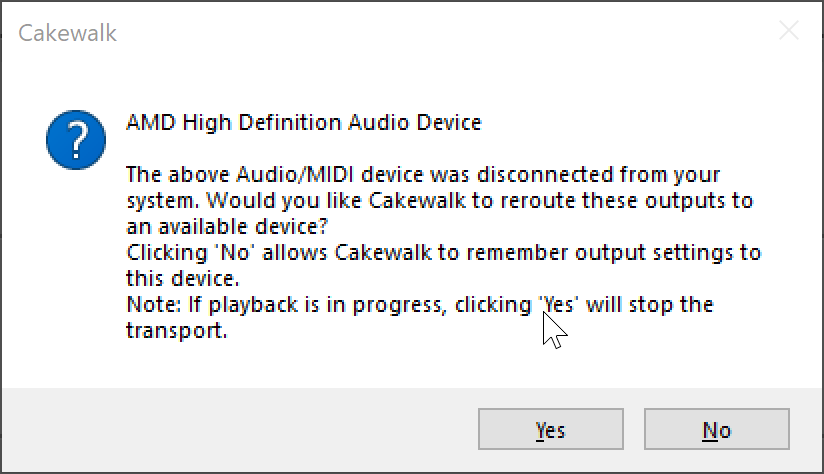
This is the single reason that this interview is being cut short of 30 days. I get this dialog 4-5 times an hour and it interrupts EVERYTHING. Nothing else can happen until the dialog is dealt with.
It's caused by a secondary HDMI-connected display. Anytime it's turned on/off Cakewalk will display the dialog. Cakewalk also displays the dialog randomly based on the same device. I've investigated and logged all device switches on my machine, and found that there's no glitches happening on the system level.
I also get this dialog if I alt-tab away from Cakewalk for more than ~15 seconds.
Project Settings
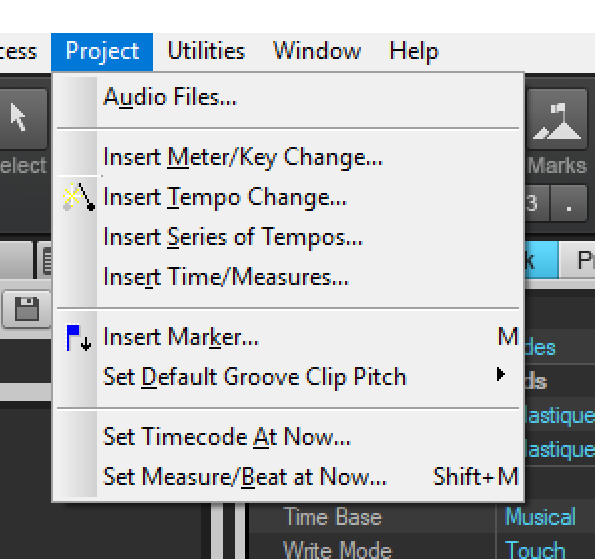
There aren't any... apparently?
As far as I can see their are no specific settings that are set project by project that you can change after the project is created, except for the things in the control bar, and associated menus.
Analytics
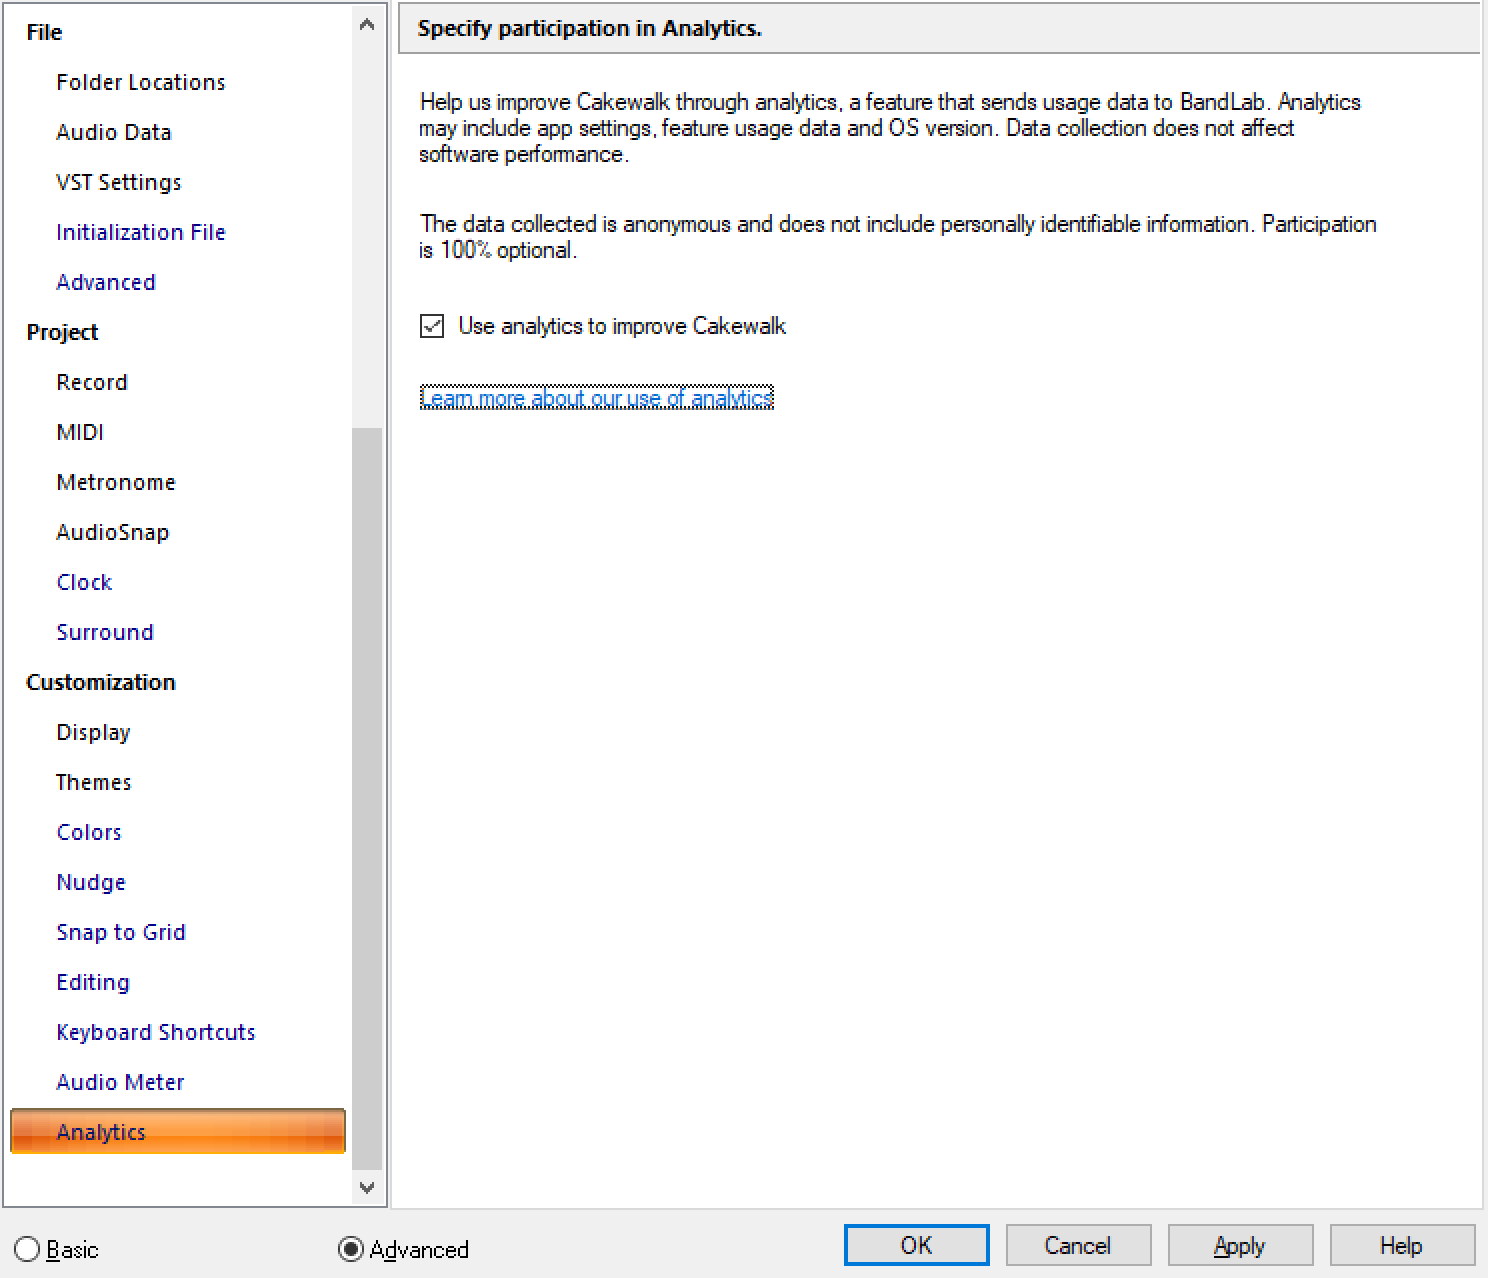
Cakewalk has analytics turned on by default, which is an invasion of privacy that I do not think is acceptable. These analytics may be anonymized, butt I do not feel that a DAW should have these things enabled by default.
Buzz Words
MIDI Microscope, Lenses, ACT, CAL, Aim Assist, VocalSync, Skylight, Audiosnap etc...
Can you guess what these things do without checking the manual? If you're not already a Cakewalk user you may be able to guess Vocalsync, or wrongly guess what Audiosnap does and be lost on the rest.
I asked a number of educated audio people (around 50 or so) what they thought some of these terms referred to, and only one person got any right: a former Sonar user. He didn't even get them all!
Cakewalk is awash in buzzwords that don't actually describe what the function does. The manual does do an admirable job explaining the features, but you may be in for some heavy manual reading to fully understand the functionality offered by the software.
Empty MIDI Clips
There is no way to insert a MIDI clip other than to drag one in, use the in-line piano roll or some wierd workarounds. Empty MIDI clips aren't even possible apparently.
For such a common workflow, it's strange that this isn't possible.
Offline Undo
If you close your project, your entire undo history is gone for good. Made a mistake and need to undo? Well, you better just never close your computer.
Then again Windows may not let you keep your system running as-is anyway.
Selecting Multiple Tracks
I had to google how to select multiple tracks. It only works if you click the track numbers. There's plenty of surface area to click a track to make it the focus, but that does not select it.
The track selection doesn't follow your "Console selection" (not sure what this is called) though. You can have a track selected via the number, but another track selected and shown in the mix strip. So there's 2 ways of selecting tracks for something to happen to them.
What a strange and unnecessary design decision.
Even-number starting stereo recording
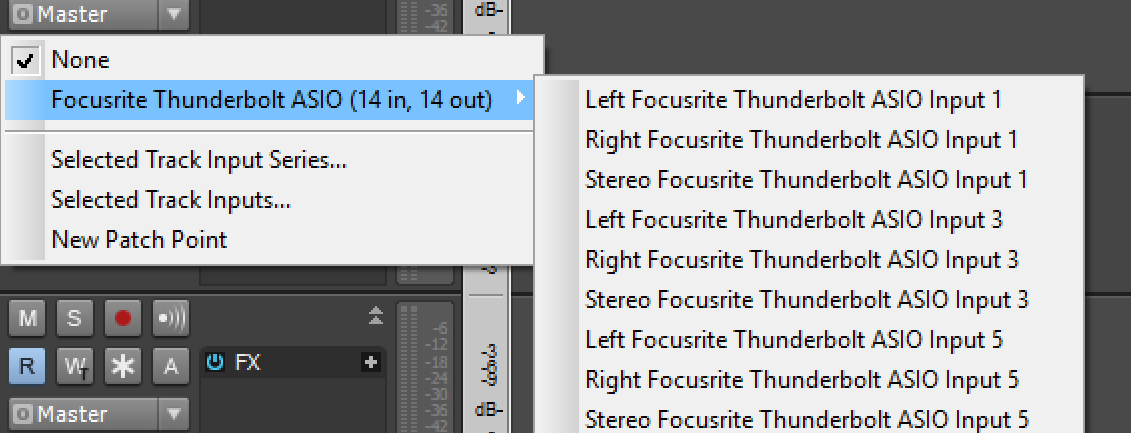
If you want to record a stereo track where the left channel is an even-numbered track, then you're out of luck I think. I was unable to figure out how to do this if it is possible.
This may not be an issue for most people, since they can just re-order their physical inputs. I have outboard equipment that necessitates not driving myself crazy re-plugging a dozen things just because of some goofy software limitation.
Clip based grouping
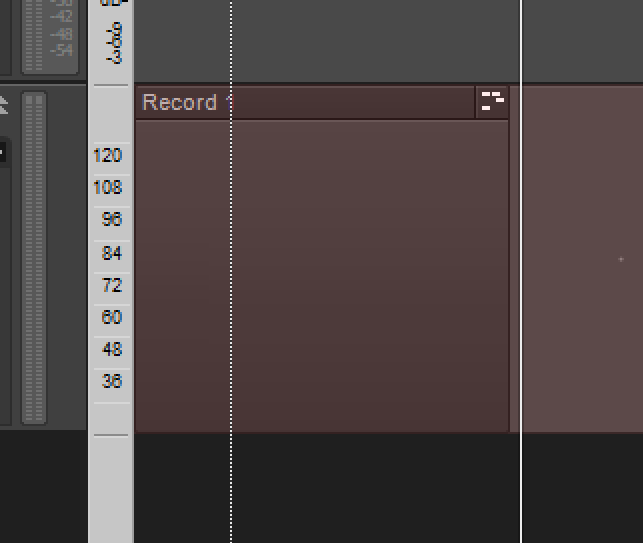
Above you can see that I have 2 "Clip Selection Groups" as indicated by the 01 in the upper left. I select one... wait, just one? It's a selection group? Anyway, I cut it and now I have a weird partial group. If I restart this process and click the top-bar of the clip instead of the body it works as expected. Messing this up is surprisingly easy if you're trying to work quickly.
Ugh. Reaper does this too. Clips are grouped instead of tracks. Here's why I don't like this...
When I record to a track, I implicitly am indicating that I want that track to contain a specific sound. The track will always have that sound.
When I want to edit multiple "things" together, those things are parts that have some semantic association. Perhaps they were recorded together or created as part of a single larger sound.
Clip grouping ignores this intention and causes the user to maintain multiple groups on a track even though the track clearly implies a single sonic entity. Clip grouping assumes that at sometime, a track will no longer be part of the same larger entity. To put it more simply, it means that the software designer thinks that the track will, at some time, no longer be making the same sound even if it was at some other time. Preposterous! Anyone that works that way should get paper cuts on the underside of their tongue.
Imagine I record a drumset. I always want my kick, snare and overheads to be grouped. Always. I may temporarily suspend the grouping to change the timing of an entire track, but I want them to always be grouped regardless of what time it is. I don't magically want my snare to not be grouped with the rest of the drums at some other point in the song!
Clip grouping allows you to have parts of tracks that do not retain associations to other tracks, since clips at one point in time may be grouped, but clips at another point in time may not be.
Clip grouping causes any workflow where the track is the primary entity to have multiple failure modes. Clips can become desynced or un-grouped, even though the association between the tracks remains.
All that said... Cakewalk's Clip Selection Groups don't work very well. I found it easy to make an edit to a clip that did not propagate because the selection didn't occur when I clicked a clip! It appears that you need to explicitly activate the clip selection group by clicking the clip's top bar or using the right-click drag selection.
Transient editing doesn't work across groups either.
So not only does Cakewalk use what I think is the worst edit-group method, but it does it poorly. It's easy to make mistakes that you may not notice and end up with tracks that should remain edit-locked, that don't.
Hanging notes
When working with digital synths (VSTi), I encountered hanging notes many times. This isn't uncommon when working in a DAW, but what was bothersome is that I was unable to find how to send an "All Notes Off" to kill any stuck notes without Googling.
It's the little MIDI icon with a cross through it on the transport, under the time display.
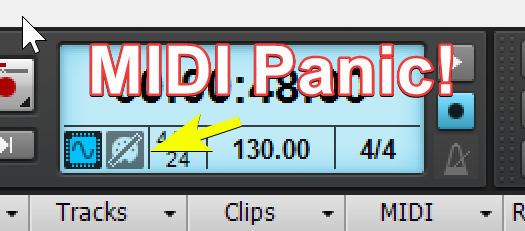
It also doesn't always work.
I know because I've had to hit it a few hundred times in the last 3 weeks. I have about a 75% success rate.
Cakewalk Application has stopped working

I've seen this dialog a good bit. I've seen it the most after recording long sections of audio, and then I manually need to find the audio and attempt to import it back to the correct place.
An extra layer of annoyance is that for some reason my 'recent projects' gets wiped or truncated after a crash on occasion. Usually the project that was active when the DAW crashed ends up missing, which means extra clicking around when I'm already frustrated enough.
Help Module
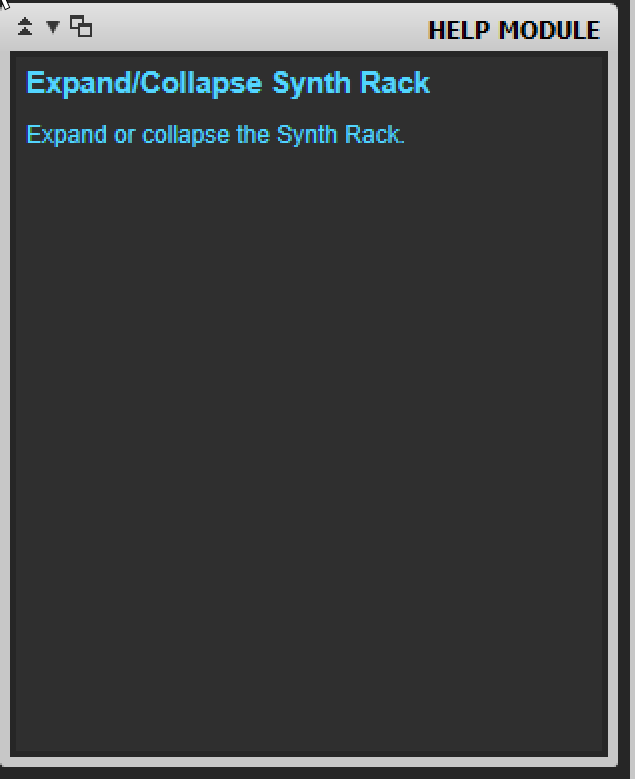
I like the concept of having some sort of live help that shows you what a control does, but Cakewalk's help module is almost completely useless.
It is slow to react to what you are focusing on, and the description offered is minimal and unhelpful.
Luckily there is another help system which allows you to press F1, and the manual load focused on the section that corresponds to where your mouses hovering. That is useful.
Weak Metronome
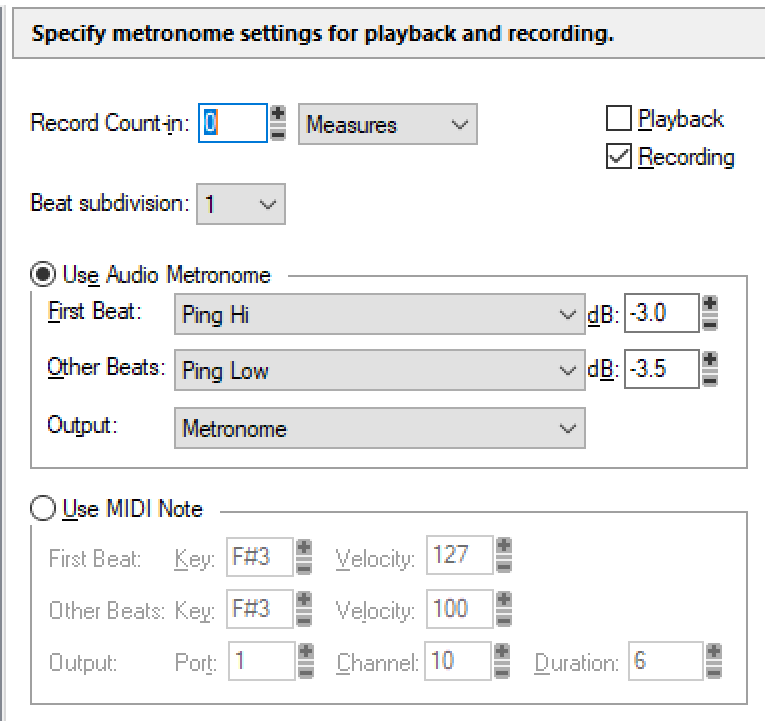
There's no rhythms, no time-signature changes, no user-based sounds (maybe you can add this in a specific folder?), no adjustable tone-based metronome.
It's a poor showing of a metronome system.
Cakewalk Projects
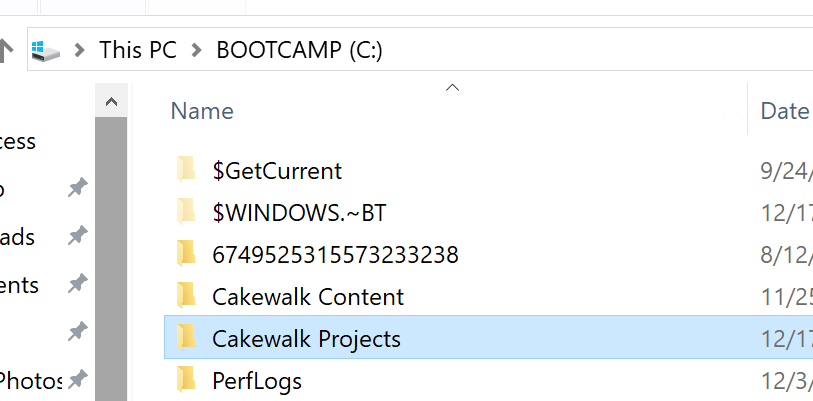
Why are Cakewalk Projects stored in the root of the C drive by default?
They should be in C:\Users\name\Documents or C:\Users\name\Music like everything else is supposed to!
NO MIXER UNDO - Mostly
AHHHHHHHHHHHHHHHHHHHHHHHHHHHHHHHHHHHHHHHHHHHHHHHHHHHH
Watch as I move a fader and hit ctrl-z multiple times. My project slowly disassembles itself, but the fader never changes value.
It's 2018. Most DAWs have mixer undo. It's a vital workflow tool, especially when working with certain automation tasks or working with grouped faders.
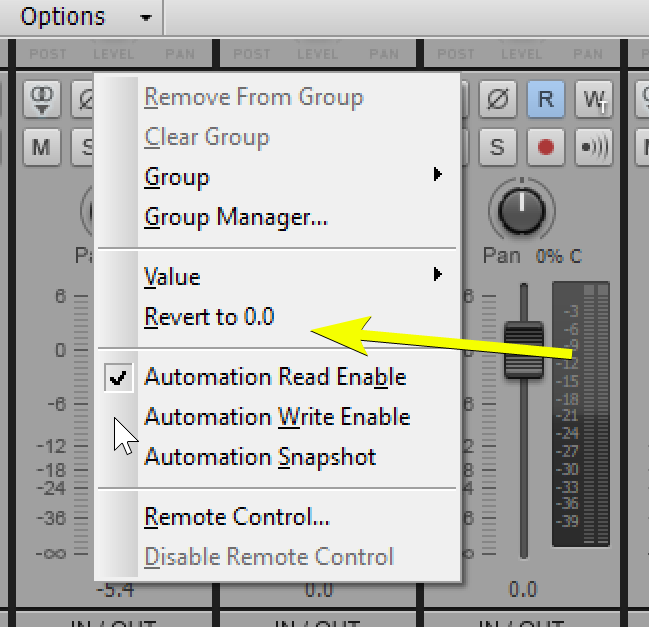
There is one-level of "revert" for faders, and only faders. Not particularly useful for me since I'll execute a 'fader move' in multiple clicks: move, listen, adjust slightly, listen etc...
Fader revert does have the benefit of being independent per fader though. So even if you change Fader 4, and then do a dozen edits and a hundred fader touches, you can easily go back and revert fader 4 without needing to wade through levels of undo and ruin your project.
If the whole mixer had multiple levels of independent "revert", then this would be an incredible feature. As-is it's a shot that misses the mark.
Plugin Selection
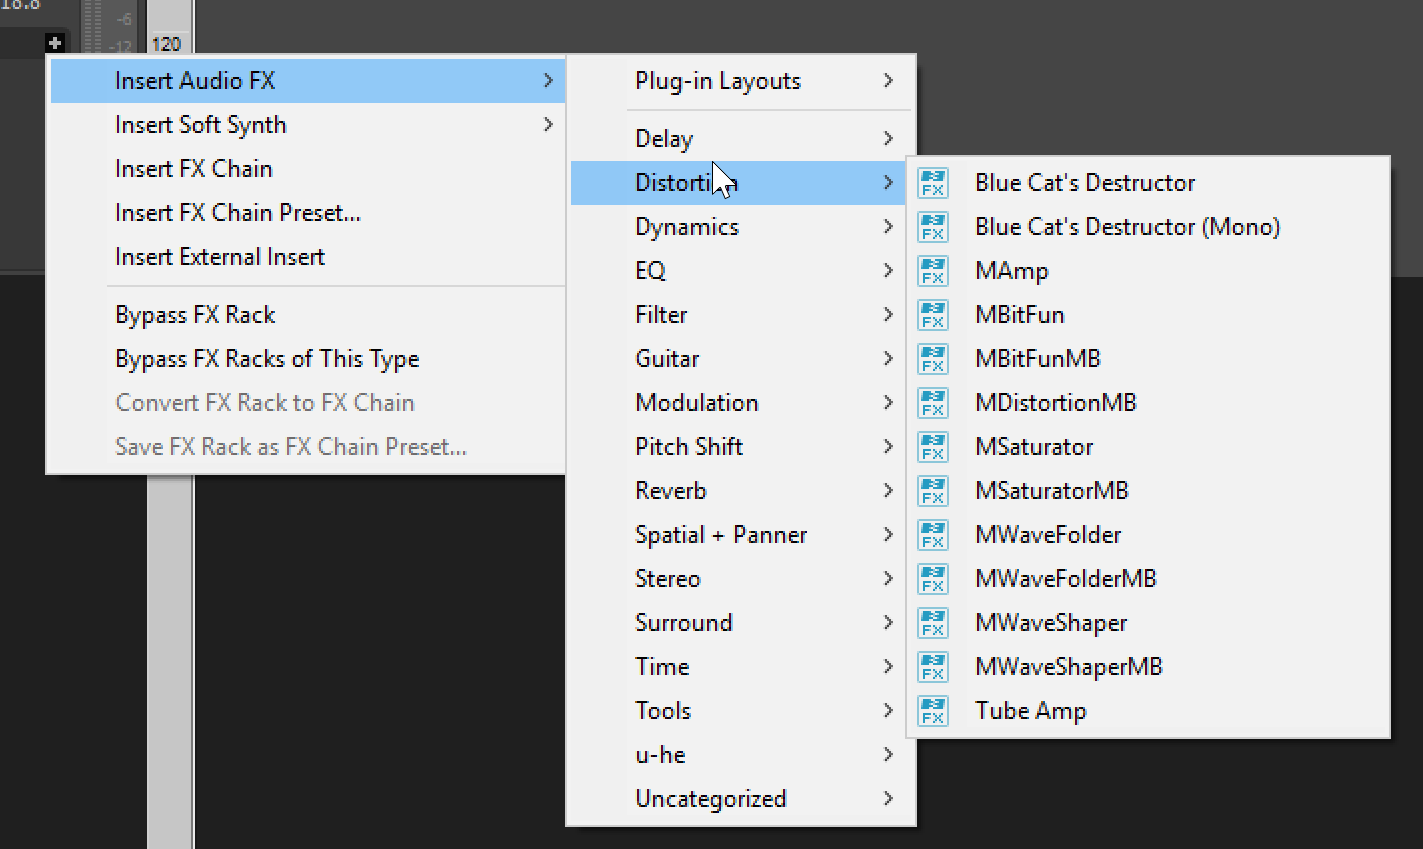
Adding/Removing plugins isn't particularly fun in Cakewalk. You need to either use the browser + drag'n'drop or utilize the terrible menu system.
There is a third-party solution that sorta fixes the issue, but it still relies on utilizing multi-layer menus for finding your products.
A proper in-line plugin finder is needed! The other DAWs have it guys, get with the times!
Fader Groups are Borked
Watch how when I move a fader, then touch another... the previous one pops back.
Cakewalk stops fader movement when one of the faders in the group has reached its max/min value. The issue is that the fader you're currently moving still can move. Soon as you touch the group again, that fader will reset.
This is broken as of this posting. It may be fixed in the future.
Media Browser
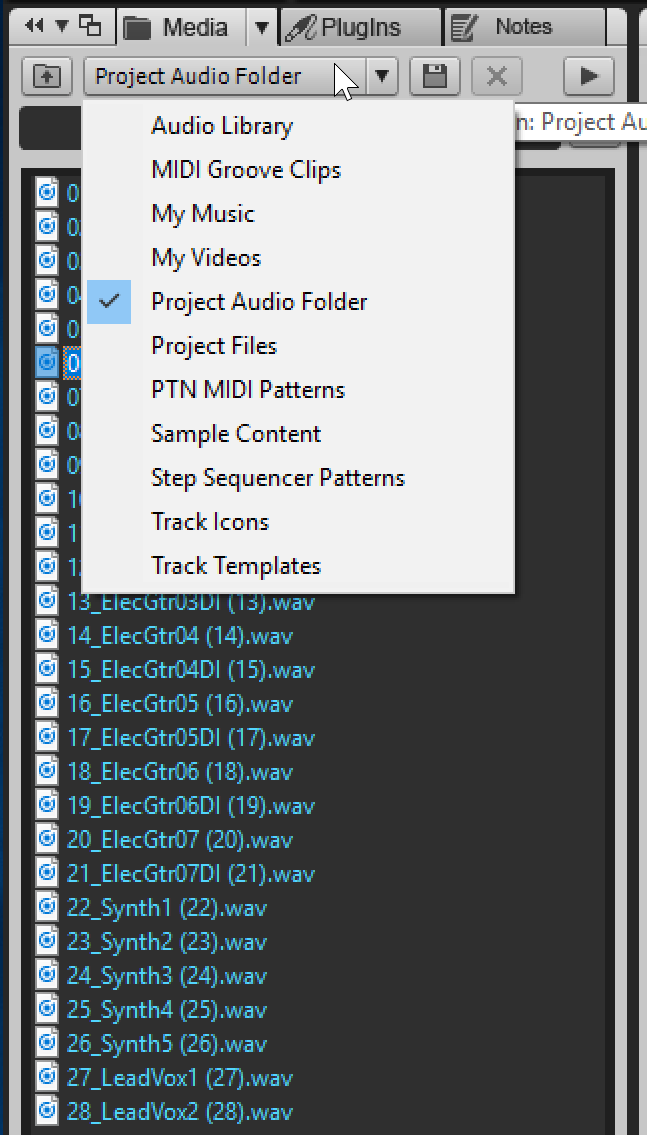
The media browser is not that great.
If you right-click to get properties you are given the useless Windows file properties window.
MIDI files can be previewed through the currently selected track
The controls for preview output (audio and synth are separate) and 'preview at host tempo' are located in a multi-layered menu triggered by pressing a small downward facing triangle.
I was unable to find an ability to set user-folders, and even if it is possible there does not seem to be any way to quickly jump to a user folder.
Automation Modes

This is something that may fly in a hobbyist environment or simple professional contexts, but having 3 simple automation modes is bothersome.
Let's take a moment and look at what a competitor offers, then I'll explain why this matters.
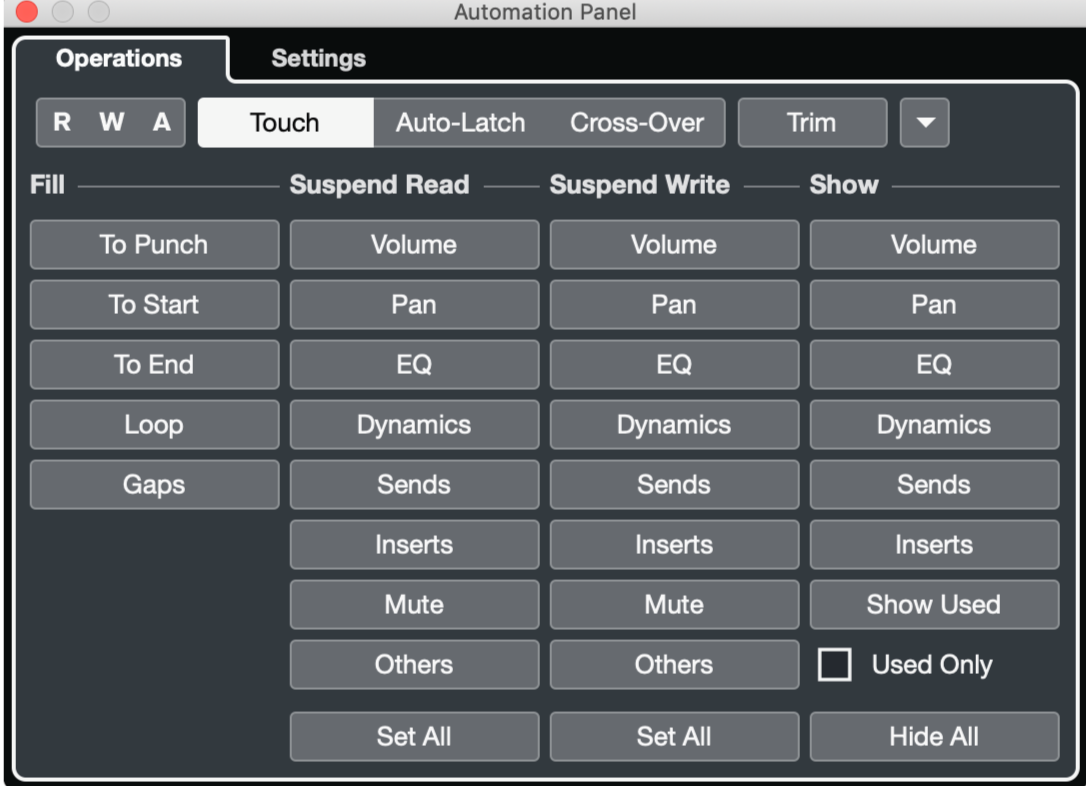
Cubase doesn't even have the crème de la crème of automation systems (in fact, it can be argued that it's the worst of the more advanced systems), yet it's FAR superior to what Cakewalk offers.
So why should you care?
Have you ever wanted to just punch-in some automation to a short section? Adjust an entire complex automation curve after the fact by combining 2+ curves? Scale a curve by another curve? Redo only a section of some automation? Write the first or last value to the beginning or end of the track? Loop a section and have the mix "set" by the end of that loop (and continue mixing along the track in 'loops')? Have a specific time selection where no automation exists and your fader value reigns supreme? Stop playback in latch mode and write the final value stopped? Write automation using native controls when stopped?
I can go on... there's dozens of workflows other DAWs are capable of that can greatly speed up your mixing workflow once you realize they exist.
Sonar's automation system is in great need of an overhaul. It's the absolute basics, and arguably is even missing some basic tenants of a competent automation system.
Let's not forget either that it does not have any sort of implicit curves. All of the draw tools utilize a system that generations new points of automation. Should you want to change a curve, you need to re-draw it. The transform tool doesn't exist for automation like it does in other DAWs (like DP, Cubase, Studio One and Reaper)
There is "offset mode", but it comes with this silly caveat
Note: Any position that you set a fader to in Offset mode remains in effect when you switch back to Envelope mode. For example, if you set a volume fader to -INF while in Offset mode, switch to Envelope mode and drag the fader to its maximum level, you will not hear anything.
What a brilliant way to end up with a project that seems hopelessly bugged! You can easily end up with a fader that seems like it's doing nothing.
When using 'offset mode' I also crashed Cakewalk multiple times.
No VCAs
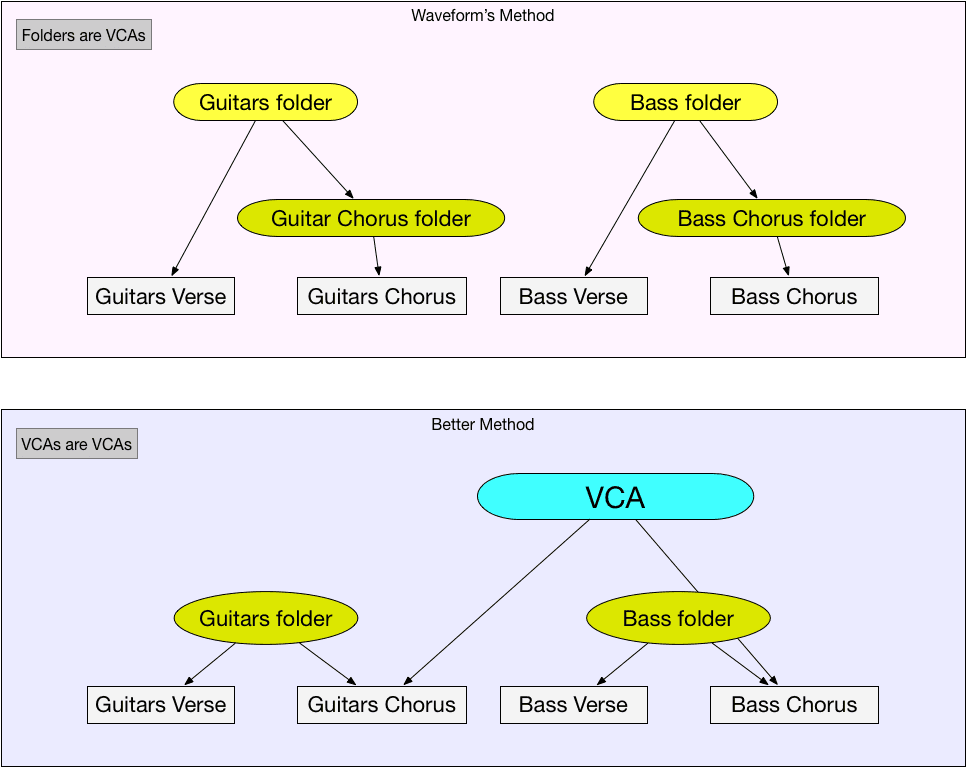
We can't discuss my dislike of the automation system without talking about VCAs. First let me help you understand why this matters:
Hopefully one of those explanations hooks you. I occasionally take a stab at explaining the 'whats' and benefits of VCAs in various ways to reach new people.
Along with Cakewalk's simplistic automation system, there are no VCAs faders. VCA faders not only make mixing a joy, but are another tool in the arsenal of a automationist (I made that word up, I hope it sticks).
I LOVE working with VCA faders. They make working with large complex arrangements a breeze. If anything, they allow you to easily layer automation and create 'trim automation' easily.
Crossfades
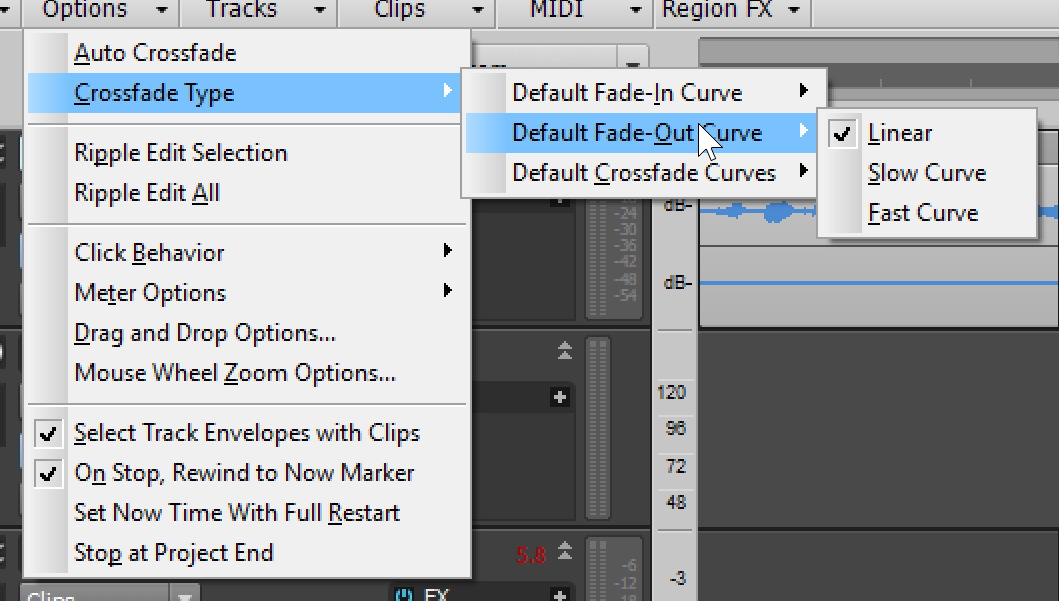
Crossfade options are simple and down 2 layers deep in a menu. If you want asymmetrical fades or custom fades or to do anything beyond simple crossfading of 2 adjacent clips then you're out of luck. For a DAW that has mastering like features this is a strange omission.
~~Let's not stop there though! Crossfading two clips is quite an endeavor. Look at the manual to see the multi-step process of crossfading two clips.
I'm somewhat baffled that people put up with this, but then again, Bitwig didn't have crossfades at all for years and apparently most of their users didn't even understand what a crossfade is.~~
UPDATE July 2019 - It's possible to turn on "Auto Crossfade" in the Track View Options menu to easily crossfade overlapping clips IF Preferences->Editing->"What to do with existing material:" is set to "Blend Old and New".
I still find this to be suboptimal behaviour because even though 2/3 of the editing preferences disable "Auto Crossfade", the option is still visible and toggleable.
I also find it strange that "Auto Crossfade" isn't on by default, but that's a personal preference.
Zoom Tool

I begrudgingly enjoy the mouse-based zoom workflow. I don’t like using mice for much, but for selecting areas of the screen to work on it’s a great tool.
Cakewalk has a tool that lets you select what you want to see by just boxing that area. Press z to activate it. It’s not on the tool palette though! I bet a lot of Cakewalk users don’t know it exists.
Try the modifier keys with it to unlock some extra features.
There’s also a hidden scrub tool if you look for it.
Conclusion
See a dissenting opinion here .
If you've made it this far then you may think I have a poor view of the software. If you just skipped here then scroll up and start over. No cheating!
Cakewalk is littered with half-finished features. I don't know if this is caused by various owners looking for marketable features or if it's endemic to the development of the software. I suspect that due to the strange over-use of buzzwords that this is driven by a marketting team that pulls the reins on a talented developer team.
Luckily, the core features necessary for basic music making are in tact. For simple recording and mixing, Cakewalk is excellent. I quite enjoyed just recording a few guitar parts, some drums and bass, then doing a mix. It's possibly the most pleasant of experiences in that regard when it comes to DAWs.
The software falls apart in serious ways when it comes to workflows that are more common in professional contexts. If you work with large orchestral tracks, post, high-pressure/tight-deadline band recording then I'm sure you can squeeze by, but there's SO MANY features that exist in other DAWs that would make your life immeasurably easier. Even just improving some specific areas of the software could lead to workflow improvements.
Automation is laughably bad. Audio editing is basic. No VCA faders. Effects management is reliant on third-party tools. Surround support is spotty. Navigation tools are non-existent. MIDI editing is 2 decades behind other products. HiDPI support is poor (see all the images in this post?). The GUI is fractured with varying menus in each section and hotkeys scattered around and overloaded. Video support is like it was in the 90s.
I can understand why people enjoy the software. There's no shame (or anything negative at all!) about having basic needs. Cakewalk gets the basics right for the most part.
However... There's a huge number of features that other products have attained that can speed up basic workflows. Automation is a prime example. Until you understand how a mature system works, you may not realize how much extra work you're doing. Imagine having to enter a 10-digit code, turn a key and do a little dance to enter a building while the guys across the street just put their eye to a scanner.
As a free product Cakewalk is fantastic. If I was paying $50 a month for it, I'd be quite unhappy for the value. I know that the paid version came with a lot of bonus plugins/addons, but the core functionality is behind the competitors.
As a free product I'm not sure I could call it the best product. Tracktion 7 has an excellent core workflow with some interesting workflow features. Ardour also has a brilliant core featureset, and some interesting additions (but barely any MIDI support). Radium is an incredible option for software based musicians that aren't afraid to think outside the box (it's a bit strange even for a tracker). Cakewalk isn't far removed from these options, and I think a case could be made that they surpass Cakewalk in a number of areas that may be important to certain musicians. Ardour, Radium and Tracktion are cross-platform too.
I can say that Cakewalk is worth the price you paid, possibly a bit more. If you like the workflow then nobody can convince you otherwise, but compared to the rest of the market it's clearly behind the pack.
I'm somewhat at a loss for this. Cakewalk is one of the older generation of products. Even Pro Tools has managed to surpass Cakewalk (at least in terms of usable features). Perhaps it's the multi-tiered changes of ownership over the years causing delays in product development? Corporate ownership focused on feature-based development?
Whatever it is, Cakewalk doesn't even live up to the likes of some newcomers.
Hopefully bandlab can do something with the software to shore up the half-finished features and enhance the core workflows. I don't even care about the features that aren't there like chord tools, arrangement features, advanced editing tools (spectral editing, better warping), object-based editing, sequence based editing, scratch arrangements, advanced tempo editing, live looping, navigational tools, post workflows, video editing, automation curves, automation modes beyond write/touch/latch, live collaboration features, integrated sidechain support, standards metering, reference/edit clips, audio/midi metadata support, advanced MIDI transformation tools, true scripting (not macros like CAL), remote control, VCA faders, project alternatives, clip-based automation, automation clips, video generation, DMX support, OSC support, crossplatform, automation processing, snapshot automation, control modulation, AAF support, gain reduction metering, ambisonics, VR support (producing, not using Cakewalk inside VR), user profiles, selection saving, zoom presets, metronome rhythms, MPE support, VST Expression support, ADR system, track versions/playlists, monitor track, audio analysis tooling, 'always record', re-record, logic-based search, temporary control grouping, mixer undo, offline undo, crossfade tooling, sample-accurate parameter automation, hardware inserts that work, MIDI hardware send/return, Link support, audio to midi slicing, HDPI support, offline manual, articulation management, per-project settings, hardware synth integration, choke groups, inter-application audio support, plugin parameter routing, modular track routing, etc...
Let's just ignore all those missing things, even though I can think of 4 competing products that have a significant cross-section of these features.
If Bandlab just took what's already there and fixed it, it would be a great product. Get rid of the annoying popups, consolidate the menus, finish the tab view, finish the matrix view, improve automation, give the console an update, add some proper MIDI tooling, improve audiosnap, speed up the GUI, and integrate a decent audio editor, add AAF support. Now you have a product that will give any DAW a run for its money no matter the cost.
Until then it just feels like corporate America in DAW form: half-baked, promise-driven and 15 years late.
Unlike corporate America... there's some real promise here.
Support Me!
This post took 46 hours to research, screenshot, write, whine and edit. If you appreciate the information presented then please consider joining patreon or donating!
Other parts in this series
If you appreciate the information presented then please consider joining Patreon or donating money/time.
