It’s time for everyone’s favorite DAW v DAW series!
Today I’ll be covering a difference that really annoys me: Automation smoothing.
Other posts in this series:
- Part 1: Automation and Fades
- Part 2: Automation
- Part 4: More volume automation
- Part 5: Plugin Automation
- Part 6: Pan Laws and Pan Curves
Contents
Video
The File
Here is the test file that I used.
The Test
For my testing here I set the tempo to 100bpm, and at beat two I created the fastest possible automation from 0dB to -Inf. On beat three I created the fastest automation possible from -Inf to 0dB.
All DAWs had their buffer size set to 64 samples. All other settings default.
NOTE: Not all DAWs have automation snapping or the ability to set an automation point to an exact value. This may yield slight differences in results, but I believe that the results are easy to navigate.
The Desired Outcome
The goal is not to abruptly jump. The goal is to do so without any significant artifacts such as pops/clicks. A fade is desirable, but a very quick interpolated fade.
Why? Because no DAW in these tests shows a fade. It should render what you see.
This can be verified with a high-overlap, large-window FFT as well as visual inspection.
Why?
Not all DAWs have done sample-accurate updates for automation data. For many years the standard was to update automation every once in a while, then smooth that value.
There’s two ways to smooth the value: “manual” interpolation, and low-pass filtering. Most products use some form of interpolation, from in-house algorithms, to polynomial to linear. I know of a few products that use a simple low-pass filter, which also can yield a noisy and unstable automation signal.
(Remember that a ‘stairstep’ signal can be represented by a sum of harmonics, if you filter the harmonics then you are left with the nice curvy fundamental sine wave. That’s why filtering yields a smooth signal from a “stepped” one. This is the (same concept that all of your digital-to-analog converters use)[https://en.wikipedia.org/wiki/Nyquist–Shannon_sampling_theorem].
The downside is that aliasing is possible, and so are signals that are exactly fs/2. This can result in a ‘straight’ automation signal that is rendered as a wobbly sine. Fixing this adds another layer of cpu intensive operations or a carefully tuned filter along with sample-accurate value updates.)
Creating an interpolated automation signal that will provide clean automation at a sample-accurate rate is not easy, and for many years it was somewhat CPU intensive. It’s 2019, sample accurate volume automation isn’t an issue. It wasn’t even an issue in 2005. (but wait… 2009?. You’ll see.)
What you’re likely seeing below in the not-awesome results is residuals from that era: automation being chunked, then smoothed.
Simple updating each sample’s value every sample yields “better” results, but requires that the automation signal is filtered to avoid any aliasing in the modulation signal.
This concept will become even more important when investigating other automation functionality.
Results
I’ve ordered my results from best to worst with commentary.
I wrote a short program to render the wave files at the desired points: 28,800 samples and 57,600 samples. There are two images side-to-side: Automation from 0dB to -Inf on the left, and automation from -Inf to 0dB on the right.
Each block on the x-axis is 50 samples, or about 1 milliseconds (1.041666666…ms exactly). (one exception to this)
Every image is showing a 1600 sample window. That means 800 samples to the left of the desired cutoff and 800 to the right. (one exception to this)
Execution notes
In order of how easy it was to setup these tests:
- Pro Tools - Automation snapping and moving to specific values is precise
- Ableton Live - Automation snapping and moving to specific values is precise
- Bitwig - Automation snapping and moving to specific values is precise
- Reaper - Automation snapping, but moving to precise values is fiddly.
- Digital Performer - Difficult to set precise values.
- Ardour - Setting precise times is difficult.
- Studio One - Coalesces automation points sometimes. Ugh.
- Logic Pro - This is so annoying to do in Logic. Automation points like to coalesce when the get near each other if you have snap on.
This doesn’t tell you much other than how easy it is to set an automation point to an exact value, and at an exact position.
Test Signal
Reference for you.
Grab the test file and the results here. 16.7MB zip file.
Pro Tools 2019.5.0
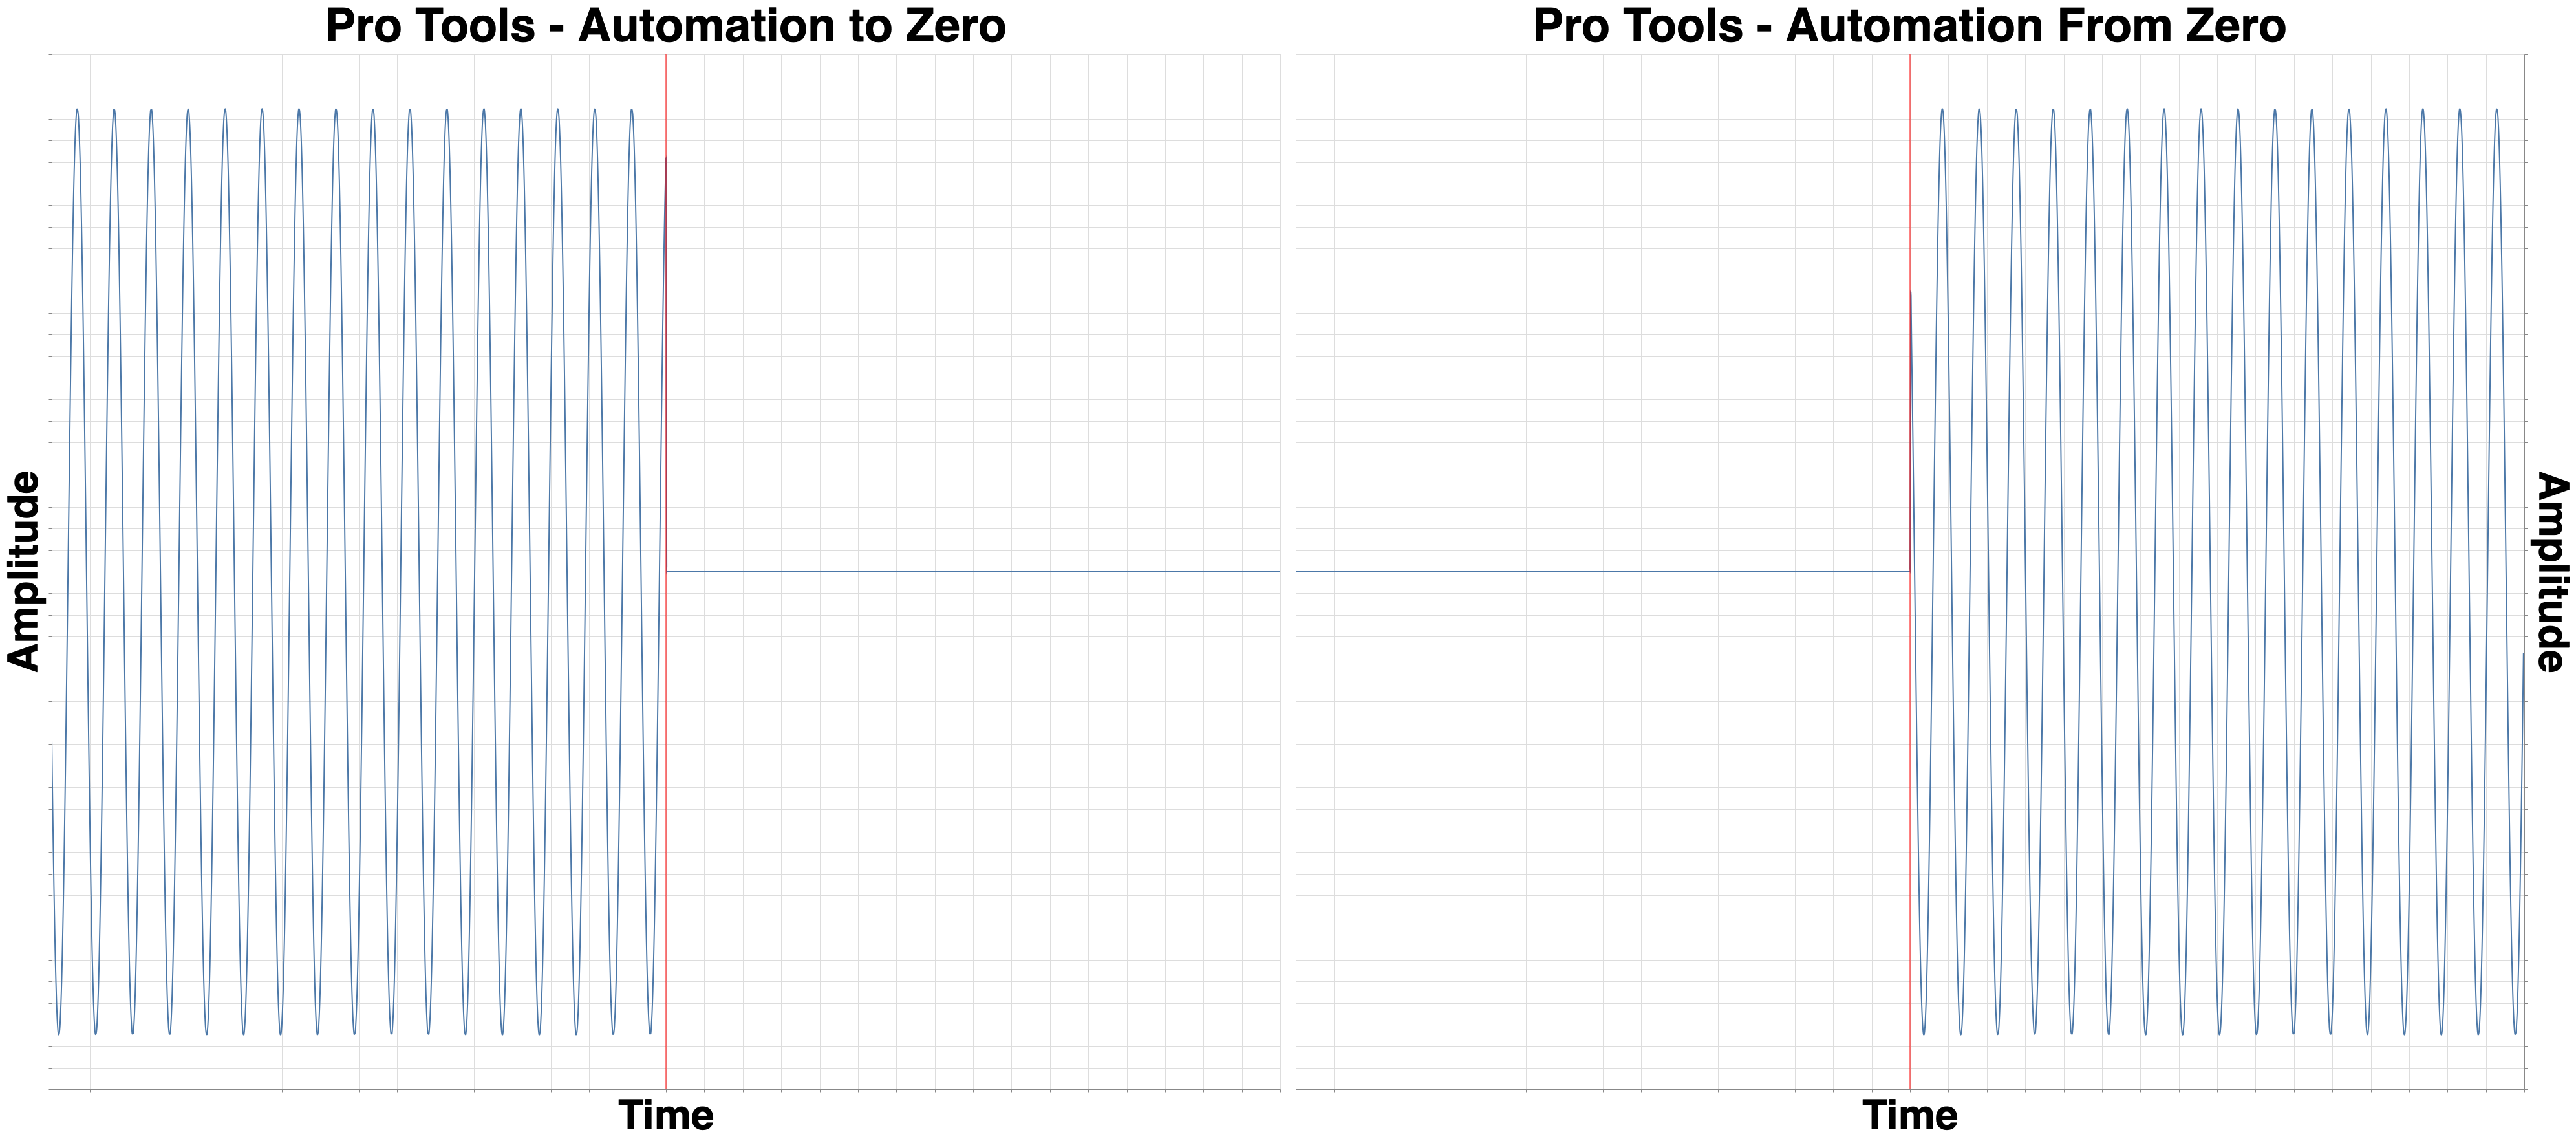
Once again Pro Tools is king. The fade is <0.5ms and it’s a complete fade that ends precisely on the transition point.
Reaper 5.978

Reaper is second place to PT only because of a slightly slower fade. Open the images in separate tabs and ctrl-tab back and forth. You can see that the waveform fades quicker in the Reaper example.
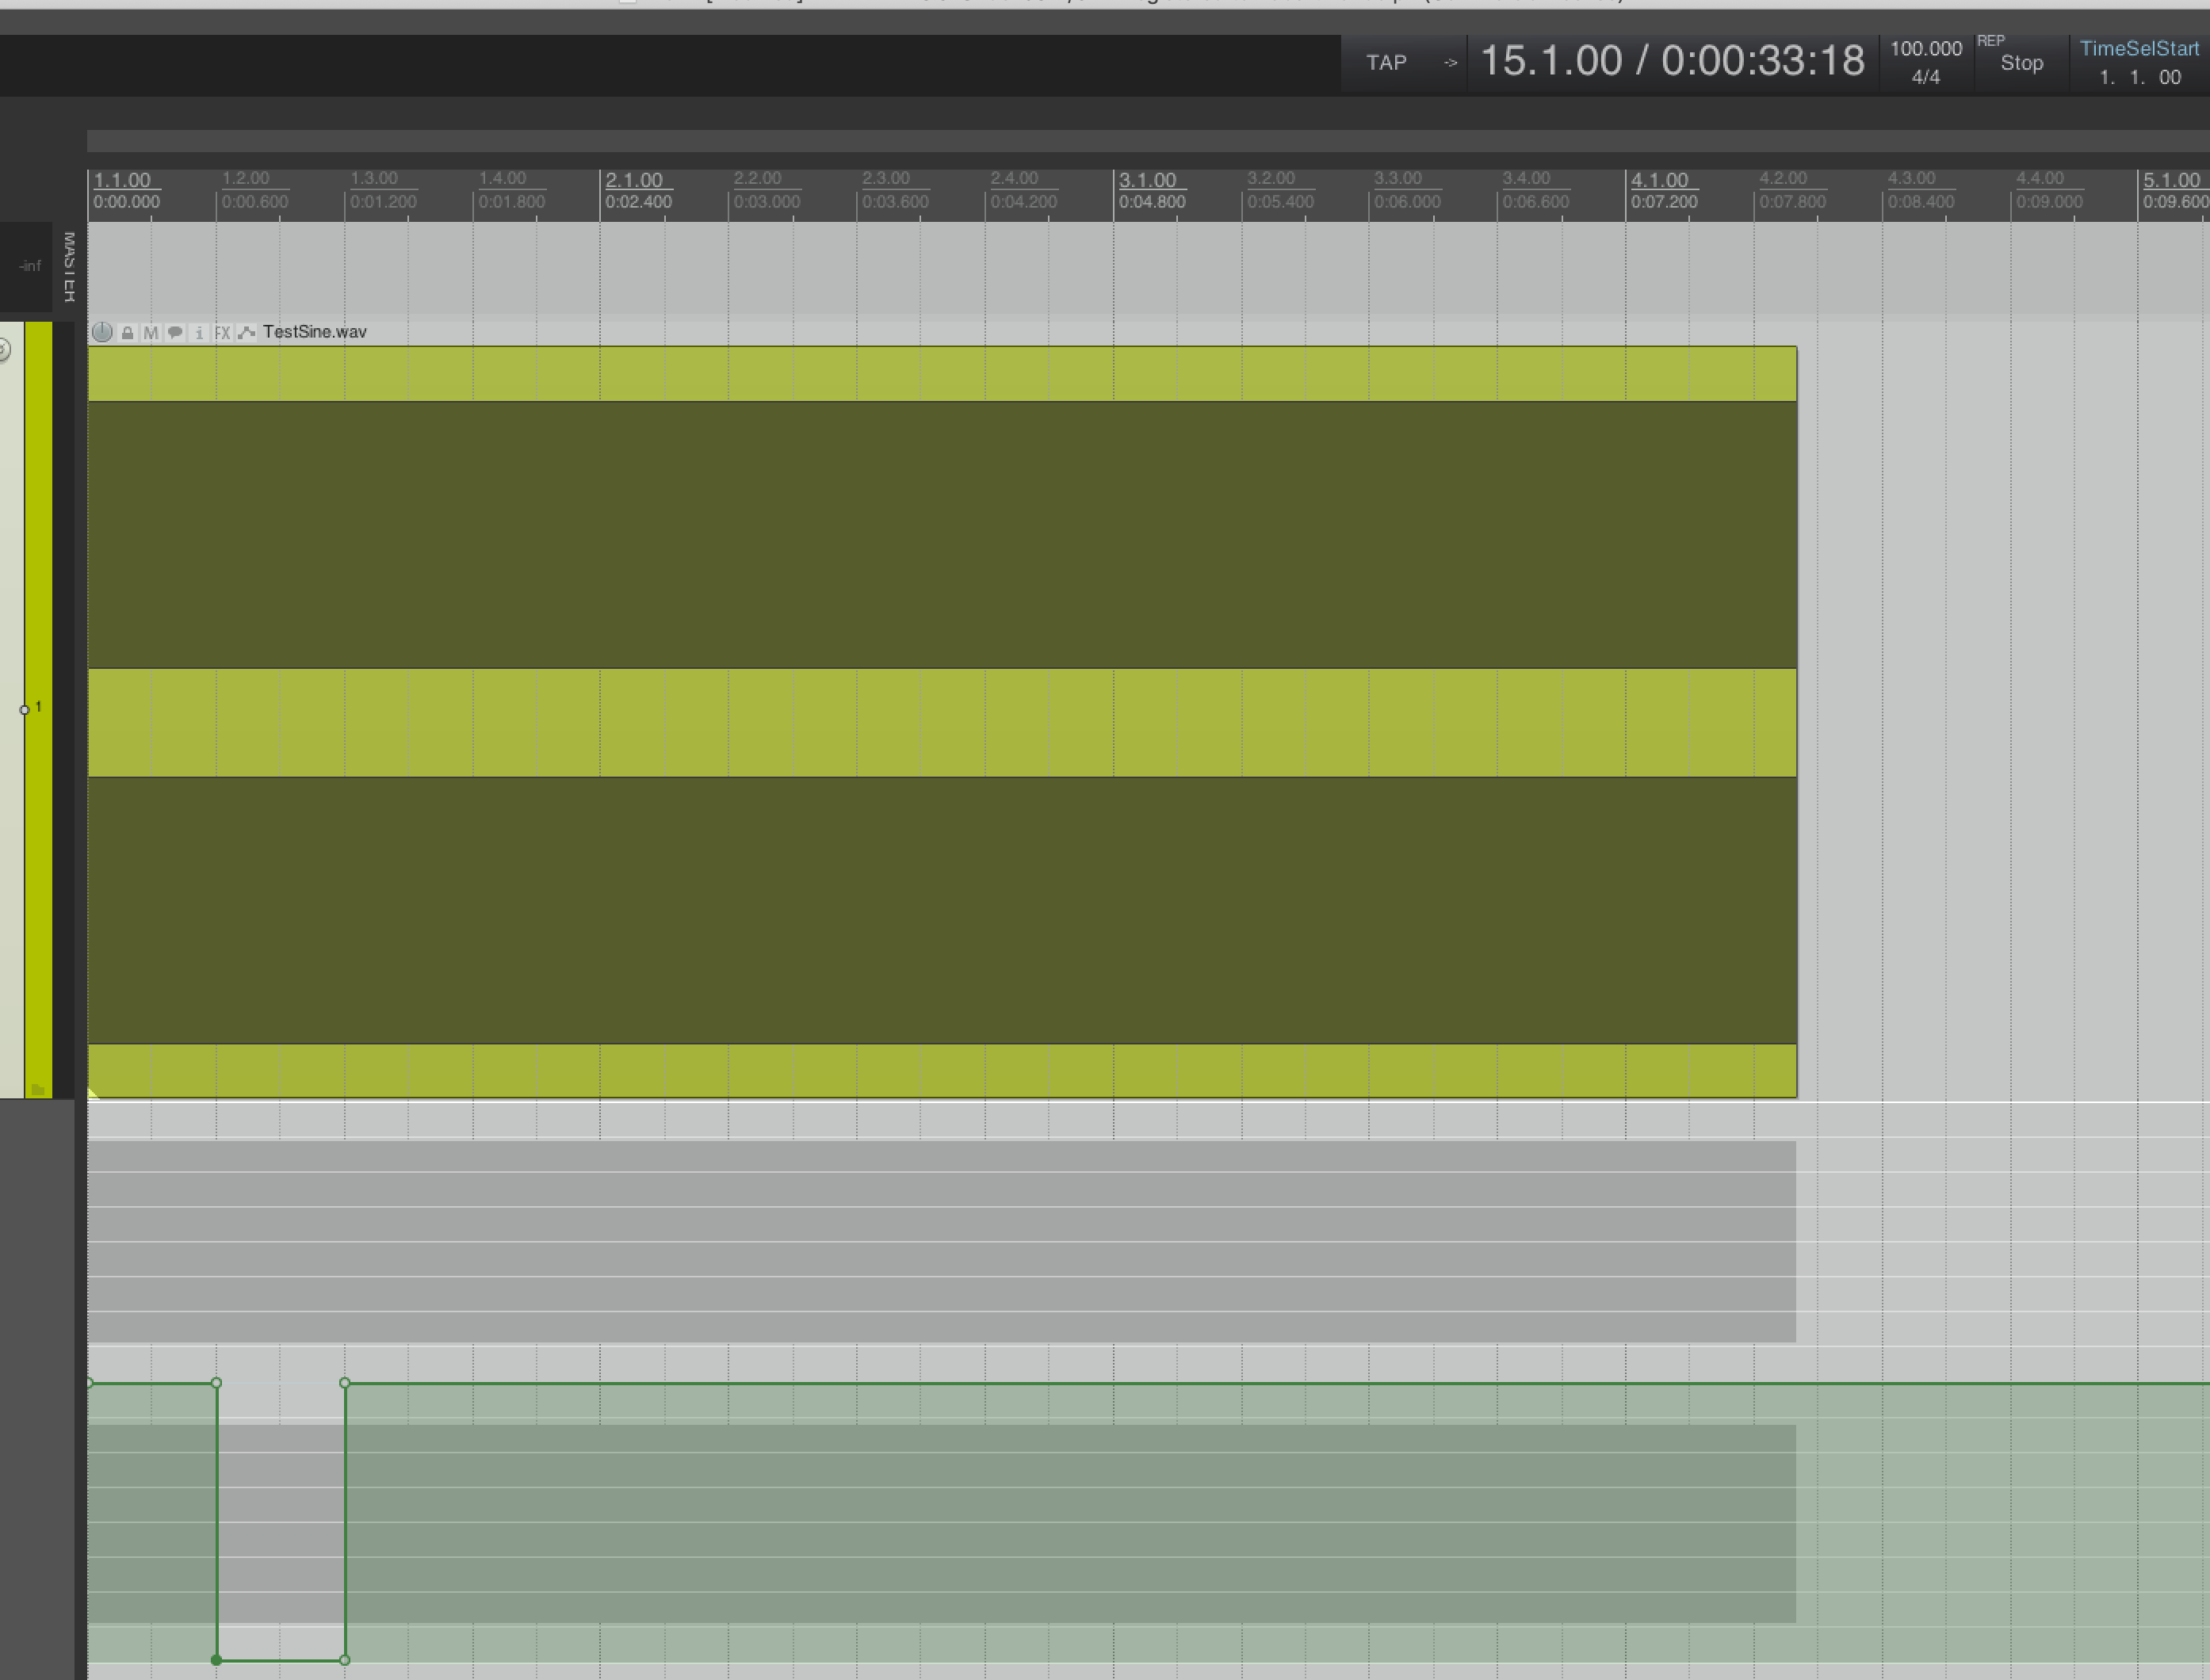
Digital Performer 10.01

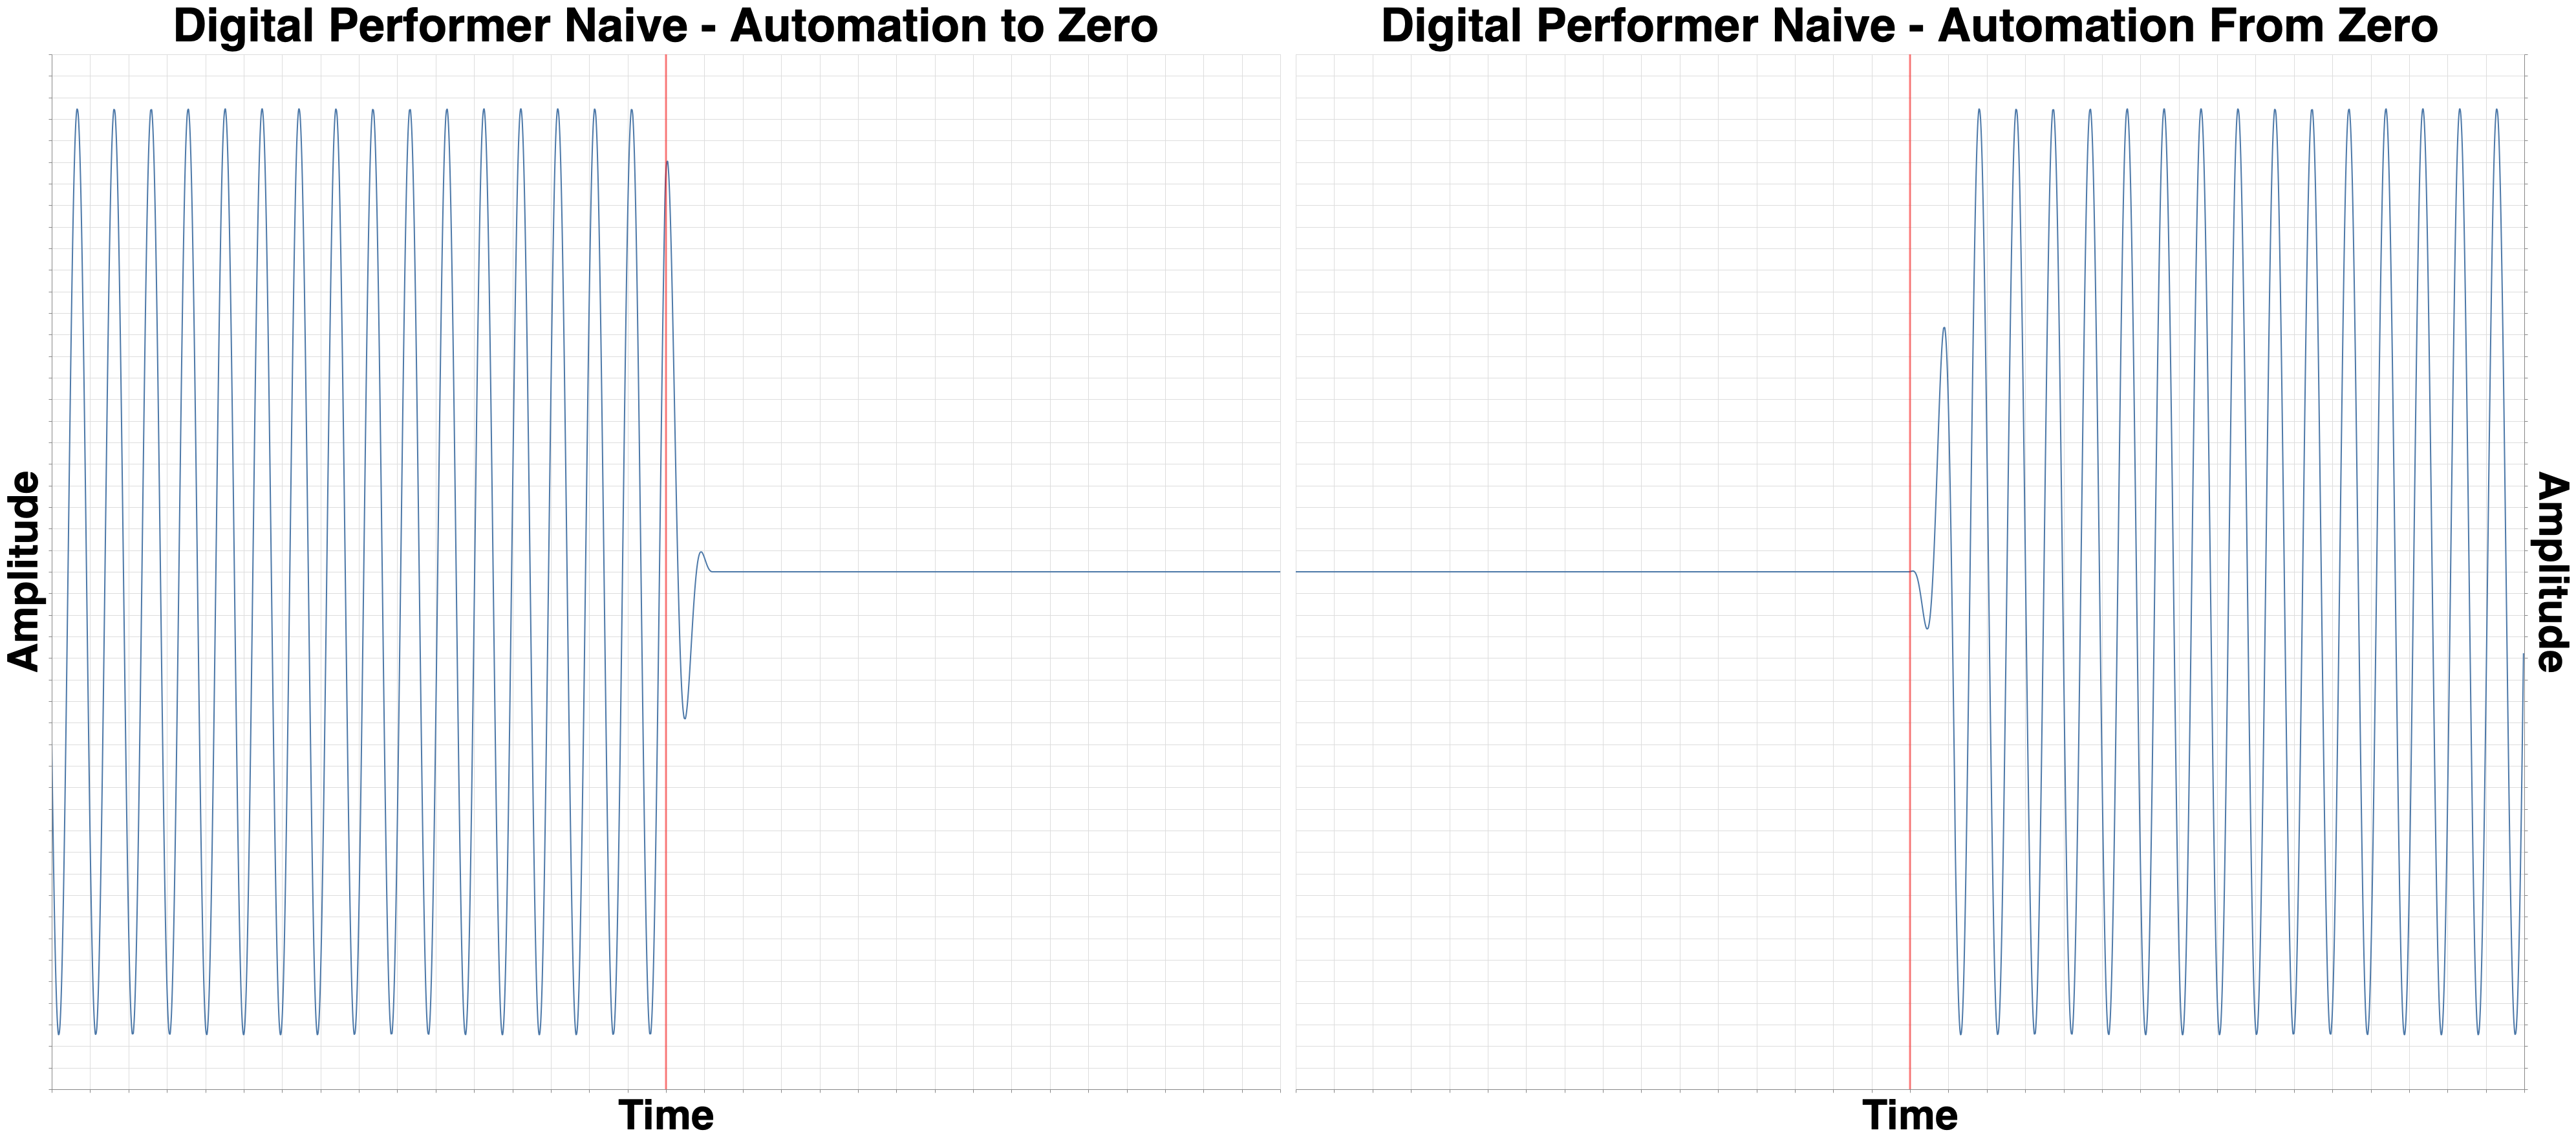
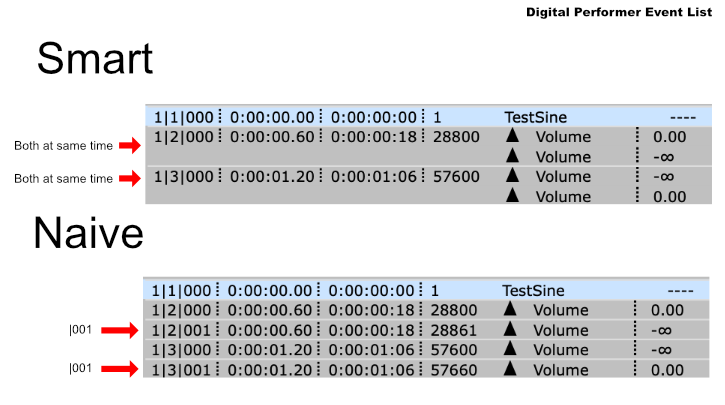
Digital Performer has a fade that’s only slightly slower than Reaper, but there’s a gotcha here.
DP doesn’t have easy automation snapping, so it’s easy to end up with two points that separated by a fraction of a time division. The other side of this is that DP also has the easiest way to precisely set automation: the Event List.
Open the Event List and make sure the automation points occur at the same time and you’ll be rewarded with excellent results.
Ableton Live 10.1b22
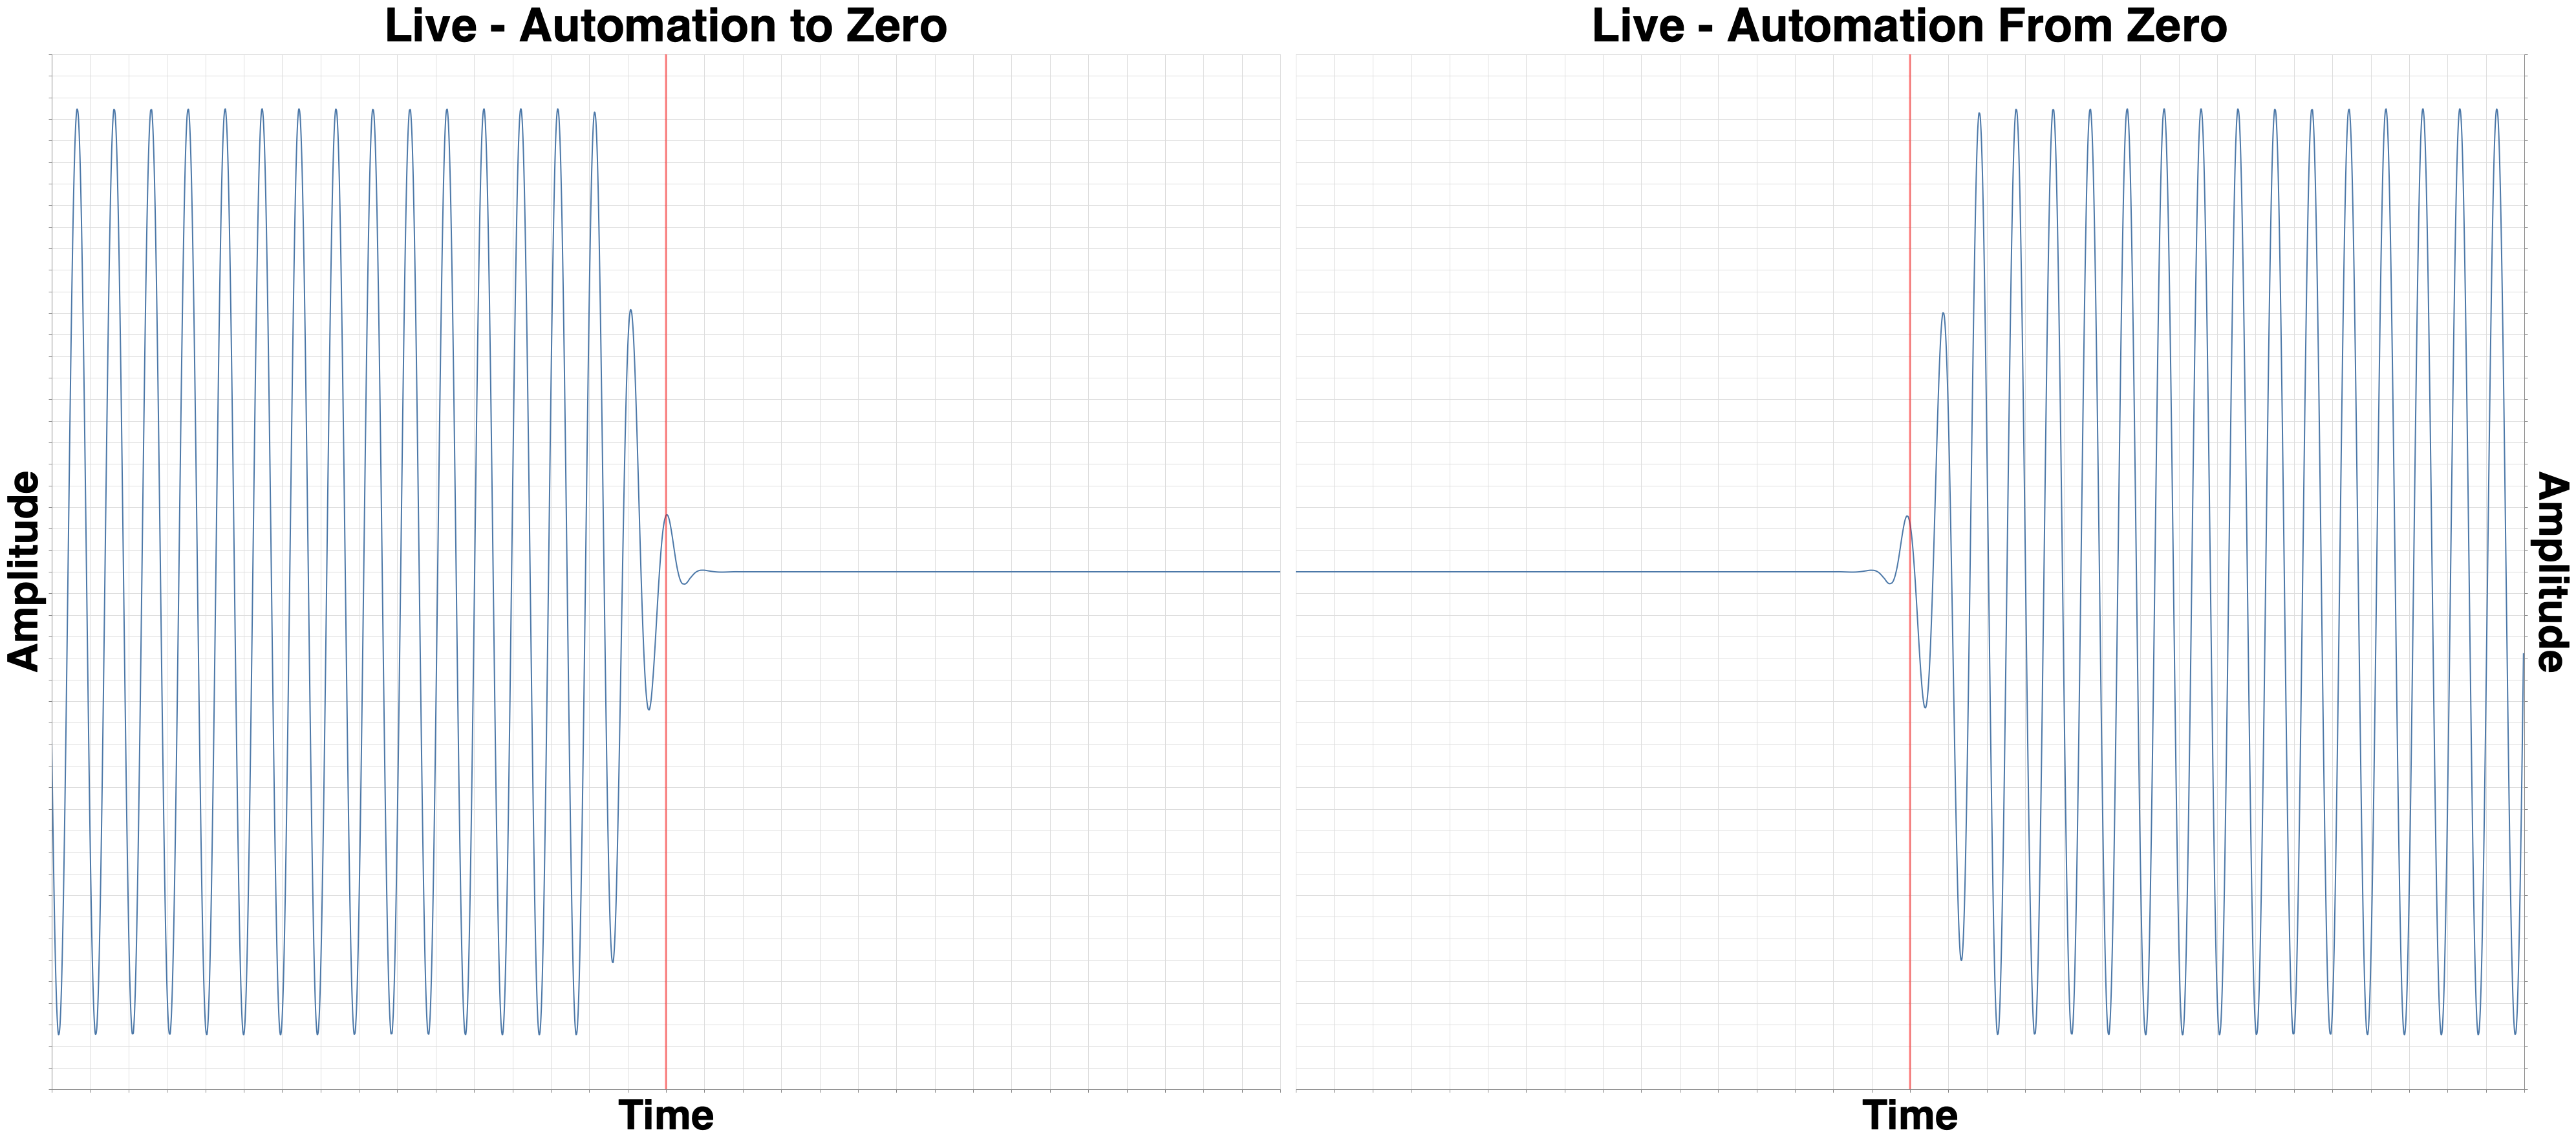
Here begins what I’d consider to be “deficient” products, everything including and below Live.
Live begins to fade for about 2ms before the transition to -Inf, and 2ms after the transition to 0dB.
I believe that this is preferable to Cubase’s method.
Cubase 10.0.15
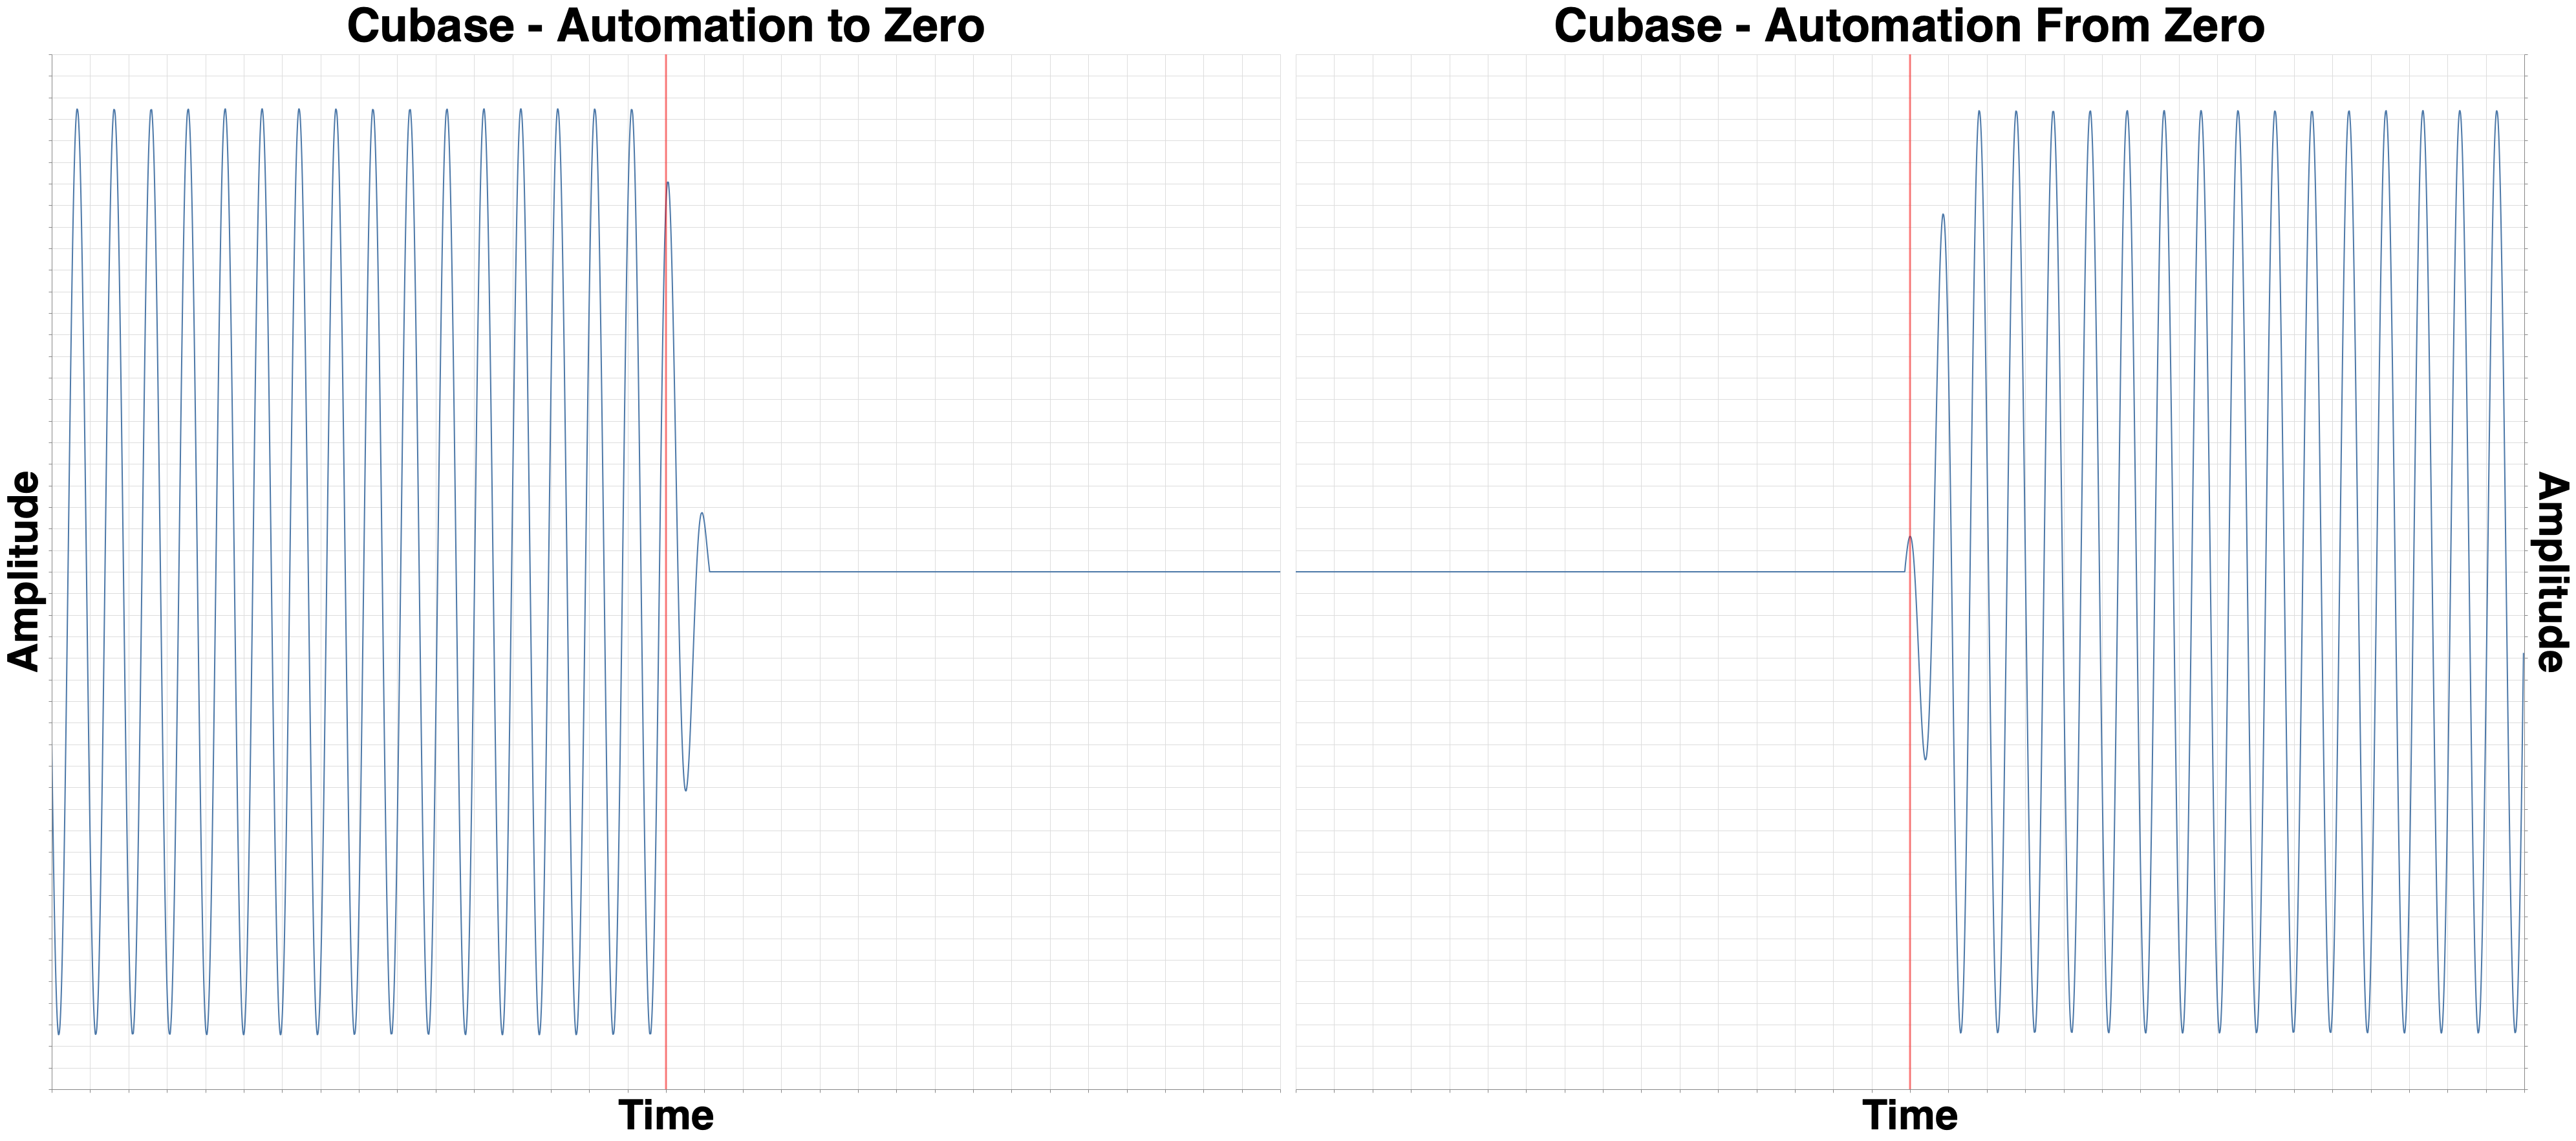
Cubase always fades from the previous value to the next. So if you were trying to “mute” a section like in this test, then there will be initial leakage, and the beginning of the next part will be cutoff.
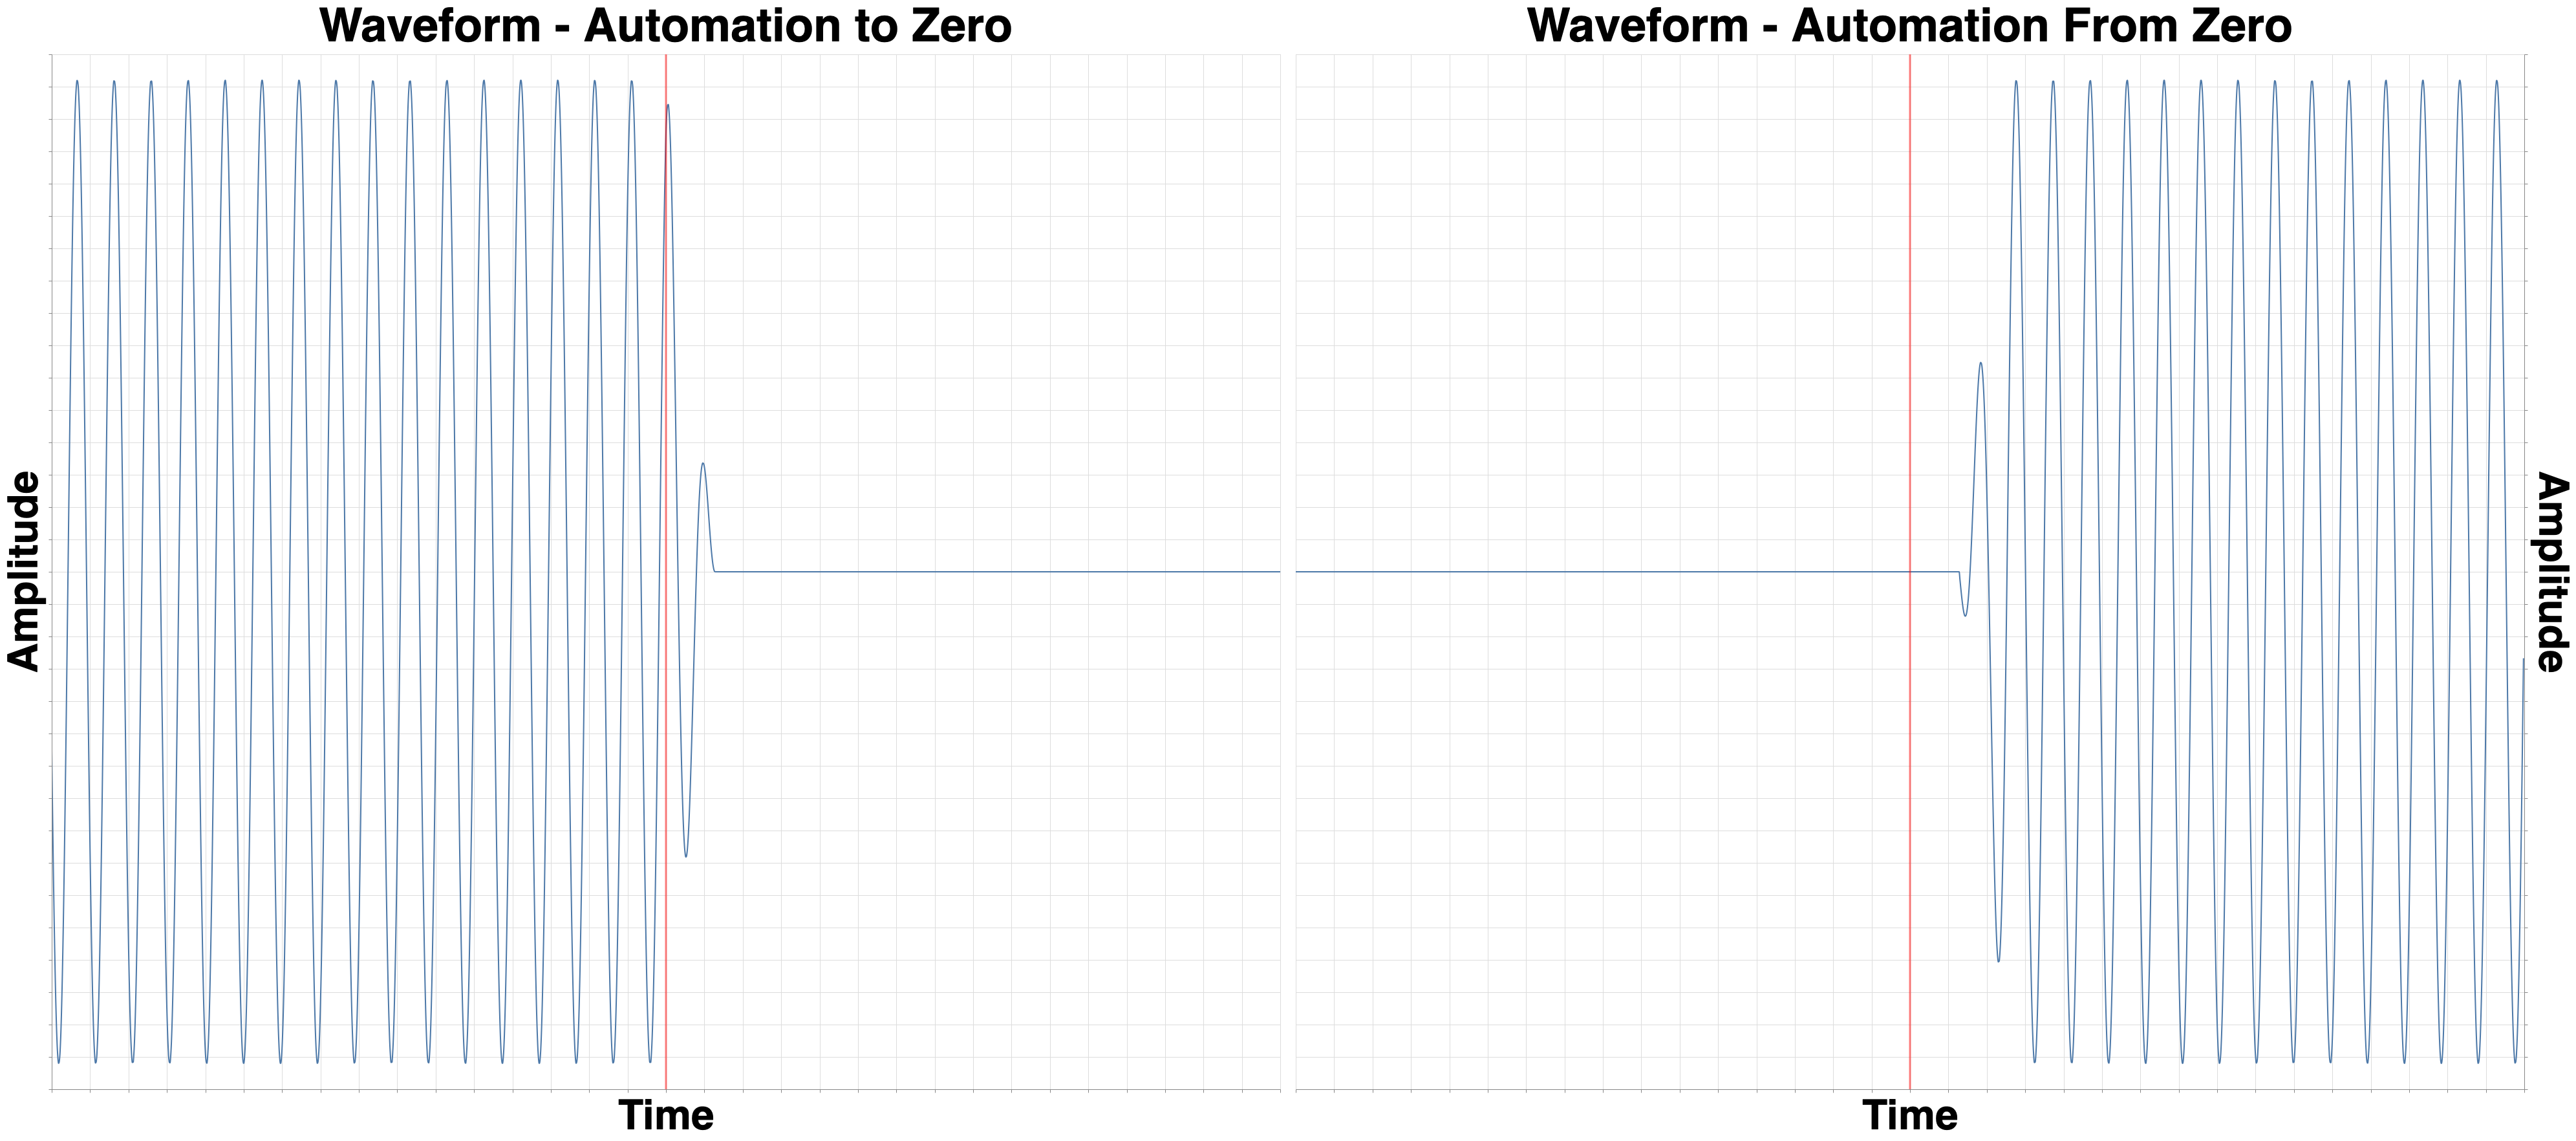
Waveform 10.1.5
Waveform is late on automation for some reason.
I’m certain that the values were set correctly since Waveform 10.1’s Actions window lets you edit and view automation values easily.
However, even though it’s late, it’s still better than everything below.
Logic 10.4.4

If you’ve watched this series then you’re aware of Logic’s 5ms automation fades.
It’s also difficult to get the points exactly where you want them to compensate for the fades.
Annoying, but it’s been like that for over a decade.
Ardour 5.12

Ardour is slow, but in both situations. 20ms+ fade.
However, Ardour is consistent, and setting points to where you want isn’t terribly difficult.
Bitwig 3.0 Beta 3

Bitwig handles the fade to -Inf ok, however the transition from -inf to 0dB is terrible.
The interface shows an abrupt transition from -Inf to 0dB, but the rendered audio is a 20ms+ fade. Totally unacceptable.
I hope they notice this and get it fixed.
FLStudio 20.1.2

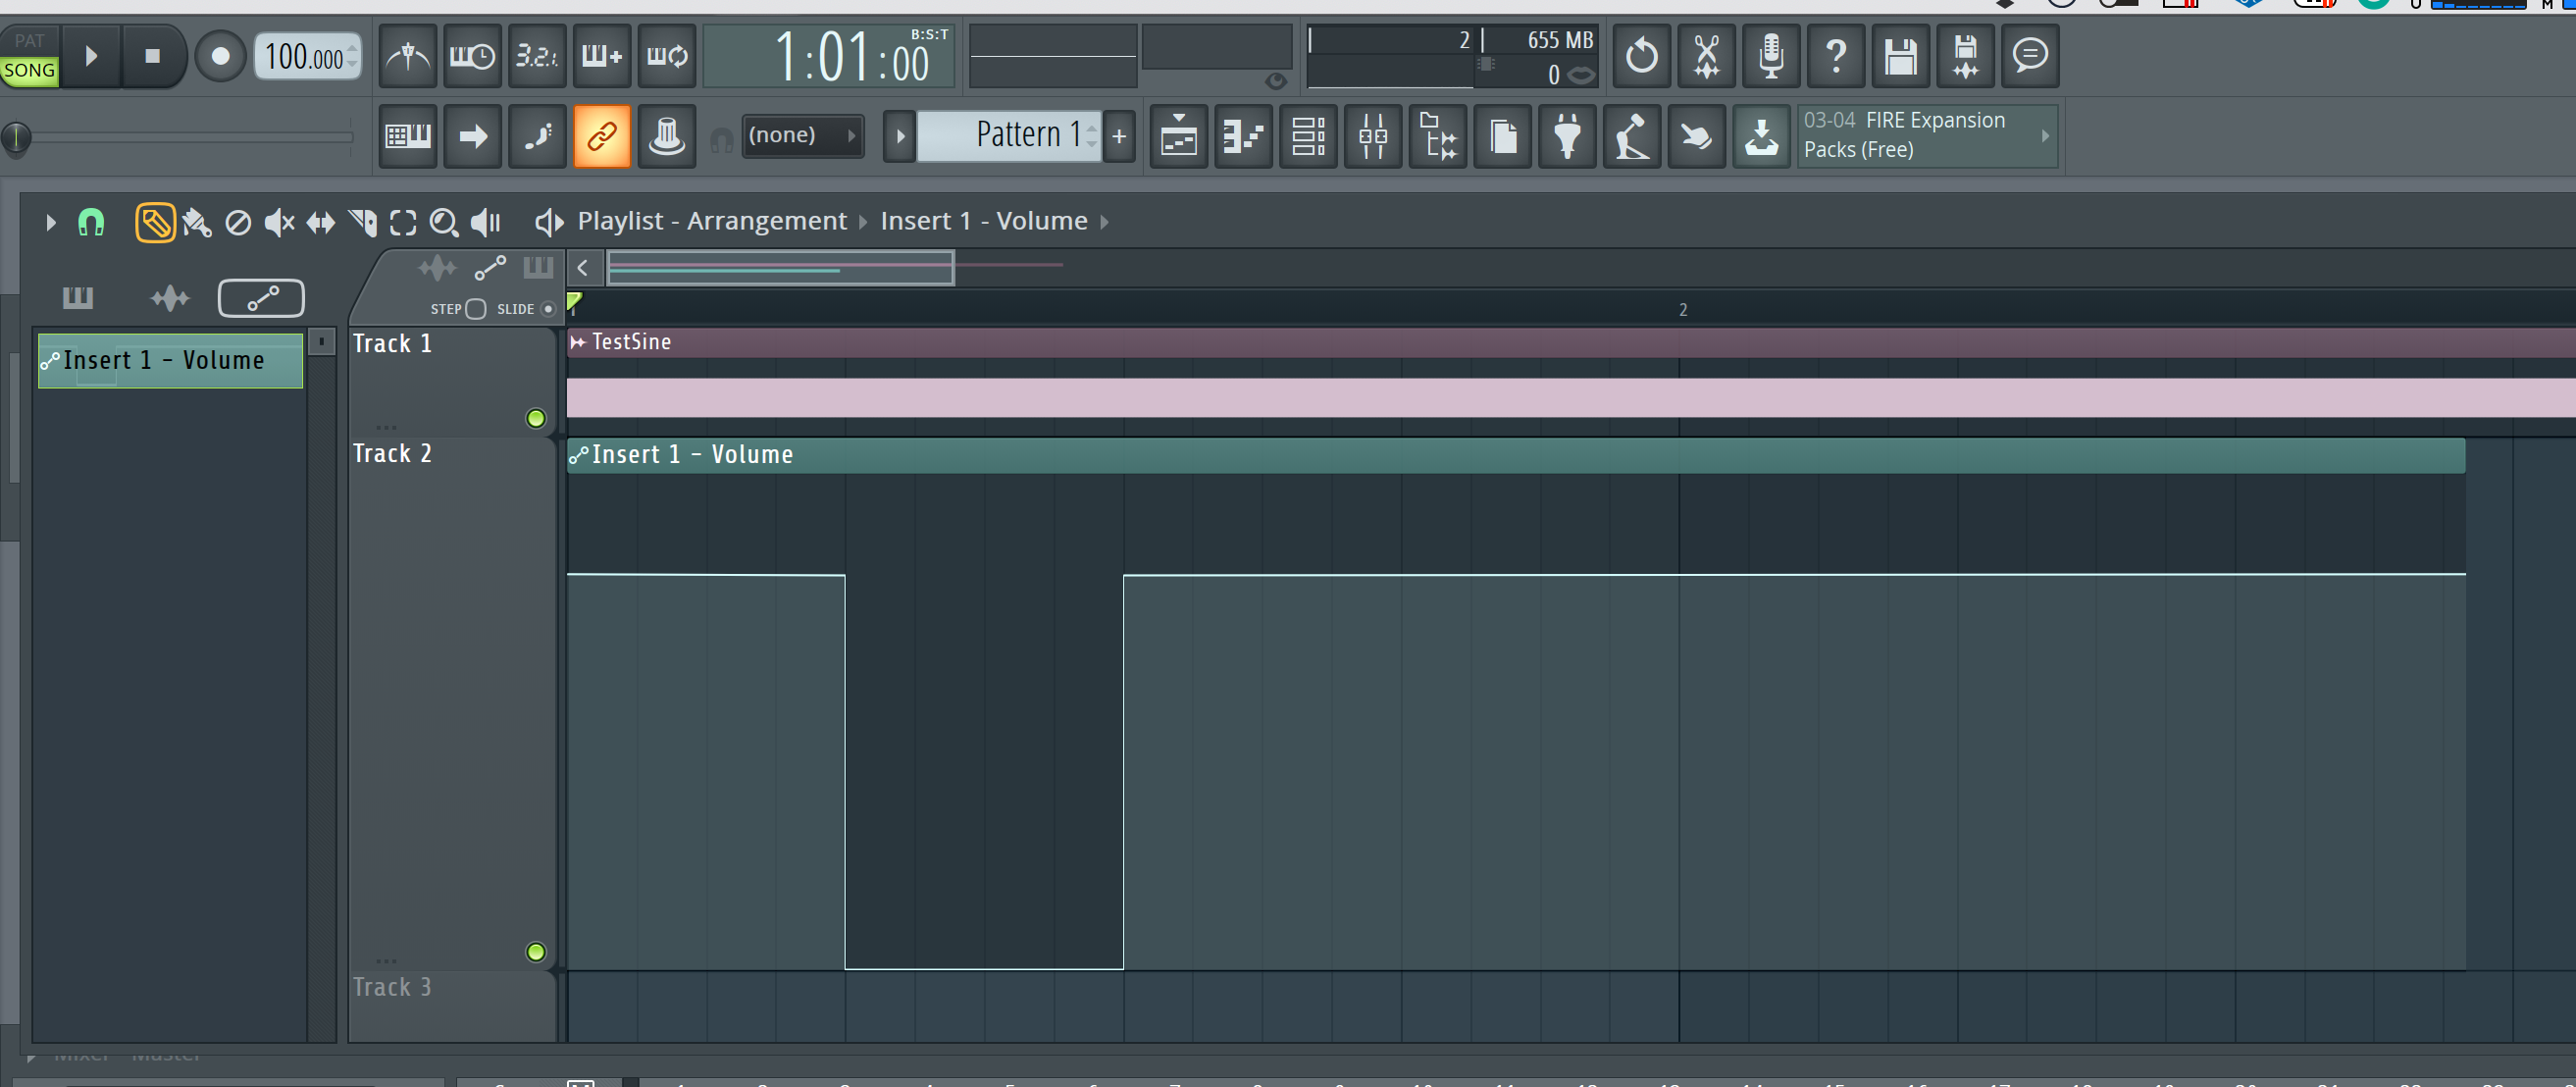
Let’s take a huge fade time and make it inaccurate. Welcome to FLStudio.
I’m fairly sure that this has to do with point priority regarding snapping. If there’s a way to consistently determine which of two points snapping to a point takes priority, then I could not find out how. (though, I didn’t try very hard… why should anyone have to try for this nonsense?)
25+ms fade in both directions and difficult to create accurate or precise time values.
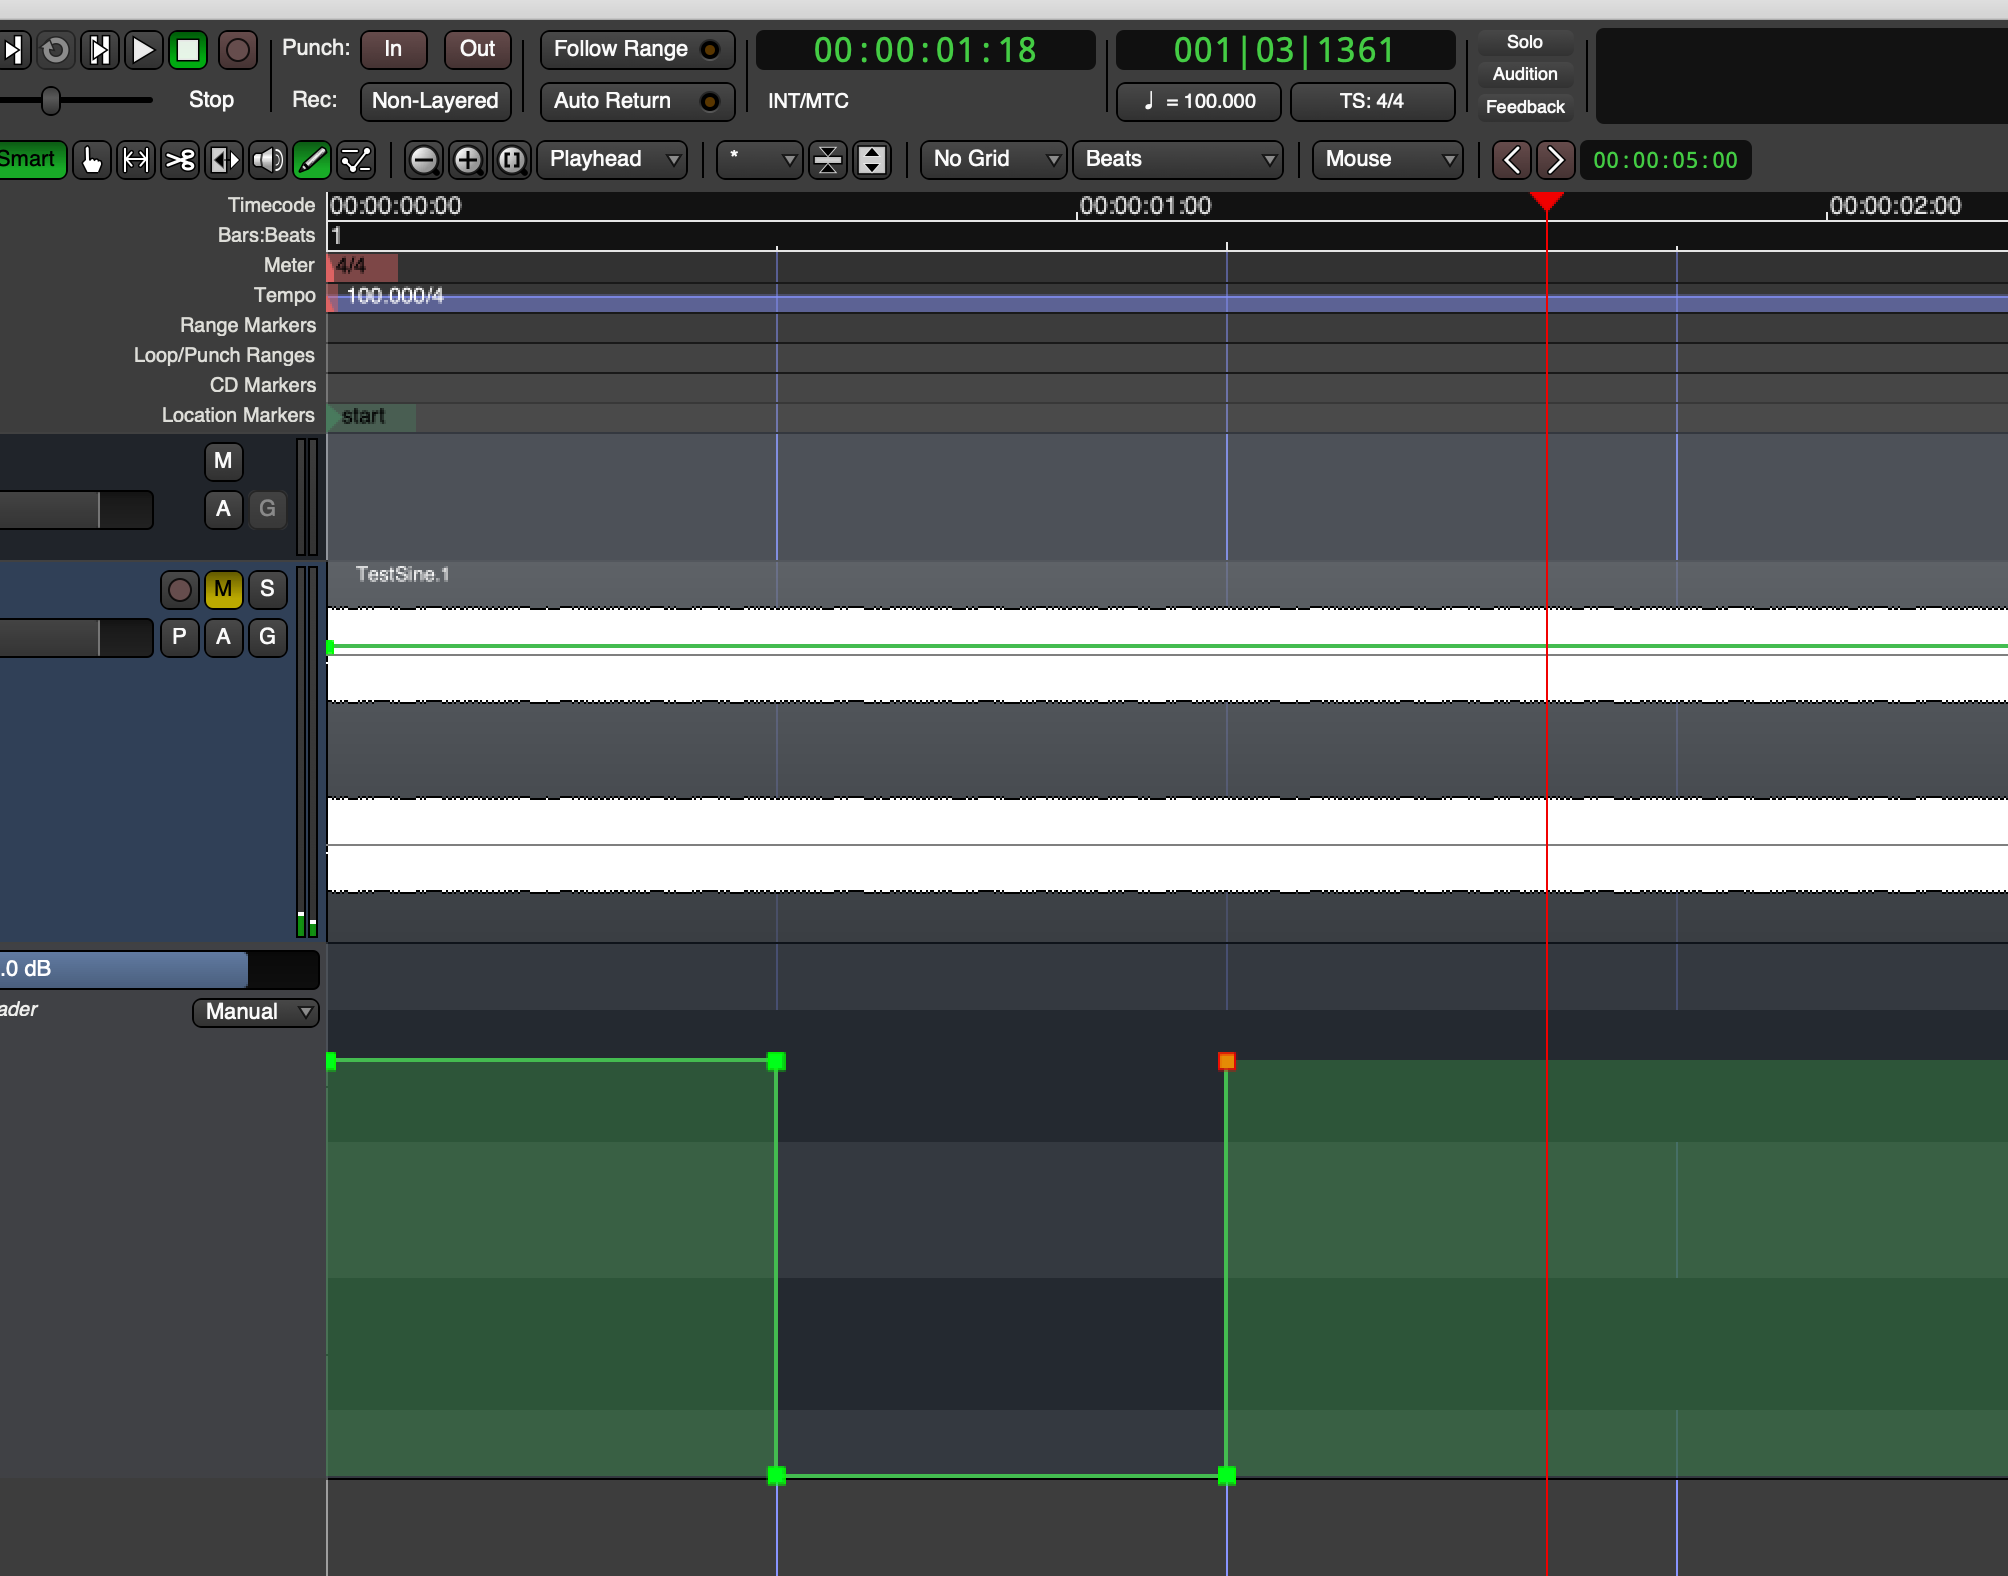
Studio One 4.5.0

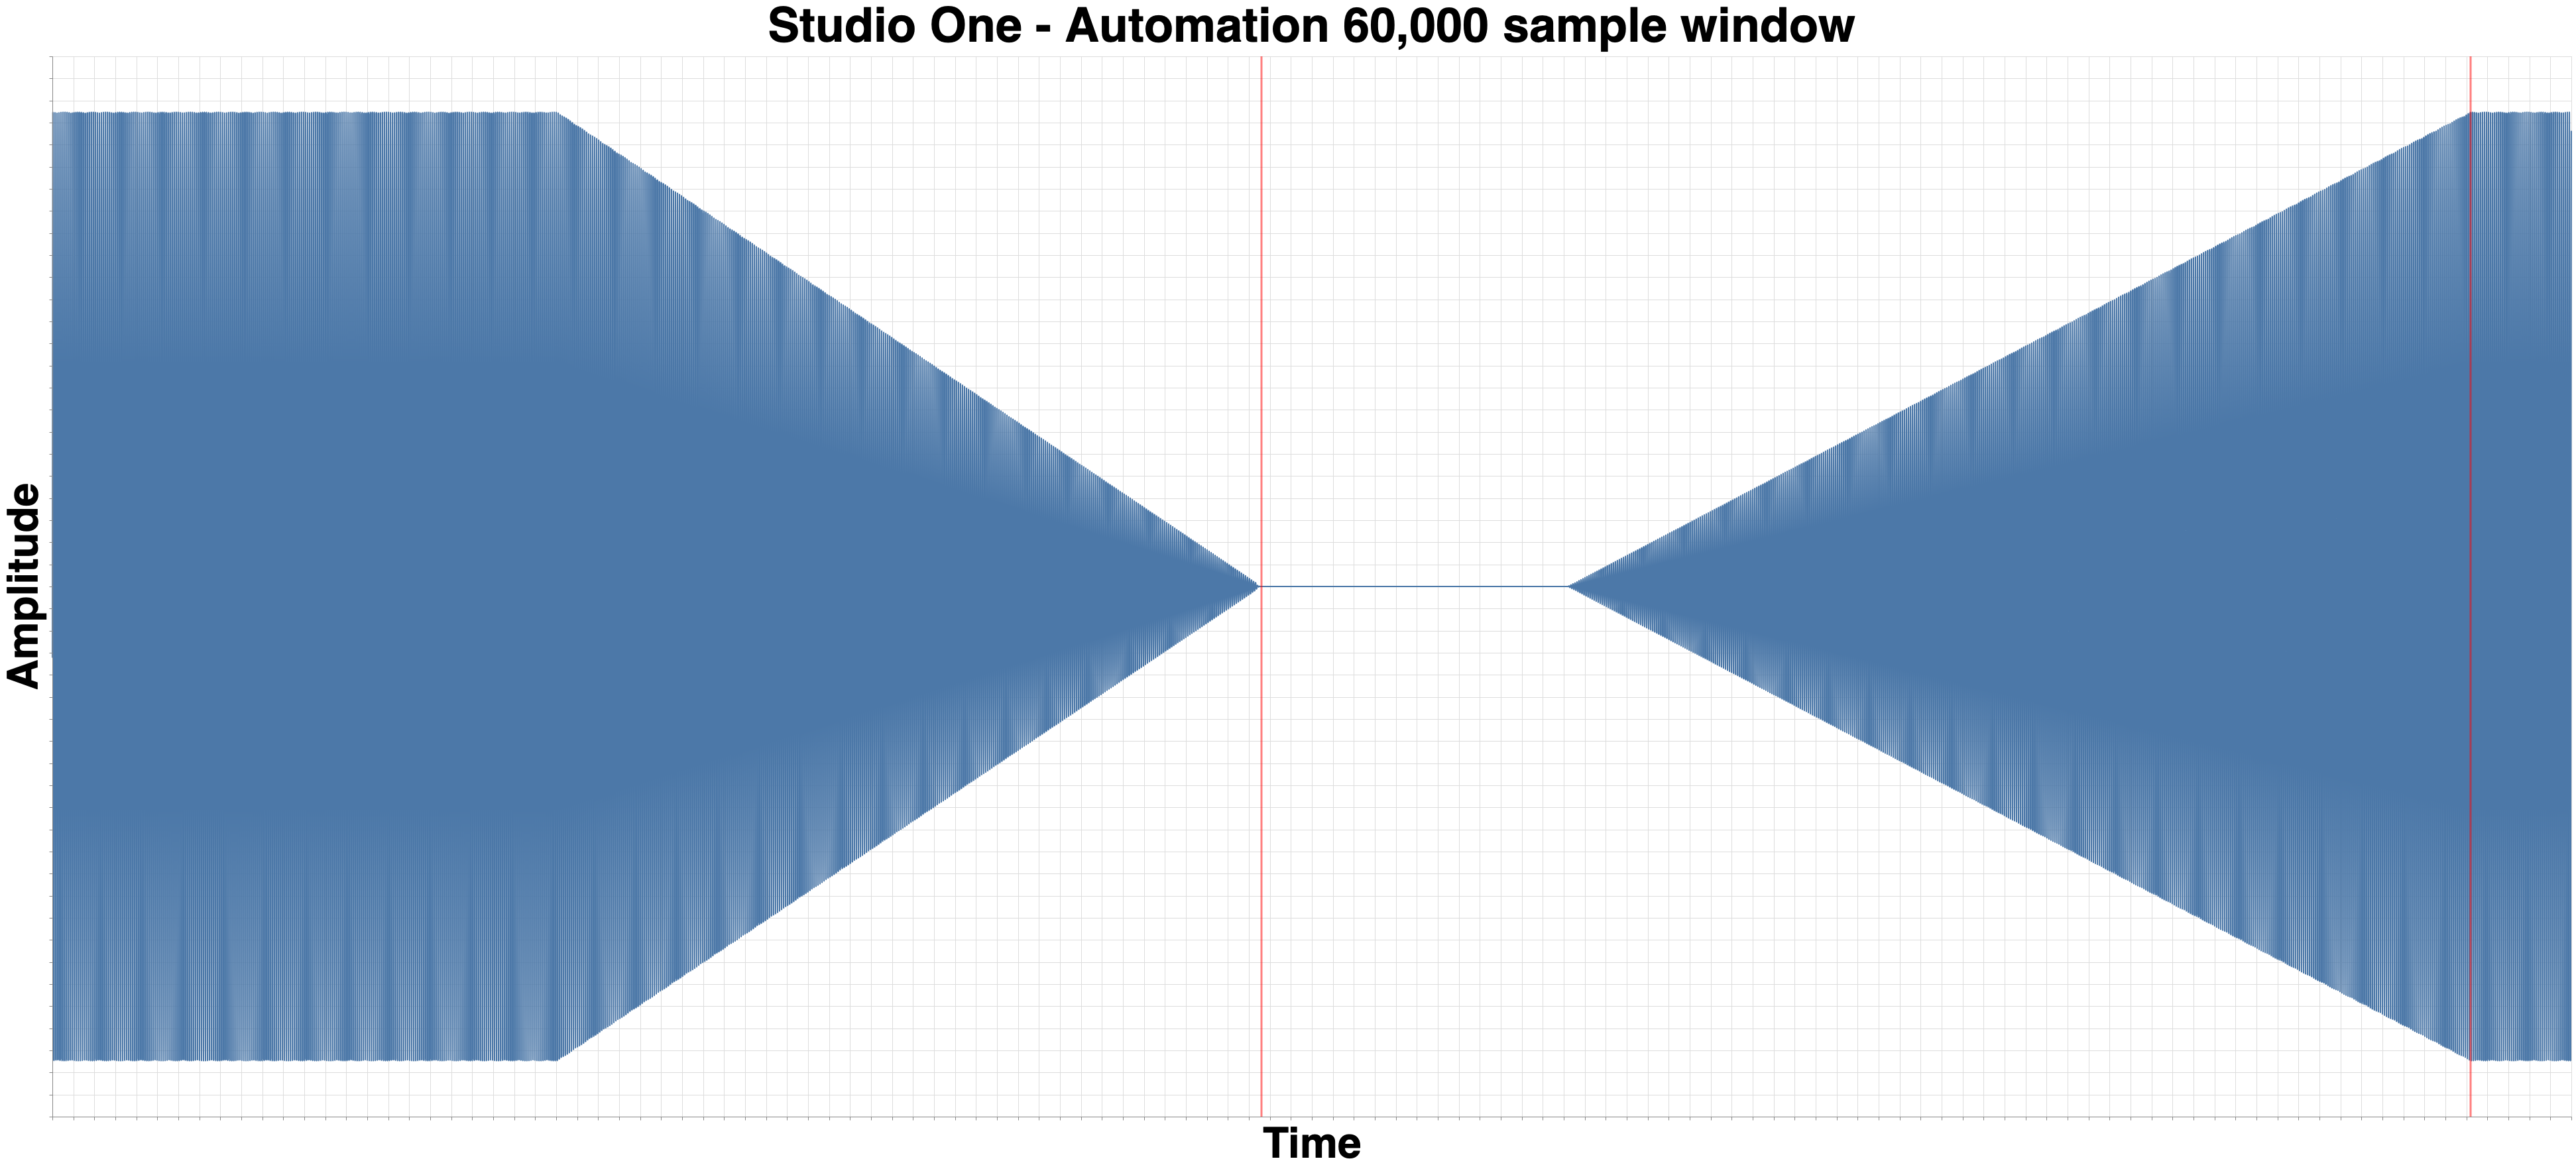
Yes, it gets worse. Unsurprisingly it’s the reigning champion of sucking at automation: Studio One.
The normal 1600 sample (800 on both sides of transition) window was way too small. I had to render the entire file in a single image with a 57,600 window. In the large image, each block is 1,920 samples on the X-axis.
That’s a 15,360 sample fade. 48 samples is 1ms. 320ms fade when then visual feedback, and what I entered, is a sharp transition.
HOLY COW
Studio One already had some problems with automation, but this takes the cake.
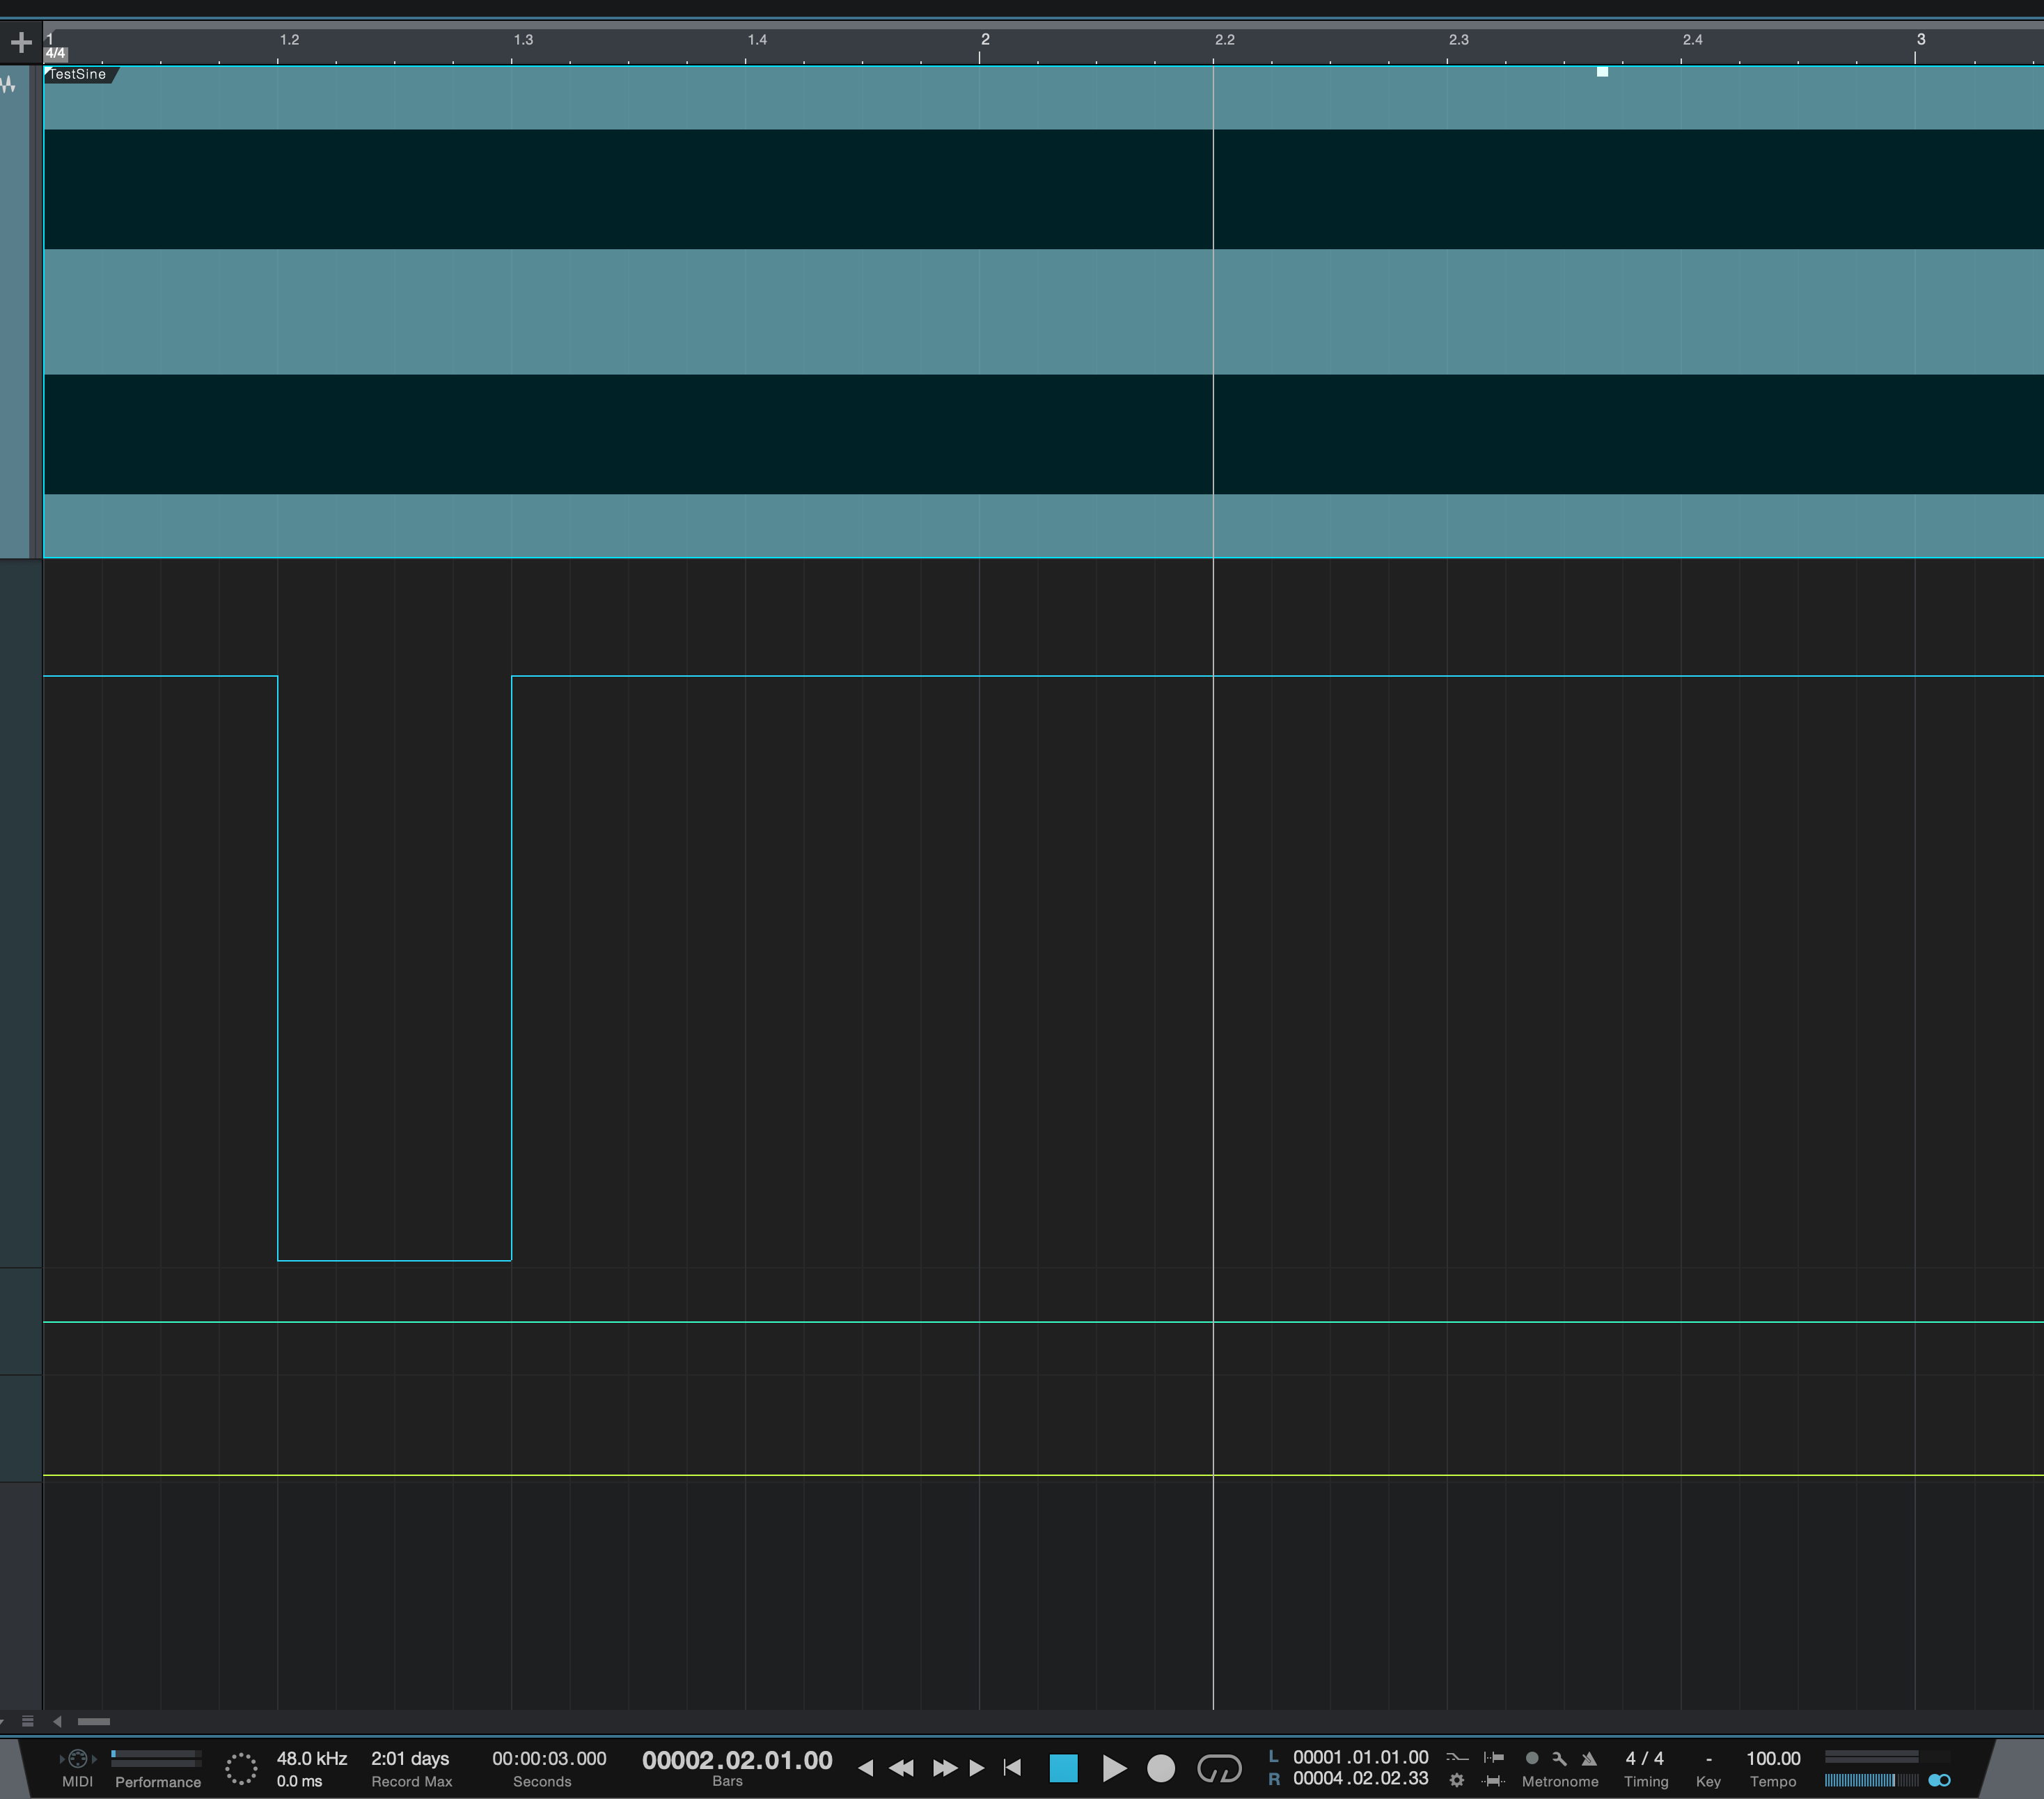
Studio One 4.1.4

I had a sneaking suspicion something was up. I have projects with this type of automation that work just fine… I thought.
Studio One 4.1.4 has excellent automation fade time in this regard, but it had that distortion for all automation.
Version 4.5 fixed the distortion, but it broke this.
I guess there’s always 4.5.1?
Conclusion
DO NOT TRUST ME. Try this yourself. It’s really easy to setup, render and then inspect the render in your DAW.
Does this matter? YES. This can affect when/where you put your automation and the results. It’s especially important for dialogue automation where leaking room tone at the end of a phrase can sound unnatural. Similarly important when working with heavily distorted guitars, live drums, synth patches with reverb etc…
Should you drop your DAW over this? This time… maybe. It’s pretty important.
If you use Studio One, please send a very polite angry letter. If you’re reading this Presonus, feel free to contact me. audiolabs, gmail.
Thanks for reading.
Support Me!
This post took 49 hours to research, screenshot, program, screencast, write and edit. If you appreciate the information presented then please consider joining patreon or paying me for my time spent bringing you quality content!
