My wife has a neck injury for which she uses resistance bands in her therapy regimen.
The rub is that the bands need to be held at certain positions, in various ways, so that she can pull on them. Our house is basically a labyrinth of workshops, we don’t even have a living room. We’re both artsy/crafty folk that don’t have much of an interest in a “normal” house. The result is that there’s only one place in the house where she can spread her arms out.
That place also happens to be the main walkway in the house. Which means I don’t want things on the wall where I’ll inevitably run in to them and destroy it, or me.
My solution was to build a portable resistance band holding station that can be clamped on the wall.
Luckily, this also buys me some time for my next review that’s coming up later this week. It’s taking me some extra time so consider this post my ninja-kung-fu redirection while I finish it.
On with it!
Contents
- Wood
- Marks
- Crosscut
- Mark Parallel
- Transition
- Planed
- Center
- Mark Divisions
- Drill
- Drilled
- Clean
- Dirty
- Cleaning
- Cleaned
- Roundover
- Rounded Over
- Cut Open
- File
- Finished
- Support Me!
Wood
I’m starting with a portion of a pine 2”x4”. Simple construction lumber. It’s worth about $2.
Marks
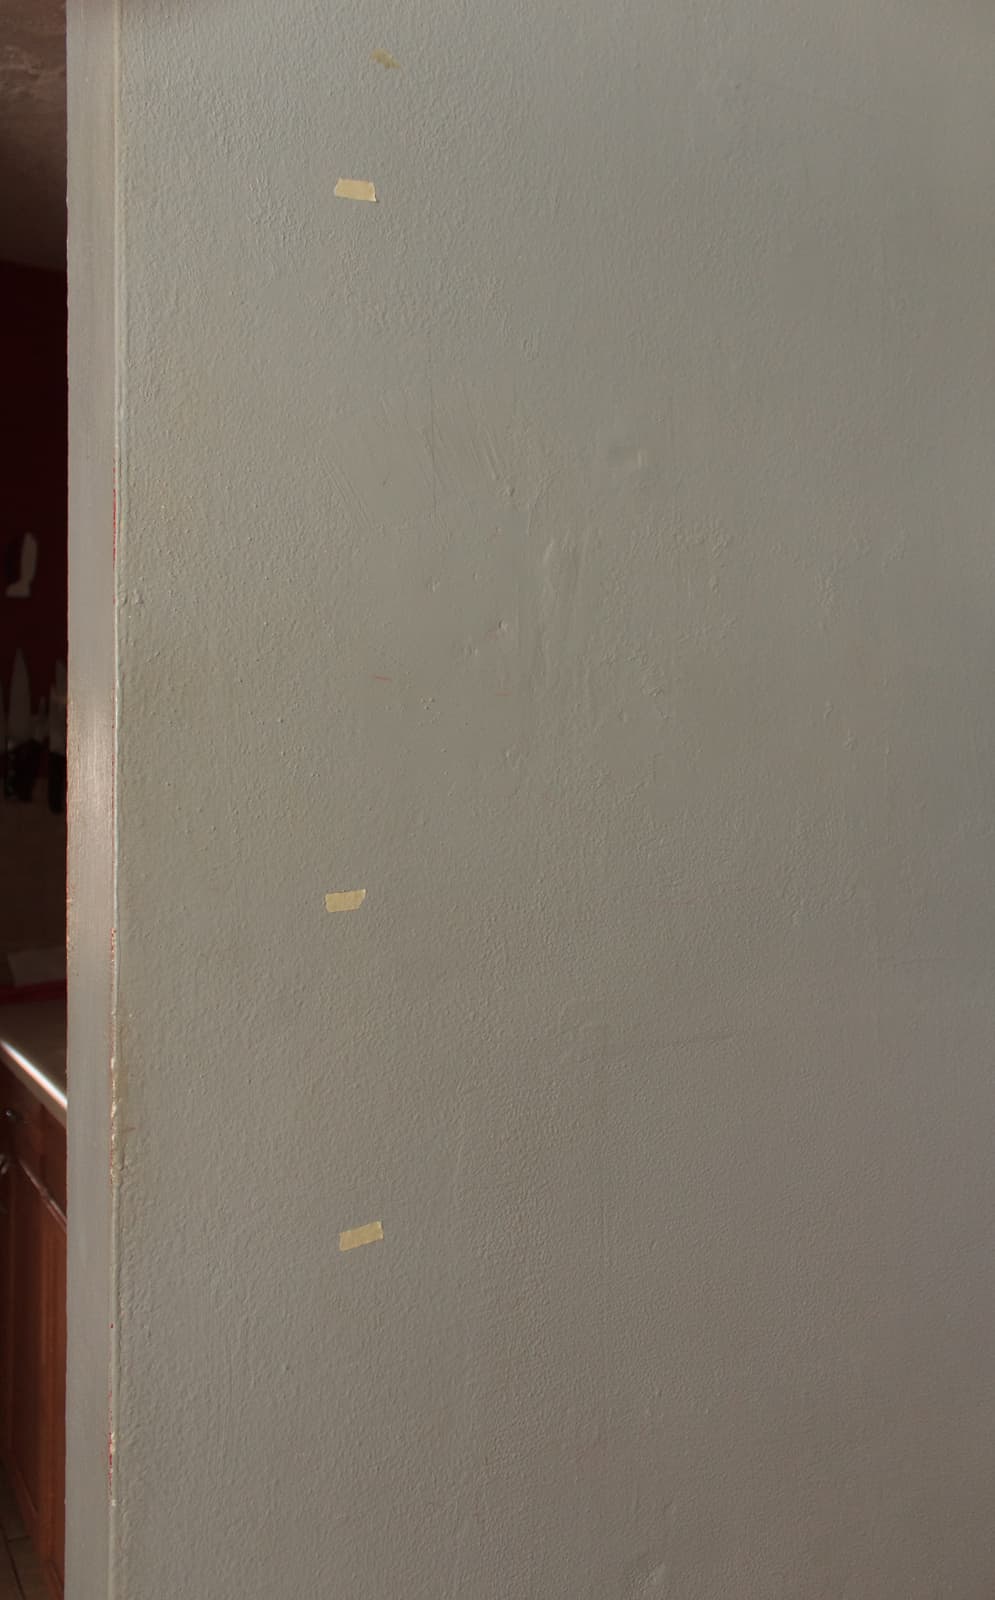
My wife put masking tape marks on the wall where she wants holders to go, but little does she know my plan!
(Spoiler: She didn’t like my plan, and wanted exactly what she asked for. Ugh.)
Crosscut

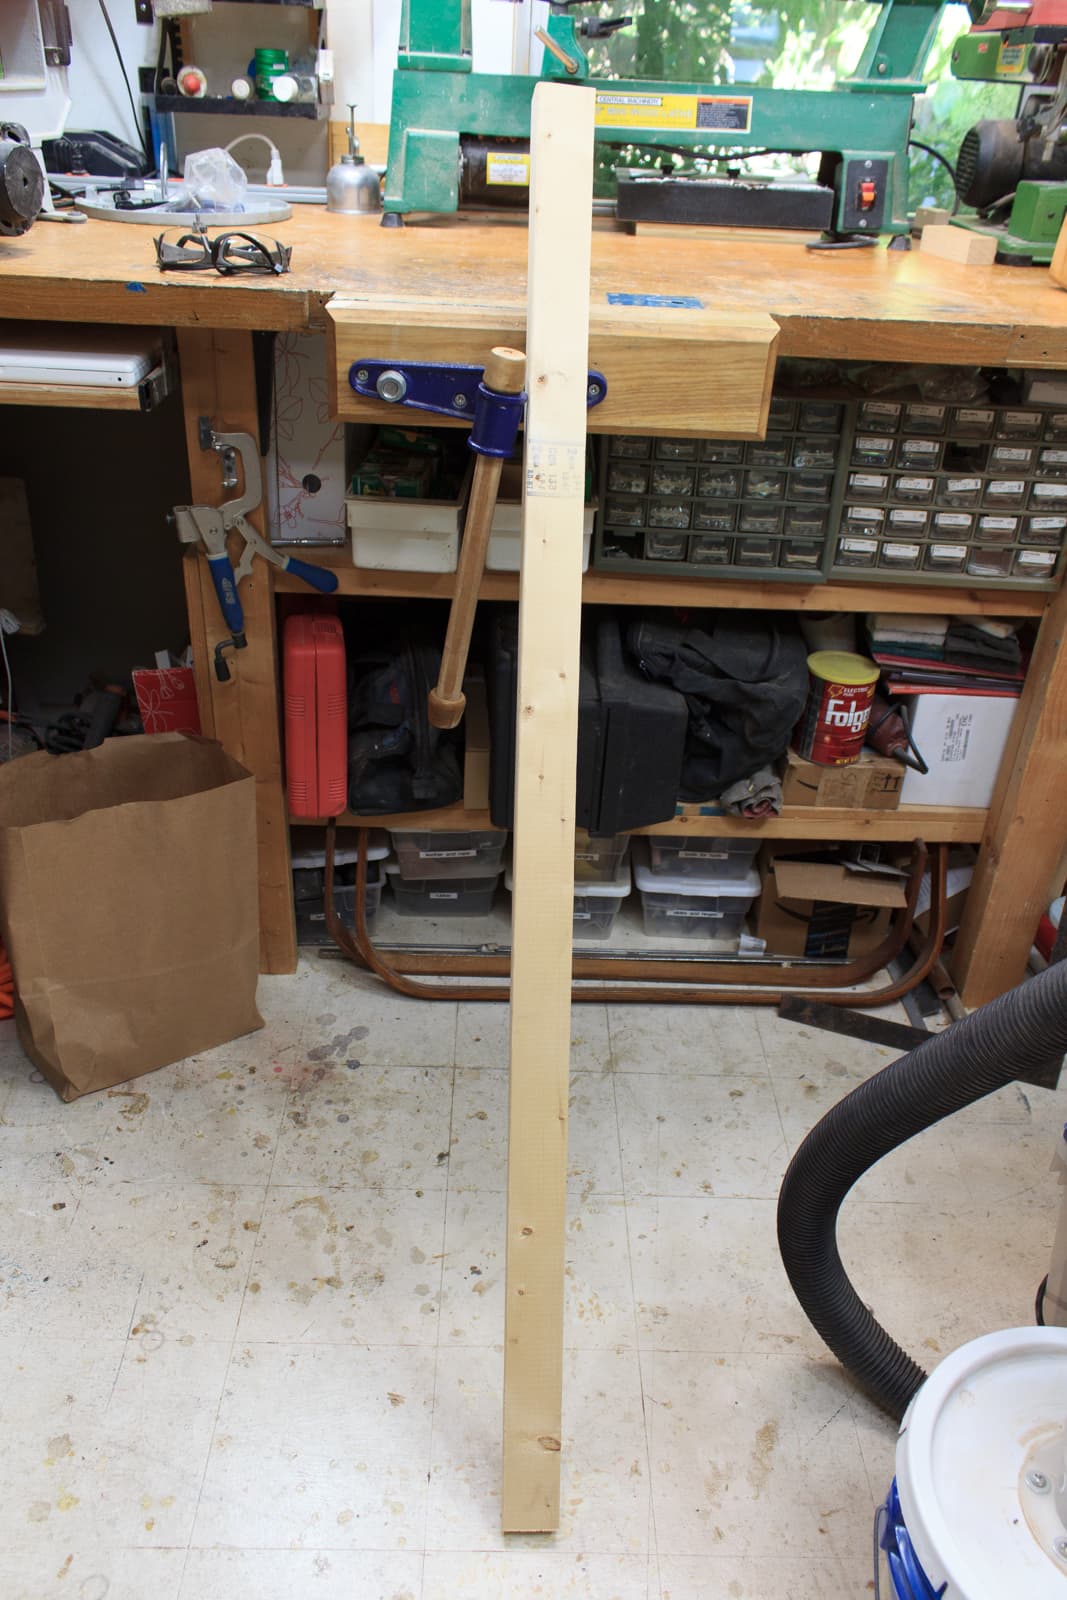
I cut the wood to 36”/0.9m. It’s cut with a Ryoba using the crosscut side.
Mark Parallel
The wood I’m working with was cut poorly by some dumb bastard (me). So I need to make the sides parallel.
I use a Lee Valley Marking Gauge to mark a line from one side to the other.
I then plane to this line. Since the marking gauge cuts a light score line, you can actually see a telltale thin shaving of wood come off when you hit the mark.
Transition
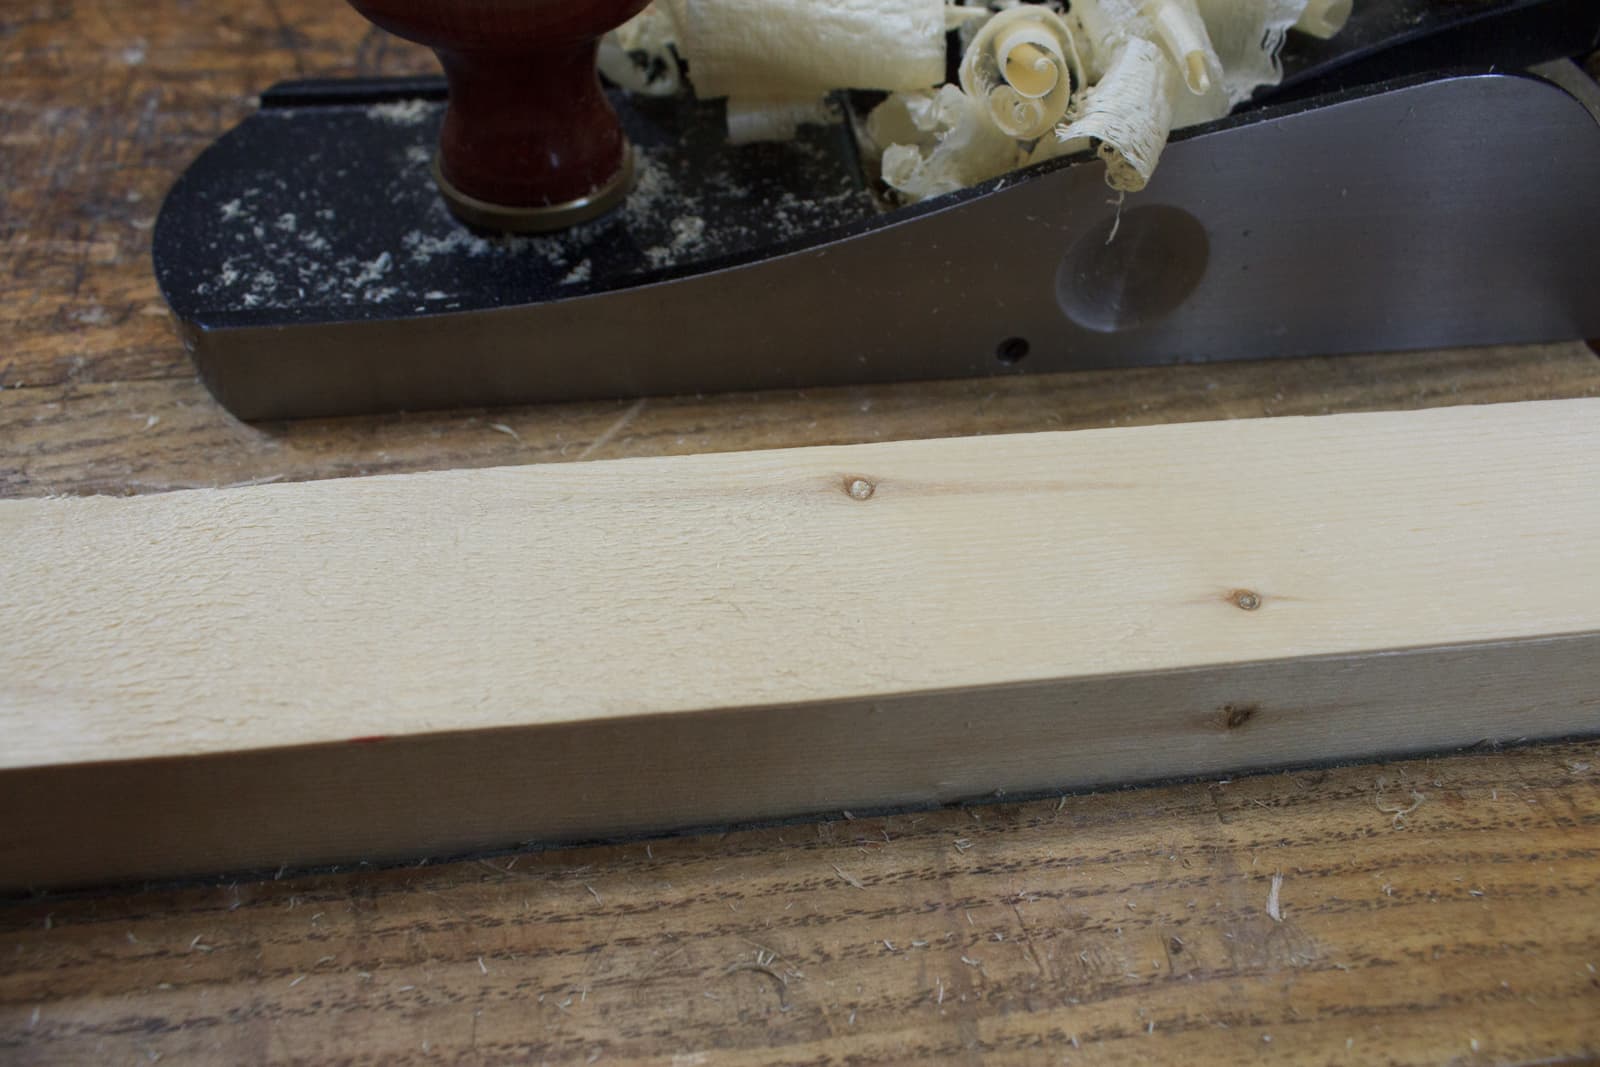
On the left you can see the fuzzy low spot. On the right is where the plane is cutting. I take down the high spot until it cuts the low spot as well.
Then I lightly fine tune the cut to match my parallel mark.
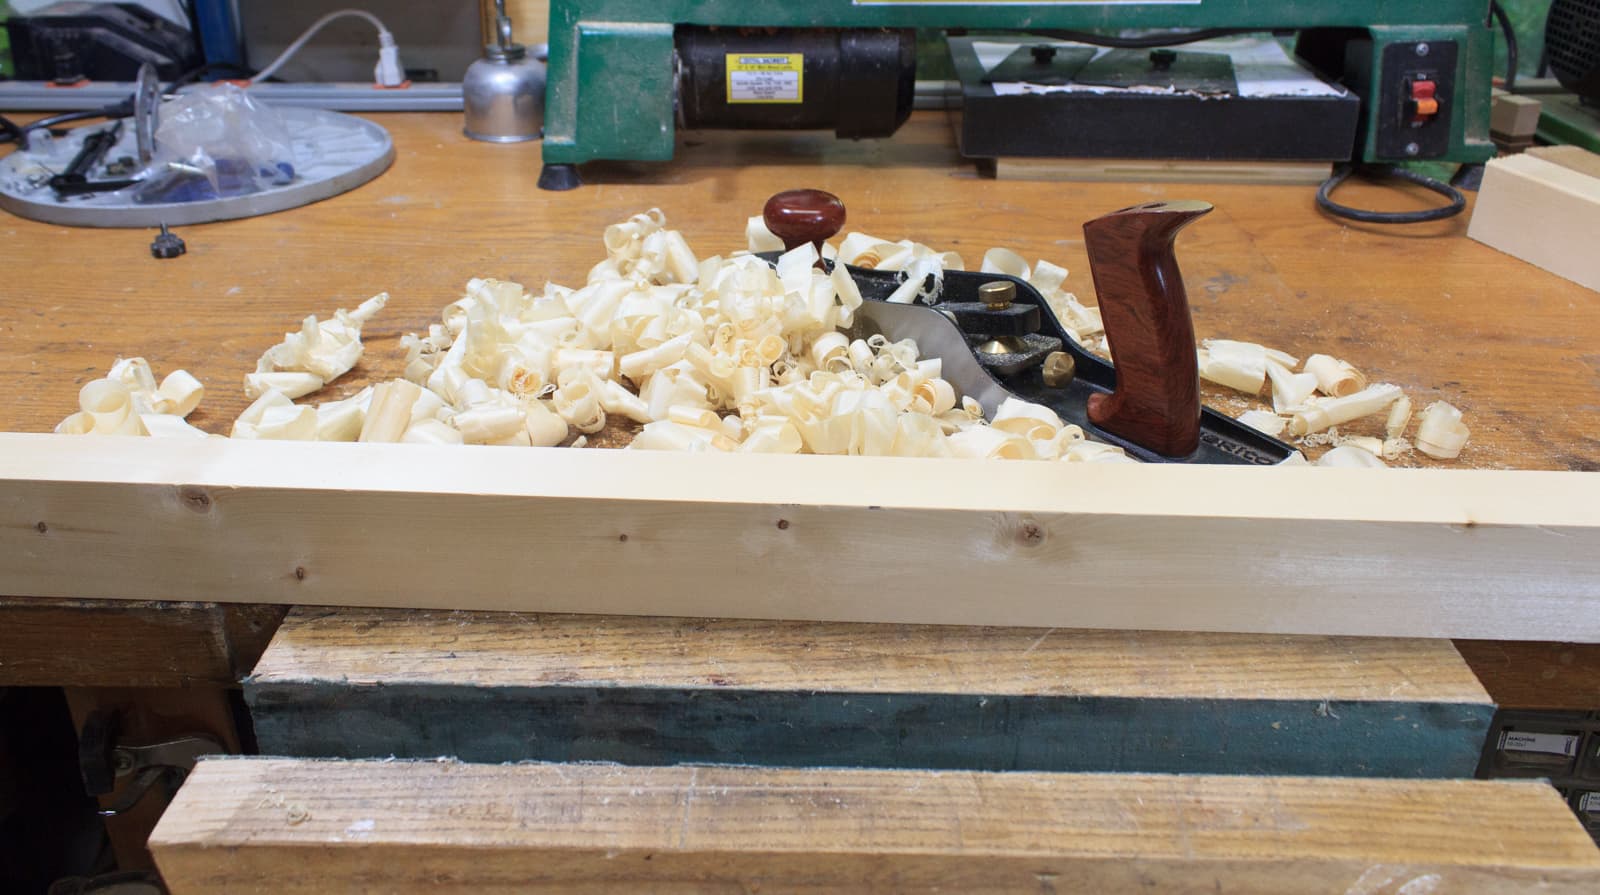
Planed
Done. Planed. 90° and parallel on all sides.
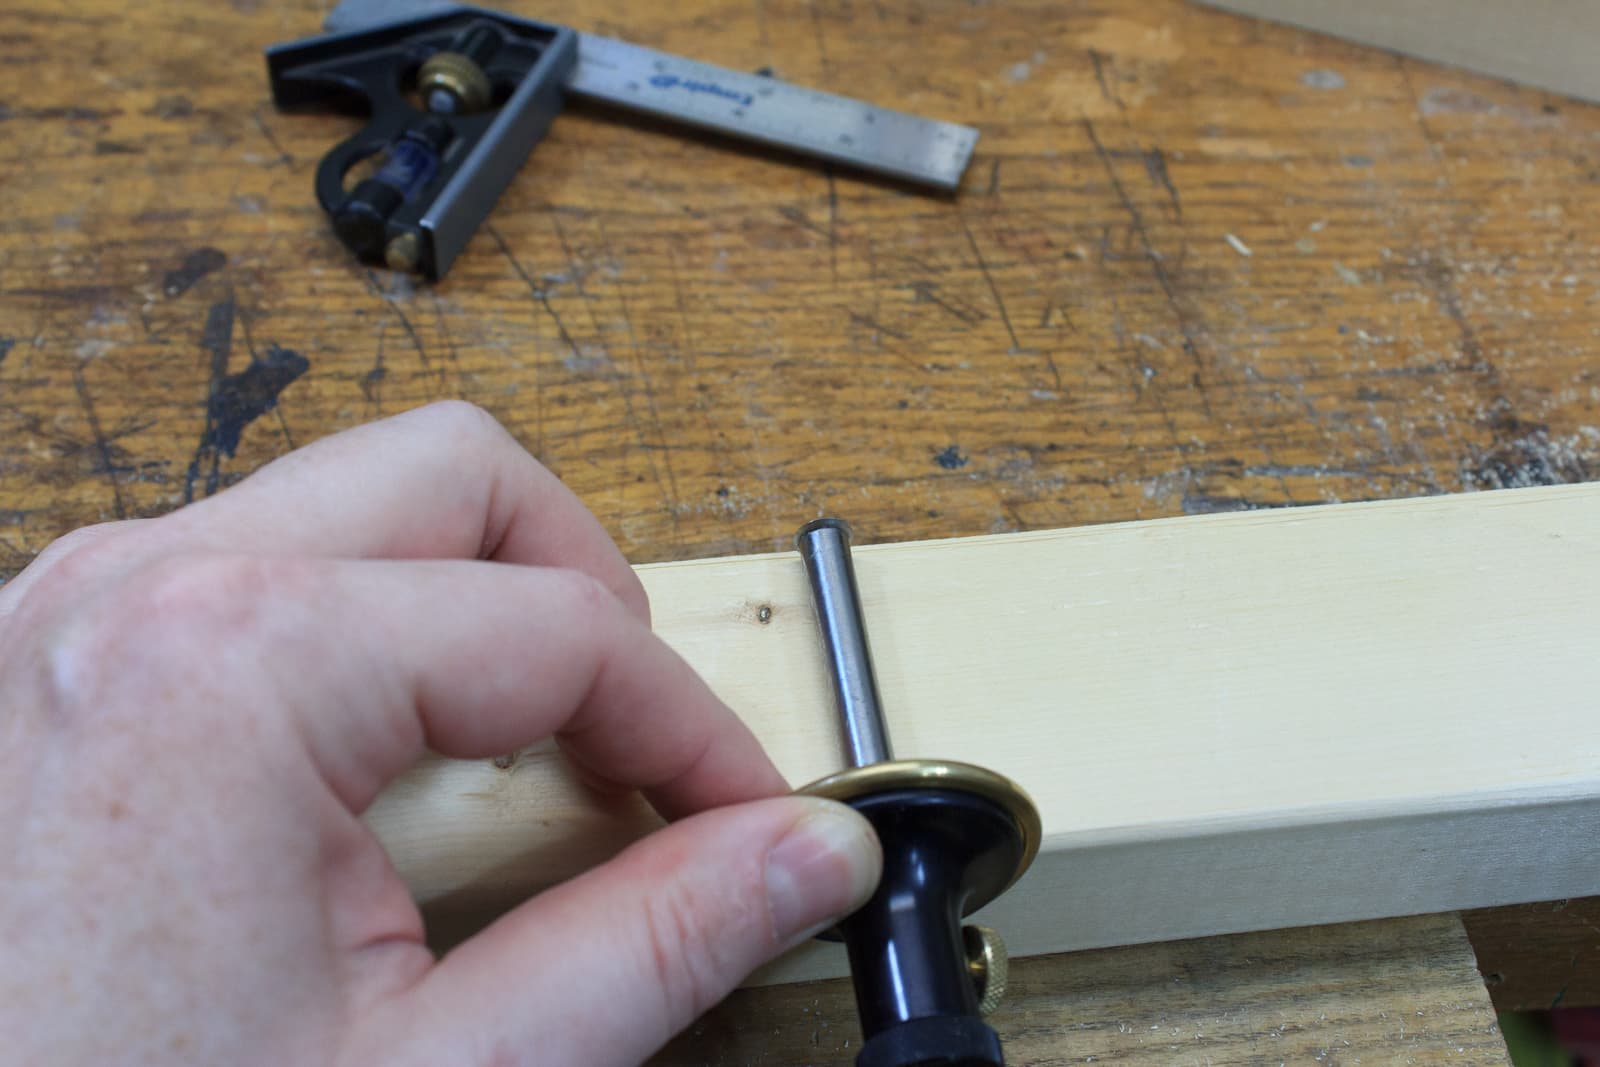
Center
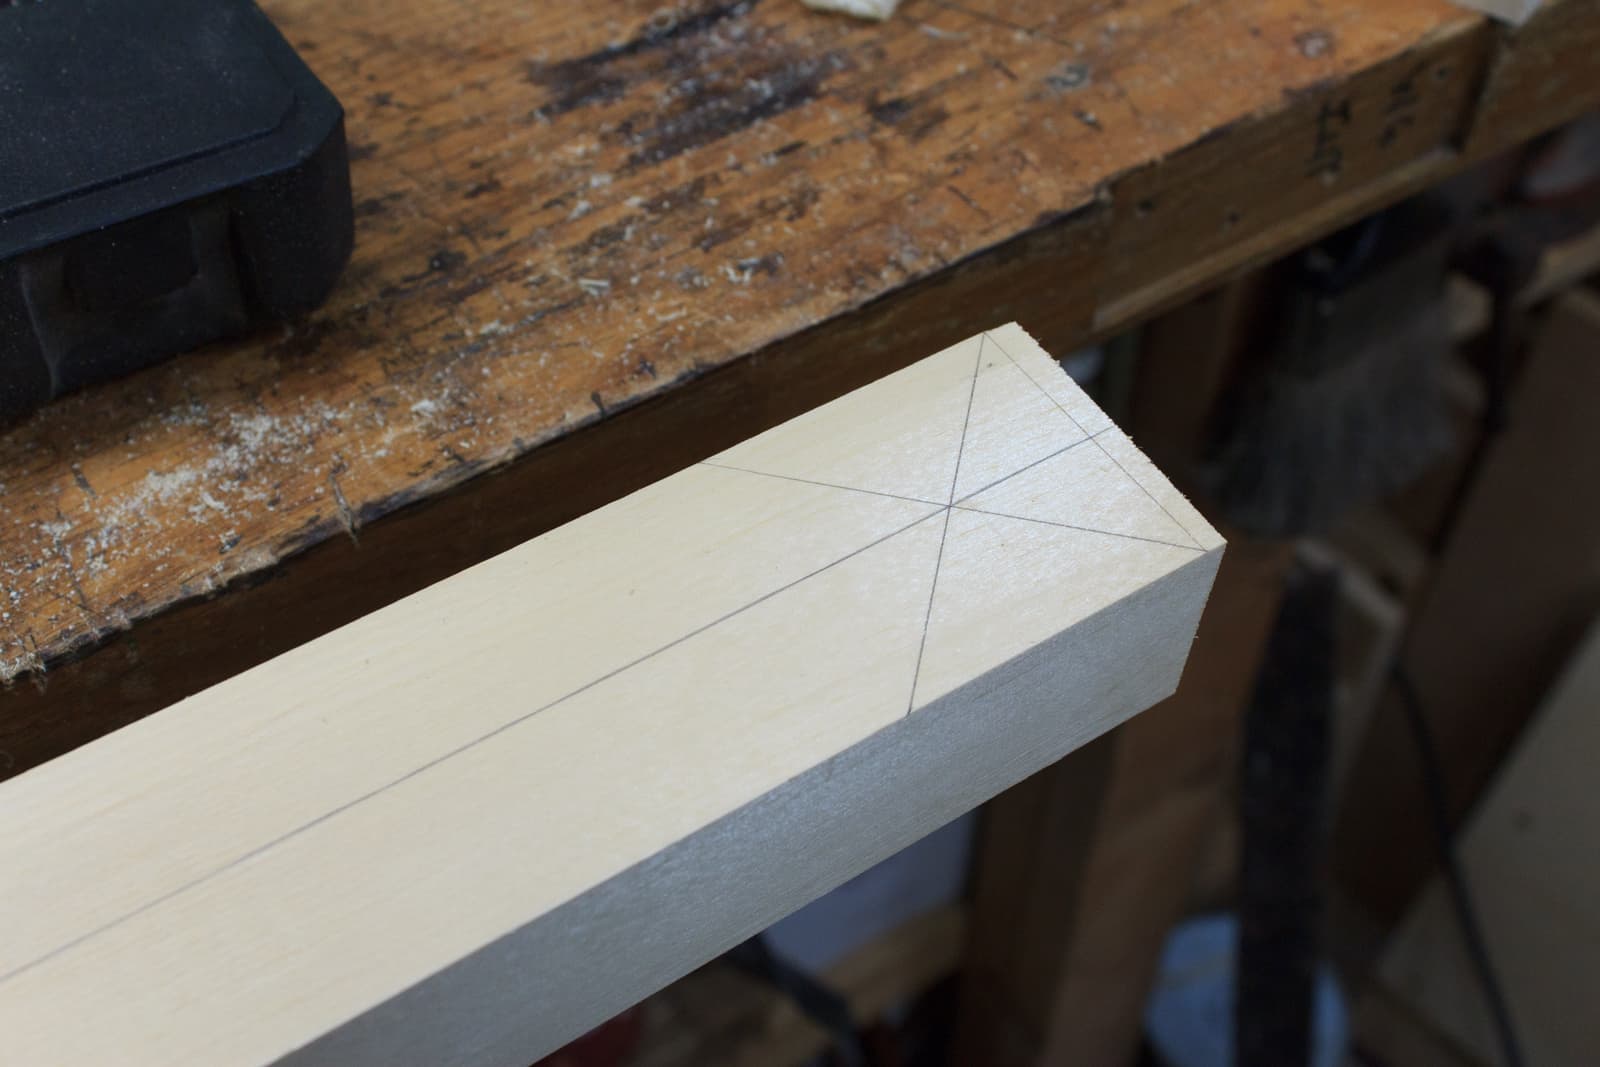
To find the center of the board I create a mark that’s 90° to a face. I have to do this because the end of the work is not trued.
I then draw an X with the legs meeting the mark and the edge of the board.
Where these meet is the center.
Mark Divisions
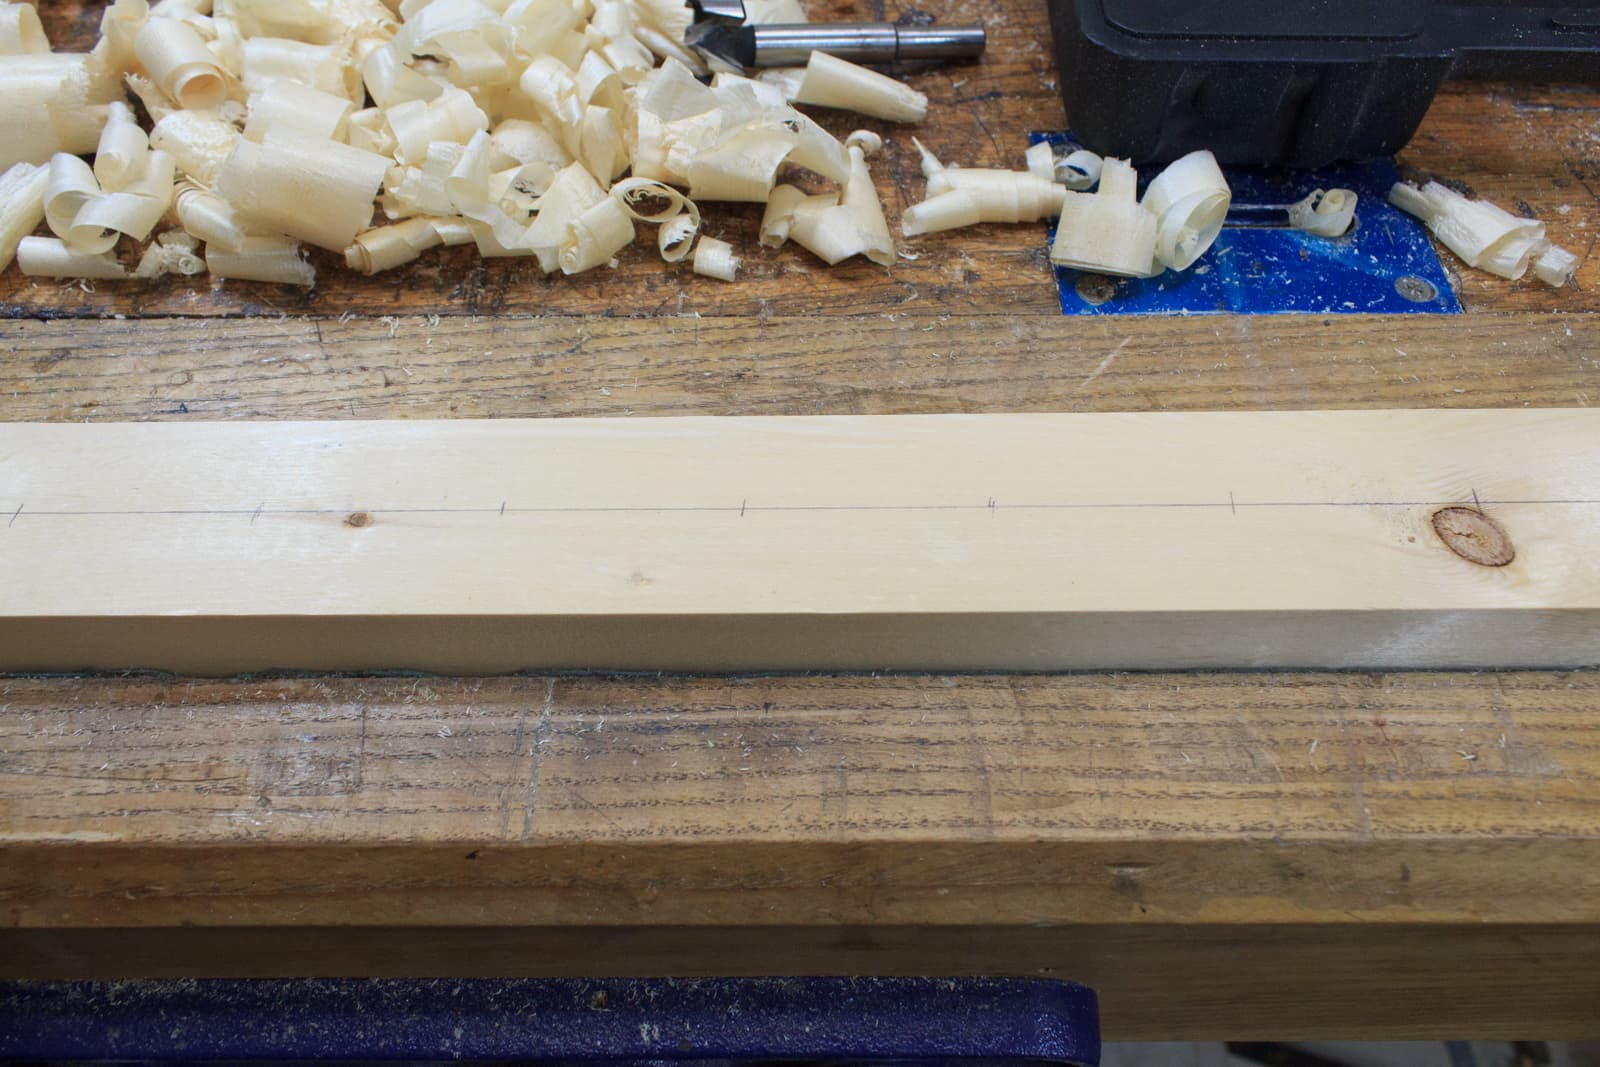
I mark divisions down the center line every 2”/5cm.
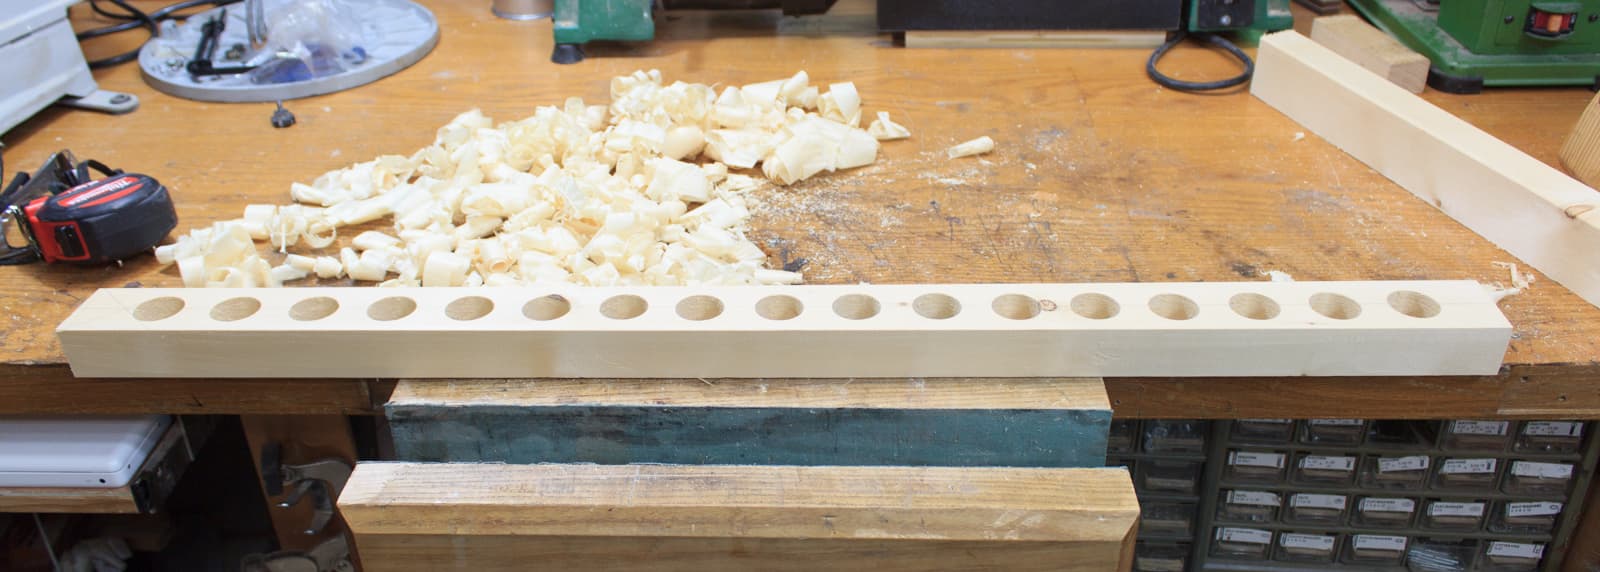
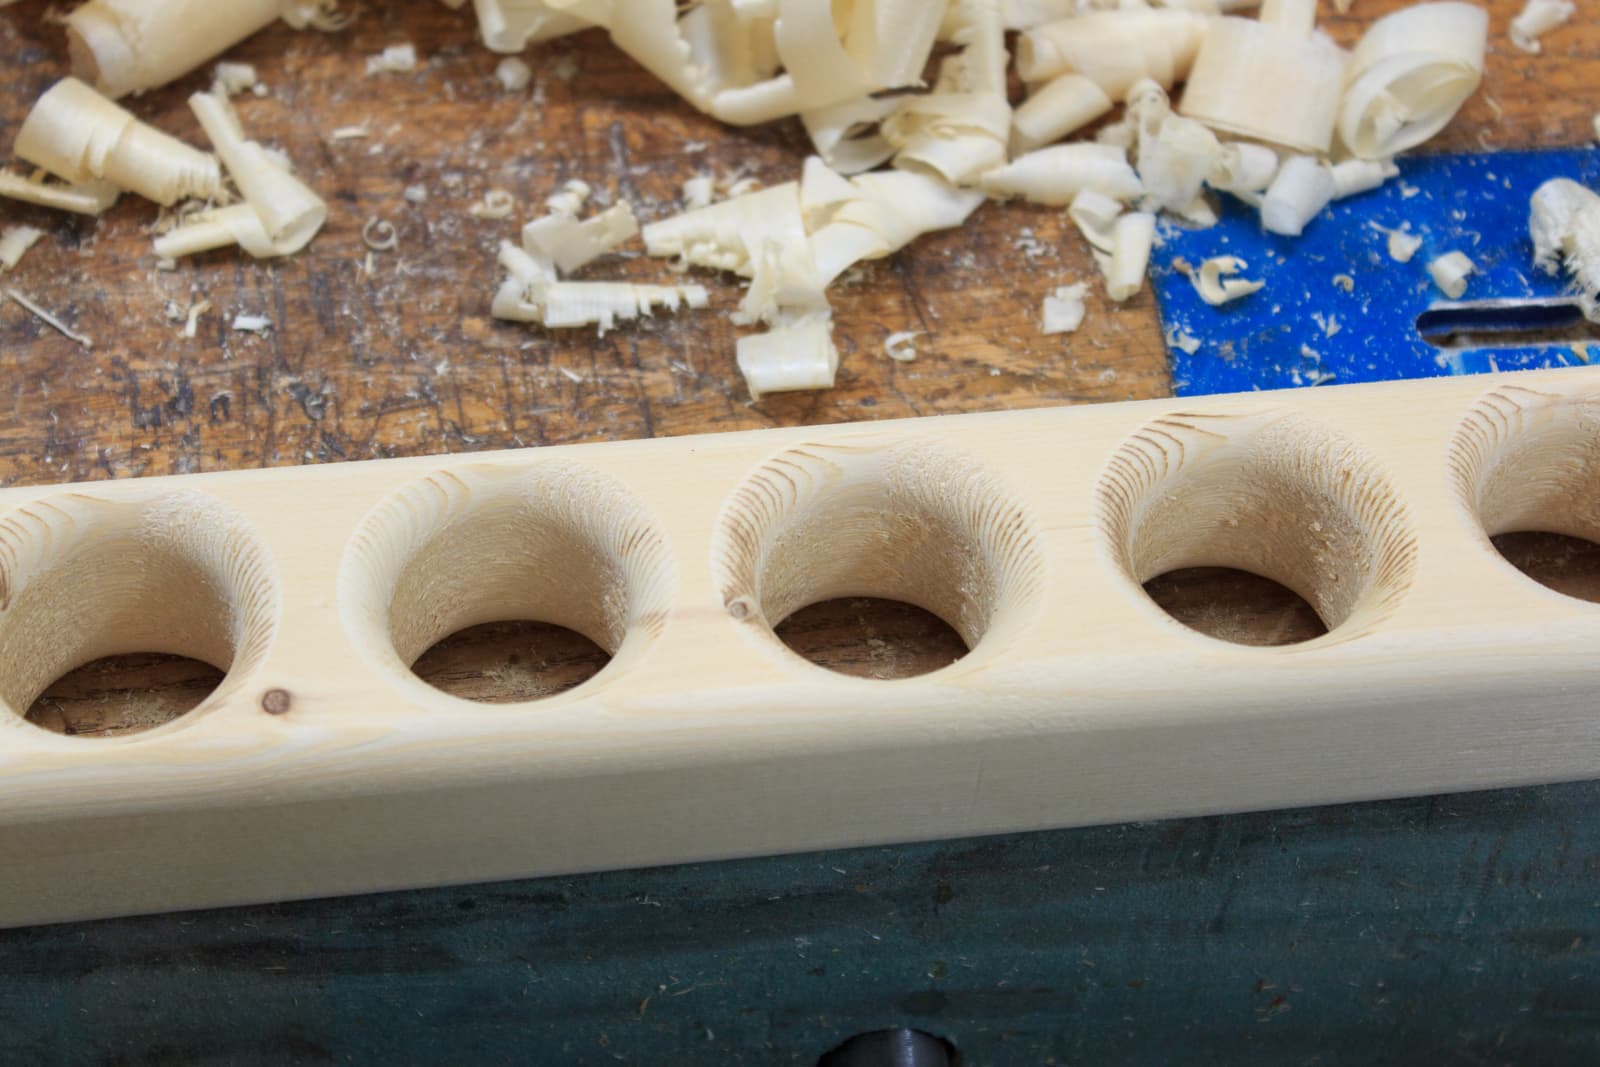
Drill

Now I drill holes at each mark using a 1.25”/3cm forstner bit. This is a lot of work!
Drilled
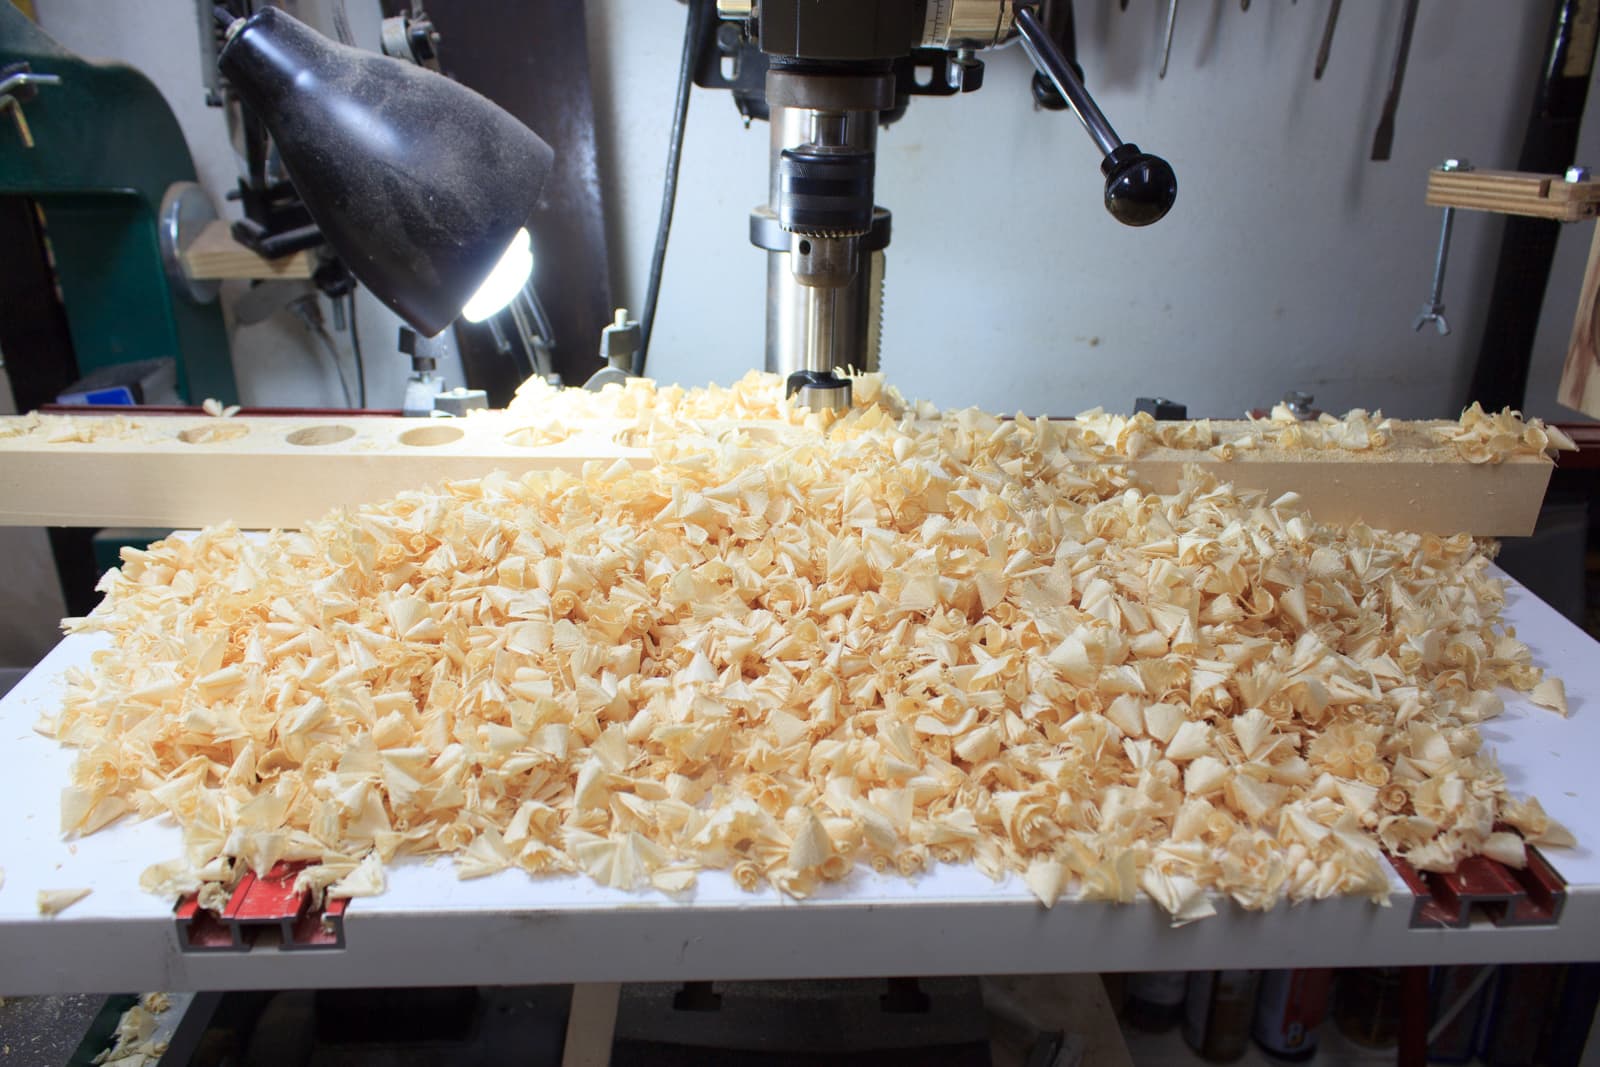
Really… it’s a lot of work. I removed about 40% of the wood with the drill bit. Don’t let it get hot, and clear the chips frequently.
Treat your drill bits well and they will treat you well.
Clean
The side that the bit pushes into is very clean…
Dirty
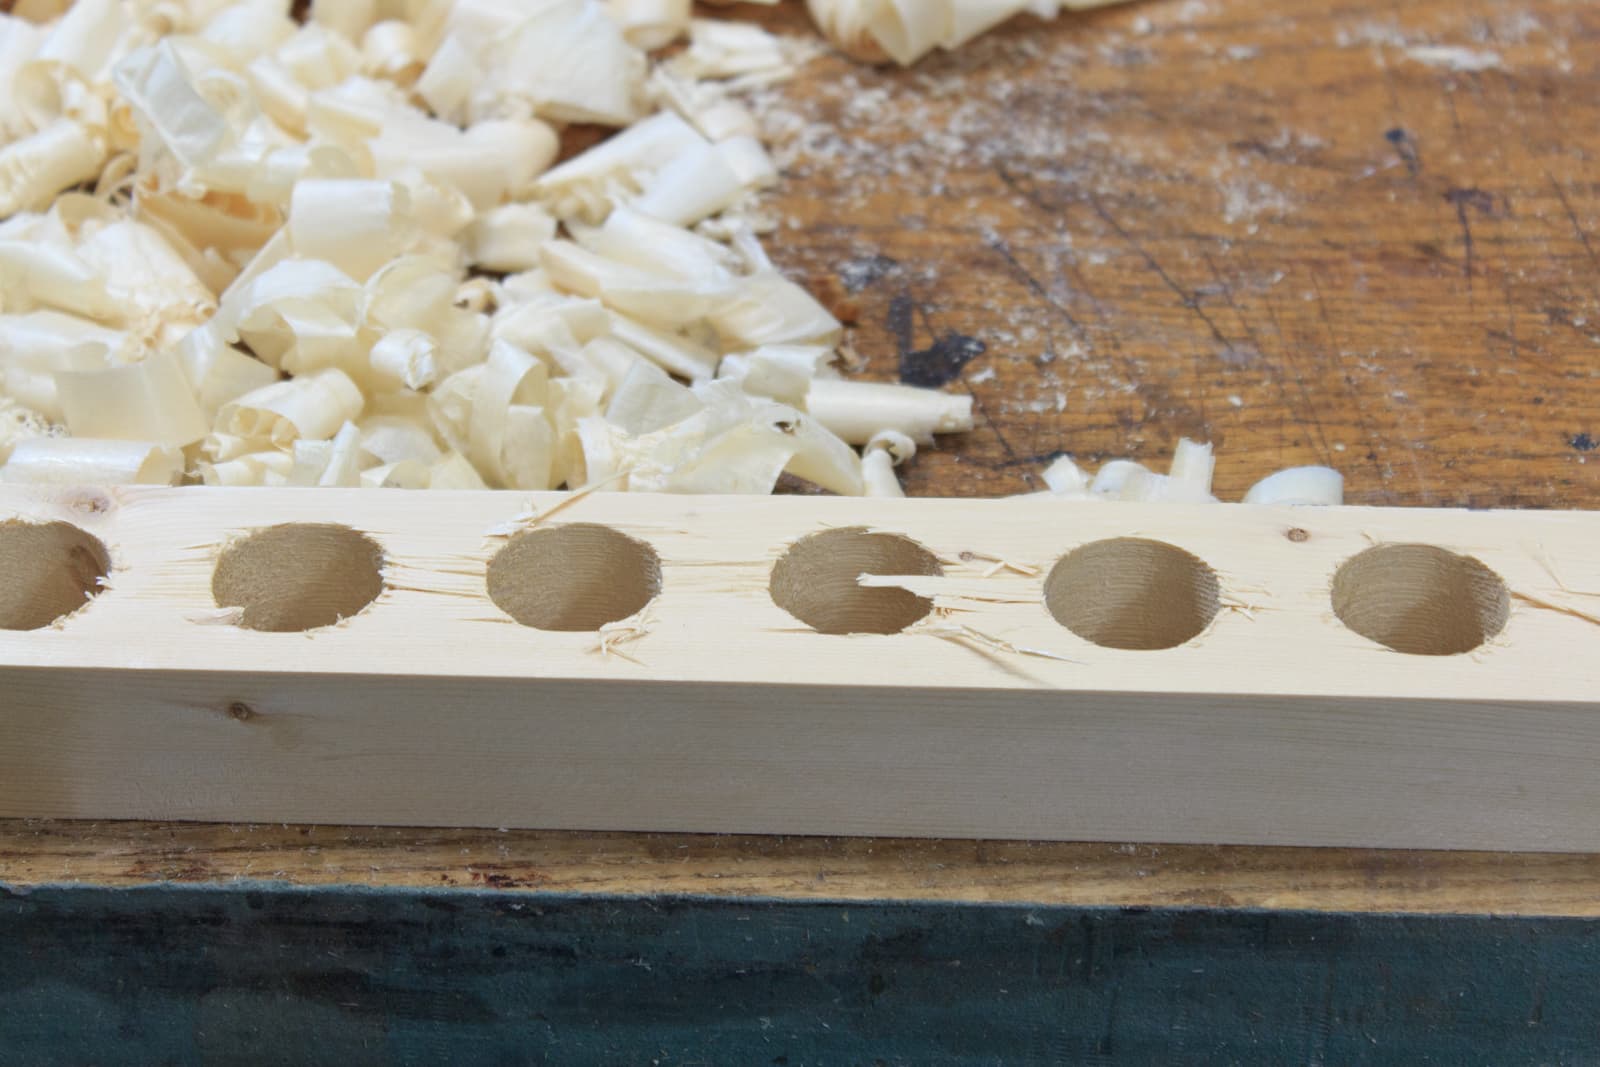
Even with a support board behind it, the exit side is nasty.
Cleaning
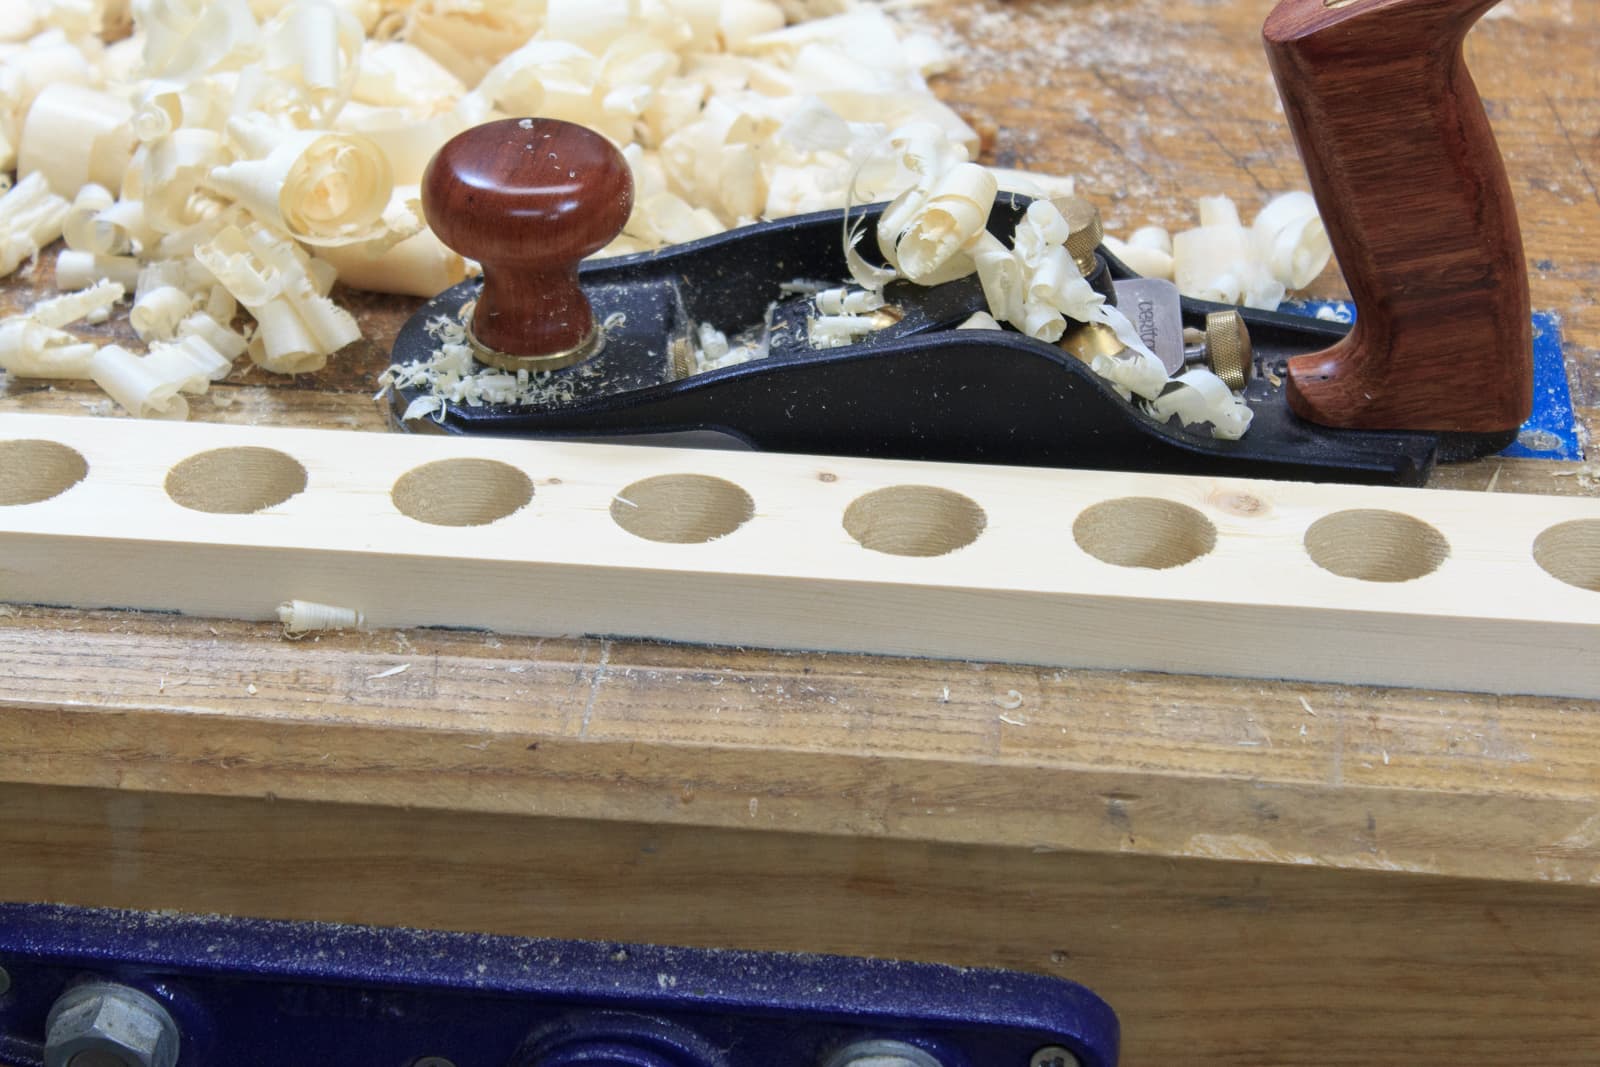
I clean up the exit holes by planing the wood down past the chipped sections. It takes about 10 passes with a heavy set, sharp plane.
Cleaned
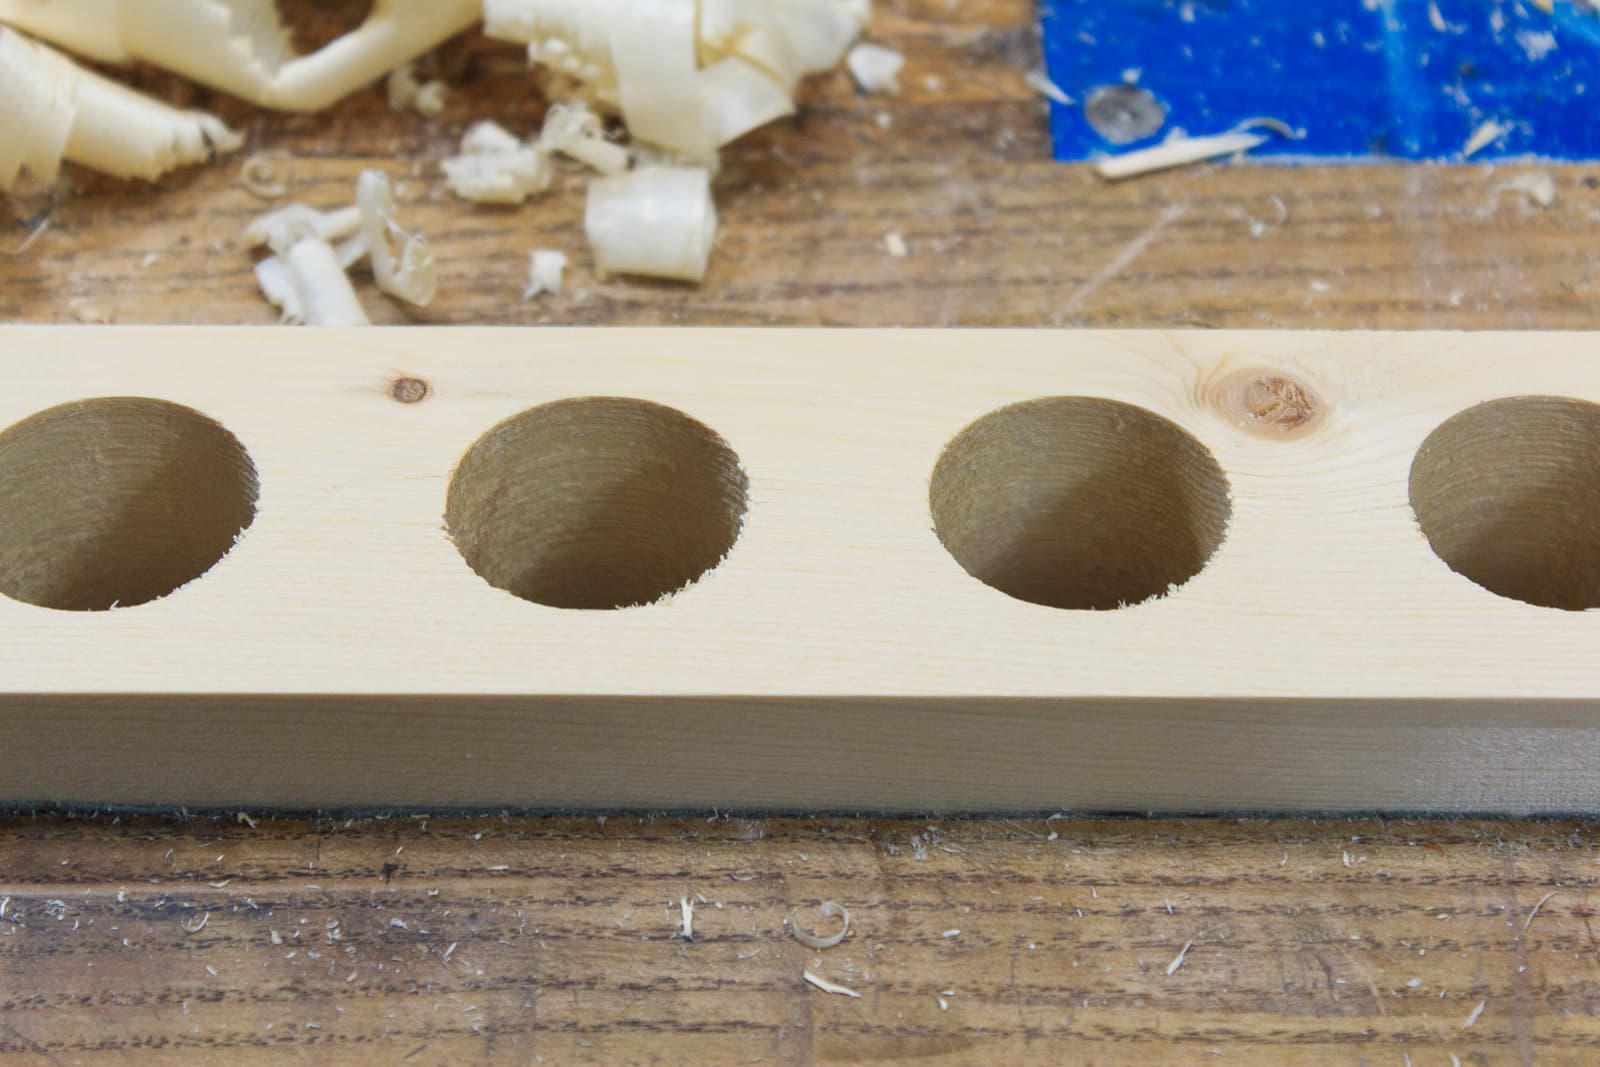
That’s the dirty side… nice and clean.
Roundover

Now I want to make it pleasant to hold. I use a 1/2”/1.25cm roundover bit and roundover everything
Rounded Over
This is the result. You can see that where the bit engages the endgrain there’s some burning. I remove that with sandpaper. There’s really not any way around this except having a very sharp router bit, and let the bit cool occasionally.
Of course I was impatient and rather than let the bit cool occasionally, I “saved time” by zipping through it… then spending 30 minutes sanding.
Save 5 minutes, spend 30. That’s how I do it. D’oh :(
Cut Open
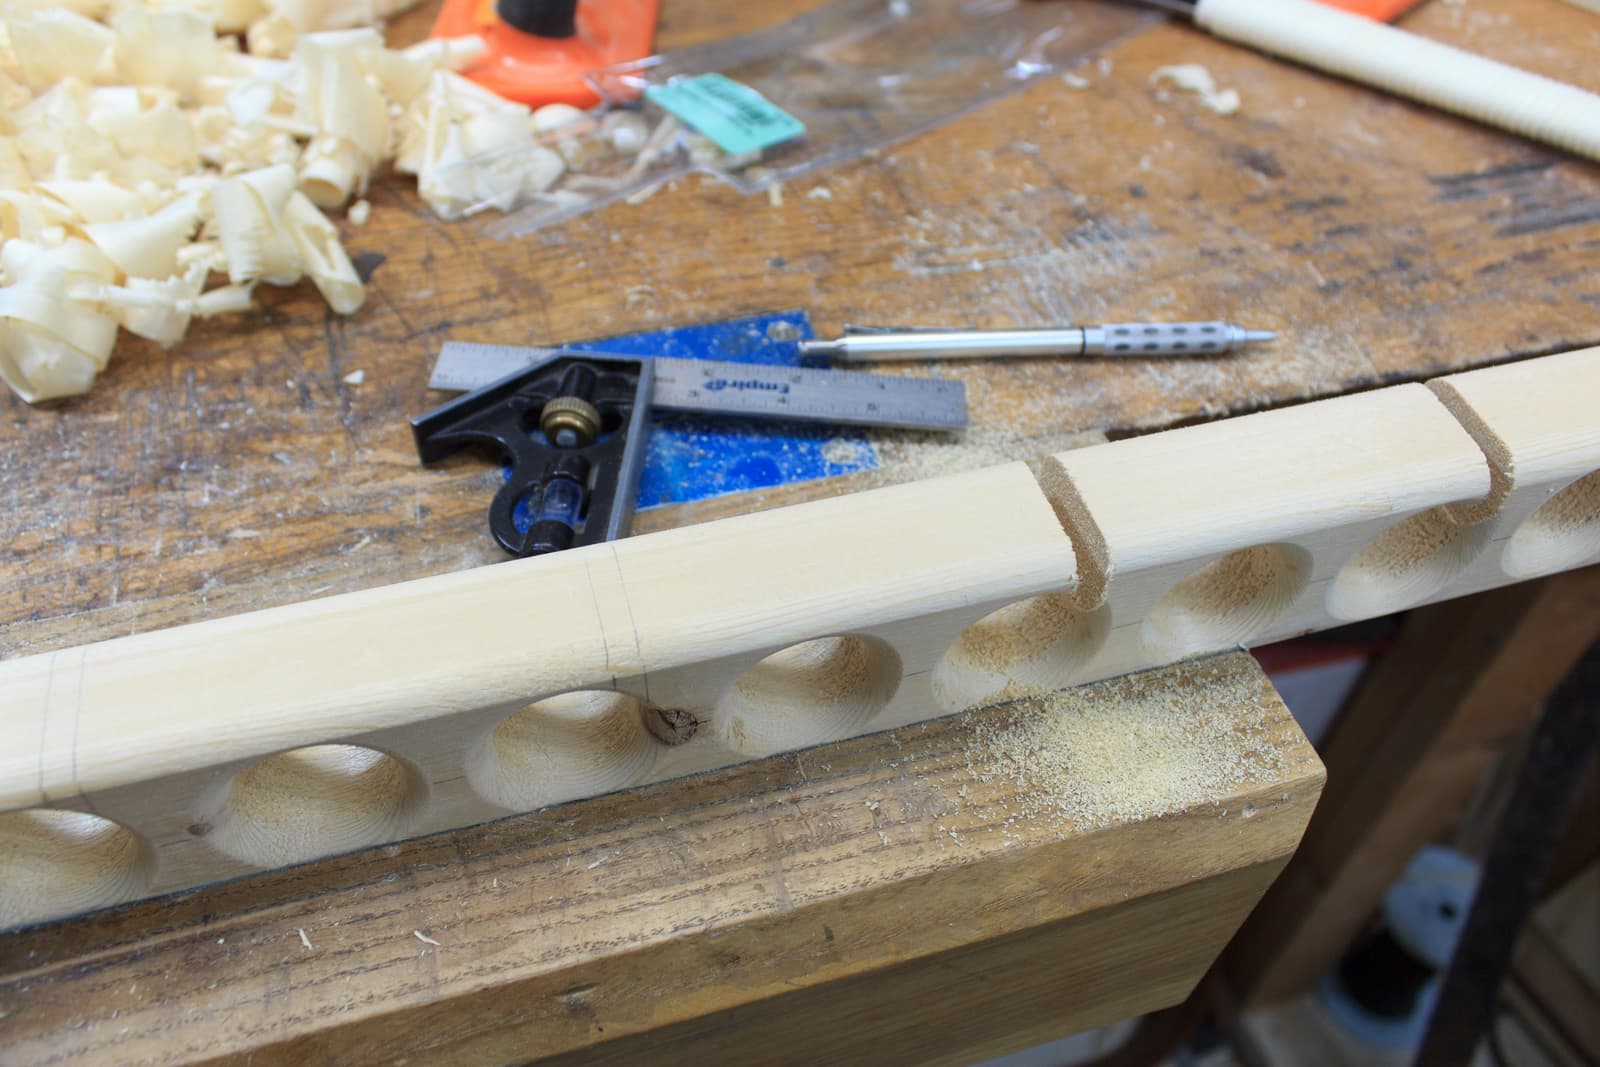
Every other hole is cut open. Some places need to have the band threaded through, and those will stay closed.
Some sections need to have the band hooked in to the rack. Cutting the hole open near the top/bottom of it lets this take place.
The opening is about 1/4”/6mm. One side is tangent to the inner circle.
If you are making one of these, make sure you cut open the appropriate side. Take in to account which direction the band will be pulled so that you don’t have the band slipping out!
There’s another way to create this entry location that is vector agnostic, but this is just a prototype.
File
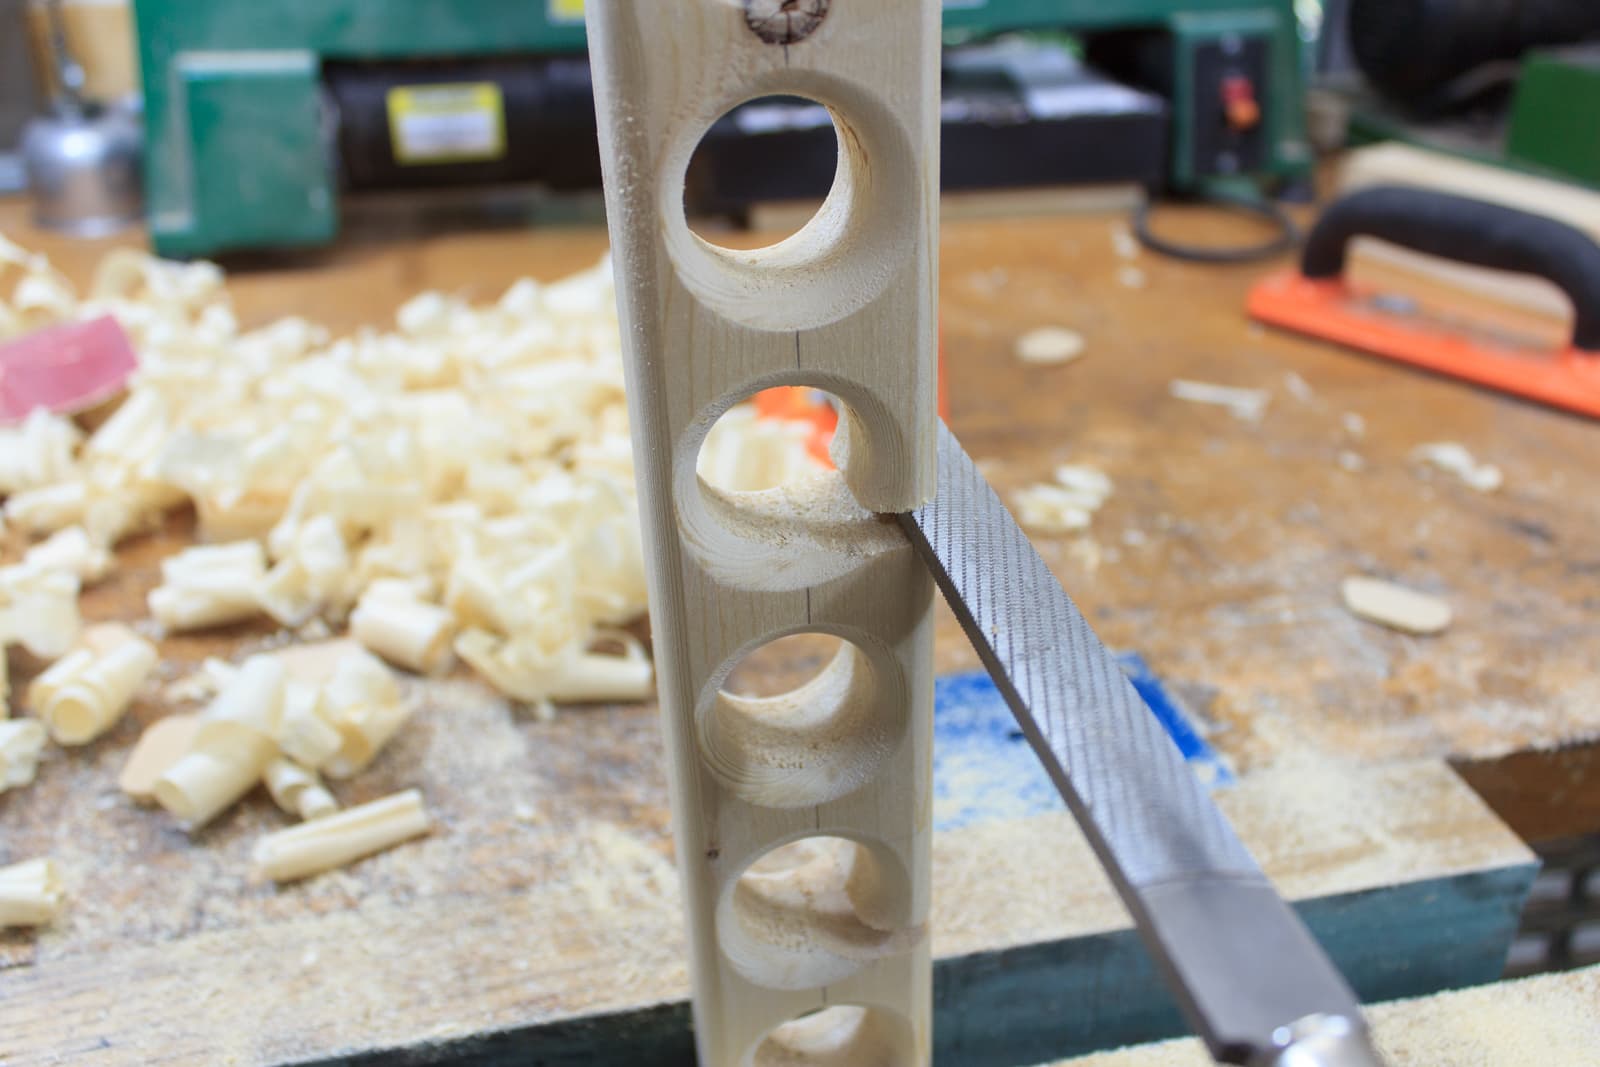
I use fine cut iwasaki file to make things look nice.
Finished
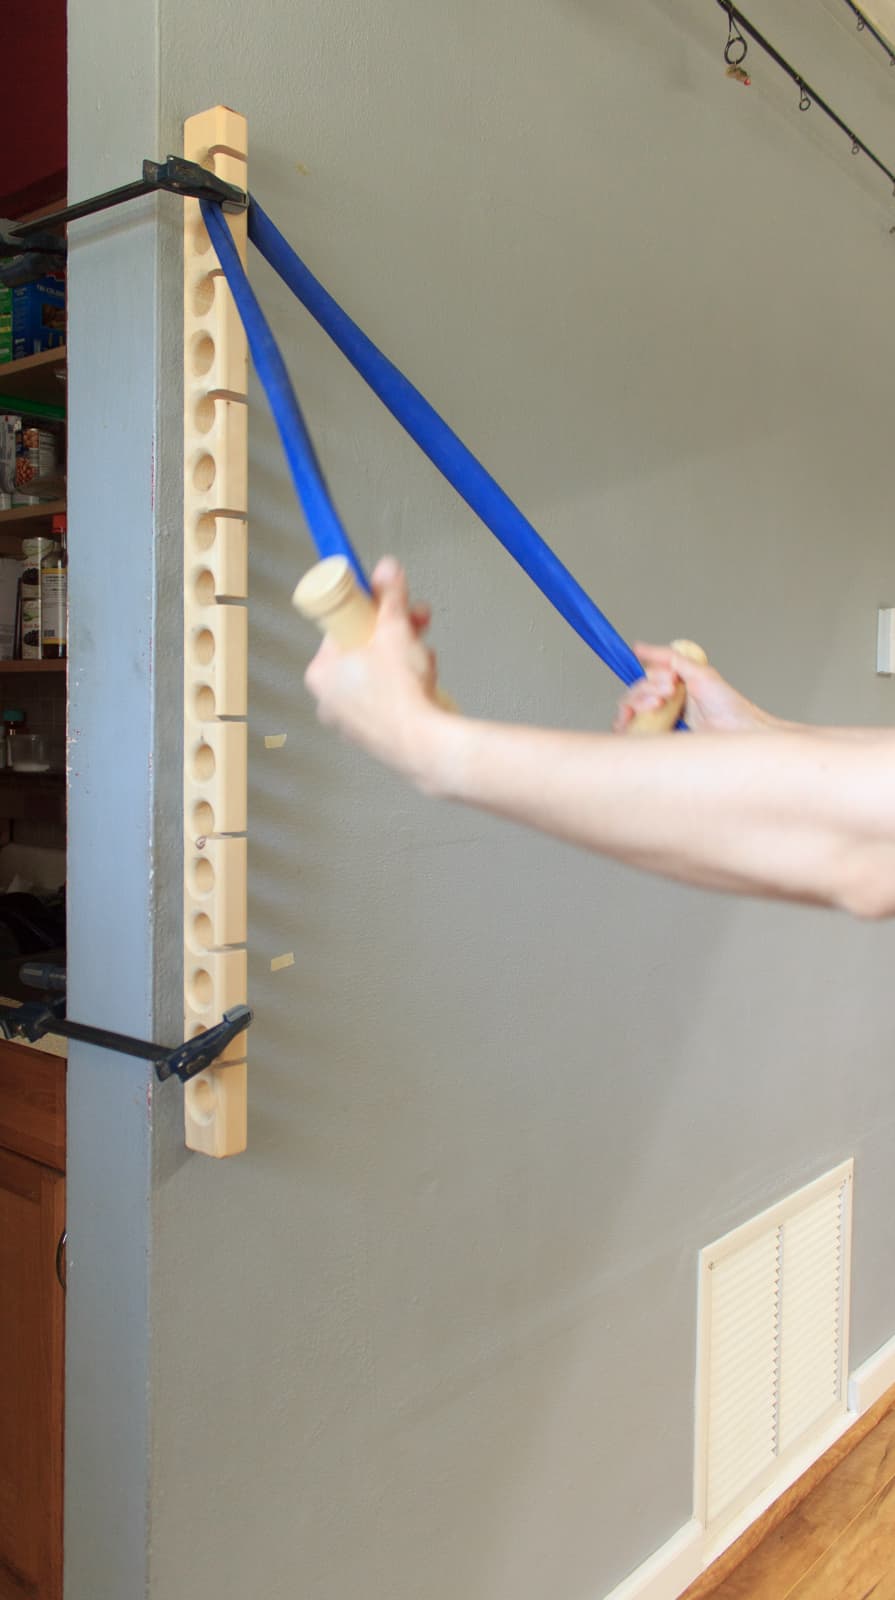
That’s it! Here it is in use by my wife. It clamps to the wall near the kitchen. She can then do her exercises and take it down so I don’t destroy my face on it as I walk by.
It turns out that she doesn’t like it that much. The holes don’t line up exactly where she needs them… by a few millimeters. The pine isn’t as strong as we’d like, which I expected.
I’ll have to build another one, but since this was just a prototype that’s fine. I’ll make another one in a while.
p.s. Those resistance band handles I made ;) They’re pretty neato.
p.p.s. No, we do not have cabinet doors in our kitchen. I don’t like them.
Support Me!
This post took 3 hours to build, photograph, write and edit. If you appreciate the information presented then please consider joining patreon or donating!
