You might be aware that I ‘was’ a big fan of REAPER, and I amassed a somewhat ridiculous configuration which I’m not even particularly happy with anyway!
REAPER 6 came out and I thought it was a disaster, largely the GUI. I was annoyed with REAPER at this point because of my (over?)use of scripts and their instability. Perfect storm of reasons to move on.
I stopped using REAPER. I’ve been happily using Studio One 5 and Cubase 10/11, with Logic Pro X for any video production (nice integration with FCPX).
I’ve been doing my “30 days” in private. Various self-improvement tasks, depriving myself of things that I think I rely on, 30 days of playing a single instrument, etc… I think it’s about time to do another 30 days here with my readers.
Here we are: 30 days of Starting over with REAPER.
- 30 days of Starting over with REAPER
- Rants and GUI Tweaks (again)
- Designing MIDI commands
- MIDI Command Inventory
- Item Editing Design and Inventory
- Project Template, Preferences and Mouse Modifiers
- Hotkeys, again! ...?
- Look Ma! No Hands
- An evaluation and conclusion
Contents
Introduction
For the next 30 days I’ll be writing articles detailing my journey of starting with REAPER from scratch. Every feature I use, setting I change, script I install, window I move or question I ask on the forum will be logged and explained.
In some form, I’ll aim to answer 2+ questions for every decision:
- Why is this a problem for me?
- Why did I decide on this solution?
- (Optional) How is this done in a competing product that I believe achieves this better?
- (Optional) What are the other options to solve this? - Not always asked, as the options may simply be “Use another program” and/or “Don’t do that thing”, which are non-optional for this exercise.
- (Optional) What are the complications of selecting this solution?
What I want
As part of this process I’ve started a new site feature: DAW Wants. I’ll be using this REAPER-centric series to flesh this out in the context of REAPER, and possibly some other comparisons that I make.
Installation
I previously used what’s called a Portable Install. This puts REAPER in a folder, and then the software puts all of its settings in that folder.
The benefit of this is that I could easily sync or move my REAPER installation to another computer. With complex setups this was not an insignificant benefit, but I plan (uh oh) on not having a portable installation. So what will I be doing!?
Portable Install.
I still wish to share my configuration between computers and back up versions of my configuration along with the appropriate REAPER version.
Version
I’ll be using pre-release versions.
First Changes
Transport
I like to avoid docking anything at the top of my screen. There’s 4 primary locations to put information: left, right, top, bottom.
- Track information is on the left, so I avoid putting windows there.
- Toolbar and timeline is on the top, so I avoid putting windows there.
- Right… free space!
- Bottom… free space!
The windows that I put at the bottom of my screen change depending on the screenset; most importantly, their height varies.
If I keep my Transport at the default location then my transport will move around as my view(s) change while I’m working. If I place my transport at the top, or left side, where I am unlikely to put a window, then it will be statically placed.
REAPER’s transport does not like vertical placement, so the remaining option is to move it to the top.
Right click the transport and select Docked transport position->top of main window. The transport is now in a place where nothing will interfere with its position.
Views
Create Screensets
Reaper has a feature called screensets. Screensets allow you to ‘press a key’ and re-organize all of your windows. Screensets are located in the View->Screensets/Layouts menu.
I think the default view with the mixer at the bottom of the screen is inefficient. I am either editing audio, recording audio, recording/editing MIDI or mixing. I rarely mix the three. I will create 4 screensets for these tasks so that I have only the necessary information in view. If I want to do something in the other workflow, I can change screensets.
Alternate solutions:
- Learning hotkeys for each window
- Good - Increase knowledge of software, finer grained views by viewing only as many windows as necessary.
- Bad - Cumbersome, mental burden.
- A single view with all common windows on screen
- Good - Do not need to remember any shorts. Information always available. Easily adjusted to an “optimal” view over time.
- Bad - Visual distraction. Each view will compete for screenspace.
- Do nothing.
- Good - REAPER setup always matches books/manuals.
- Bad - limited information/functionality. (Might be good if this is all you need!). Floating windows will appear and become a nuisance.
I’m a fan of Studio One and Cubase’s setup where there’s left, bottom and right areas. Each area has specified content available, selectable by hotkey. I don’t have to think much about where something is, as it will always show in the same place.
REAPER’s system is mildly annoying in comparison. There’s a docking system1 that is difficult to use and requires uses of “Screensets” to remember where windows should be (and when they should be there!). I can emulate Cubase or Studio One’s concept to some degree.
Editing
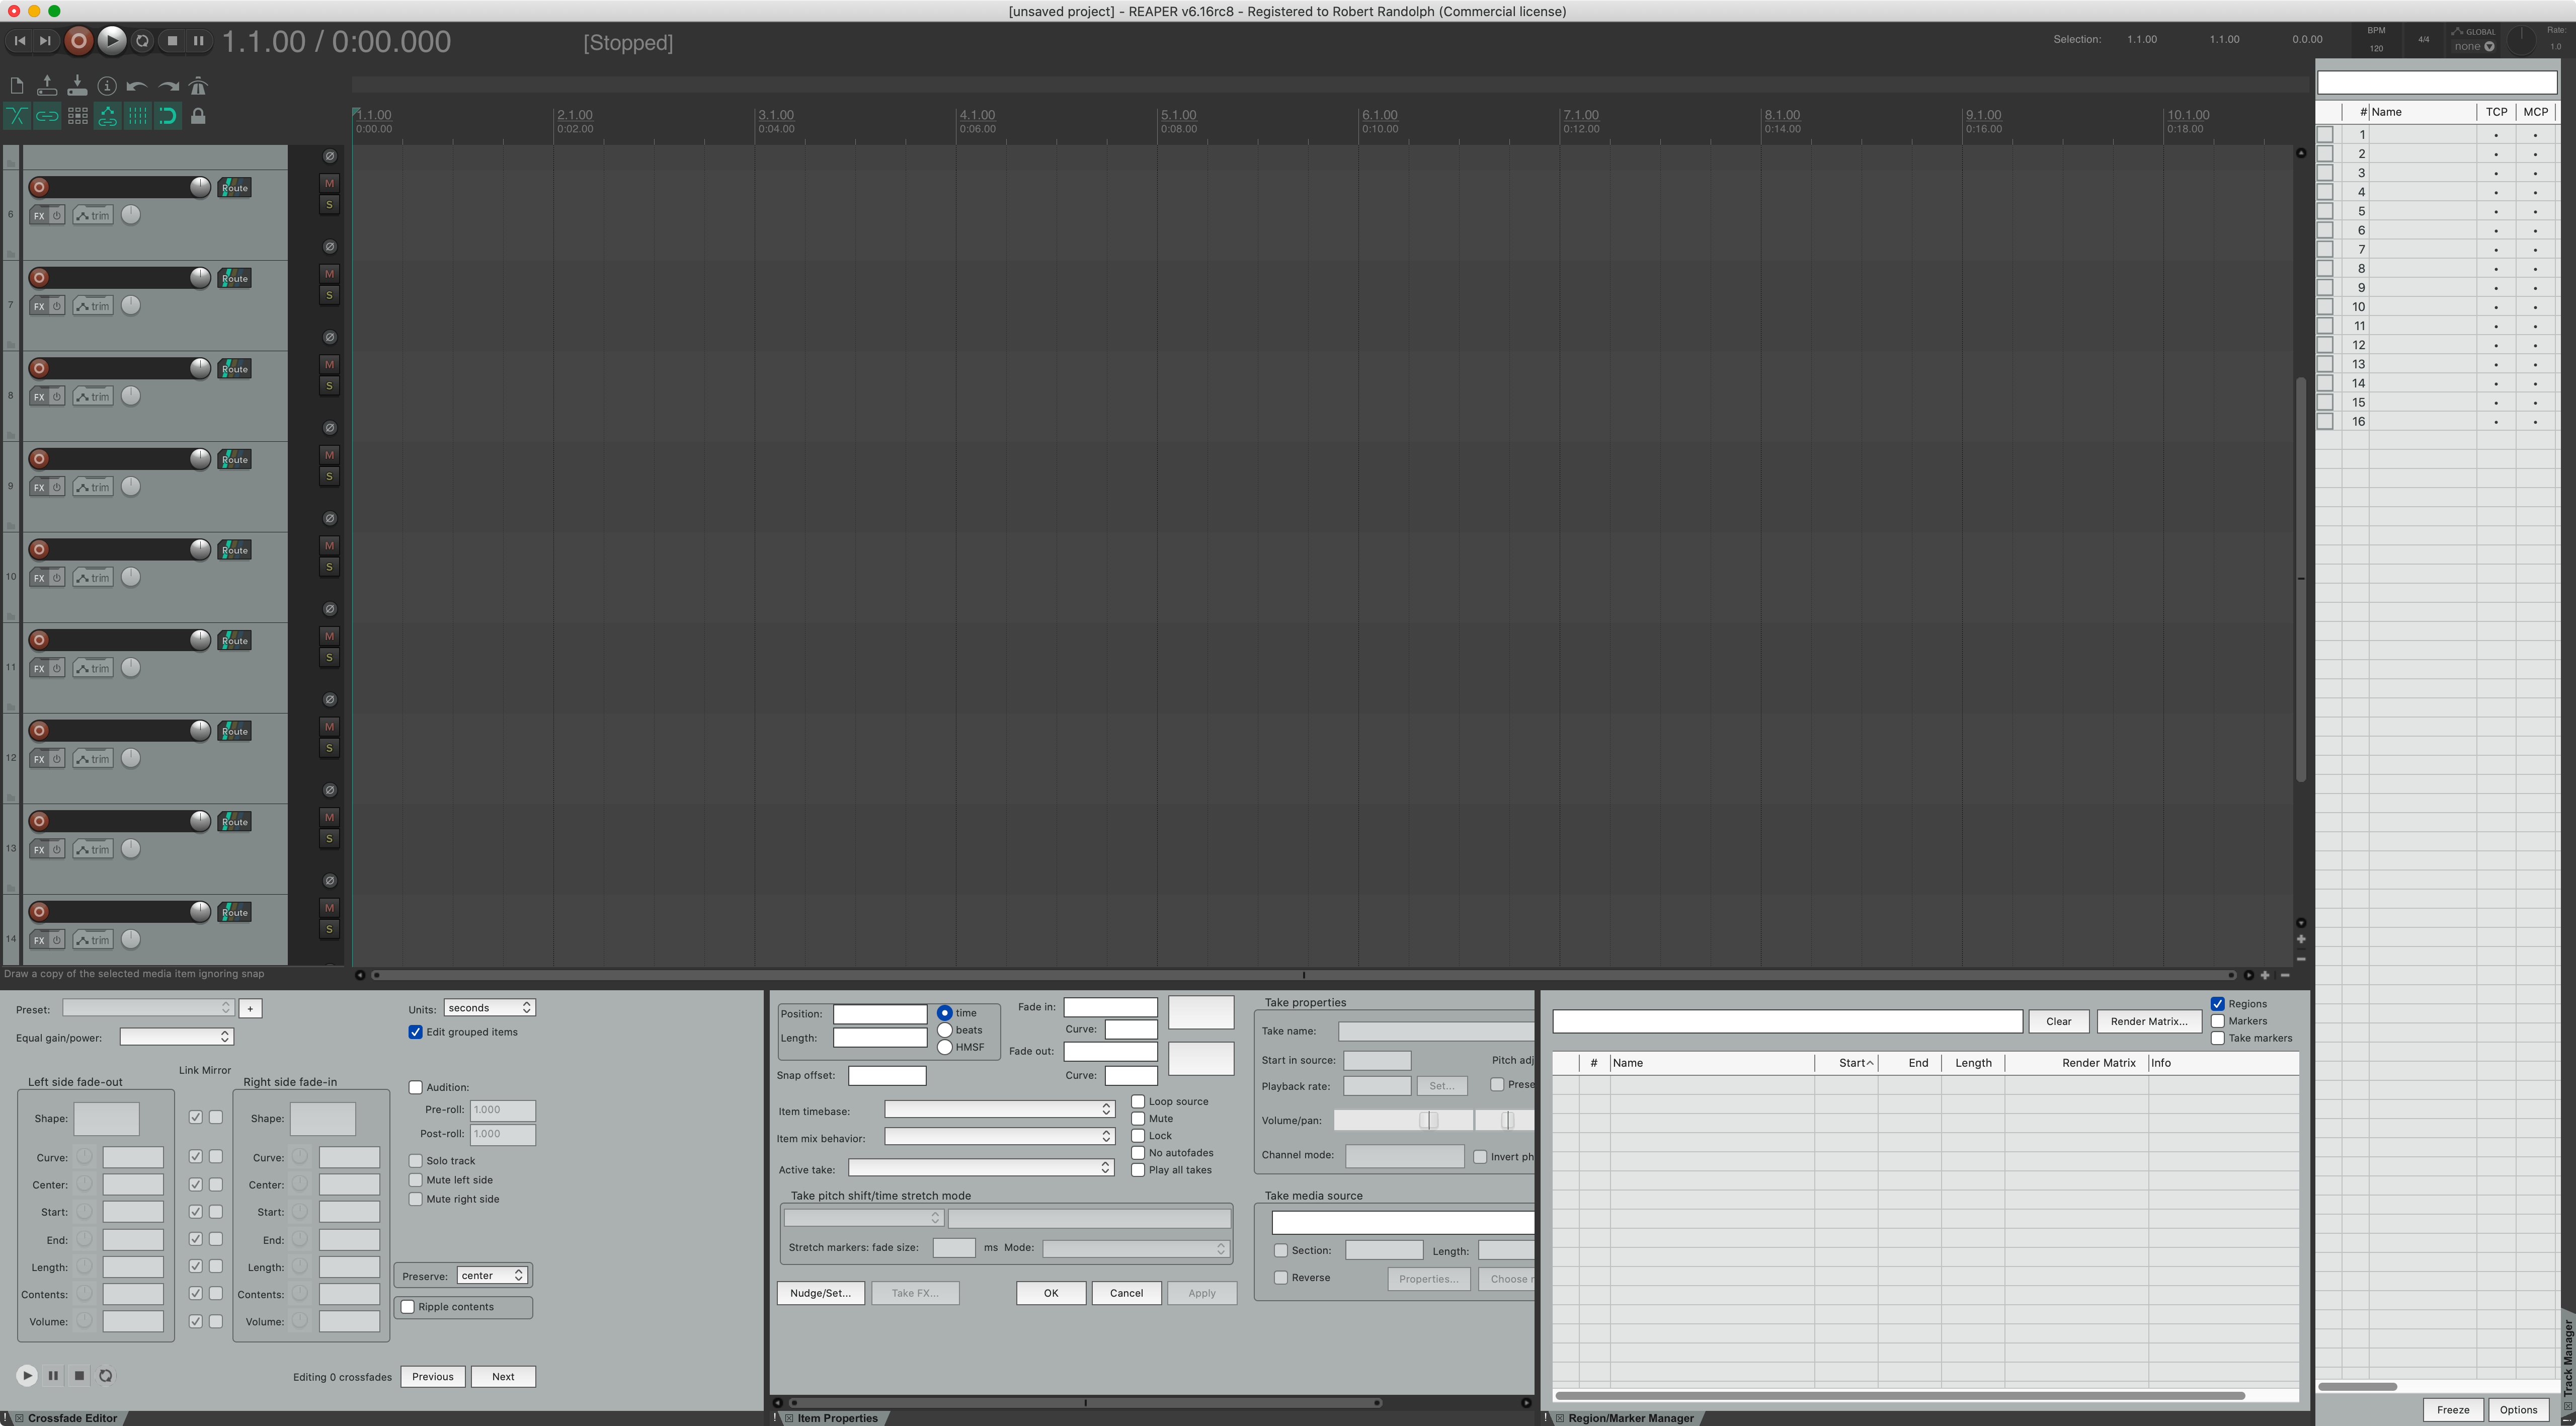
My Editing screen will start out as a large screen of tracks with the following windows at the bottom of the screen:
- Crossfade Editor -
Edit->Crossfade Editor, right click empty space and select “Dock Crossfade editor in Docker”. Drag to bottom split docker location. 1 - Item Properties -
Item->Item Properties, right click empty space and select “Dock Item Properties Window in Docker”. Drag to bottom split location. 1 - Region/Marker Manager -
View->Region/Marker Manager, right click empty space and select “Dock Region Manager in Docker”. Drag to bottom split docker location. 1 - Track Manager -
View->Track Manager, right click empty space and select “Dock Track Manager window in docker”. Drag to right side.- I adjust the track manager name column to be fairly small and only show the colour, #, Name, TCP and MCP columns.
I use the track manager for finding, displaying and hiding tracks. REAPER combines track folders with track routing (unless explicitly turned off). Usually when I search for a track, I want to see what’s routed into it, or associated with it. This behaviour requires some settings changes:
Track Manager Settings
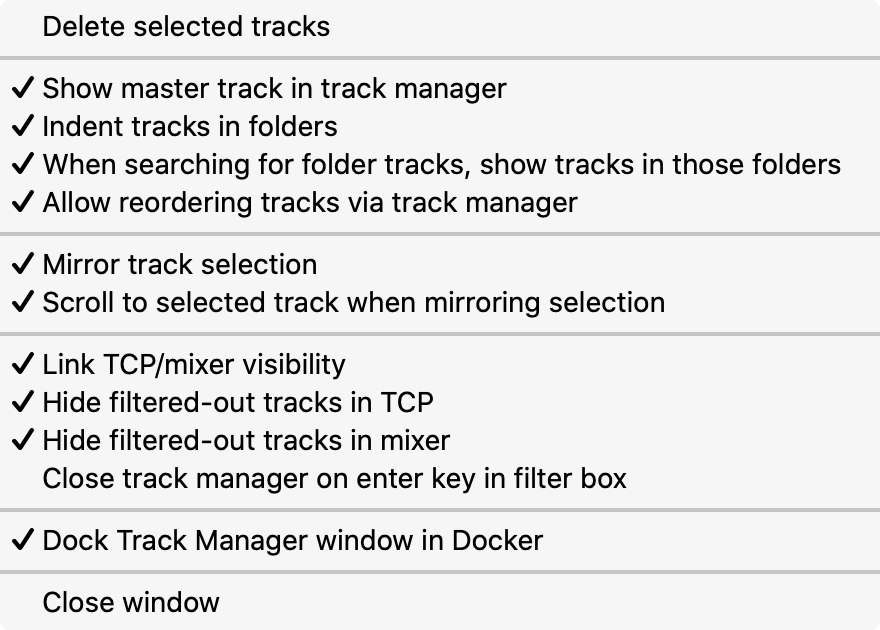
These settings allow me to search for a track and automatically have the found tracks show, along with their children. It also displays the tracks with the same hierarchy as the track control panel.
-
OFF - Delete selected tracks
- ON - Show master track in track manager
- ON - Indent tracks in folders
- ON - When searching for folder tracks, show tracks in those folders
-
ON - Allow reordering tracks via track manager
- ON - Mirror track selection
-
ON - Scroll to selected track when mirroring selection
- ON - Link TCP/mixer visibility
- ON - Hide filtered-out tracks in TCP
- ON - Hide filtered-out tracks in mixer
-
ON - Close track manager on enter key in filter box
- ON - Dock Track Manager window in Docker
Recording
My recording setup is the same as my editing setup, but with the bottom row of windows removed.
Mixing
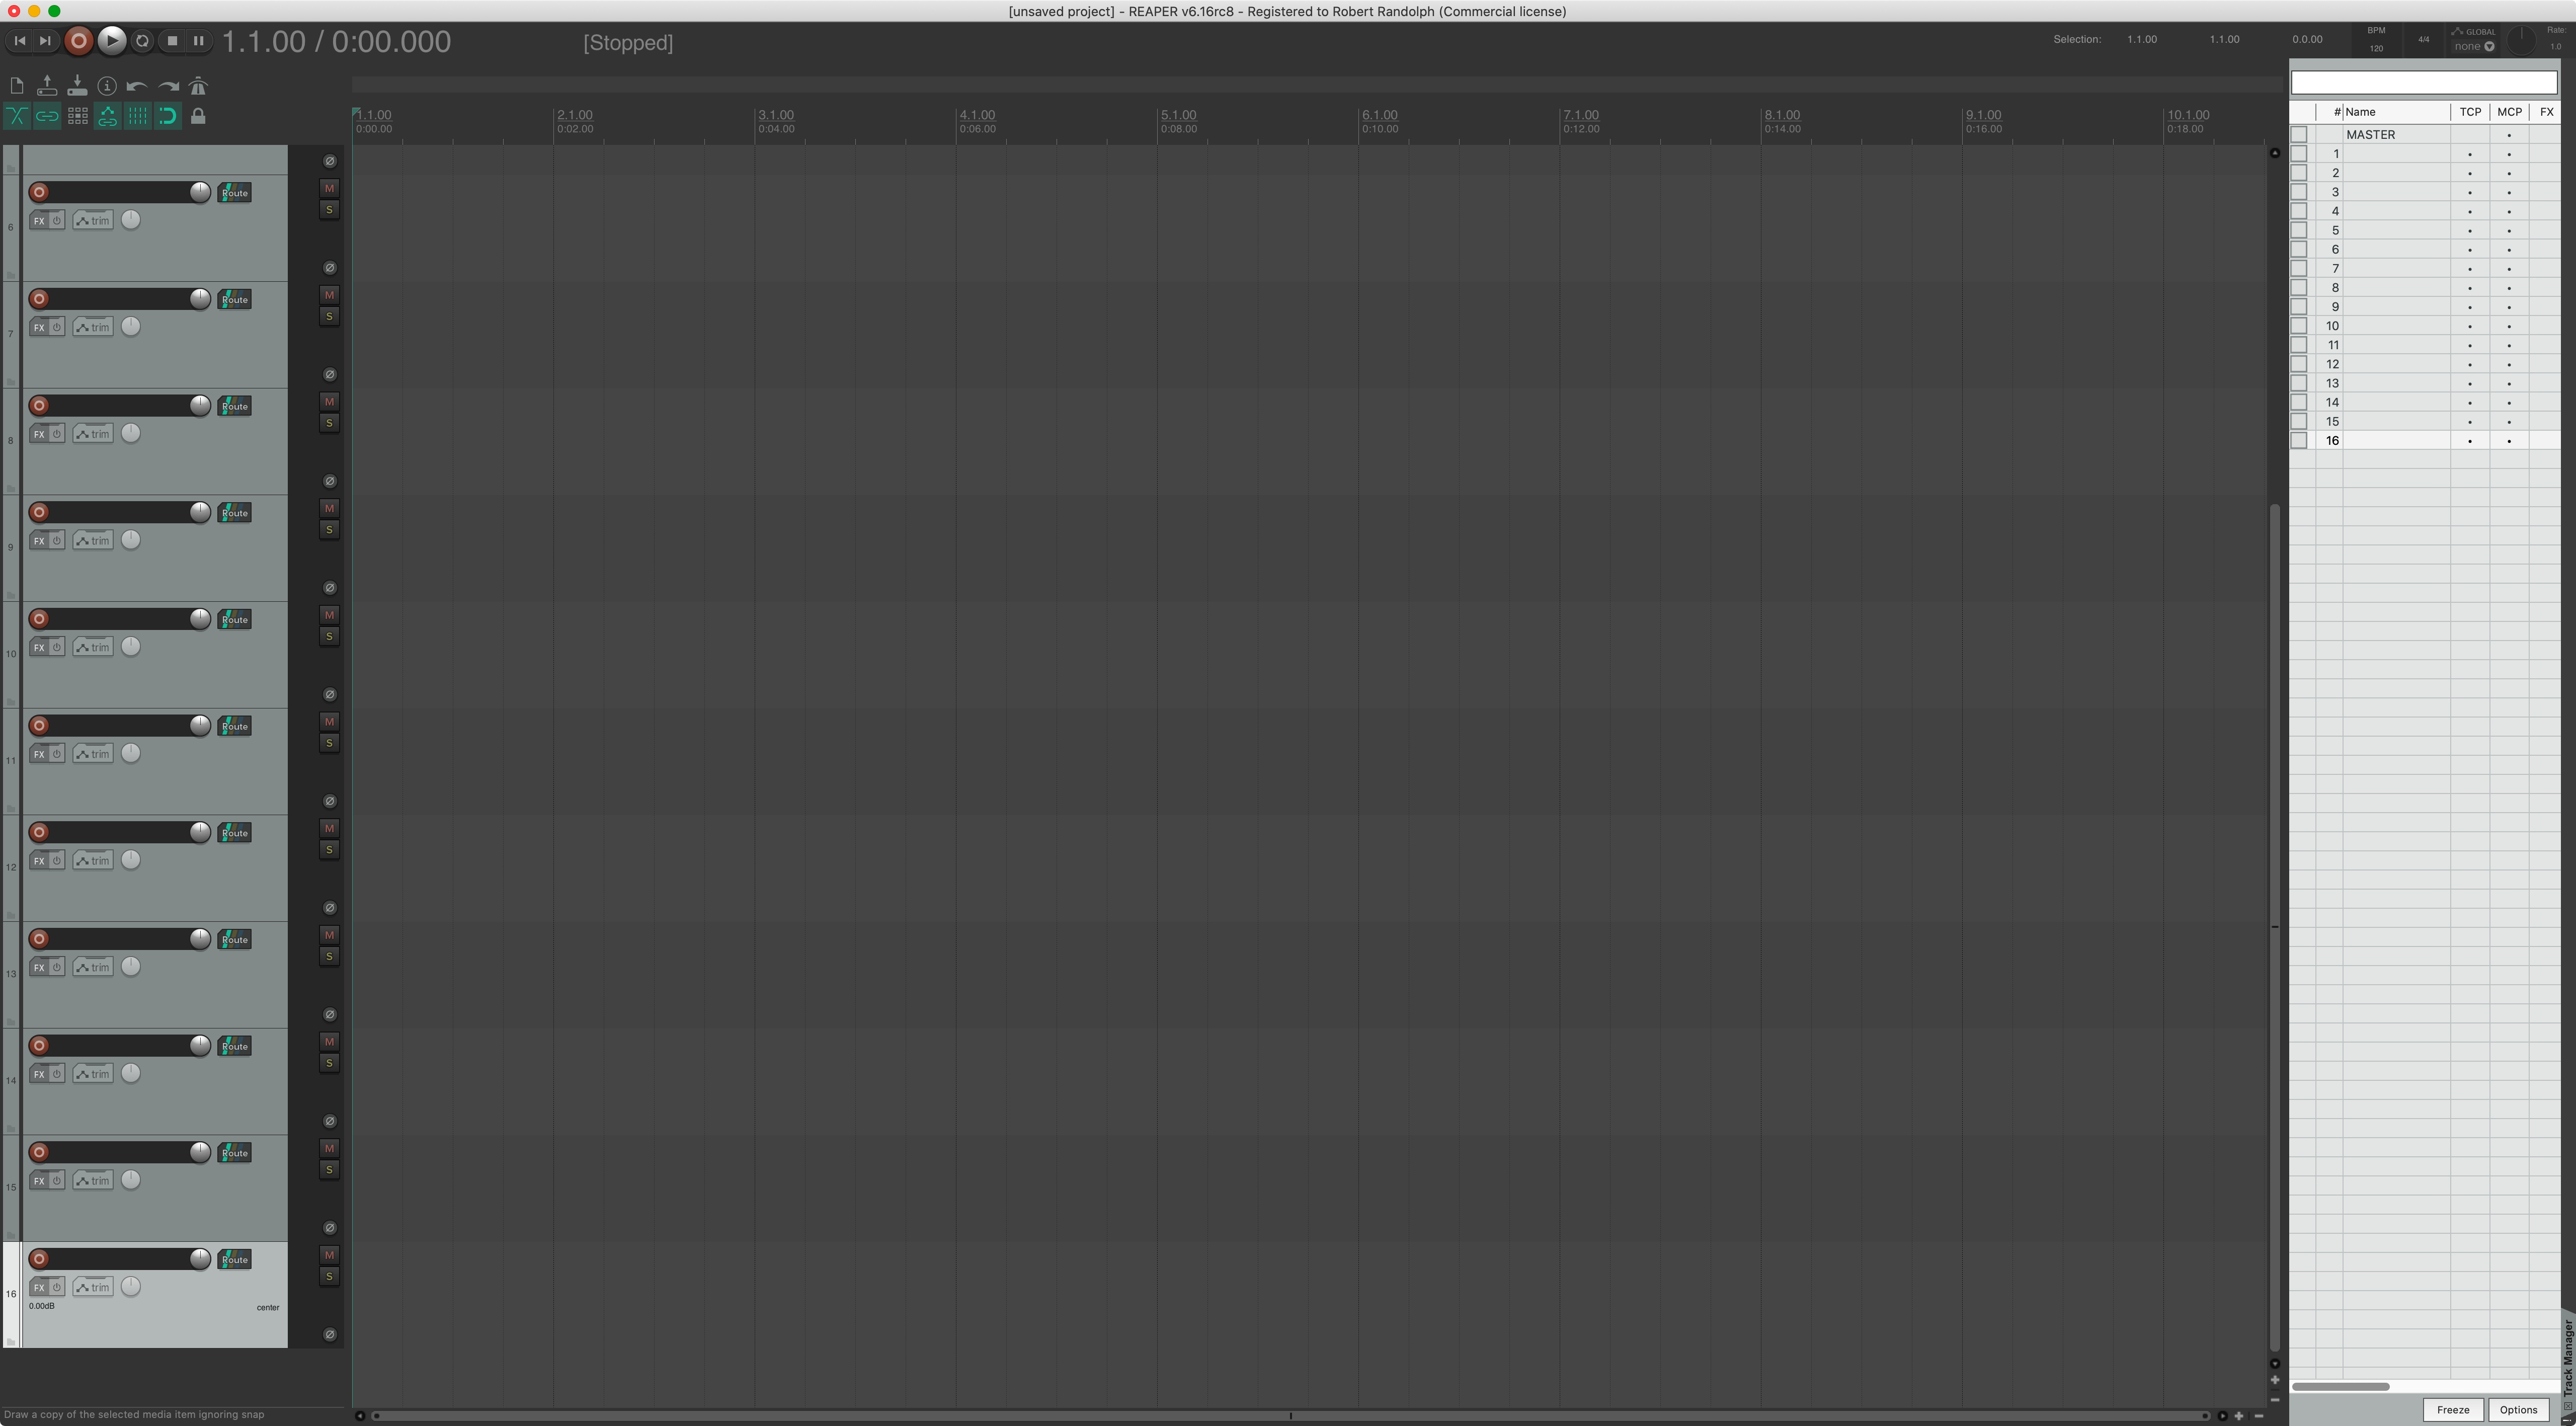
My Mixer screenset is fairly simple. I take my recording screenset, add a mixer at the bottom and pull it up fully.
I retain the mixer in the dock so I have a single window and I still have access to the timeline as seen in the screenshot. I don’t like to switch between windows, or look side-to-side between mixer and another window to locate where I am in the project. I don’t know of any other options except for this setup.
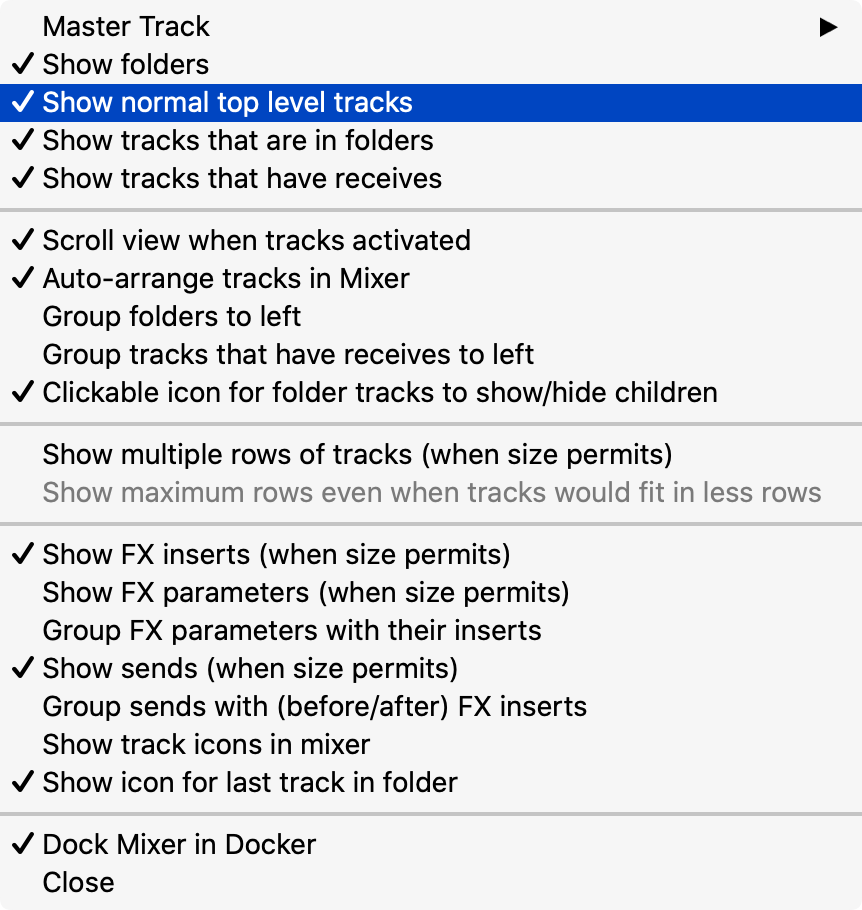
Mixer Settings
I like my groups to match their location in the main arrangement view so that I only need to keep a single mental map of where tracks are.
I do not like multiple rows in the mixer because it reduces the fader resolution. Using fine-tuning means that I need to remember to press an extra key constantly. Multiple rows also changes the rotated 1:1 map of track location in the arrangement to the mixer.
- ON Master Track -> Show in Mixer
- ON - Show folders
- ON - Show normal top level tracks
- ON - Show tracks that are in folders
-
ON - Show tracks that have receives
- ON - Scroll view when tracks activated
- ON - Auto-arrange tracks in Mixer
- OFF - Group tracks that have receives to left
-
OFF - Clickable icon for folder tracks to show/hide children
- OFF - Show multiple rows of tracks when size permits
-
N/A - Show maximum rows even when tracks would fit in less rows
- ON - Show FX inserts when size permits
- OFF - Show FX parameters when size permits
- OFF - Group FX parameters with their inserts
- ON - Show sends when size permits
- OFF - Group sends with (before/after) FX Inserts
- OFF - Show track icons in Mixer
-
ON - Show icon for last track in folder
- ON - Dock Mixer in Docker
MIDI
Setting up the MIDI Screenset is not fun because I like to switch to a screenset with an open MIDI editor, then select the MIDI items that I want to edit at will.
I do not like juggling between multiple windows. I want to maintain a single mental model of what is selected and have that reflected in a window that’s a single key away.
- One MIDI Editor per track means I may need to keep track of dozens/hundreds of MIDI editors.
- One MIDI Editor per item means I may need to keep track of hundreds of MIDI editors.
Here’s the process:
- Create a MIDI item (ctrl-click and drag, or cmd-click and drag on a track.)
- Double Click it.
- In the MIDI Editor, click in an empty space on the bottom toolbar.
- Select “Dock window”
- In the MIDI Editor, click in an empty space on the bottom toolbar.
- ON
Contents->One MIDI Editor per-> Project.
- ON
- In the MIDI Editor, click in an empty space on the bottom toolbar.
- OFF
Contents->Options when using one MIDI editor per project->Close editor when the active media item is delete in the arrange view- REAPER’s menus really suck, don’t they? Why isn’t this in a searchable file or organized dialog?
- OFF
EDIT: It’s been pointed out to me by the fine fellow at REAPER blog that this is all available in Preferences->Editing Behavior->MIDI Editor. My oversight there!
EDIT: It’s also been pointed out in the comments that these can be accessed via the MIDI Editor window’s menu before you dock it. Alternatively these options are in the Actions List, however I did look there before I knew exactly what I was looking for. Now that I know what I need, it would have been easy to find in the Action List, but the menu hierarchy helped me in this case!
Now the screenset can be saved.
When I originally set this up, it took me days to figure this out. I wrote some notes, and apparently my notes weren’t great because it took me 2 hours to figure it out this time.
Hotkeys
My window sets are:
- Edit Window Set.
- Record Window Set.
- Mix Window Set.
- MIDI Window Set.
I assign:
- F3 to “Screenset: Load window set #01”
- F3 to “Screenset: Save window set #01”
- F4 to “Screenset: Load window set #02”
- F4 to “Screenset: Save window set #02”
- F5 to “Screenset: Load window set #03”
- F5 to “Screenset: Save window set #03”
- F6 to “Screenset: Load window set #04”
- F6 to “Screenset: Save window set #04”
Conclusion
It took a good while to think about and write up the DAW Wants feature, so this week I’ve only made it as far as setting up screensets!
Meta
This post took:
- 10 hours to write.
- ~12 hours to think about and write the DAW Wants page.
-
Docker locations are HARD. Afaik, REAPER has 16 positions plus dynamic “split” locations, and 12 of them are a pain to access. I suggest making your window size half the screen in width and height, then drag a docked window around. Move your mouse around the edge of the main REAPER window and you’ll see many available dockable locations. ↩ ↩2 ↩3 ↩4