I loaned out some of my electronics equipment to my mad scientist, likely-soon-to-be-blown-up-or-blind, brother. So we’re taking a dive into a topic I’ve not seen properly covered anywhere else on the net: Installing Rotosound PSD Strings
Installing some bass (or acoustic!) guitar strings might not seem exciting, but these are unique strings with a tricky installation procedure.
So let’s get these strings on… BUT DO NOT REMOVE YOUR OLD STRINGS YET!
Contents
What are PSD
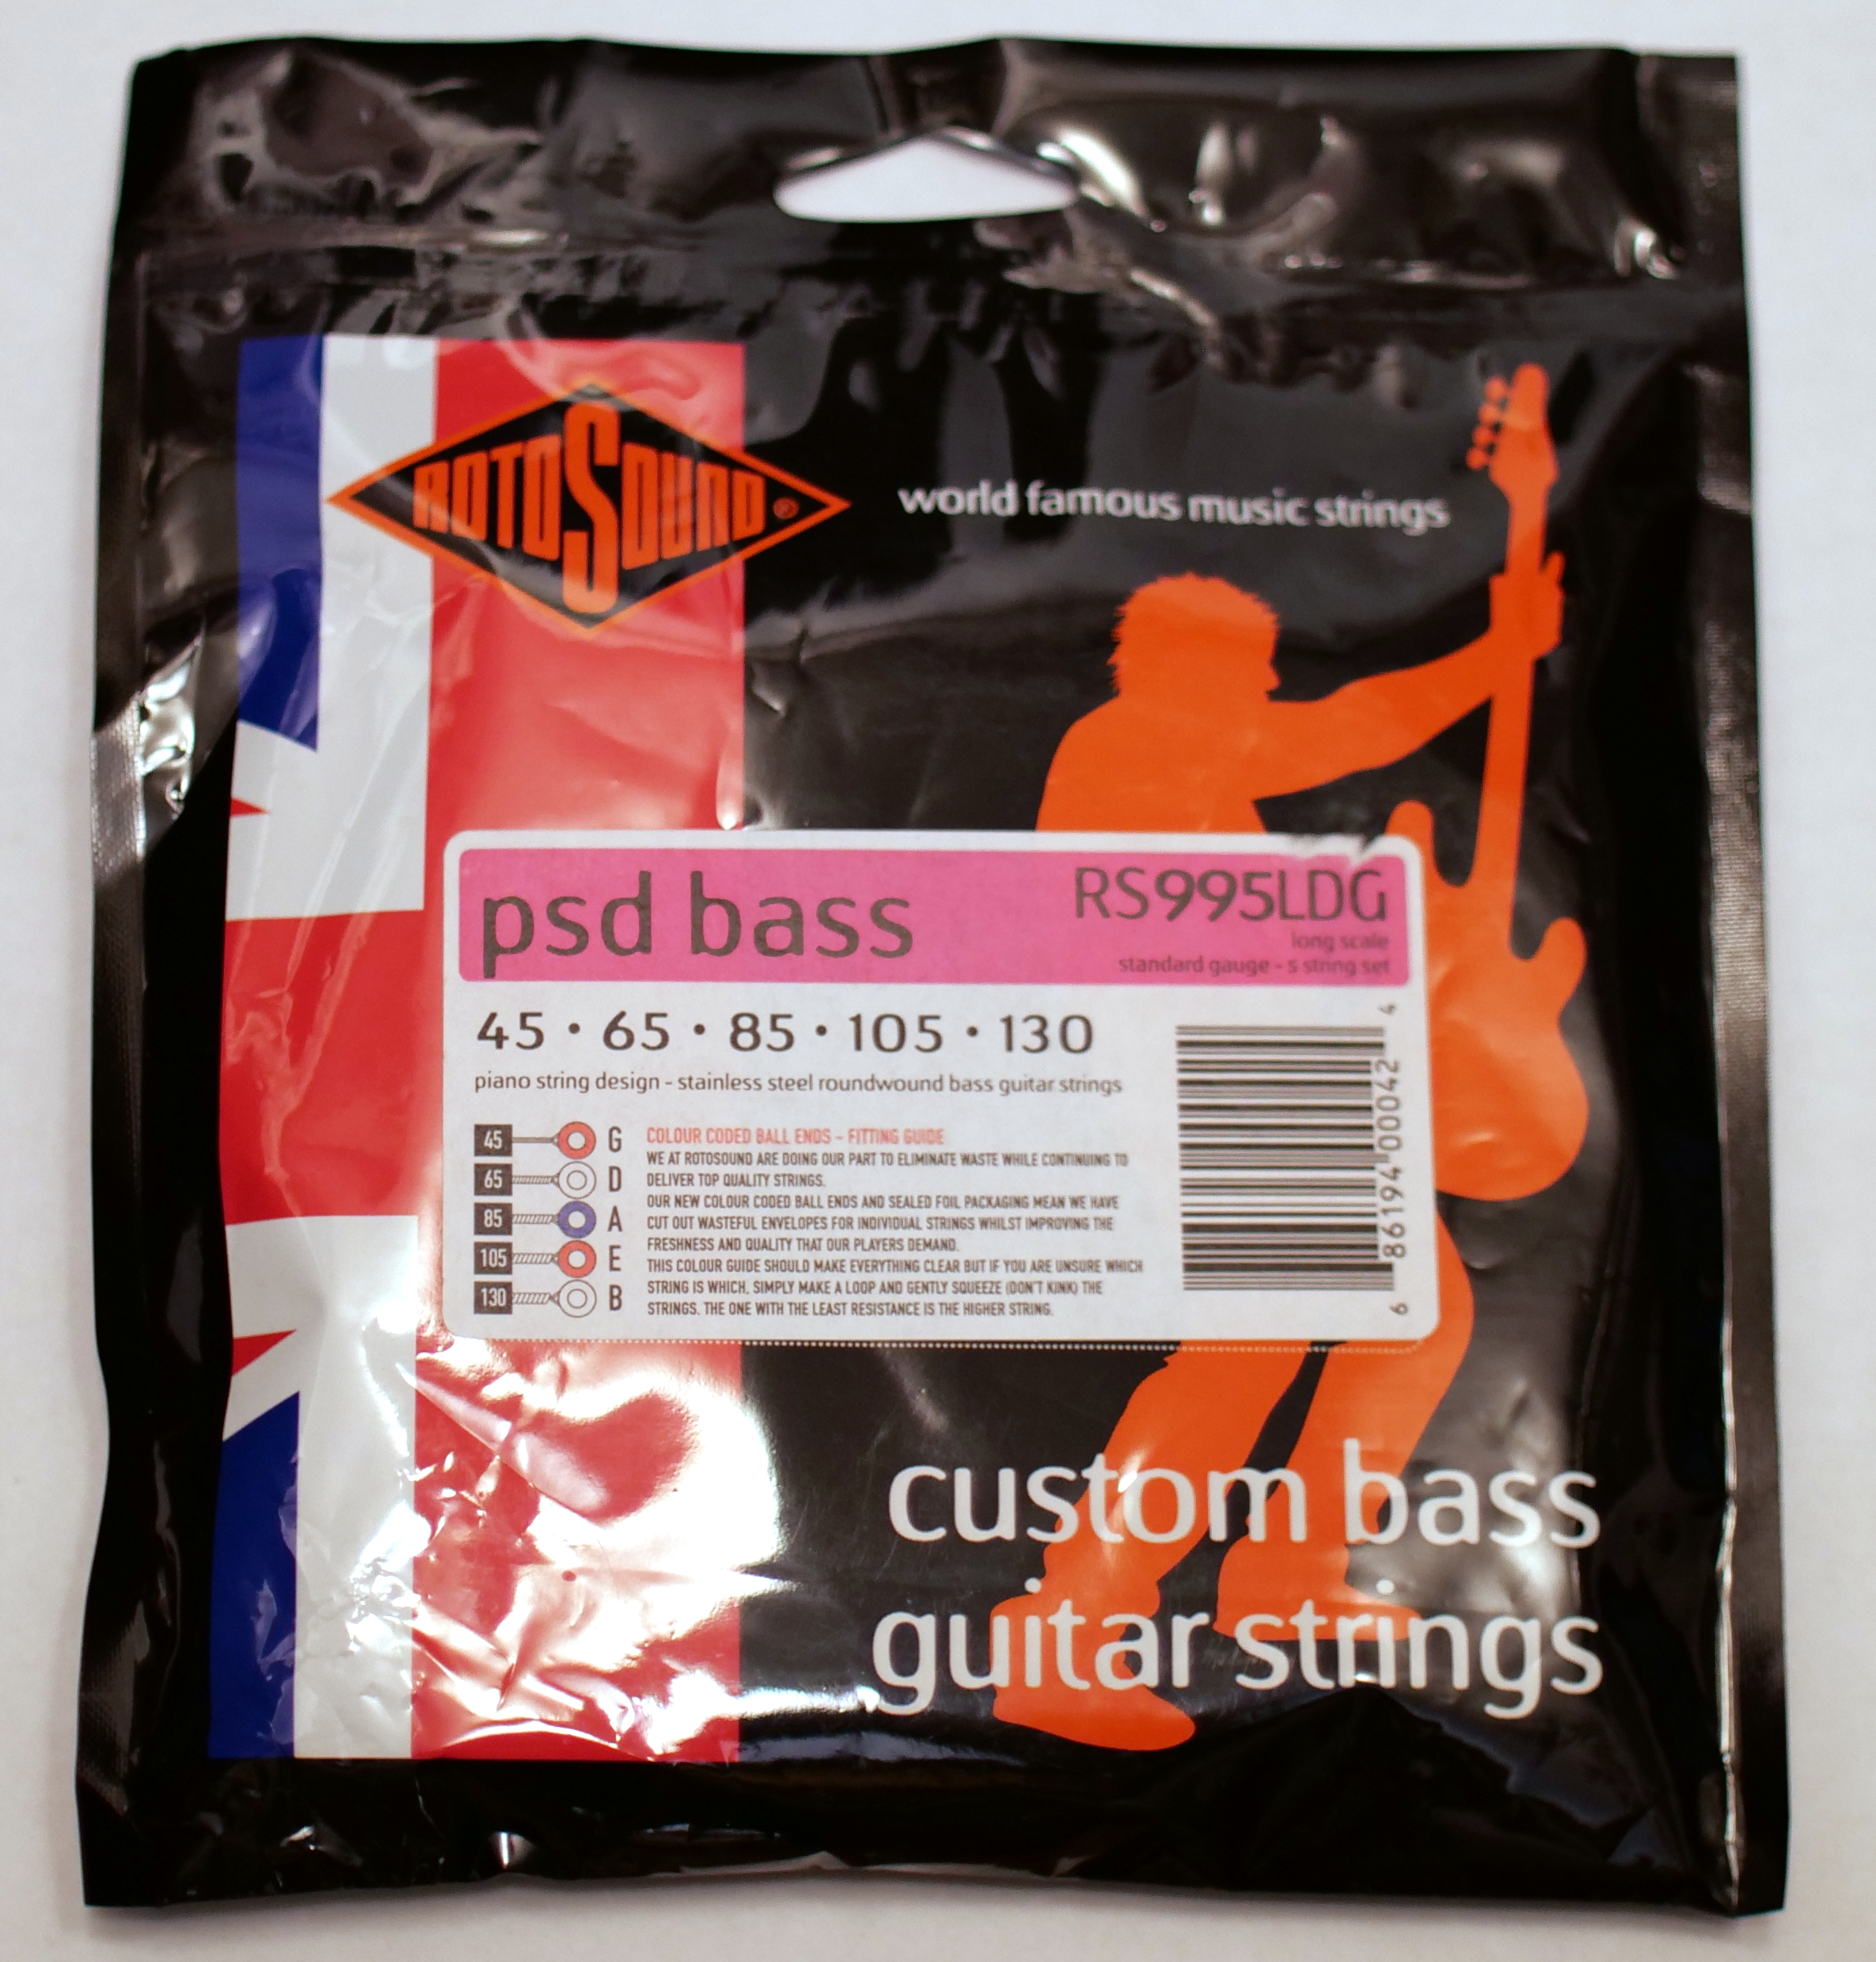
PSD (Piano String Design) are strings with a tapered series of windings on the bridge side of the string. Why you would want to use these, and why they work is a topic for another post.
Yeah but really… what’s the big deal?
These strings do not have a ball end. One end is silked (the part that goes on your tuning peg), and one end is raw wire.
You certainly won’t be tying these on, so you you’ll be constructing the ball end yourself.
Why would you want to do this though? The gist of it is that strings are thick. Thick things tend to have larger bend radiuses and resist movement. By reducing the bend radius at the saddle break point and reducing the damping effect of that thick string at the most important fulcrum, we can create a string with more high frequency harmonics, more sustain and a more stable pitch envelope.
Tools
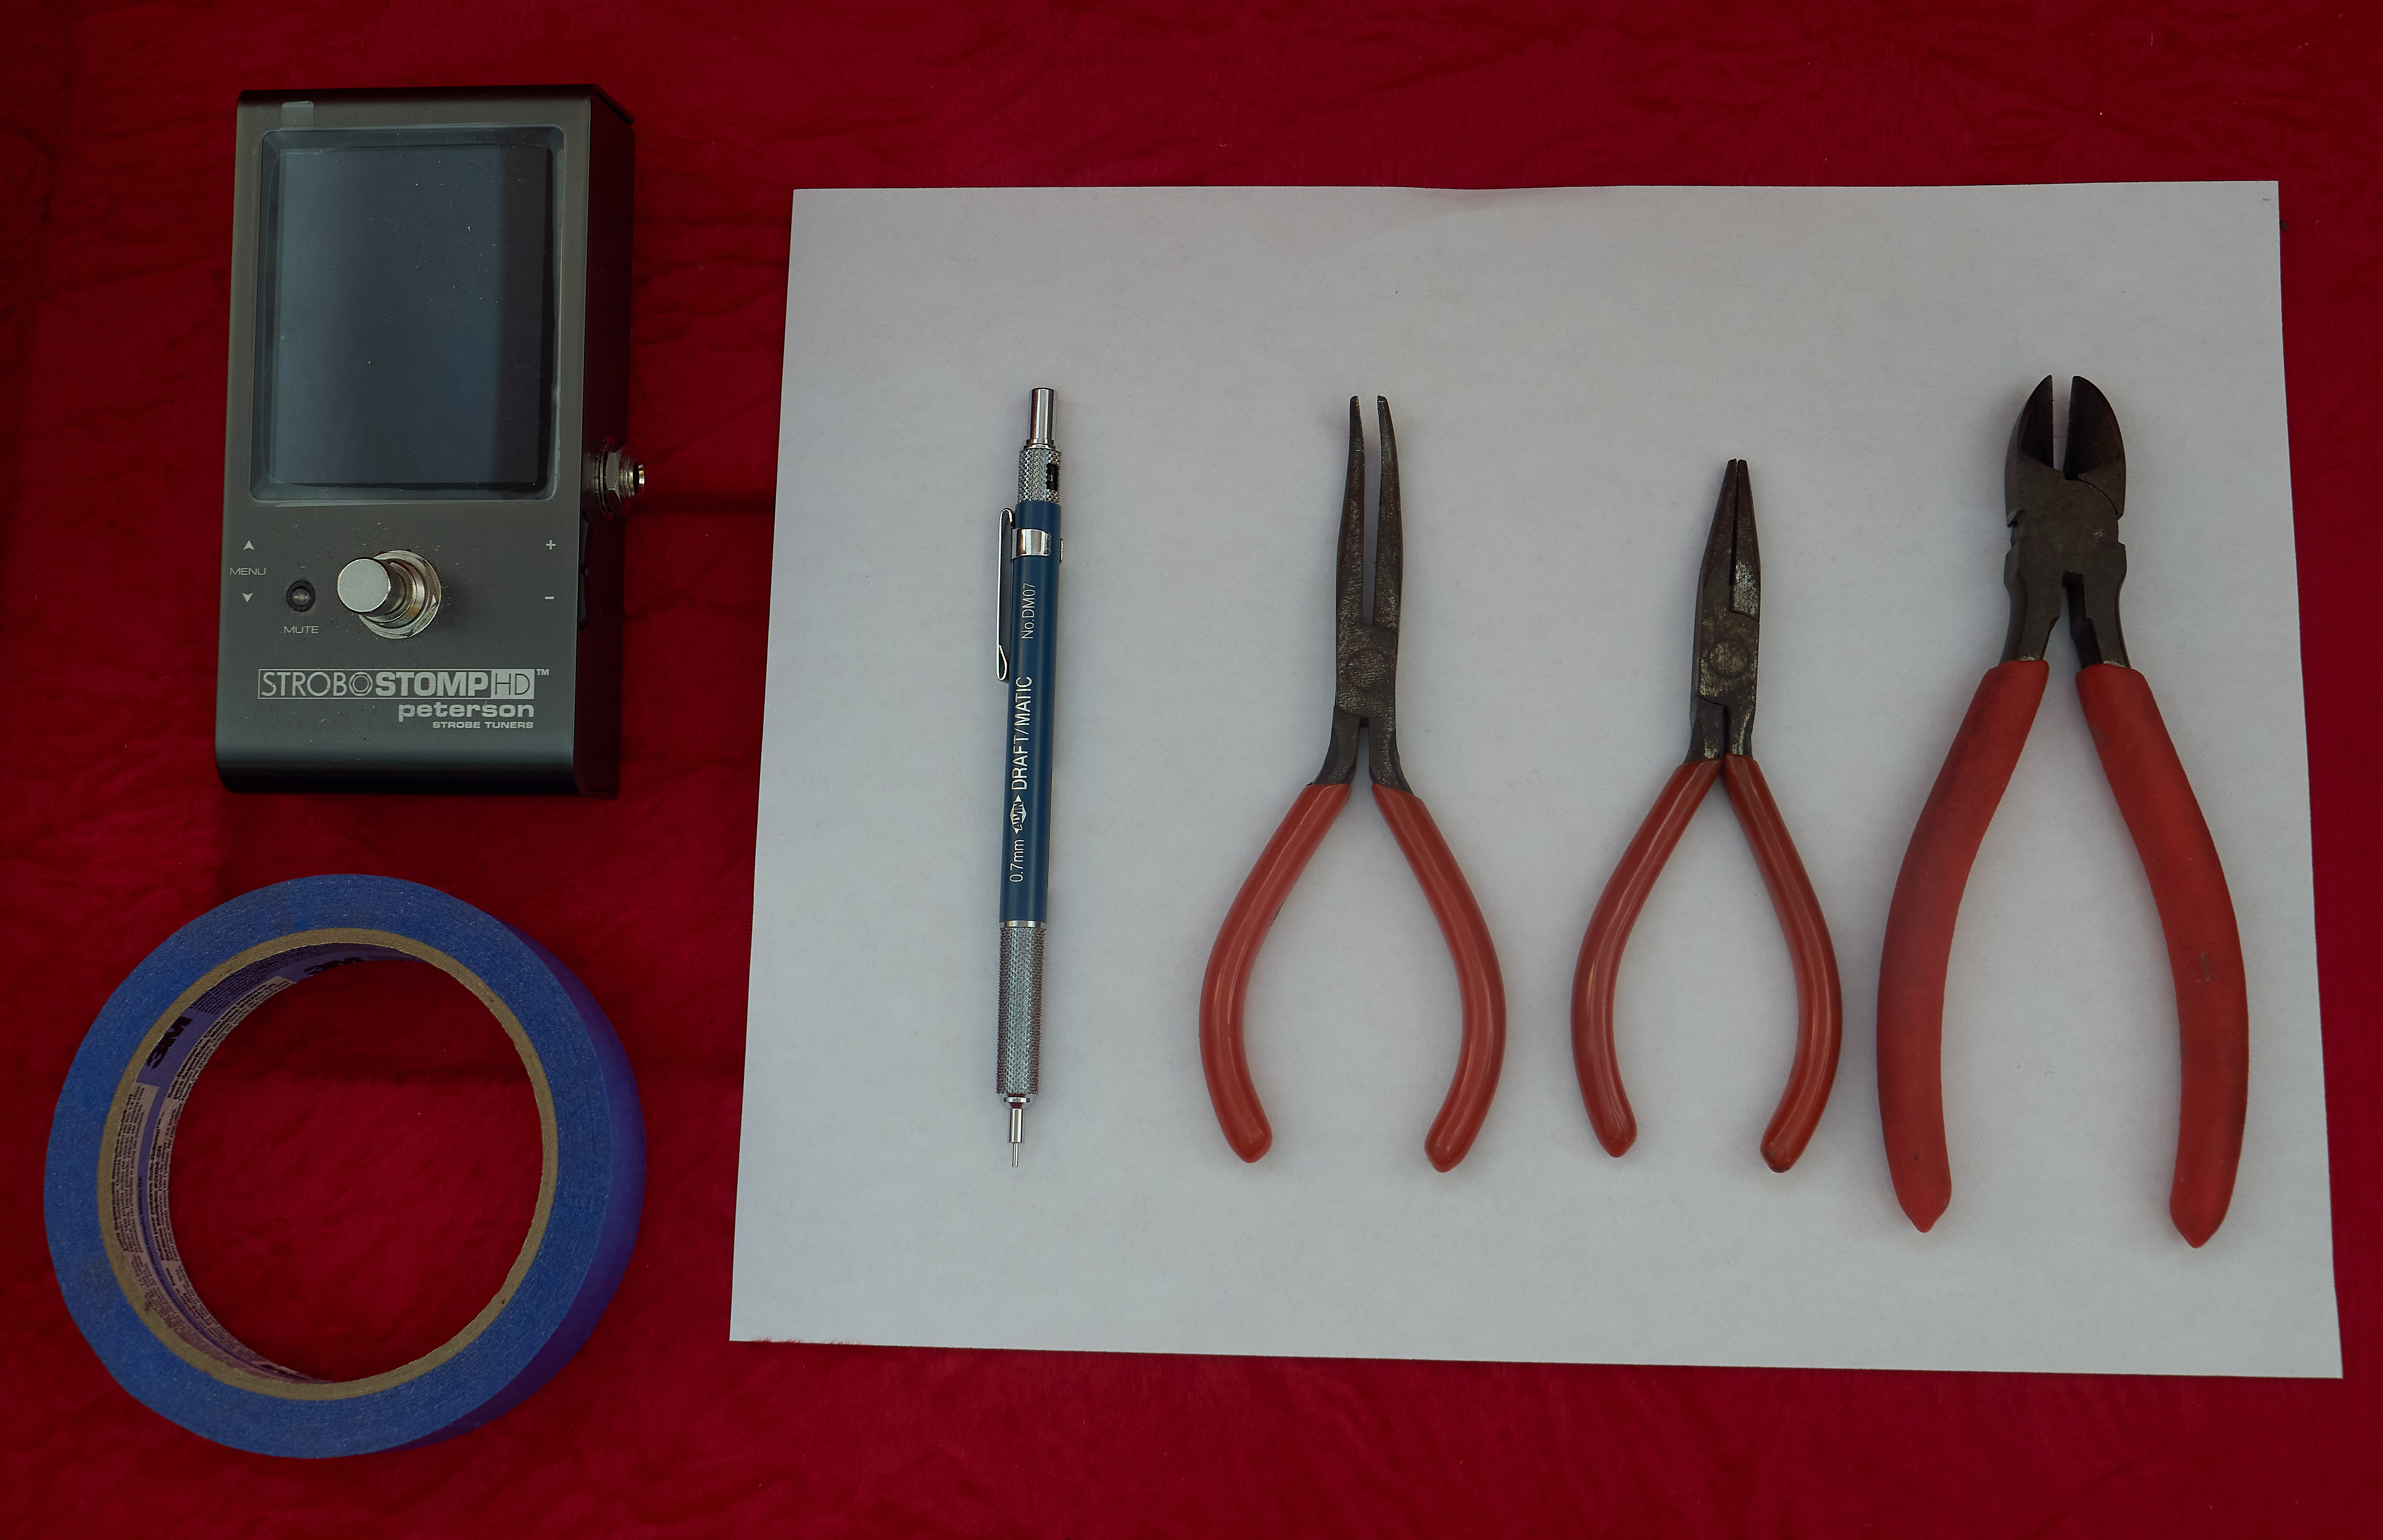
You will want to have the following tools:
- Wire cutters.
- A set of needle nose pliers.
- A set of needle nose pliers. (That’s not a mistake, you want two.)
- Paper.
- Pencil.
- A spreadsheet, probably.
- I like masking tape, but you may want a permanent marker or a piece of string… read the full article and come back to this point if you’re not sure why.
Preparation
The amount of taper between the contact point of the saddles and the beginning of the taper is very important. In fact, it’s so important that you have to go through dozens of sets of strings to figure out exactly how you like this setup. (I’ll let you decide if I’m joking or not).
Rotosound recommends about 1/4”(6mm).
Various body/bridge/saddle designs have different lengths between the ball and the contact point on the bridge. PSD strings are designed so that you position the ball end of the strings.
Some bridge designs are easy to measure. Some are not.
THIS IS IMPORTANT - Variations can change how these strings sound, and too long will sound weird. (You might like that though?). Start at the recommended taper->saddle-break distance and experiment from there.
Mark

It’s easy enough to avoid any potential issues by marking your existing strings before you remove them:
There are a few paths. These assume that you have a properly intonated instrument.
Existing tapered bass string
Either:
- Refer to your spreadsheet for previous PSD99 setup information.
OR
- Mark existing tapered string 1/4” or 6mm from the bridge.
- Mark all tapered strings perpendicular to that string.
- For existing non-tapered strings please refer to the section about normal gauge strings below.
Fixed Saddle
- Mark all strings 1/4” or 6mm from the bridge
Existing normal gauge bass strings
- On your lowest string make a mark (tape, marker, tie a string… whatever) 3/8” or 9mm away from the saddle.
- On your highest string make a mark 3/8” or 9mm away from the saddle.
- Use a straight edge between these marks and mark the other strings.
It is important to mark all of the strings! String gauge has a slight effect on the the functional distance from ball to saddle contact point.
An observant reader may wonder why we use more distant marks when the original strings are regular gauges. This will be explained partially in the intonation section, and possibly in a part 2(??).
I have my own preferences here. I’ll be using my preferred taper lengths, but labelling the pictures at “factory spec”.
My Mark
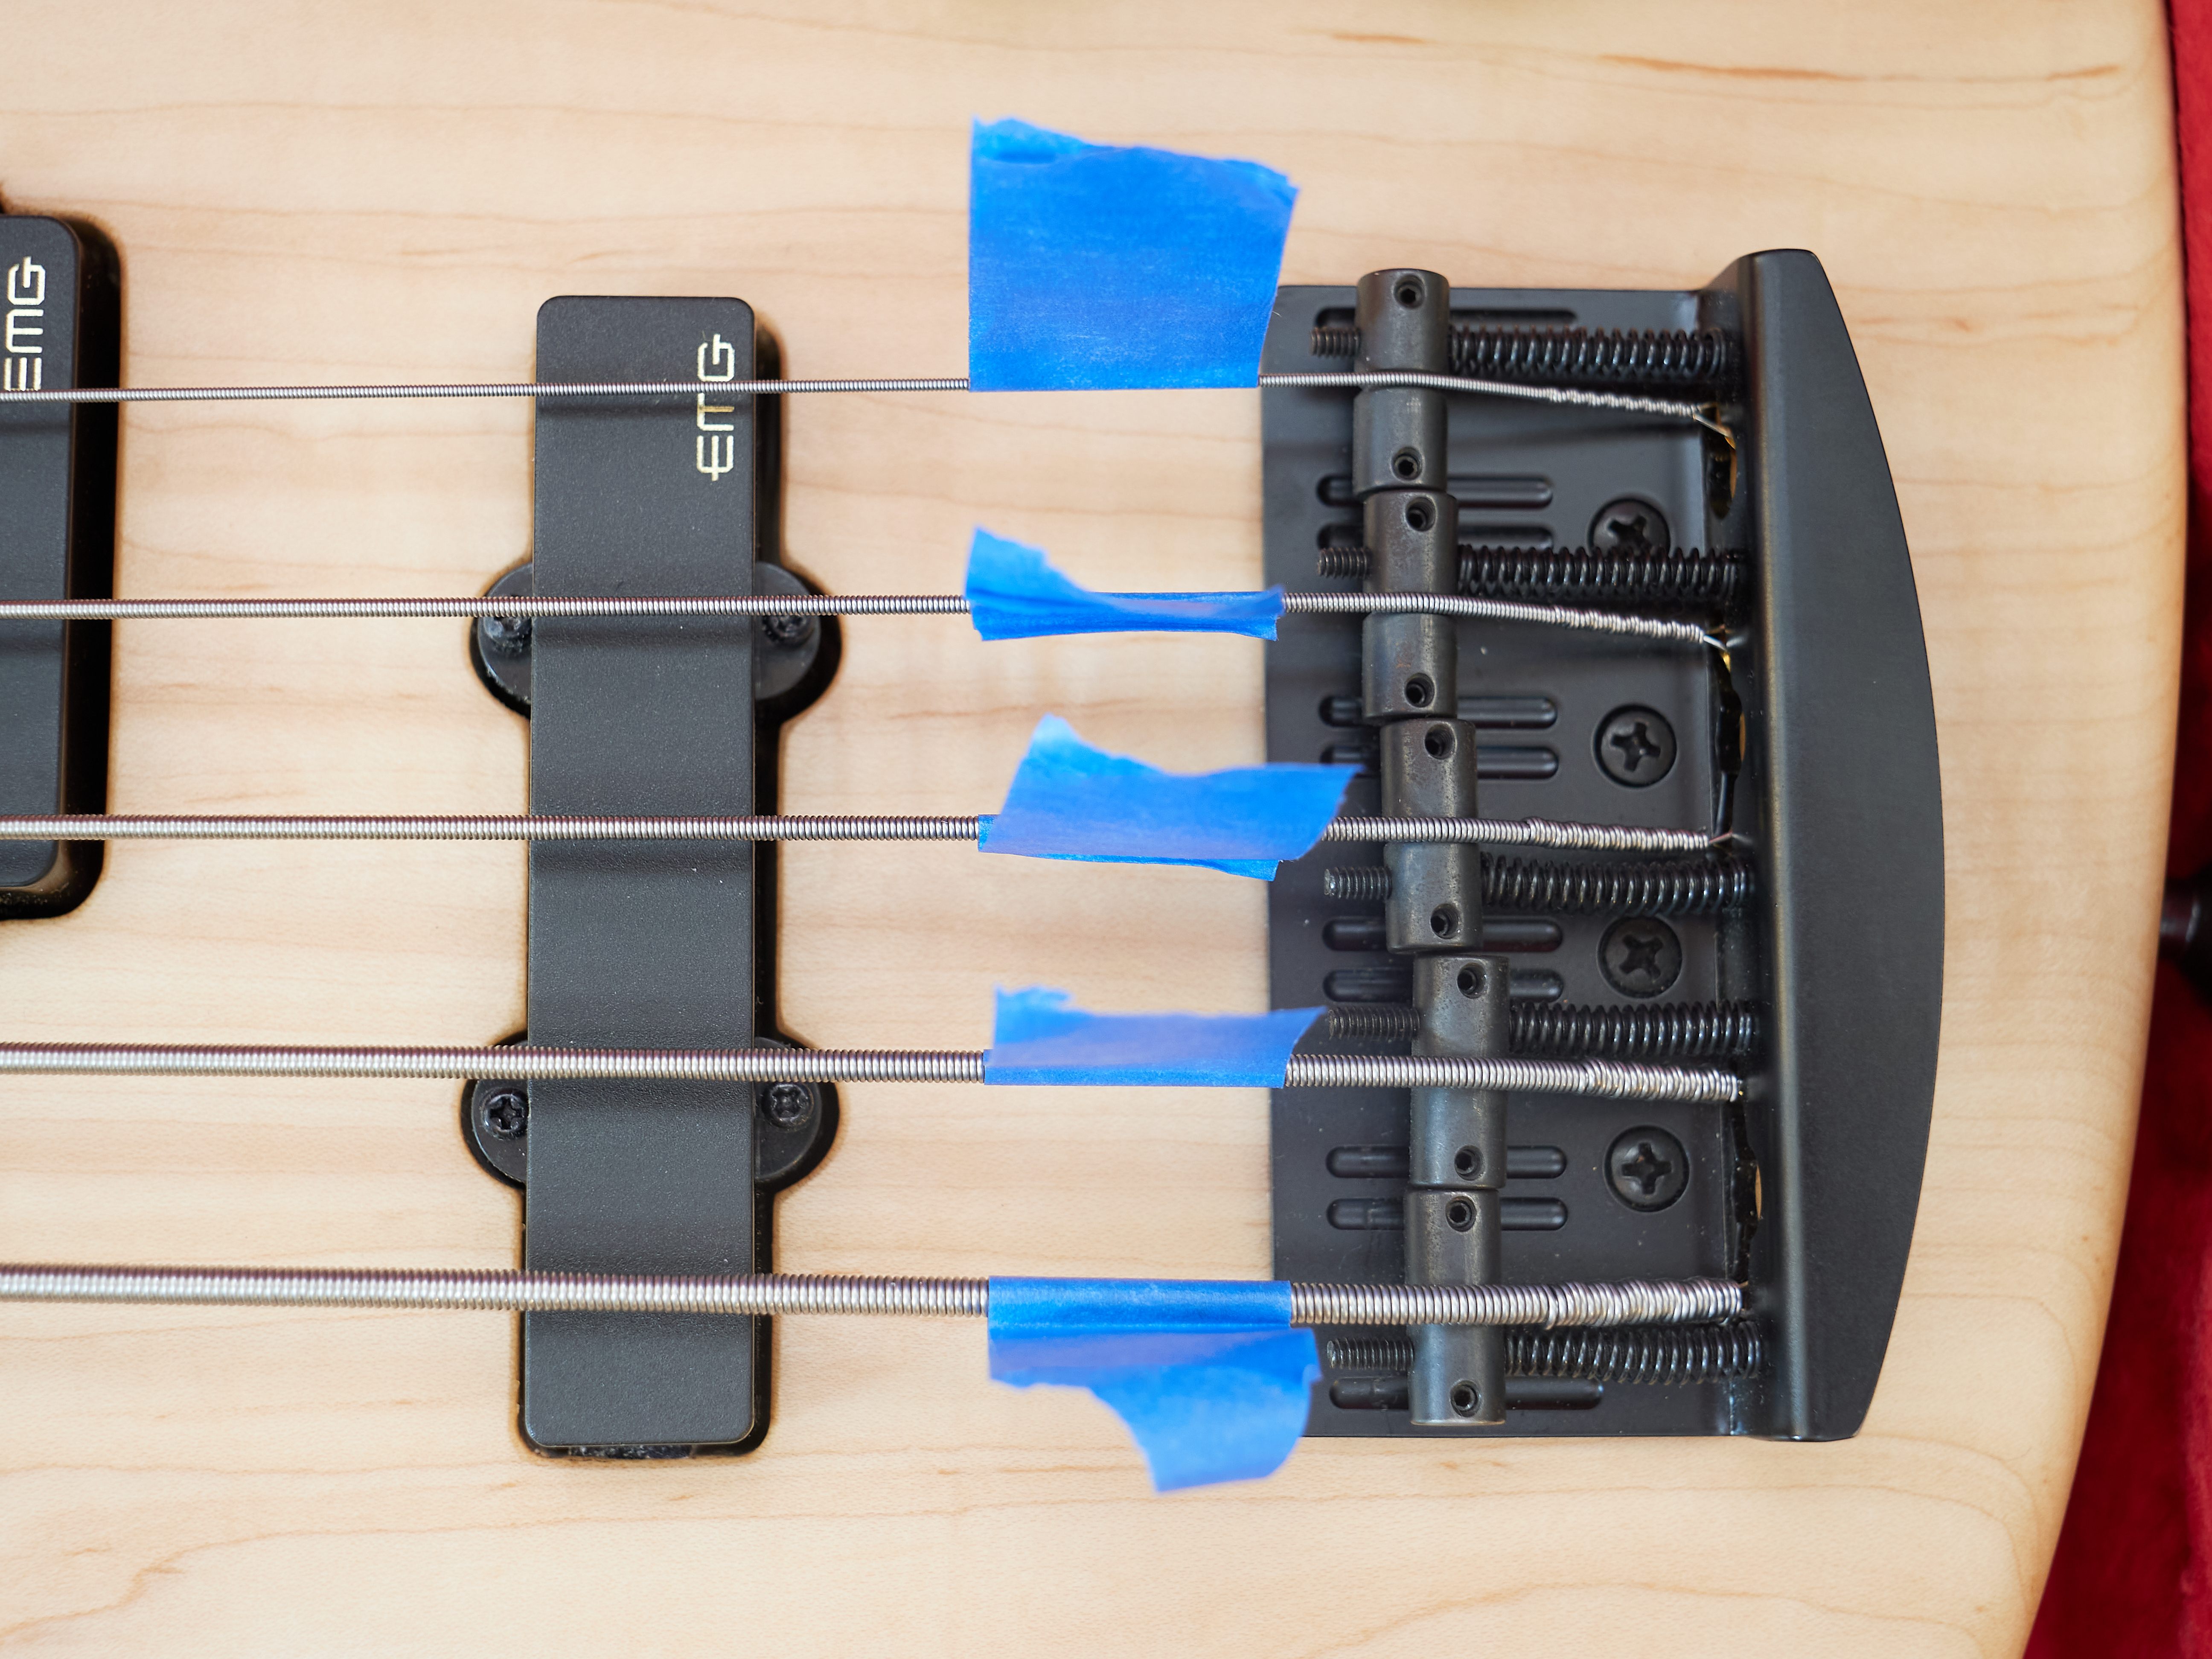
I wrap some masking tape around the strings and firmly press it in place.
The bridge on this bass allows the strings to come out through a notch. If you have a string-through-bridge or string-through-body bass, then you will want to BE CAREFUL about how you mark the strings. You do not want your mark being rubbed off or shifting while removing the strings.
Tape works for me though.
Record
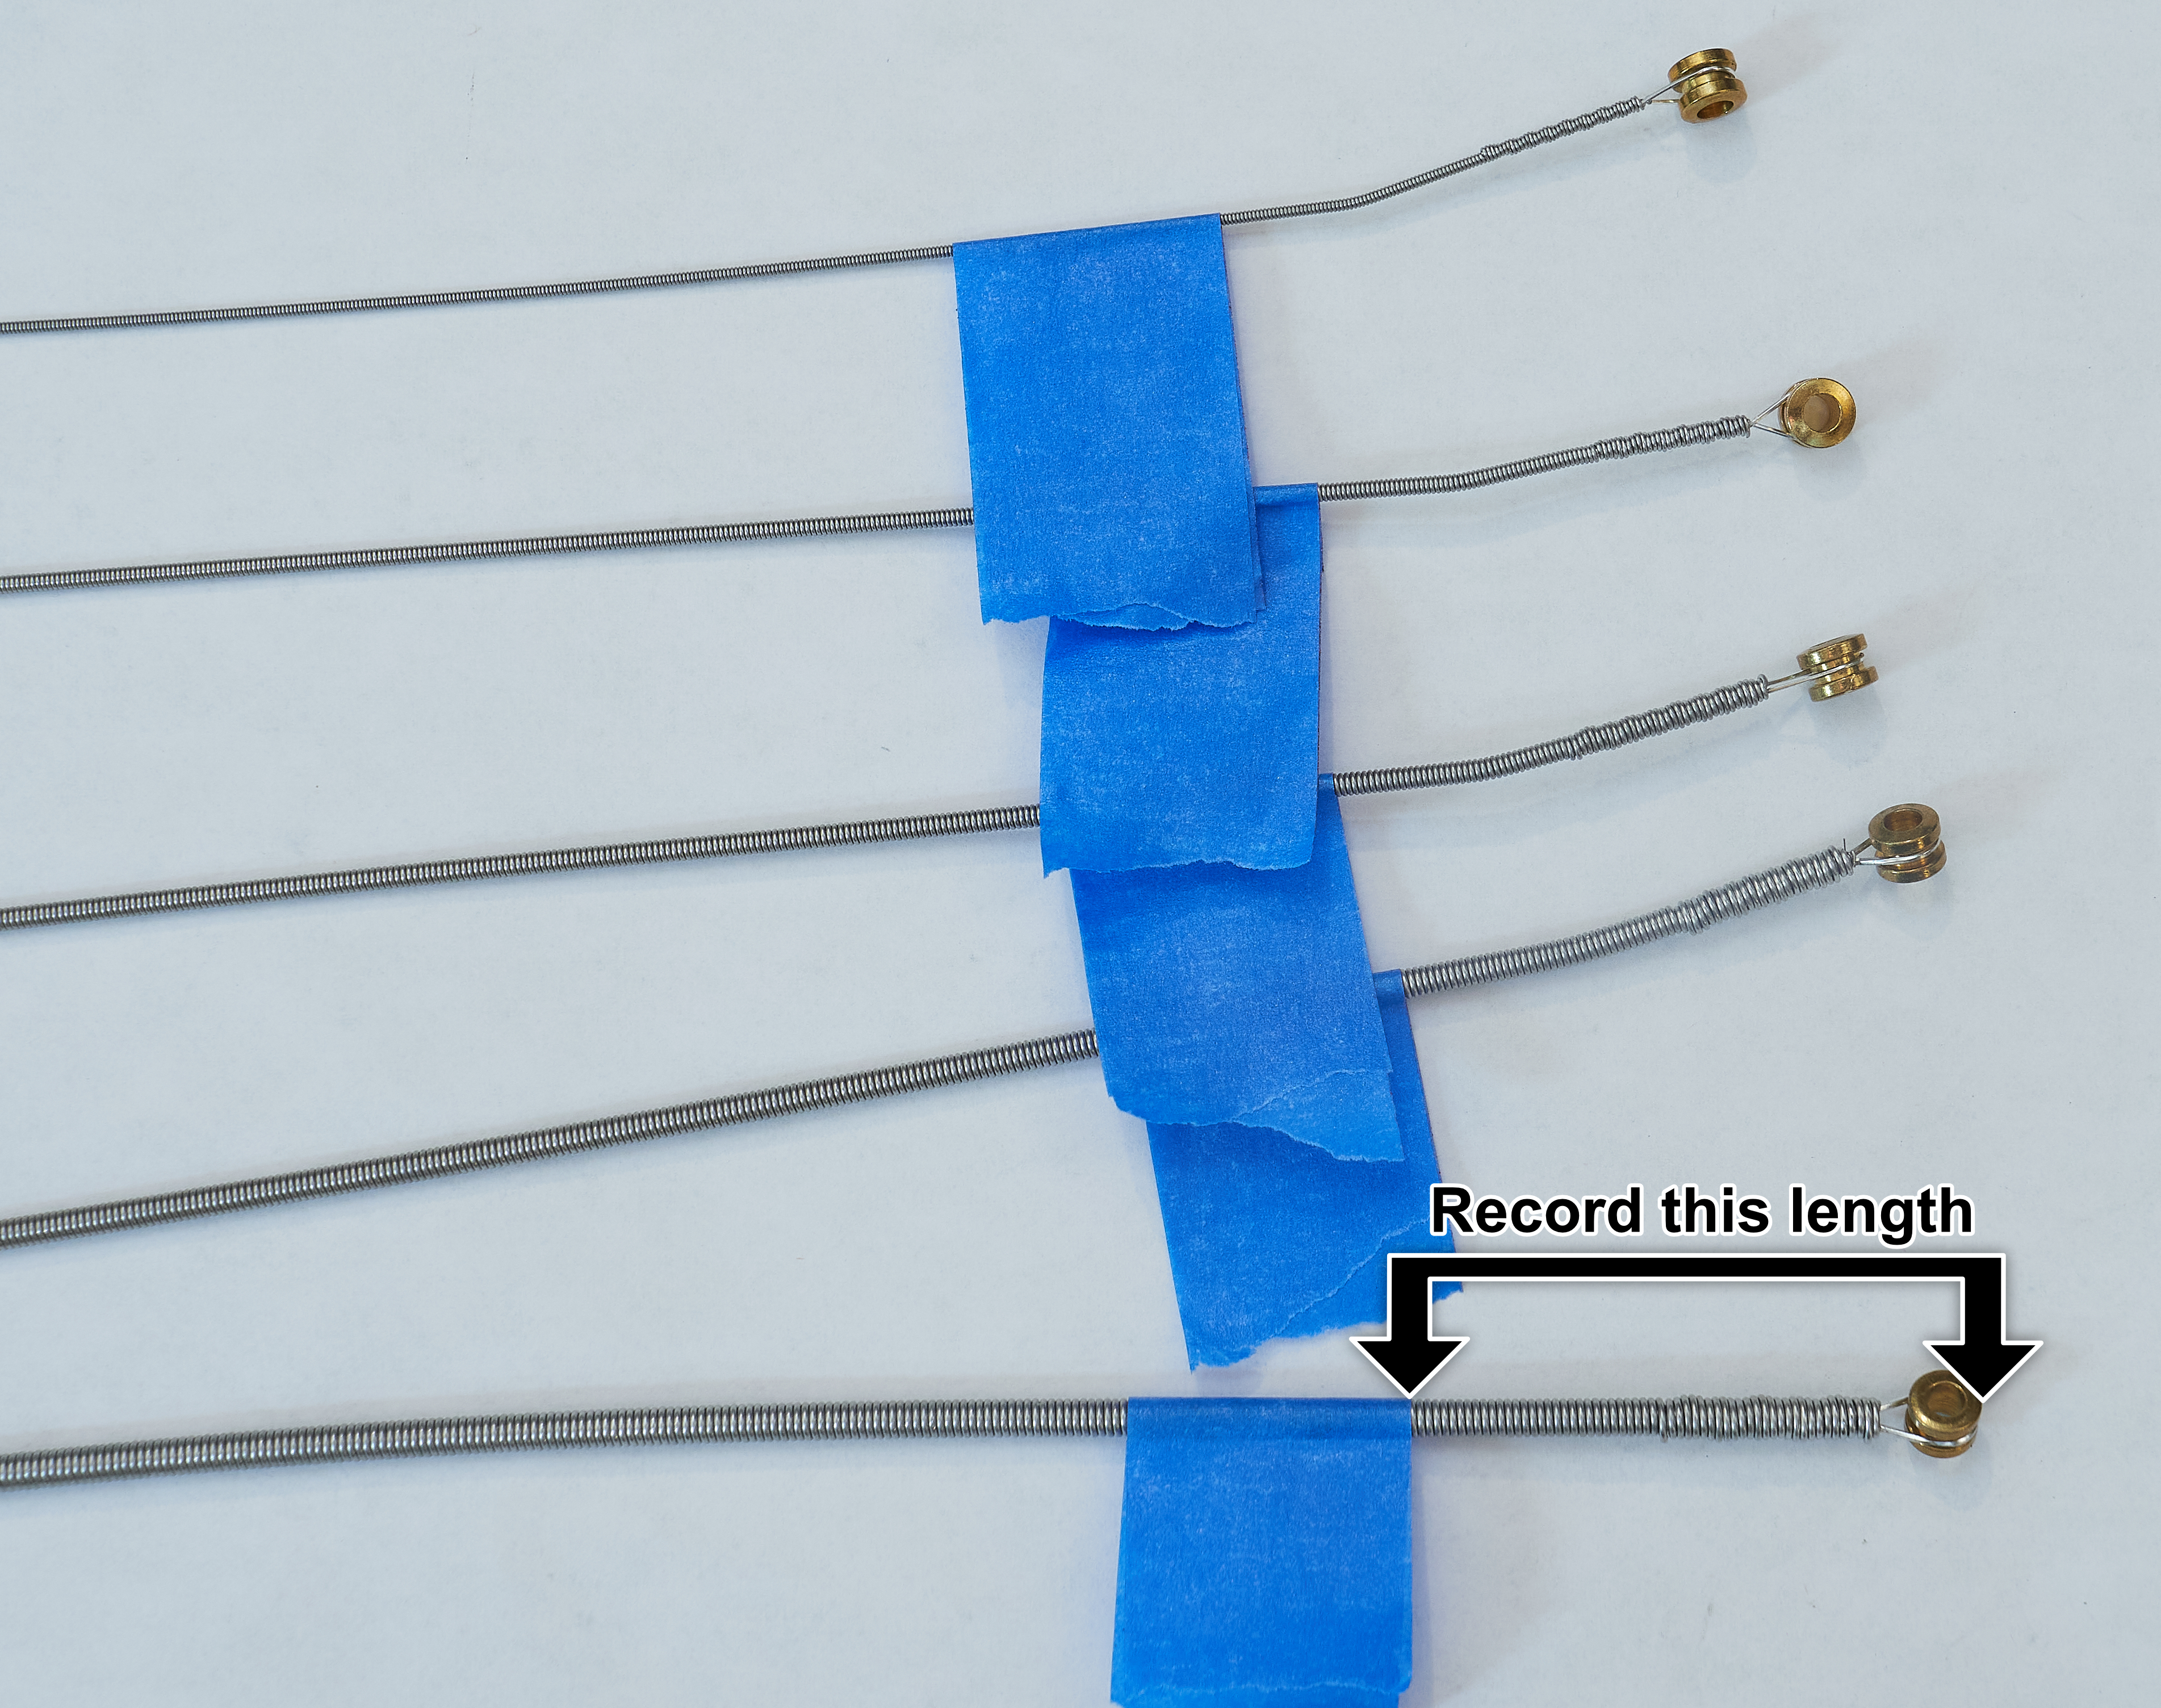
- Remove the strings.
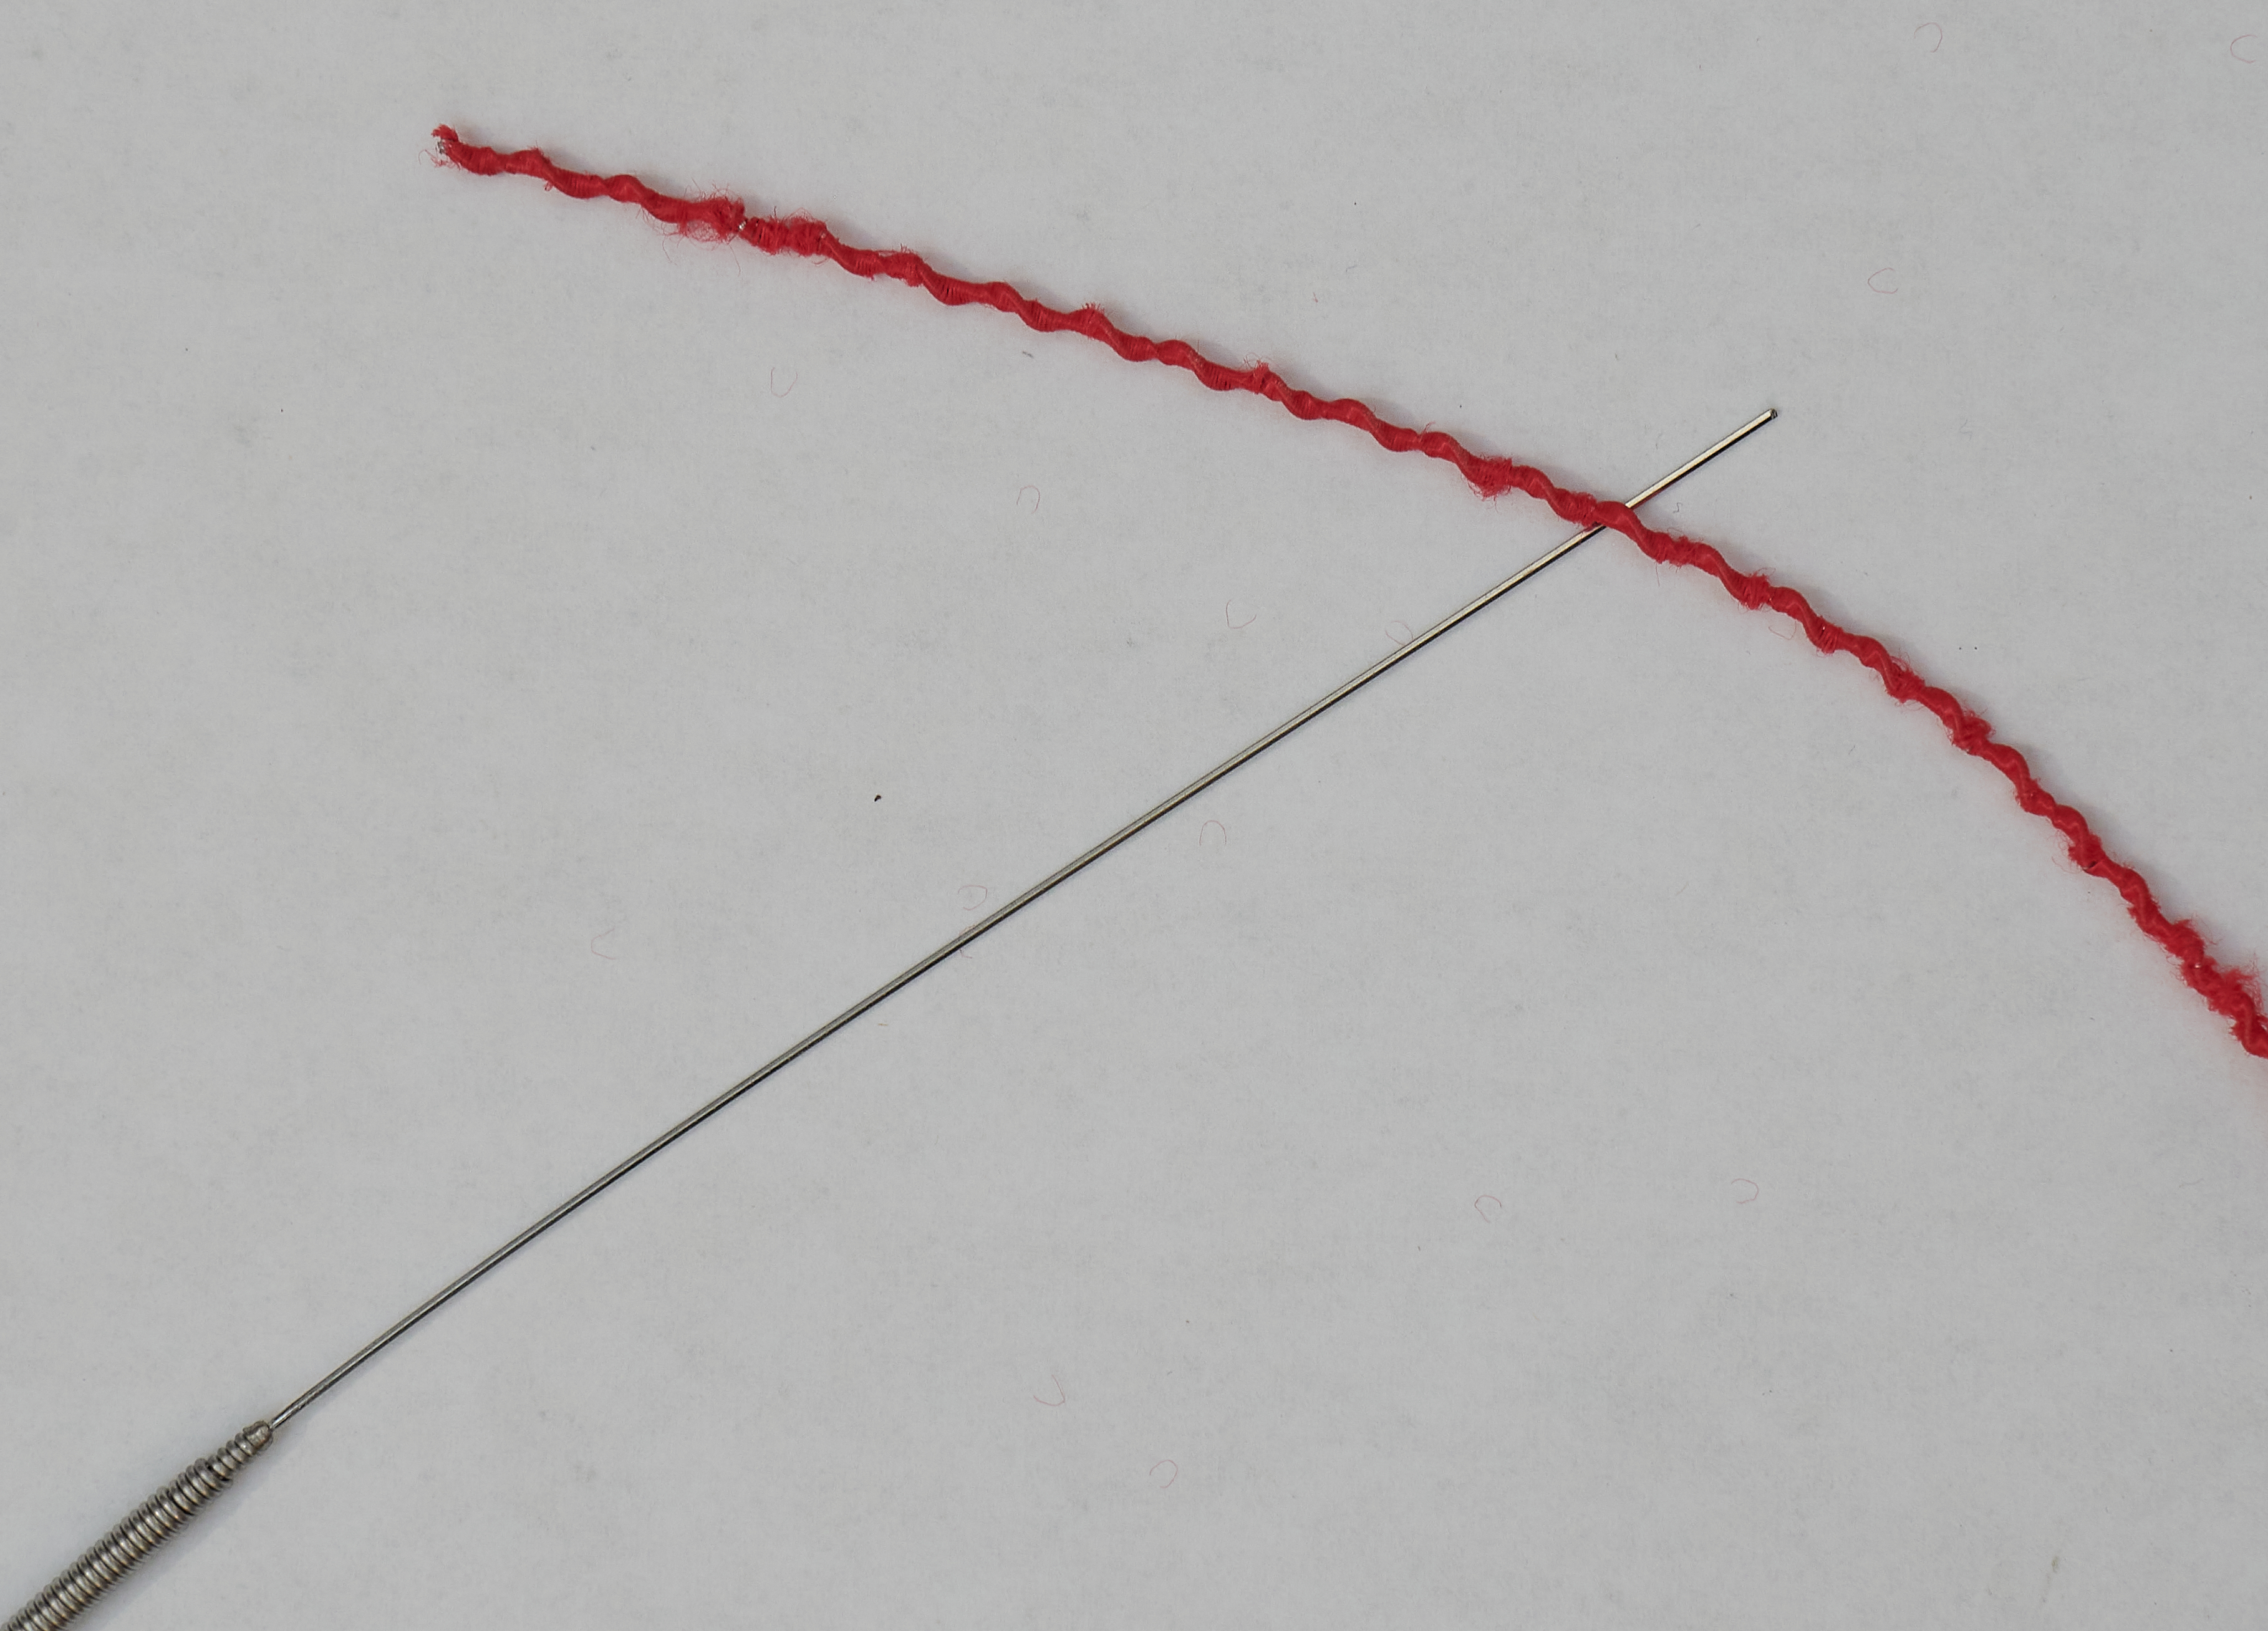
- On your old strings, document the distance from mark to the ball. DOCUMENT. You do not have to measure. You can cut a piece of string or paper to the length. You can mark it on a piece of paper. You can measure it with calipers. I don’t care.
- The measurement is to the END of the ball as shown in the picture.
- Keep a spreadsheet - If you have multiple basses or want to improve on the intonation step, then having a record of measurements with notes will help.
It is worth trying slightly more or slightly less distance if you try the strings again on this instrument. (Why? Another post…)
Ball End
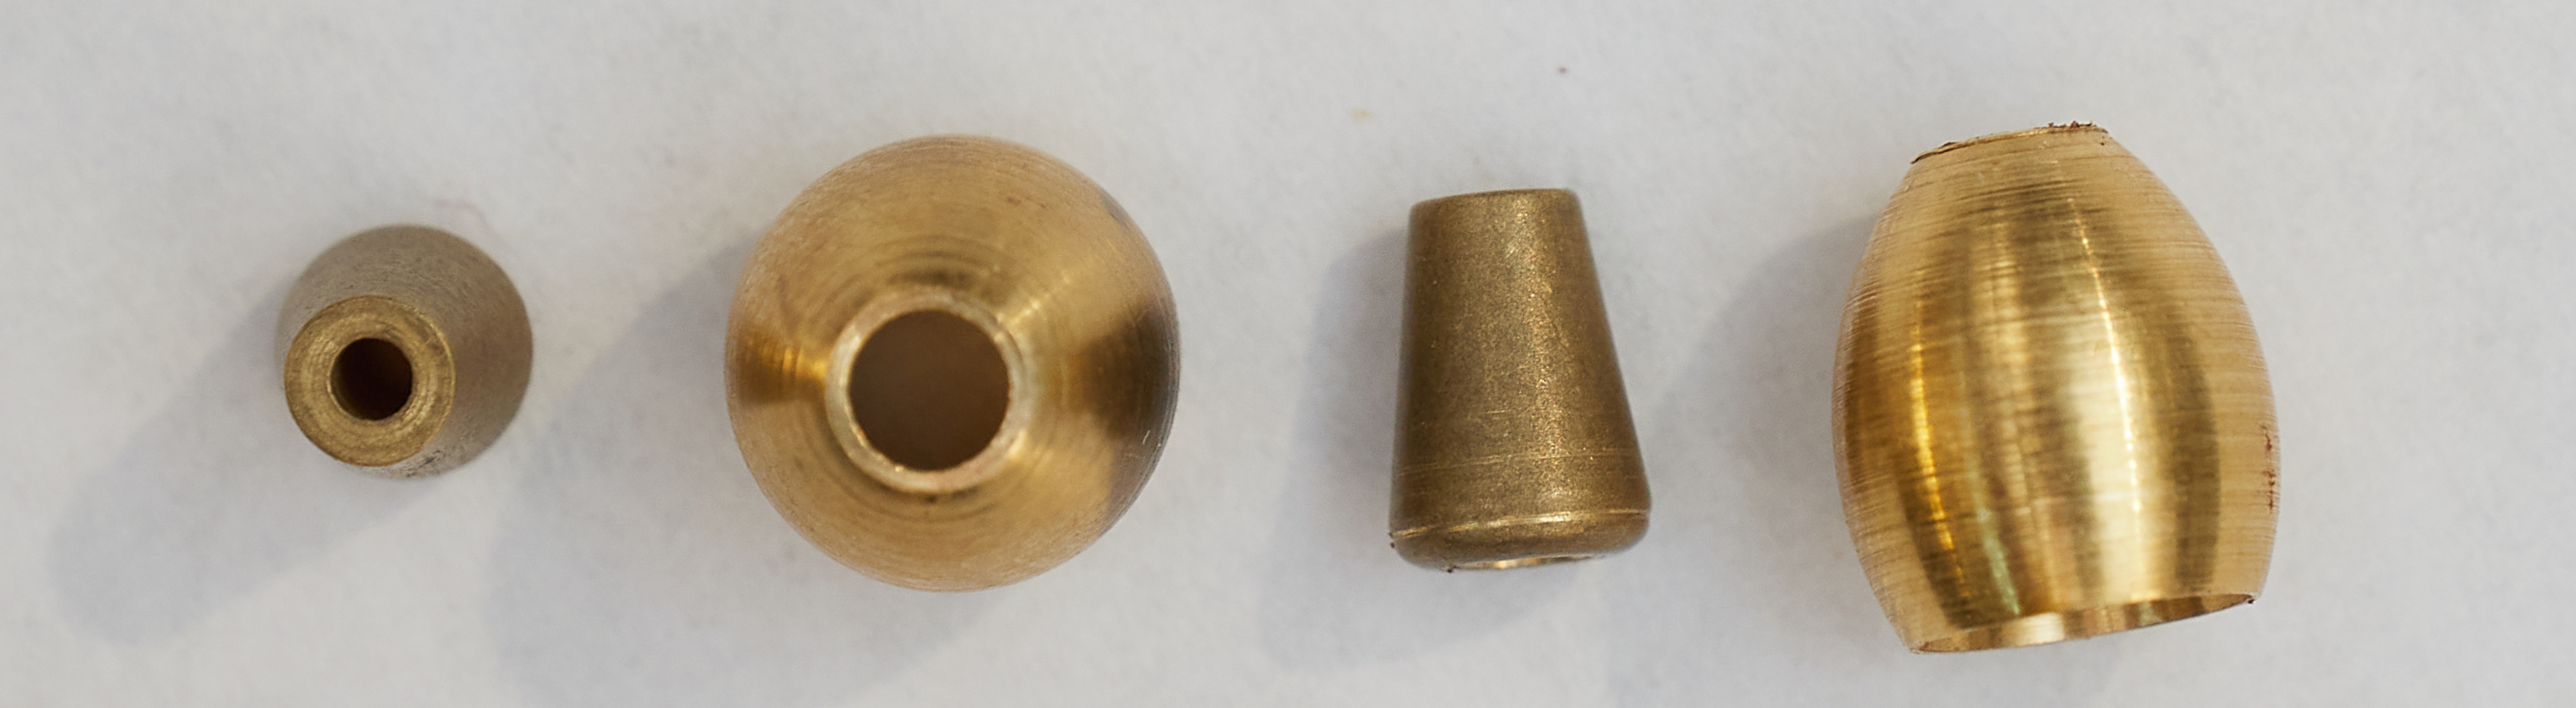
Unlike other strings, you must deal with both ends of PSD strings. You assemble the ball-end side yourself.
If you are feeling particularly persnickety then I would suggest lightly sanding the small hole on the large end. The string will exit through that, and they can be a bit rough from the factory.
Bending - Step 1

I suggest using two pairs of pliers for these step:
- Set the start of the taper at your first mark.
- Grab the string with a pair of pliers at the second mark.
Bending - Step 2
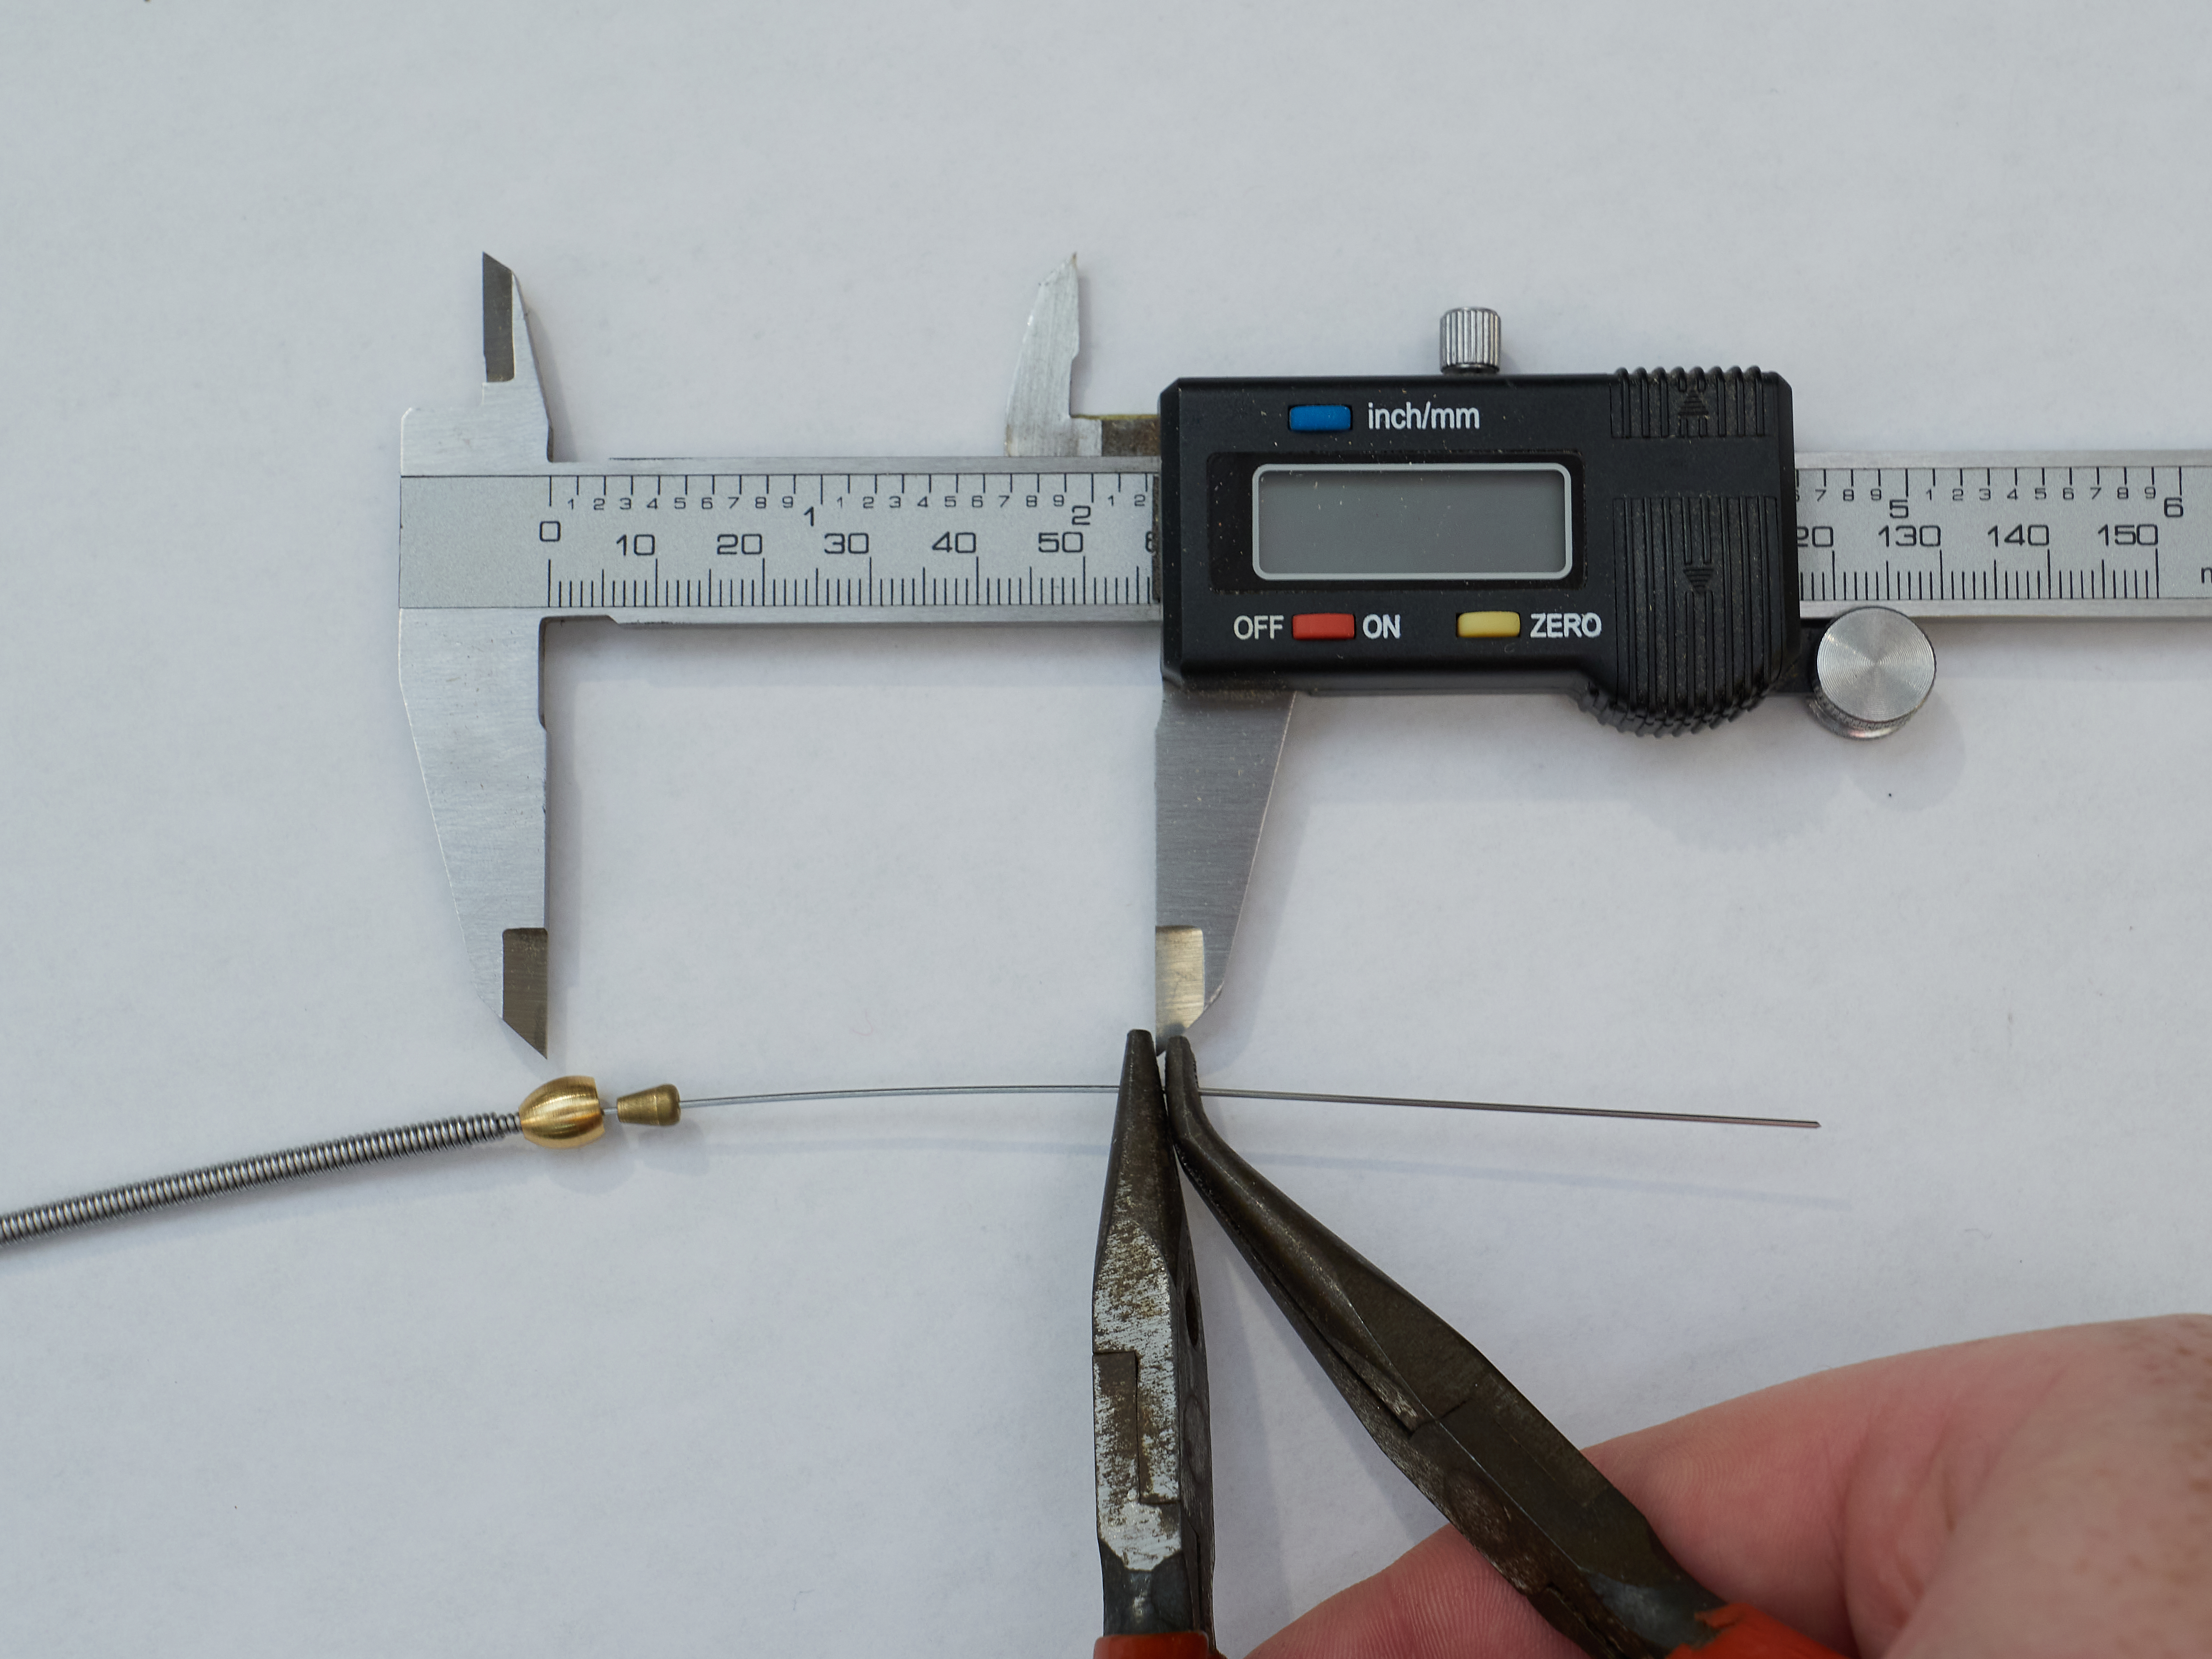
- Use a second set of pliers to create a right angle bend.
- Push the small cone to the bend.
- Feed the string core over the small cone and into the large cone.
Note: I forgot to take a picture of the string after bending. Use your imagination. It looks like this: L
Threading - Step 1
- Push the small cone to the bend.
- Take the wire tail and feed the end through the large round cone.
Threading - Step 2

- Take both cones and pull them towards the bend.
The large cone will clamp the string over the smaller cone.
- CAREFULLY Trim the excess. Don’t cut the string itself or you’re screwed.
Really. Don’t do that. DO NOT CUT YOUR STRING. Only cut the excess.
Installation
- Install your strings.
Nothing fancy here. Do your normal thing and be careful that your cones don’t fall off. A drop of super glue in the cone or a light taping helps keep them together while stringing the instrument
Intonation
If I make a part 2 then I’ll go into further detail why this is necessary (reduced natural bend radius at breakpoint), but you need to reintonate your instrument.
If you are on an acoustic guitar then you will have to accept that your instrument is going to be slightly flatter the higher up you play. That’s likely not a bad thing, and in a band context you’ll probably sound more in tune.
On electric bass you will need to move your saddles towards the neck. Possibly a good amount. There is already an excellent series on this topic so I will not be covering it here.
Unless your last strings were fully tapered strings then YOU WILL NEED TO INTONATE or accept that your instrument will play flatter as you play higher pitches on each string.
Conclusion

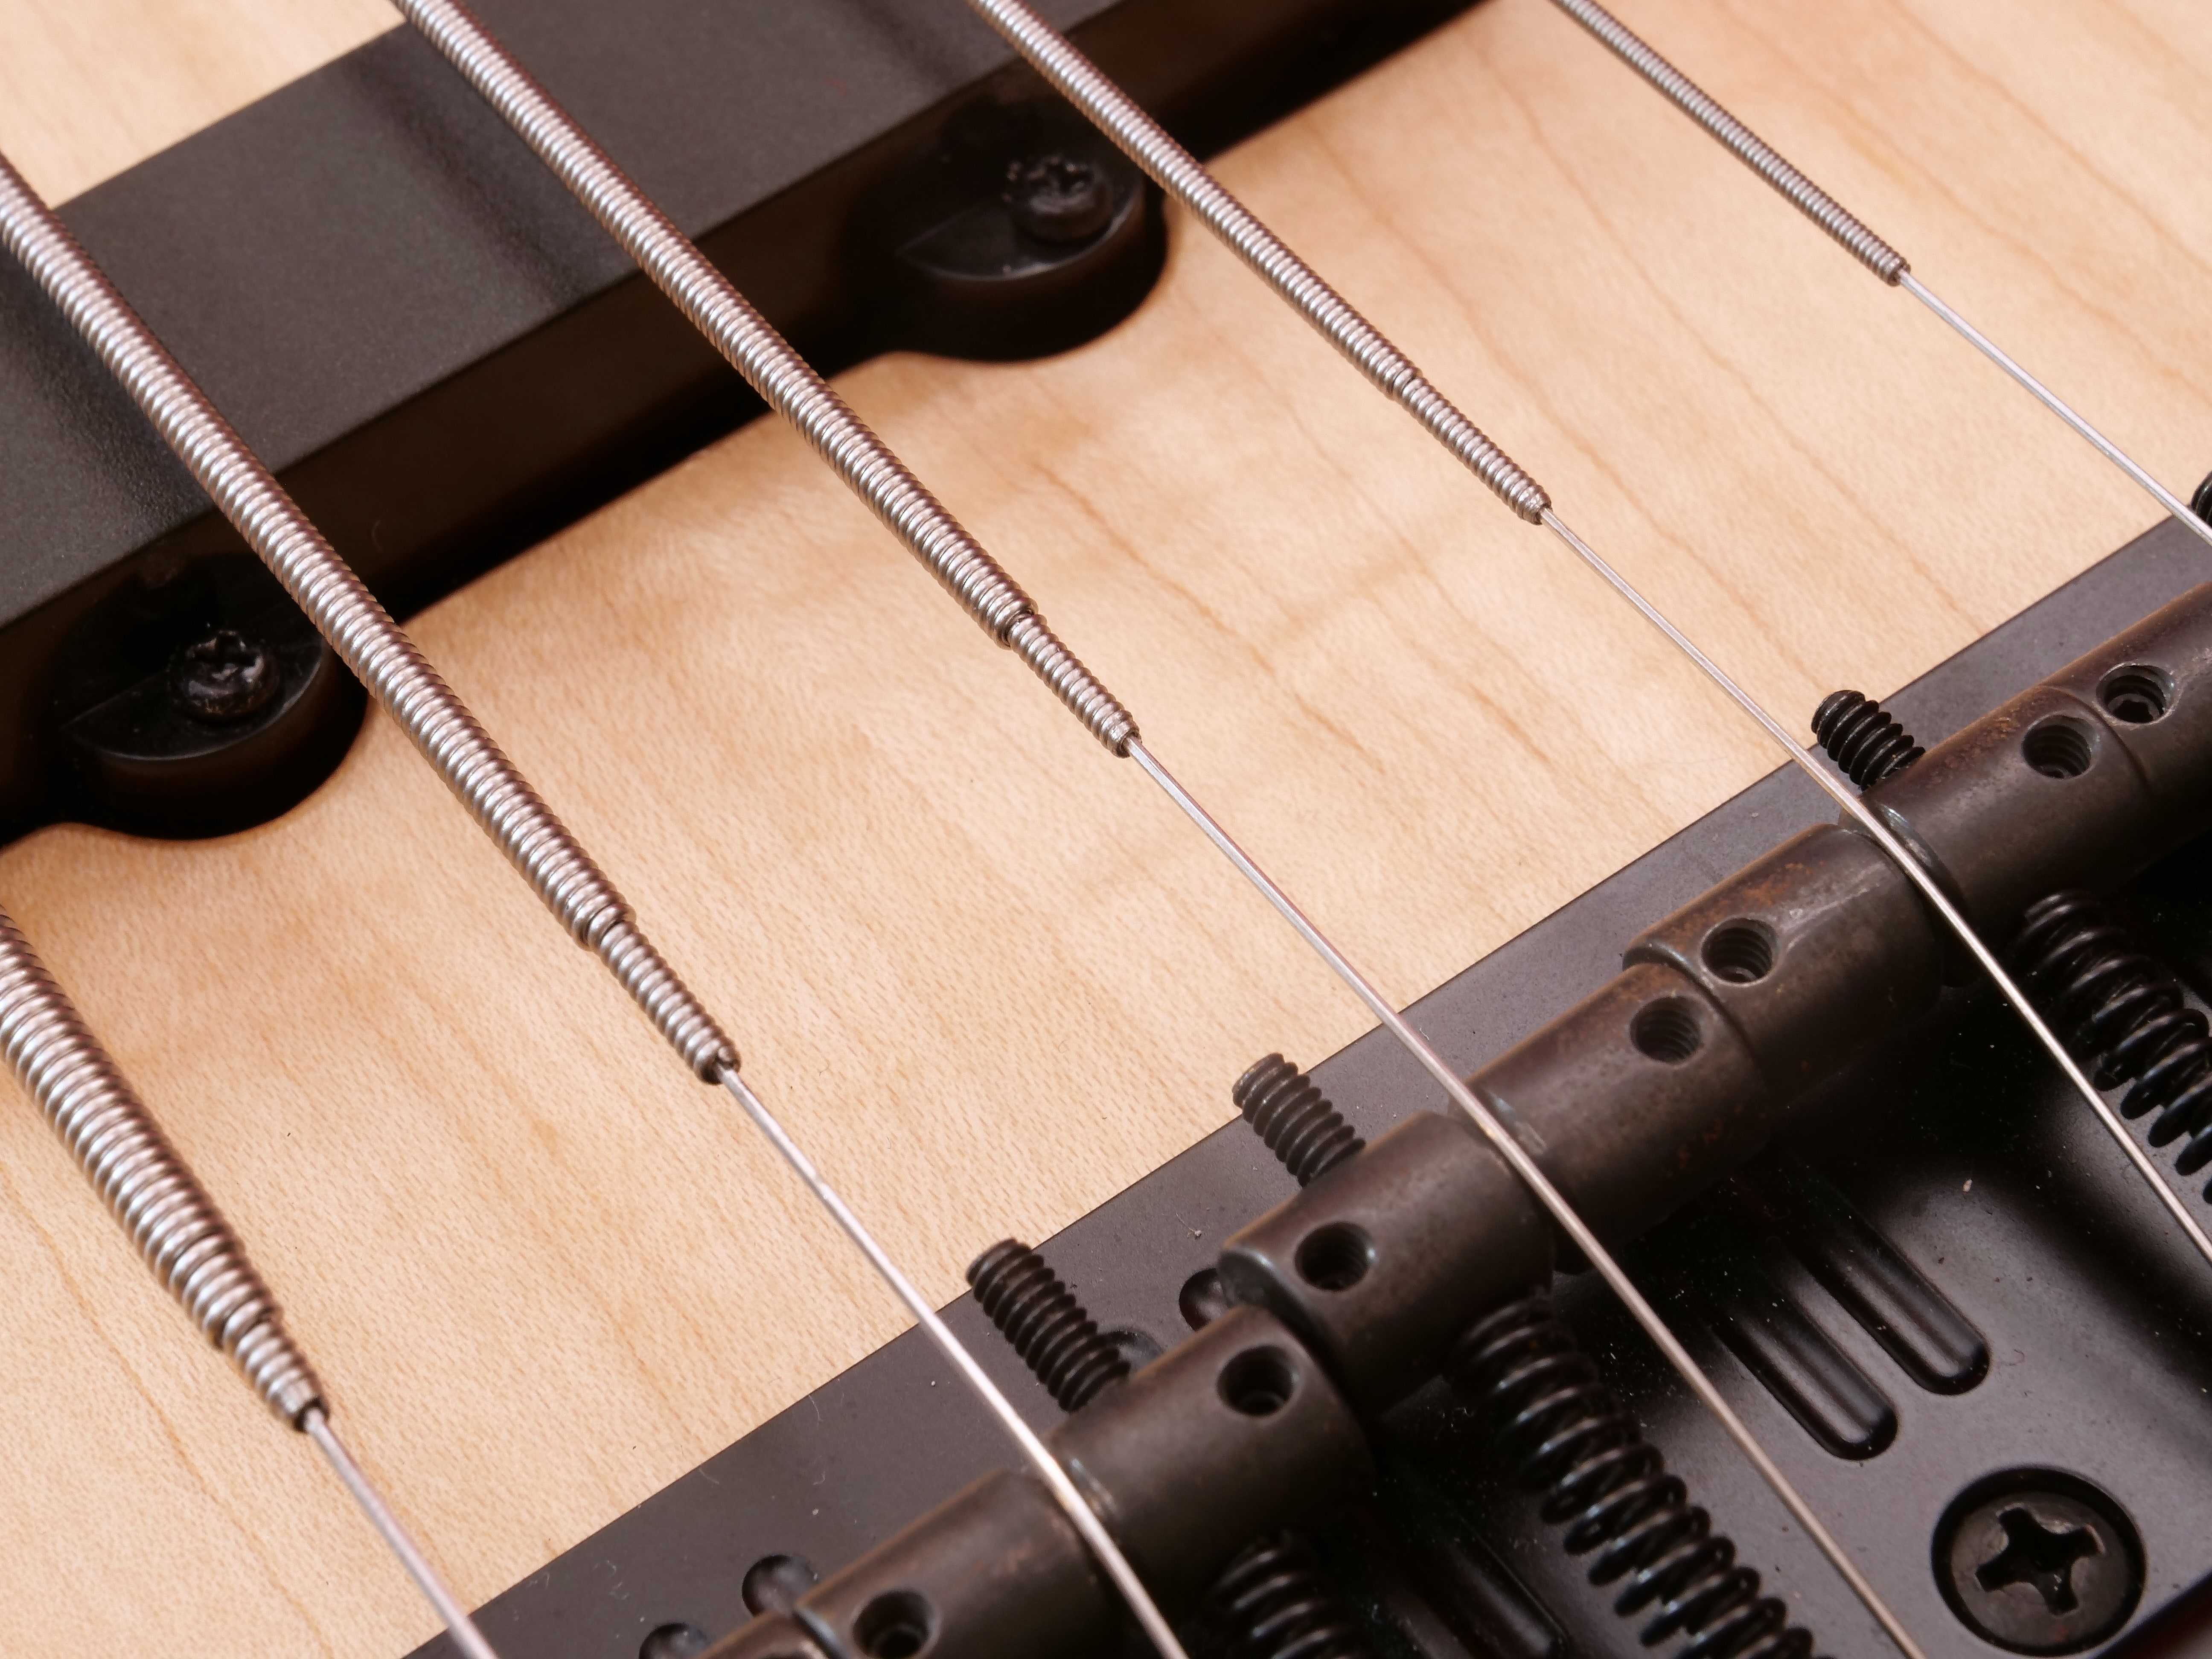
A few things that you may notice in the final image here:
- Not all tapers line up - This is because of the measurements I took from the previous bass.
- I’ll be noting these and making adjustments for the next set.
- Note that the saddles are further “forward” (towards the neck) than the previous photos. This is properly intonated for this bass.
The strings are very bright and clean sounding. They don’t have that “Weeommp” sound where the second or third harmonic start sharp and get in tune during the decay. It’s like a soft sine wave.
Bonus!
The strings I had on this bass developed what I would call a “Sour” sound. As the note rang out it it would start to sound slightly out of tune.
Using Peterson iStrobosoft with the Harmonics Tuning mode I noticed that the first and third harmonics would go flat as certain notes sustained.
The problem? Separations of the windings. Bass strings are multiple windings on a solid core, and the windings on these strings began to separate very slightly in some places. I measured approx 0.01-0.02mm of separation in the windings. It’s visible to the naked eye in good raking light, but you’d never see it unless you were looking.
Enjoy the image of my dirty fretboard (which looks clean to the naked eye!) and a 0.015mm winding separation on my D string.
Meta
This post took:
- 8 hours to change the strings while taking photos.
- 2 hours to realize I completely screwed up.
- 5 hours to do it all again (practice makes efficient?)
- 3 hours to sort and edit photos.
- 4 hours to write the text.
- 13 hours to make a video that I decided to scrap.
