A frequent scenario for some Reaper users:
- Multiple MIDI items
- Each item corresponds to parts of the same instrument (like drums - kick, snare, toms, cymbals etc...)
- Editing the files requires working with many parts at once
- You go crazy jumping between MIDI items
We can fix this, and make it easy to use. It can also be toggled on/off.
Today I'm also doing a companion video. It covers the exact same thing as the text, but in video form. This is an experiment, so I'd like feedback on it! The video is in 4k resolution.
If it works out and I am happy with the output, I'll try to do this for future posts as well.
Contents
Introduction
The goal of this tutorial is to allow you to select multiple MIDI items, then be able to edit them as a single item.
Look at the video above to see the result that we're looking for.
Setup
I am using a brand new and unmodified Reaper installation for this tutorial.
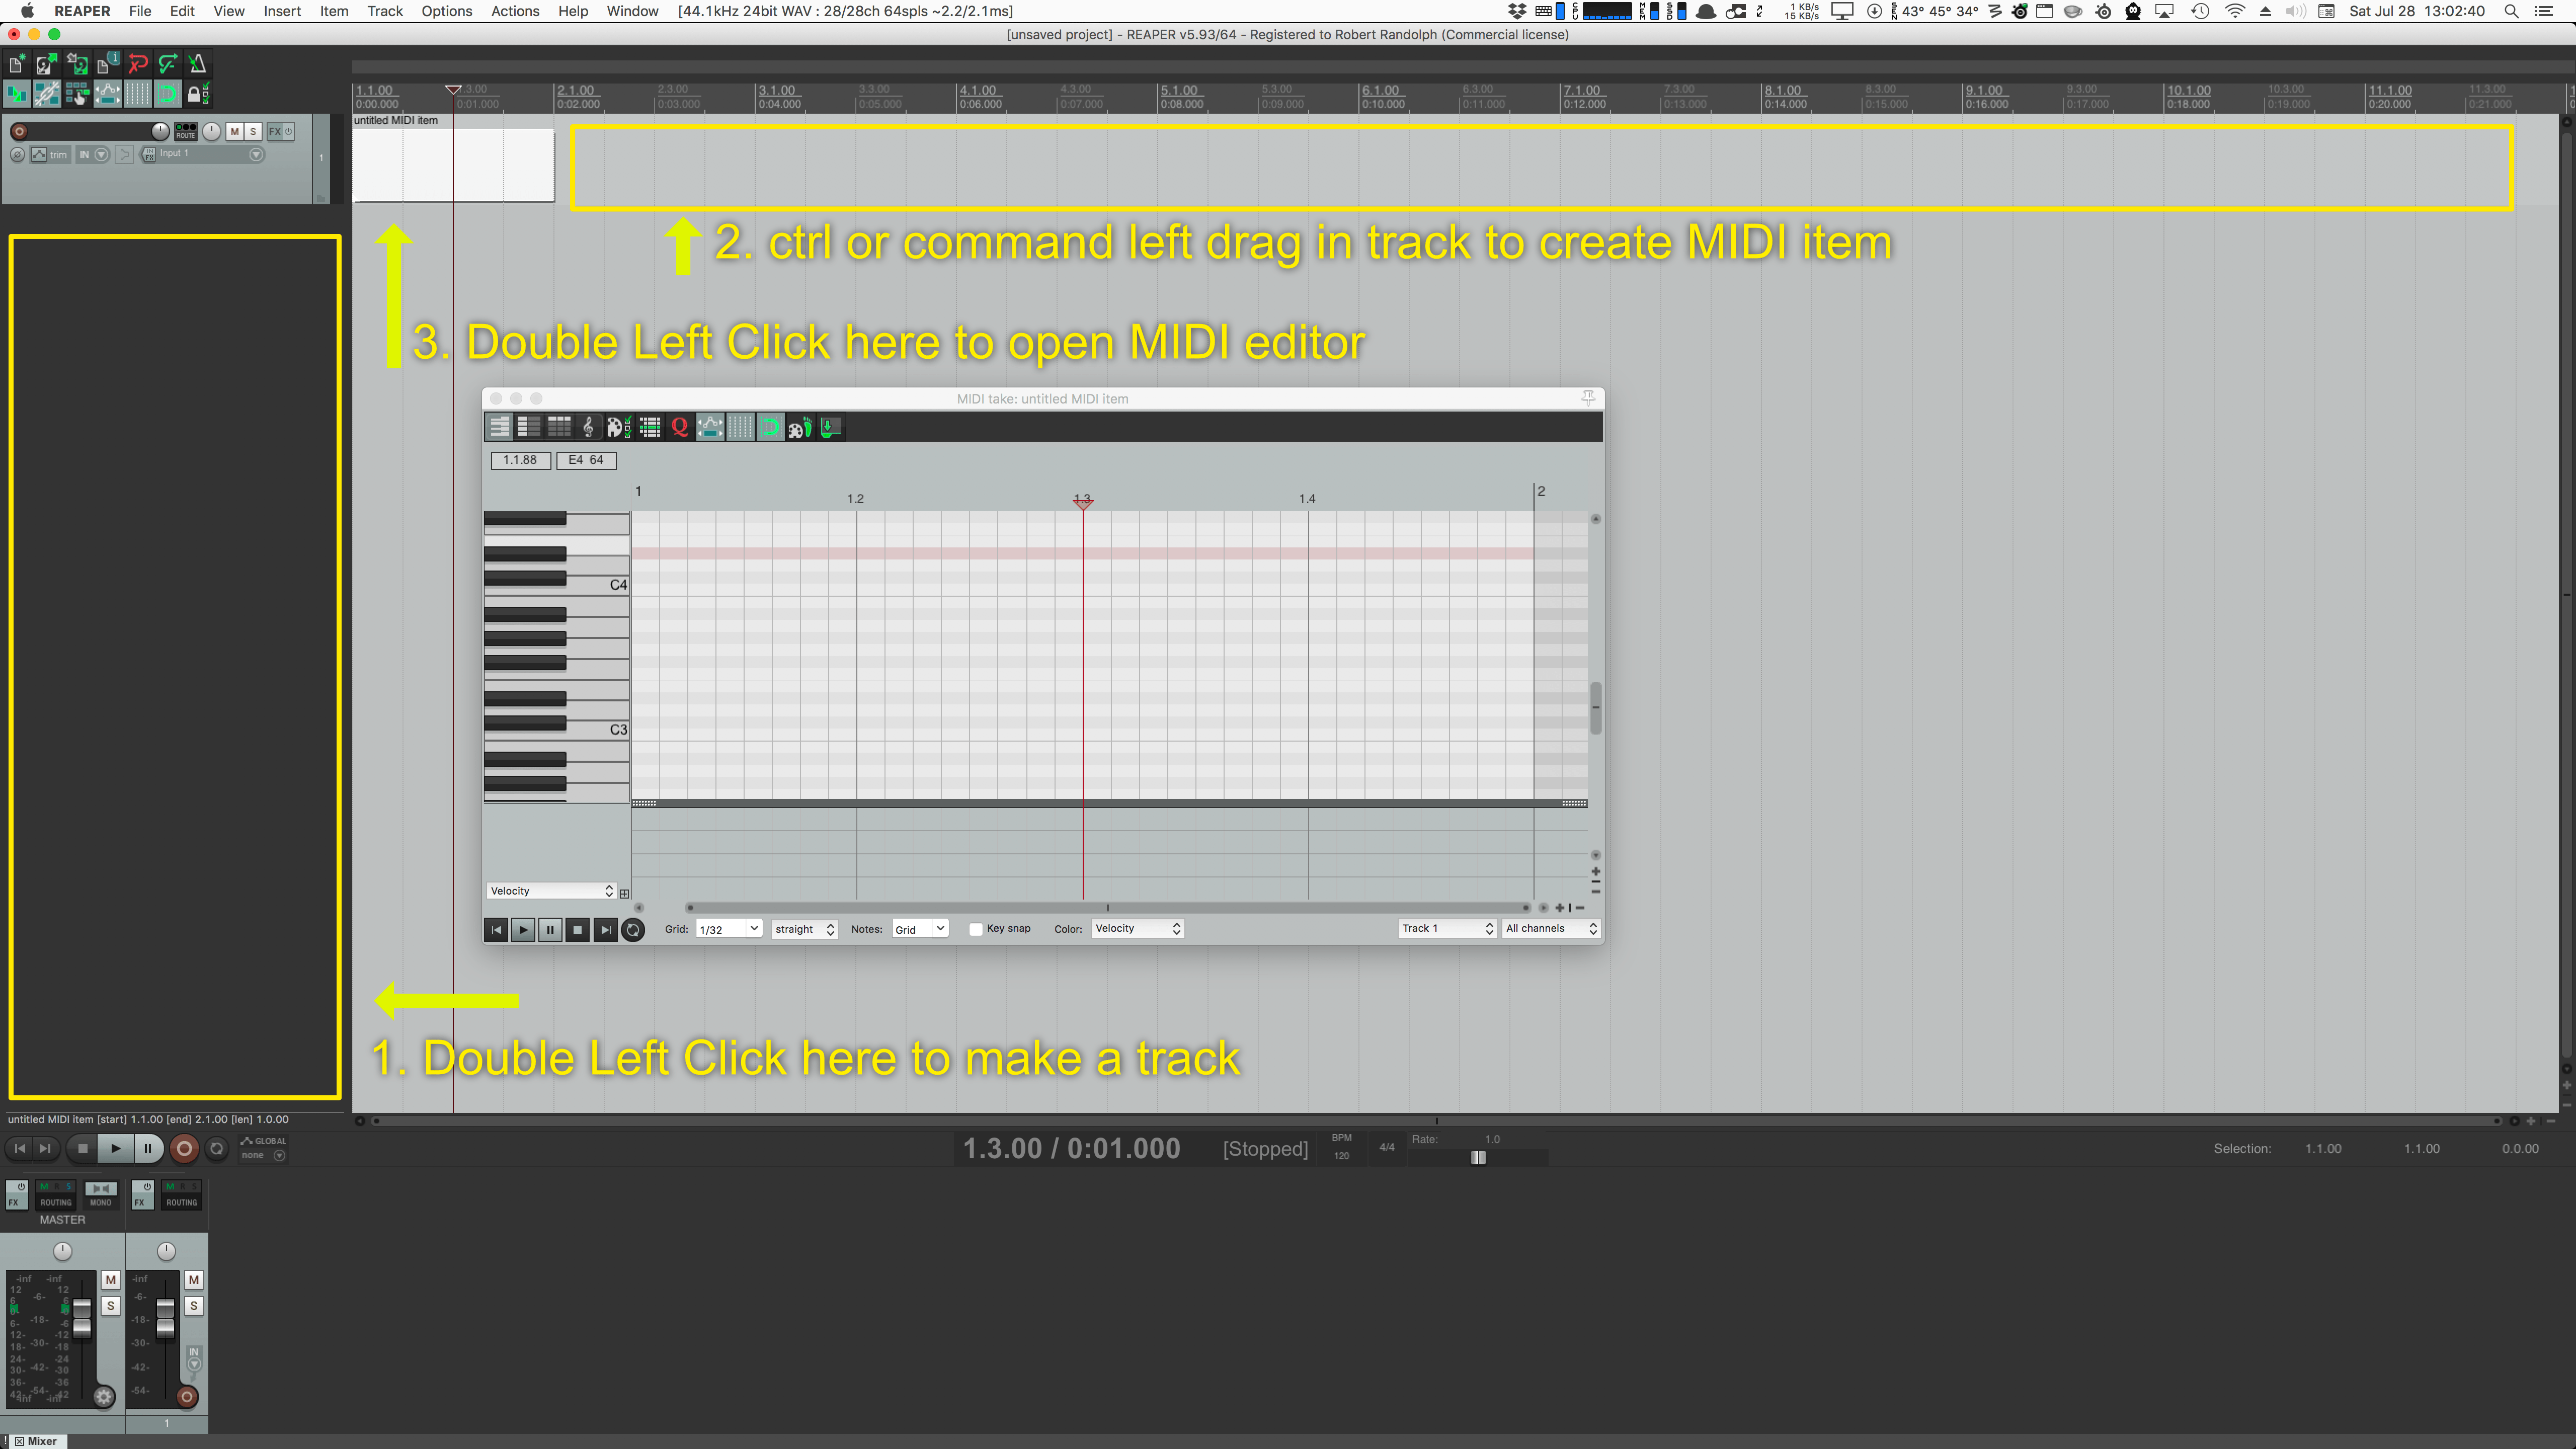
To begin you need to add a track, then create a MIDI item by holding ctrl (Windows) or command (macOS) and left-button dragging on the track.
Now you can do one of the following to open the MIDI Editor:
- Double-left-click the MIDI item
- Press ctrl-alt-E (Windows) or command-option-E (macOS)
- Select the MIDI item then, use the menu item
Item->Open in built-in MIDI editor (set default behavior in preferences
Now you have a track (tracks don't care if they are MIDI or Audio or Video in Reaper). You have a MIDI item. You have the MIDI editor open.
The next step is to change some settings:
Settings

In macOS you can select the menu bar at the top to adjust these options. In Windows the menu bar is attached to the MIDI editor window. This is where these settings can be changed.
If you want to just use a right click menu, you need to know where to clicIf you want to just use a right click menu, you need to know where to clicIf you want to just use a right click menu, you need to know where to clickkk. In the image above I've highlighted the areas where you can right click to access the menus to assign the settings you need.
Here are the settings to change:
- ON
Contents->One MIDI editor per->project - OFF
Contents->Behavior for "Open items in built-in MIDI editor"->Avoid automatically setting MIDI items from other tracks editable - ON
Contents->Options when using one MIDI editor per project->Active MIDI item follows selection changes in arrange view- This is optional, but it makes everything easier.
- ON
Contents->Options when using one MIDI editor per project->Media item selection is linked to editability- You can also link this to visibility.
That's it!
Now when you select 2 MIDI tracks, you well have all of the notes of them editable and visible. We can make this better though...
Grouping

First you need to set a menu item. It's hidden in the toolbar, so you need to right click the button in the graphic above and turn ON Selecting one item selects group.
You can also open the action list with ? and search for "select one item". One option will appear and you can select that then hit Run.
Next you need to select your MIDI items that you want to work together then press the "G" key. That groups them. When you click any of them from now on, all of them will be selected.
If you want to ungroup the items, then select an item in the group and press "U".
Adding Notes
When you have multiple items selected in the MIDI editor with this setup, we need to make one more change to allow you to select which MIDI item gets new input.
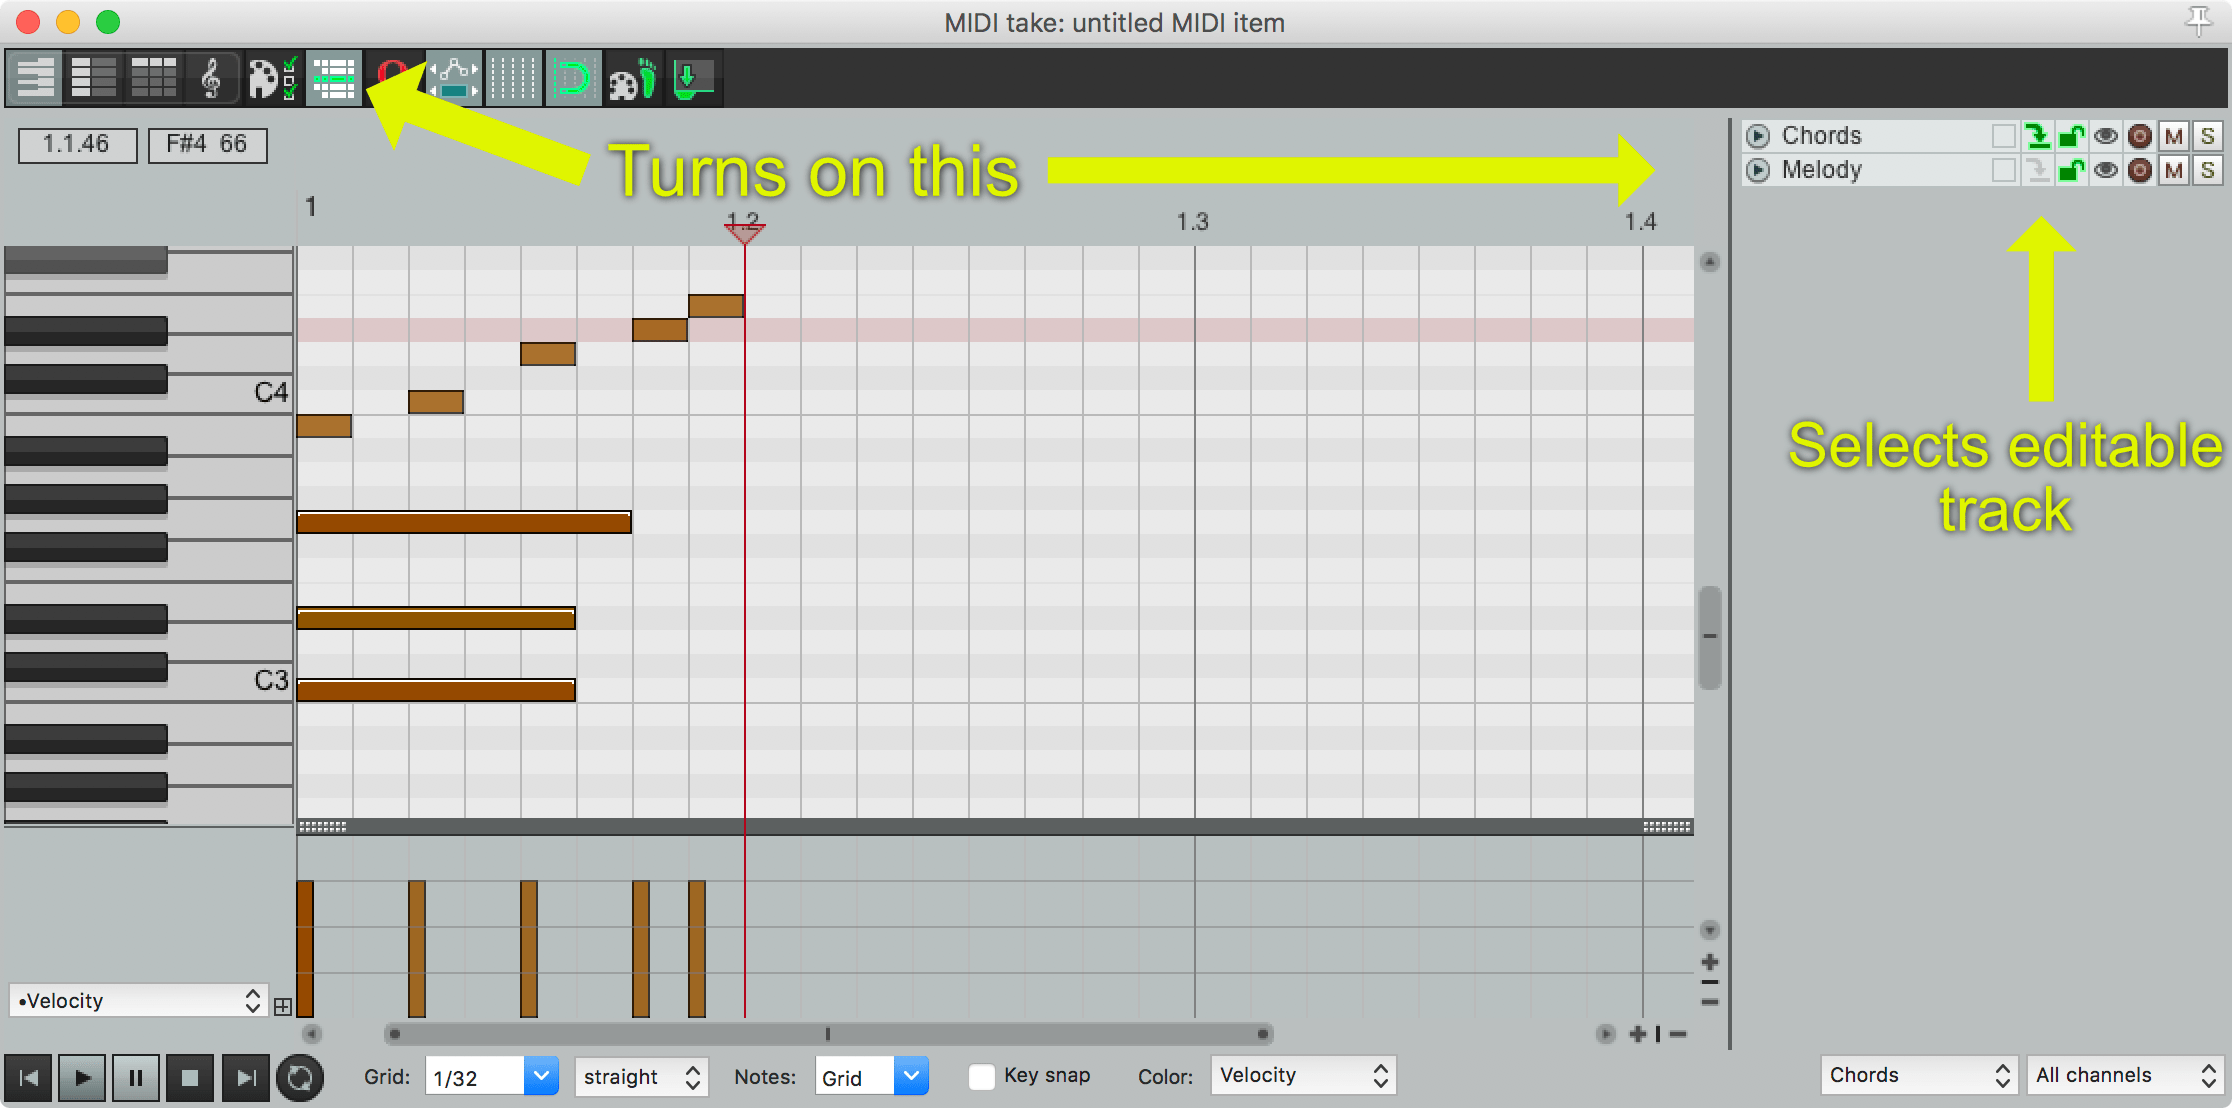
Look at the image above and click that button in the toolbar to turn on the 'Track List'.
In the track list there is a button with a green arrow pointing to a horizontal line. The track with that arrow (as shown in the graphic above), determines which track gets new notes.
With the setup described here, you can edit notes across multiple items at once, and you can precisely select which track gets new data.
Toggle it on/off
Sometimes this setup is not ideal. You may want to turn it on/off so you can edit 'normally'. Let's make a toggle for this functionality.
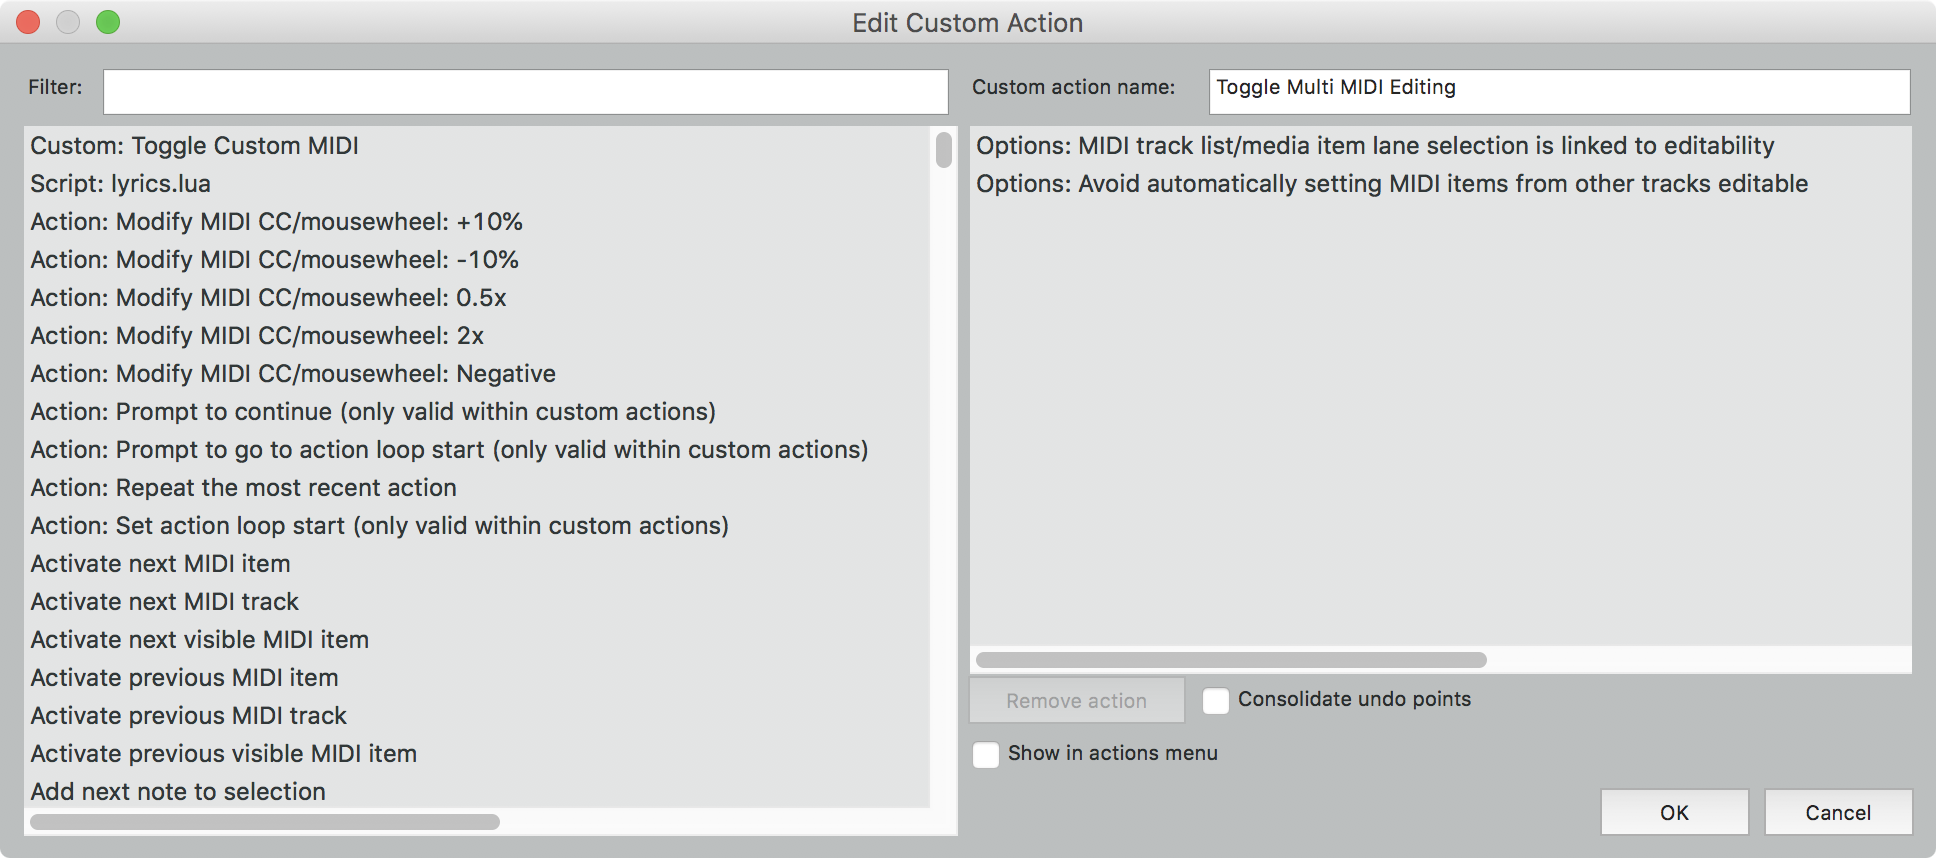
- Open the Action list (press "?")
- Under "Section" in the upper right, select "MIDI Editor"
- Click "New" under "Custom actions"
- Add the following actions
Options: MIDI track list/media item lane selection is linked to editabilityOptions: Avoid automatically setting MIDI items from other tracks editable
You may wish to toggle other changes made in the Settings section, but these are the only 2 settings that you need to toggle to a more normal mode.
NOTE These are toggles. The 'Avoid' and 'link to editability' need to be opposing states. On and Off for this to work. If they are both On or both Off, then this toggle won't work.
Video
4k resolution for fantastic clarity.
I do need to improve my workflow and voiceover quality, but I'm taking this one step at a time.
Conclusion
That's it. Now you can do things like having a bunch of drum tracks with each track having its own MIDI items, then edit them together as a single entity.
If you enjoy the video, please let me know if there's anything that you'd like improved or other topics to discuss (in any DAW).
Support Me!
This post took 5 hours to record, screenshot, write and edit. If you appreciate the information presented then please consider joining patreon or donating!
If you appreciate the information presented then please consider joining Patreon or donating money/time.
