Tools in the Piano Roll. These are things that don't involve necessarily clicking directly in the piano roll, but selecting something else that acts on what you have already or generates new notes.
This is the last in the "Piano Roll" mini-series. Go check out parts three and four for more.
I'm not covering everything about working with MIDI in FLStudio, there's still some things to come. This has just been about the piano roll and surrounding functions.
On to it now...
Other posts in this series:
Contents
- What is a "Tool"
- Riff Machine
- Arpeggiator
- Articulator
- Stamp Tool
- Claw Machine
- LFO Tool
- Key Limiter Tool
- Chopper
- Flam Tool
- Flip Tool
- Quantizer
- Randomizer
- Strum Tool
- Scale Levels Tool
- IS IT THE BEST NOW?!?!???????????????????
- Support Me!
What is a "Tool"
For the sake of this post, I'm considering a "Tool" to be anything that acts on midi via some explicit interface.
That means things that require interacting with a menu or a window.
The Basic Piano Roll and Advanced Piano Roll posts dealt with things that were direct interactions with the piano roll interface or directly influenced it. This time I'm going over things that you can pop up a window or dig in to a menu.
Riff Machine
Let's start with the best tool in FLStudio. One that's unique in existence and usefulness: Riff Machine.
Riff Machine is an 8 step pattern generator and MIDI effect. Here's the 8 steps:
- Progression - Creates a progression of notes based on a "Score" (notes saved from a piano roll basically) or based on the current notes in the piano roll. The score is just a file containing a line of MIDI notes. You can save your own score files by using "Save as Score" in the piano roll, then loading that in to Riff Machine.
- Chord - Takes the existing notes and 'chordizes' them, once again using scores. The "Step 2" scores are just chords. Once again you can save these yourself.
- Arp - Works like the Arpeggiator
- Mirror - Mirror works just like Flip Tool
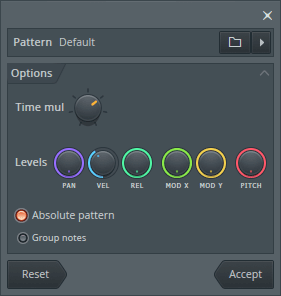
- Levels - Levels randomizes values of pan, velocity, release, mod X/Y and pitch mod. You can control the intensity of the effect and which direction it works. More importantly you can grab new "seeds" (AND previous seeds!) to change the randomization.
- Art - No, not "artistic", but "Articulation". See Articulator below.
- Groove - Groove works with note starts, with some minor adjustments to length and timing of release.
- Fit - see the Key Limiter Tool
So each of these steps happens in order. You can turn off stages. You can not re-order them.
You can "Throw Dice" to generate a new random riff, then start over or accept it.
You can work on your existing notes.
What does this all add up to?! It's an amazing tool that lets you work through writer's block while only sacrificing the amount of artistic integrity that you are comfortable with! (that's a joke).
It's a bit difficult to explain how great this tool can be to just get you started with an idea, or to create a complete and complex idea in just 30-45 seconds. Add on the fact that you can work with your existing part or use "scores" you saved makes this just a great tool.
Arpeggiator
A nice arpeggiator with variable pattern, direction, time, gating, and time compression/expansion. Once again you can use scores to create your own patterns and rhythms.
Something really fancy here other than the fact that you can create your own patterns/rhythms, save it as a score and apply it. It's a surprisingly powerful feature. When creating these scores you can control what notes are affected by arpeggiation, what notes aren't affected by octave changes and the length of the pattern.
Super cool.
Articulator
Articulator lets you adjust the ends of notes. They are lightly randomized and you can adjust the gap between subsequent notes and the overall lengths.
There's also a "Chop" function that will cut held chords when a new chord is played. So your held chord is interrupted and becomes part of the newly played chord.
Stamp Tool
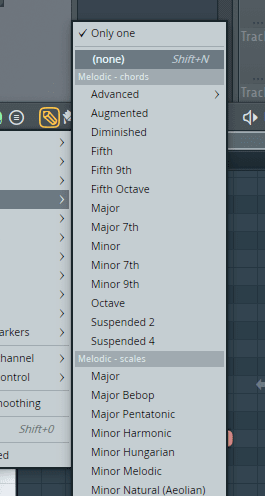
The Stamp Tool. It could be such an awesome thing... This is FL's main way of entering scales, rhythms or chords quickly.
There's a few issues with it:
- You have to dive through one, or two giant menus. Who in their right mind thought that a giant menu was the right GUI widget for this?!
- There's no inversions (changing the root note but keeping the notes the same).
- Sharps everywhere! No flats. Exceptionally annoying.
- Dominant 7th is considered "advanced" but Major 7th is in the main dropdown menu. Very odd.
- Drawing rhythm patterns doesn't let you drag them to add more via the division.
- There isn't an easy way to add things via using scores. (You can add them via your Patches/Scores/Stamps/ directory then restart FL)
It's just not the best stamp/pattern tool out there. I'm sure that some people find it useful, especially for rhythms or grabbing a scale then Riff Machining it.
However if you are an even mildly knowledgeable musician you'll find it fairly limiting until you add a lot of your own presets, and that won't even fix the workflow issue.
Claw Machine
Claw machine is rather unique. It goes through your MIDI and 'grabs' parts out like a claw machine. It can fill in the gaps or skew the process towards the end of the pattern to create a build up (or breakdown or drop).
When slicing up samples or working with synth parts that don't re-trigger on note-on, Claw Machine can create some interesting rhythms that you may never have thought of yourself.
LFO Tool
LFO Tool creates modulations of the data in the control editor, or the main data in the Event Editor.
I think the LFO Tool is pretty awful. There's no skewing, no adding with existing data, limited shapes, no parameter modulation (or changing parameters over time).
It's a very simple "make a shape of this data" tool that destroys whatever was already there. It could be A LOT better
Key Limiter Tool
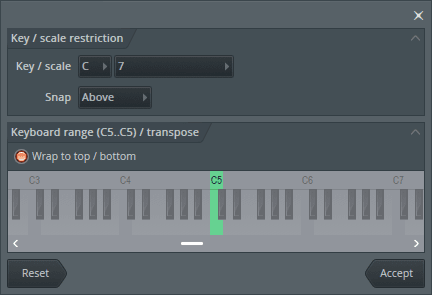
It fiddles with your notes so that they fit the desired key and transpose as you wish. Notably it has an option to let you choose which direction notes are snapped: under, above and alternate. The note snap direction can greatly affect the tonality of your generated part.
You can also select the range that things must stay in. Anything above or below is shifted, and where it's shifted to is determined by the "Wrap top to bottom" option.
It's not as complex and capable as some other transposition tools can be (see transpose at the bottom).
The lack of functionality does match the simplicity of use though, so I find that acceptable.
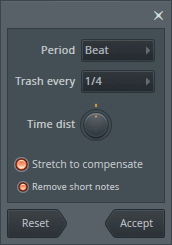
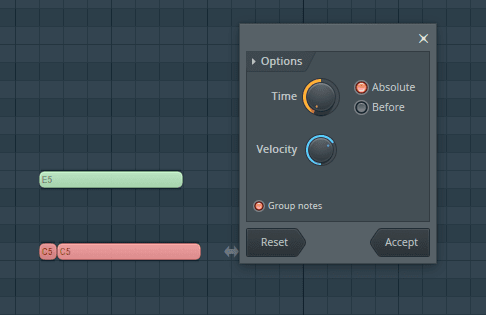
Chopper
Chop divides your notes based on the time setting and the pattern. Once again you can create your own scores for these, and I suggest that you reference the manual about this feature.
The notes are either divided right on the grid (absolute mode) or relative to the start of each note (absolute off).
The patterns used have a few cool features. You can define a pattern, notes that won't be chopped and pattern length. Same as arpeggiators except octave range limitation does apply.
There's the 'Quick Chop' feature that does this based on the snap settings, with no need for a dialog.
Flam Tool
Create a quick chop at the beginning of the selected notes. Useful, simple.
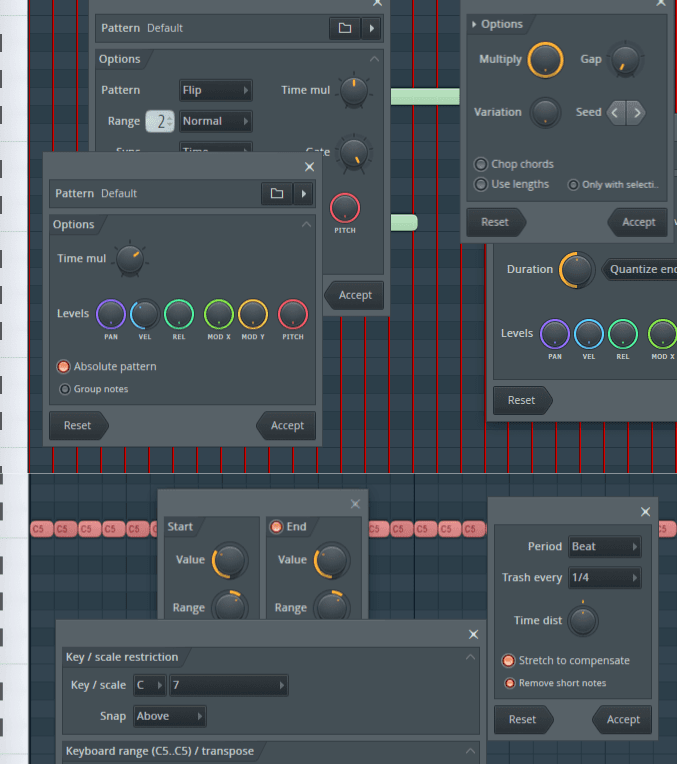
Flip Tool
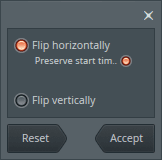
The flip tool flips your MIDI notes around. You can slip horizontally and vertically.
The "preserve start times" makes sure that your rhythms are intact when flipping certain compositions.
Quantizer
A very simple tool that adjusts the start/end times of notes to the grid. Sounds kinda lame right?
NOPE.
Three big things here:
- You can use scores to create quantization patterns. You can save a MIDI performance and then pull that back up and use those note positions as your "quantize grid"
- A grid is displayed on your Piano Roll to show you exactly where the grid is.
- Everything is applied and shown in realtime.
It seems like a simple tool, but it's incredibly powerful. If there's not a grid pattern that you want, or if you need to match a performance then you can do it.
Once again it's not as powerful as some others (scroll to the quantize window), but the simplicity:power ratio is great on FL's quantizer.
If you require some complex quantizing features then you will be sorely disappointed, but if you just want to align some notes or create some great rhythms then you are going to love it.
There's also a 'Quick Quantize' and 'Quick Quantize Start' that do what you may expect.
Quantizer... ugh
Just a side note: FLStudio does not snap to the grid. It snaps BY the grid amount. So if your note is off the grid line and you want it to line up for some reason, you must use the quantize tool
These are often called "Absolute" (snap to grid) and "Relative" (snap by grid amount) in other DAWs. FLStudio only has the latter, and for the former you are required to use the quantize functions.
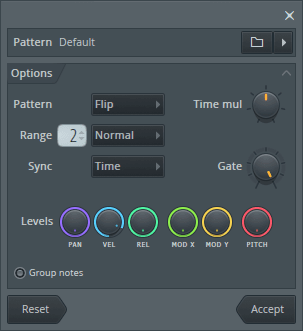
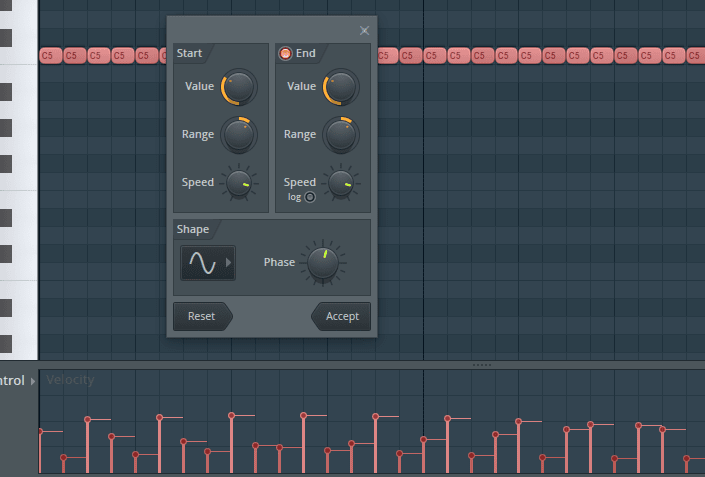
Randomizer
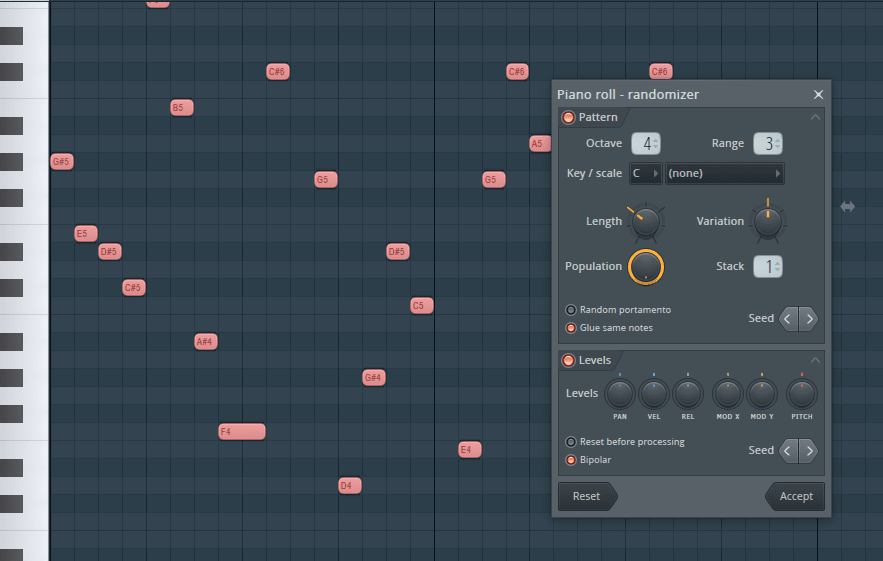
It's a randomizer. The parameters are fairly self explanatory. The only slightly strange one is "population" which basically stacks randomizers.
You can turn off the Pattern and Level sections to work on one or the other, or both.
The "Pattern" section creates new data. It will not let you randomize start/end times of existing notes.
The "Levels" section allows you to randomize control data of current notes.
Once again, one of the notable features is that the seed for the randomizer can be selected, and more important you can go back to previous seeds. That way if you want to go back to something you like then you can go back to it.
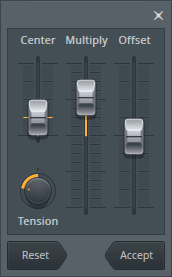
Strum Tool
Take a chord. Offset the start and possible end times. Now it sounds like strumming a guitar, kinda.
You can change the 'shape' of the offset with the "Tension" knob, which is a neat addition.
You can also select a bunch of notes and the strum tool will only work on overlapping notes (e.g. chords).
The "Alternate" allows for strumming down, then up or up then down. Which comes first can be controlled with the start time strength knob.
Some really fantastic rhythms can be made by taking a whole MIDI part and applying light strum to it. It really adds some flare that's annoying to manually program in, but comes naturally when playing.
Great tool.
Scale Levels Tool
Scale Levels lets you multiply data, shift data or push/pull it away from a center point.
That's it. Simple and I've used it quite a bit.
IS IT THE BEST NOW?!?!???????????????????
Nah.
But what IS the best? Robert... What DAW has the best MIDI editor?
None of them. Not FLStudio. Not Logic. Not Live (definitely not Live). Not Cubase. Not Digital Performer.
What is best depends on what you need.
Some people compose based on what they hear in their head, and they need tools that allow them to get those ideas quickly. What those ideas are shapes what tools they need, and thusly 'what is the best' for them.
Some people compose based on what they hear. They need tools to generate basic ideas, then they create fantastic work based on that inspiration. They need different tools for generating content and for moulding it.
Some people compose on a piano or MIDI guitar or breath controller and they need specific editing/filtering tools and nothing more. Some people click in notes with a mouse and rarely need to 'edit' their work, they just need better ways to get notes in to a computer with their mouse/keyboard.
BUT
Here's the rub. Some DAWs manage to have large feature sets that lets many 'types' of users work in their preferred method, and potentially borrow tools from other work flows.
Generally what people call "the best" is one of two things:
- the DAW that does exactly what they need
- the DAW that allows the most workflows.
If we want to call FLStudio's Piano Roll "the best" then it's surely 1., but it can't be 1. to everyone. It isn't 1. to me. I personally need tools that let me edit existing data easily, and I find that Digital Performer does that better than anything else except Cubase.
FLStudio's Piano Roll isn't bad. It's not even mediocre. I'd definitely say that it's one of the quickest workflows if you work with your mouse or create simple beats with hardware.
Calling it the best... I'm not really cool with that though. So, one more time... from the manual directly as of June 30th 2018.
FL Studio's Piano roll has the well deserved reputation as the best Piano roll in the business.
That might be true. Can't argue.
FL Studio has, arguably, the most powerful Piano roll editor available.
Ok, I argue that then. It's not the most powerful by any means. Logic, Digital Performer, Cubase and Reaper most certain have it surpassed in "power" (features and functions).
Maybe a better claim would be, "FLStudio has, arguably, one of the best workflows and an industry-wide appreciation for its innovations and design." I would certainly agree with that.
They could claim that it's the most well-designed Piano Roll for desktop/laptop musicians, and I'd agree with that.
They could claim that FLStudio has the most pleasant Piano Roll to play with, and I'd agree with that.
They could even claim that it has the best Piano Roll for electronic music creation on the market, and I'd agree with that.
What it certainly isn't, is the most powerful.
But not everyone needs a Bagger 228, some folks just need a shovel with a sharp edge and a good foot hold. FLStudio is a great shovel. (I really hope that analogy comes off right...)
There's a lot more cool stuff coming about FLStudio though.
Support Me!
This post took 10 hours to research, screenshot, write and edit. If you appreciate the information presented then please consider joining patreon or donating!
Other parts in this series
- Part 0: Introduction to this series
- Part 1: Introduction to FL
- Part 2: Recording and Editing Audio
- Part 3: Piano Roll basics
- Part 4: Advanced Piano Roll
- Part 6: MIDI Controllers
- Part 7: Modulation
- Part 8: Performance mode and Video FX
- Part 9: Workflow
- Part 10: Effects Review
- Part 11: Instruments Review
- Part 12: Conclusion
If you appreciate the information presented then please consider joining Patreon or donating money/time.
