Automation Clips/Items/Regions/Whatever are a neat concept that some other DAWs have. It allows you to contain automation data in a region so it can be easily moved around and/or linked to other regions.
Studio One doesn’t have this feature natively, but years ago I figured out a workaround. I just realized last night that I never wrote about it, so here we go!
The following is a tutorial on how to emulate ‘Automation Clips’ or ‘Automation Items’ in Studio One.
Contents
- Intro
- Setup
- Method 1 - Minimal with MIDI Controllable Plugin
- Method 2 - Method with Container and Any Plugin
- Conclusion
- Support Me!
Intro
First you need to understand what we’re doing here. The above video explains the feature in Reaper.
FLStudio has what’s usually considered the de facto standard implementation of Automatino Clips, so I suggest Reading the FLStudio Manual on the topic as well.
Once you understand what we’re doing, then let’s proceed.
Setup
You need the following things to make this work:
- A plugin with MIDI control capability. The plugin must allow you to control parameters with MIDI input.
- If your desired target plugin doesn’t support this, then you need some sort container plugin like Bluecat Patchwork or some similar plugin that hosts plugins and passes automation data.
- An Instrument track to contain your ‘automation region’
- An Audio track or Instrument track.
Method 1 - Minimal with MIDI Controllable Plugin
- Set your Instrument track output to the Plugin on your Audio or Instrument track.
- Create a MIDI Region on your ‘Automation Region’ instrument track.
- Open the MIDI editor.
- In the controller lane, hit the
...and select the parameter that you wish to automate. - Draw your automation!
That’s all there is to it. Now that clip will contain automation data for the plugin on another track.
You can “Duplicate shared” on your clip and that will allow you to have 2 regions that have the exact same automation data.
Watch the video above for more info.
Method 2 - Method with Container and Any Plugin
If your plugin does not show up as an output on an instrument track, then you need to apply a workaround.
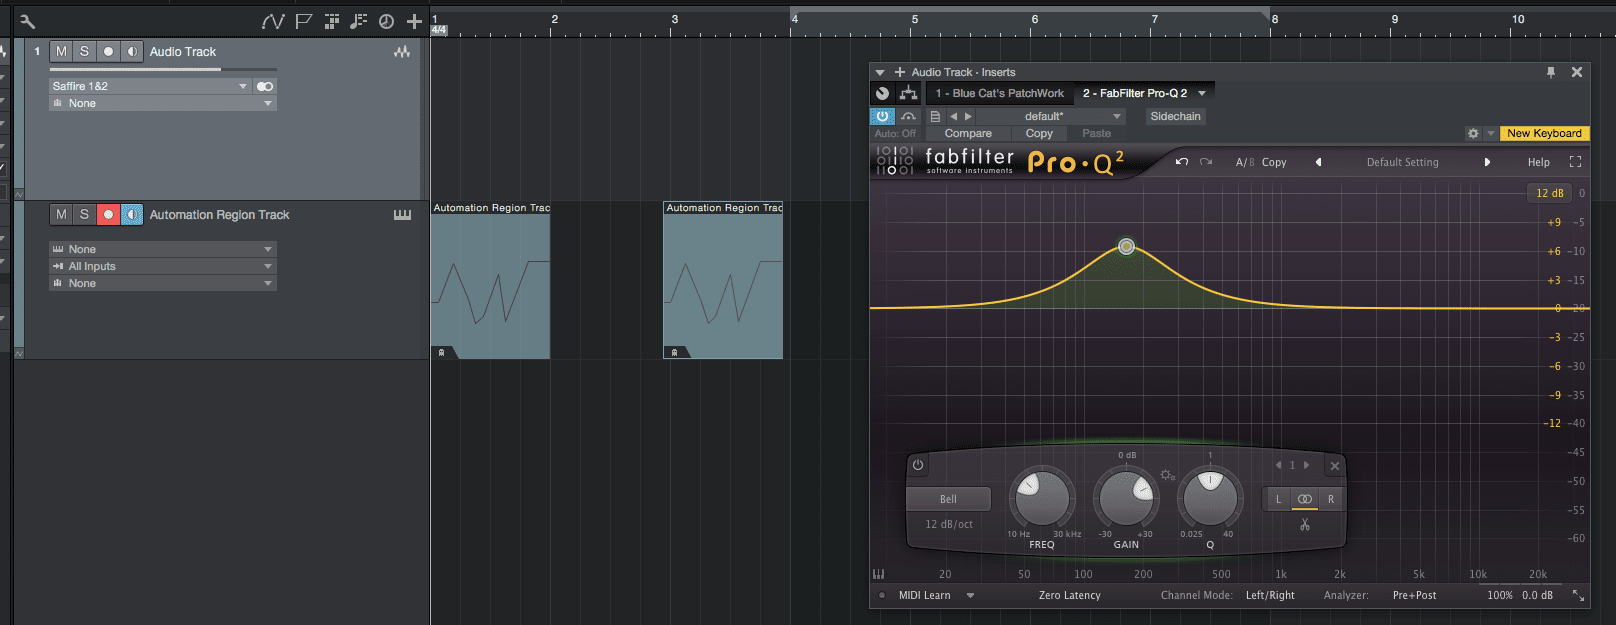
The solution is to use some sort of container plugin that does show up as an input, and allows you to map internal parameters. I am going to use Bluecat Patchwork for this. The process is similar to above with a couple extra steps.
- Add your container plugin to your ‘main’ track.
- Add your target plugin inside the container plugin.
- Map the target plugin, inside the container, to a macro or external automation parameter. (See manual of your container plugin for this information)
- Set your Instrument track output to the Plugin on your Audio or Instrument track.
- Create a MIDI Region on your ‘Automation Region’ instrument track.
- Open the MIDI editor.
- In the controller lane, hit the
...and select the parameter that you wish to automate. This is the container plugin’s external parameter that you have mapped internally to your target parameter. - Draw your automation!
Once again, watch the video above to see me do this with Bluecat Patchwork
Conclusion
Yep. It’s that simple.
Now you can have regions that hold your automation data and you can move them around wherever you want. You can have automation that is updated across your timeline as you adjust it anywhere.
People have been asking for this in Studio One for 5+ years, but it’s already there! :)
Support Me!
This post took 4 hours to screencast, write and edit. If you appreciate the information presented then please consider joining patreon or donating!
