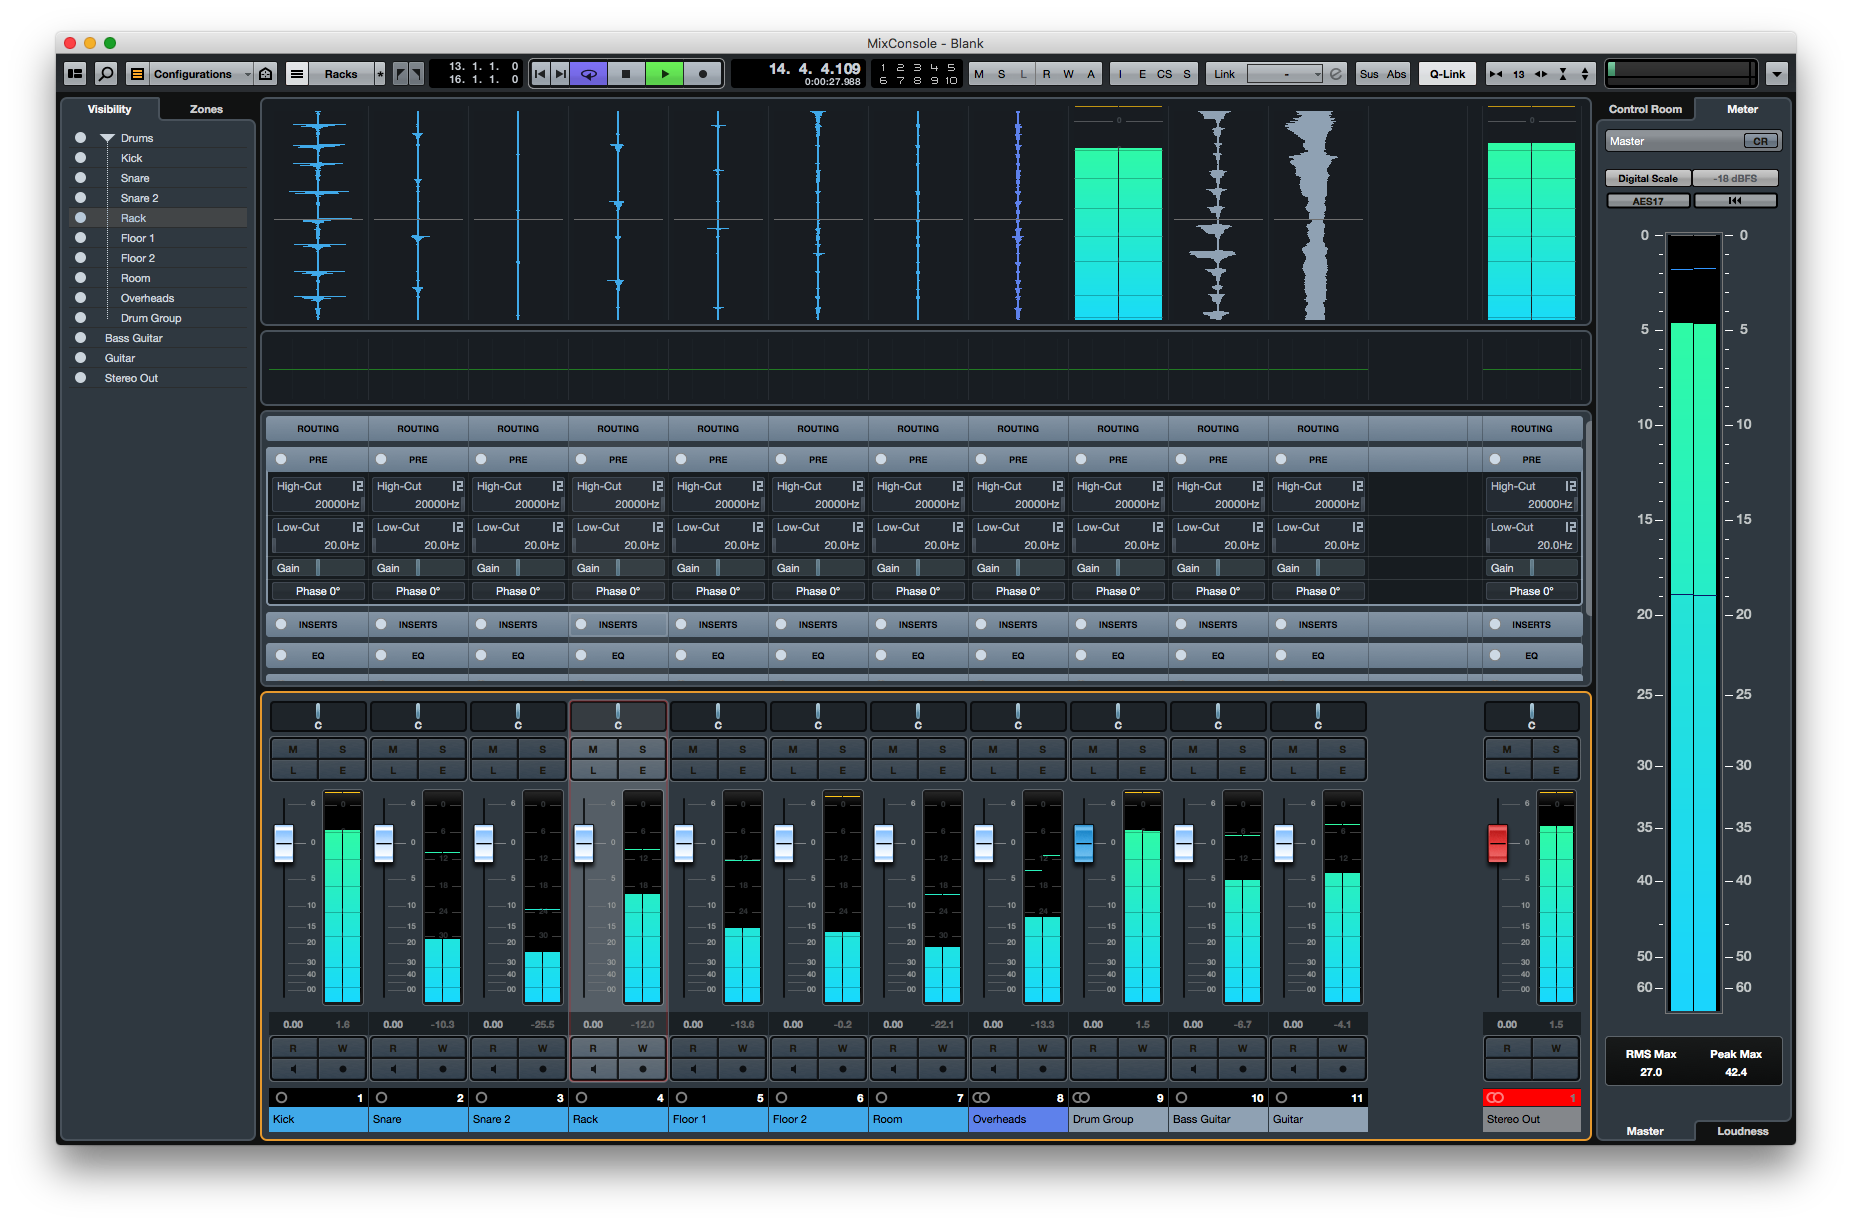
One of the best things in Cubase 8.5 so far has been the mixer. There’s a lot of people that complain about the mixer in 8/8.5, but for me it’s an amazing.
Let’s go over some of my favorite things in it.
Contents
- Built-in Transport & Markers
- Track Search
- Track Zones
- Waveform meters
- Q-Link
- Pre Rack
- EQ Rack
- Strip Rack
- Direct outputs
- Meter section
- Channel Linking
- Size Configuration
- Conclusion
- Support me!
Built-in Transport & Markers

The mixer has an integrated transport. Like me, you may not think this is very useful since you probably memorize the shortcuts for all transport related functions, but I’ve found that I use this a lot.
The available functions are:
- Go to left/right locator
- Set locator positions
- Previous/Next marker
- Cycle on/off
- Stop
- Play
- Record
- Time Display (editable)
- Marker jump and set
Being able to set locator positions, set current time and set markers is extremely useful.
It saves a lot of screen space compared to having the floating transport open.
Track Search
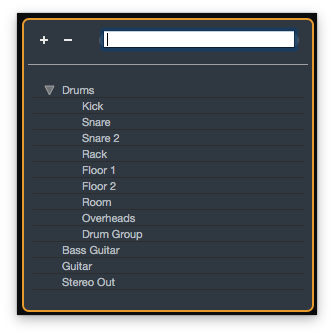
Not every DAW has this, and it’s very rarely integrated in to the mixer. In Cubase 8.5 it’s simply in the upper-left hand corner.
Quickly find tracks, folders, busses, instruments etc… I use this constantly in DP. I’m glad it’s in Cubase.
Track Zones
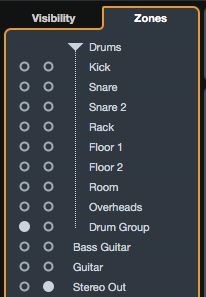
I love this feature. You can make channels stick to the left or right of the mixer as needed. You can also ‘pull’ tracks out of folders, like I have here. My drum group buss is inside my Drum folder, but I’m able to stick it to the left side of the mixer where I like to have all of my busses.
Track zones also save with Channel Visibility Configurations, so you can setup various ‘mixer views’ that show only the channels you want, arranged how you want. Super cool.
This just isn’t a static thing either. Combined with the track visibility panel (which I don’t cover here), you can create ad-hoc mixing arrangements that really speed up your workflow.
Waveform meters
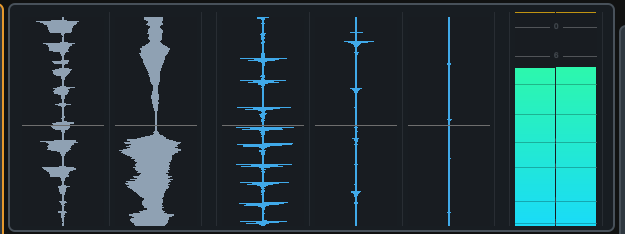
When I was first going through the manual for Cubase, I saw the meter bridge option in the mixer and I thought it was a complete waste of space. You already have meters next to your faders, why another set?
This is why another set! The wave meter mode is surprisingly useful to figure out what’s coming up in the song at a glance.
There are some things I wish it had though:
- Post-fader rendering
- Adjustable window size (how much waveform time is displayed)
- Rendering of markers/chords/etc..
- Busses being rendered
Even without these things, it’s still useful. I went to another DAW to do some work on a mix and I found myself unusually bothered by the lack of this feature. It’s not very useful when you’re exceptionally familiar with a track, but it’s indispensable when you’re working on something new or that you’ve forgotten.
Q-Link

Ok, this is one of my favorite features in the mixer. It makes it so that every channel you select is temporarily grouped.
Why is this particularly cool? Because inserts follow by row! You can insert a whole row of a specific effect quickly on selected channels and setup identical settings. You can then select another set of tracks and control any similar effects on the same row.
It makes using tape/harmonic/channel strip type plugins very easy. It’s also great when you have a bunch of ‘double tracks’ that you want to compress individually rather than sending to a group.
Seriously, I use this constantly. I wish every DAW had it and that it behaved the same as Cubase 8.5. This is a killer feature in my experience so far, along with re-record.
Pre Rack

If you read my S1 post, you know how annoyed I am with these things not being here. DP doesn’t have this either, and it bothers me every… single… day.
Very simple: every track needs a high-pass, low-pass, pre-everything gain and polarity inversion.
Cubase has it. It gets used constantly, on basically every track. Just being able to setup gainstaging properly without having to resort to a utility plugin on every track significantly speeds up the mixing process.
EQ Rack

I don’t want to insert Pro-Q 2 on every single damn channel. Especially since most DAWs don’t make it easy to insert a plugin on every channel quickly.
Having a decent clean EQ on every channel has been excellent. Not every track needs some crazy surgical EQ or the warmth of whatever over-hyped rock-brandnamed plugin that’s cool right now.
Most of the time you just need a quick EQ. It’s there.
Strip Rack

Another wonderful set of utility processes.
The gate works nicely and gets used, albeit lightly, often.
The Compressor has multiple ‘styles’, which surprisingly work well sometimes. I’ve found myself grabbing the ‘Vintage’ and ‘Standard’ compressor modes frequently when drafting a mix, then replacing them later. It’s greatly sped up how fast I can get a decent sounding draft going. They’ve stayed sometimes too!
A knobby EQ interface. I’m not a fan, but I’m sure some people like it.
The tools section offers a de-esser and an envelope shaper. The de-esser is very useful on sends and I’ve become cautiously addicted to the envelope shaper on drums. Just a little bit can really bring some life in to the track. I don’t use transient enhancers or anything otherwise, but the envelope shaper lets me quickly bring in a little extra transient woomp when I want it.
The saturation section! Combined with Q-link, which lets you apply the same settings to every track that you have selected, this is so great. I really like the magneto mode. Tube mode sounds quite good on bass guitars sometimes. Not really a fan of the ‘tape’ mode yet. I am addicted to magneto though, it’s become a minor issue.
Direct outputs
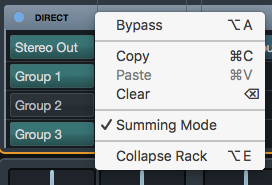
Why am I mentioning the ability to route something? Pretty mundane and common thing right? Apparently not, because a lot of DAWs screw this up.
Cubase lets you route a single channel to multiple outputs. Select summing mode for direct outs and then you can route a channel directly to any bus you want. A lot of DAWs screw this up, some don’t and you may not be very impressed if your DAW does it right…
But wait! there’s more!
You can automate output assignments! That’s right, you can switch output assignments on the fly via automation. Once again, surprisingly useful. It helps mitigate clutter in the mixer and with having multiple automations to lower send volume to different busses when big change in the arrangement occurs.
I nearly looked this one over, but I caught it in the manual. I’m glad I did. It’s allowed me to be more creative in my mixes without the fear of cluttering up the mixer with a bunch of nonsense to handle a single track switching busses in a new section.
Meter section
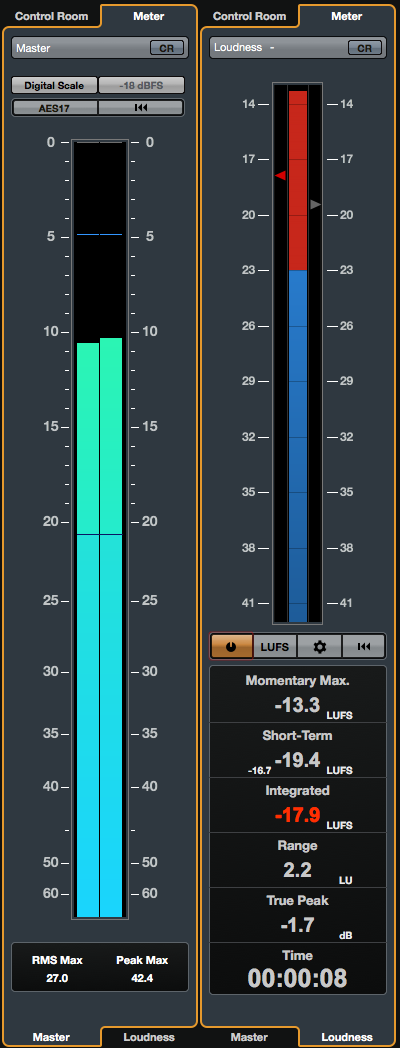
So you know, that picture is 2 tabs combined in to one image.
EVERY DAW NEEDS THIS I don’t know why this isn’t standard. A good master section allows you to gain-stage your mix properly, avoid overcompression while mixing, meet various national standards when mixing dialogue/bgm, and more.
The master and loudness sections of the Meter tab are just another instance of the Cubase mixer integrating functions that you would likely need to buy and insert a third-party plugin for.
It’s just one more extremely important plug-in that you don’t need to buy, insert, open, close, move, etc…
Speed, accuracy, information. All of these are provided, and all of these things make you more money or more happy when working.
Channel Linking

As any good DAW should, you can select what things are linked between tracks. There’s also a quick link menu in the upper right area.
The really great thing here though, is that the mixer has a row that shows you what channels are linked. The (1 Link 1) that you see in the image has a menu which allows you to quickly dissolve a group, add to a group, edit group settings and see all linked channels. In the upper right you can use the link menu to quickly select a group of tracks, regardless of where they are in the mixer, which is very useful in large projects.
There are also functions for quickly adjusting an element in a group without affecting the group, setting all parameters to the same value and globally suspend linking.
I really enjoy not having to screw around figuring out what channels are grouped in a large project. Everything is there for you to see.
Given how much audio recording I do, where a single instrument has 2-20 tracks of audio, being able to easily manage channel groups is a big deal. This is really well done in Cubase.
Size Configuration
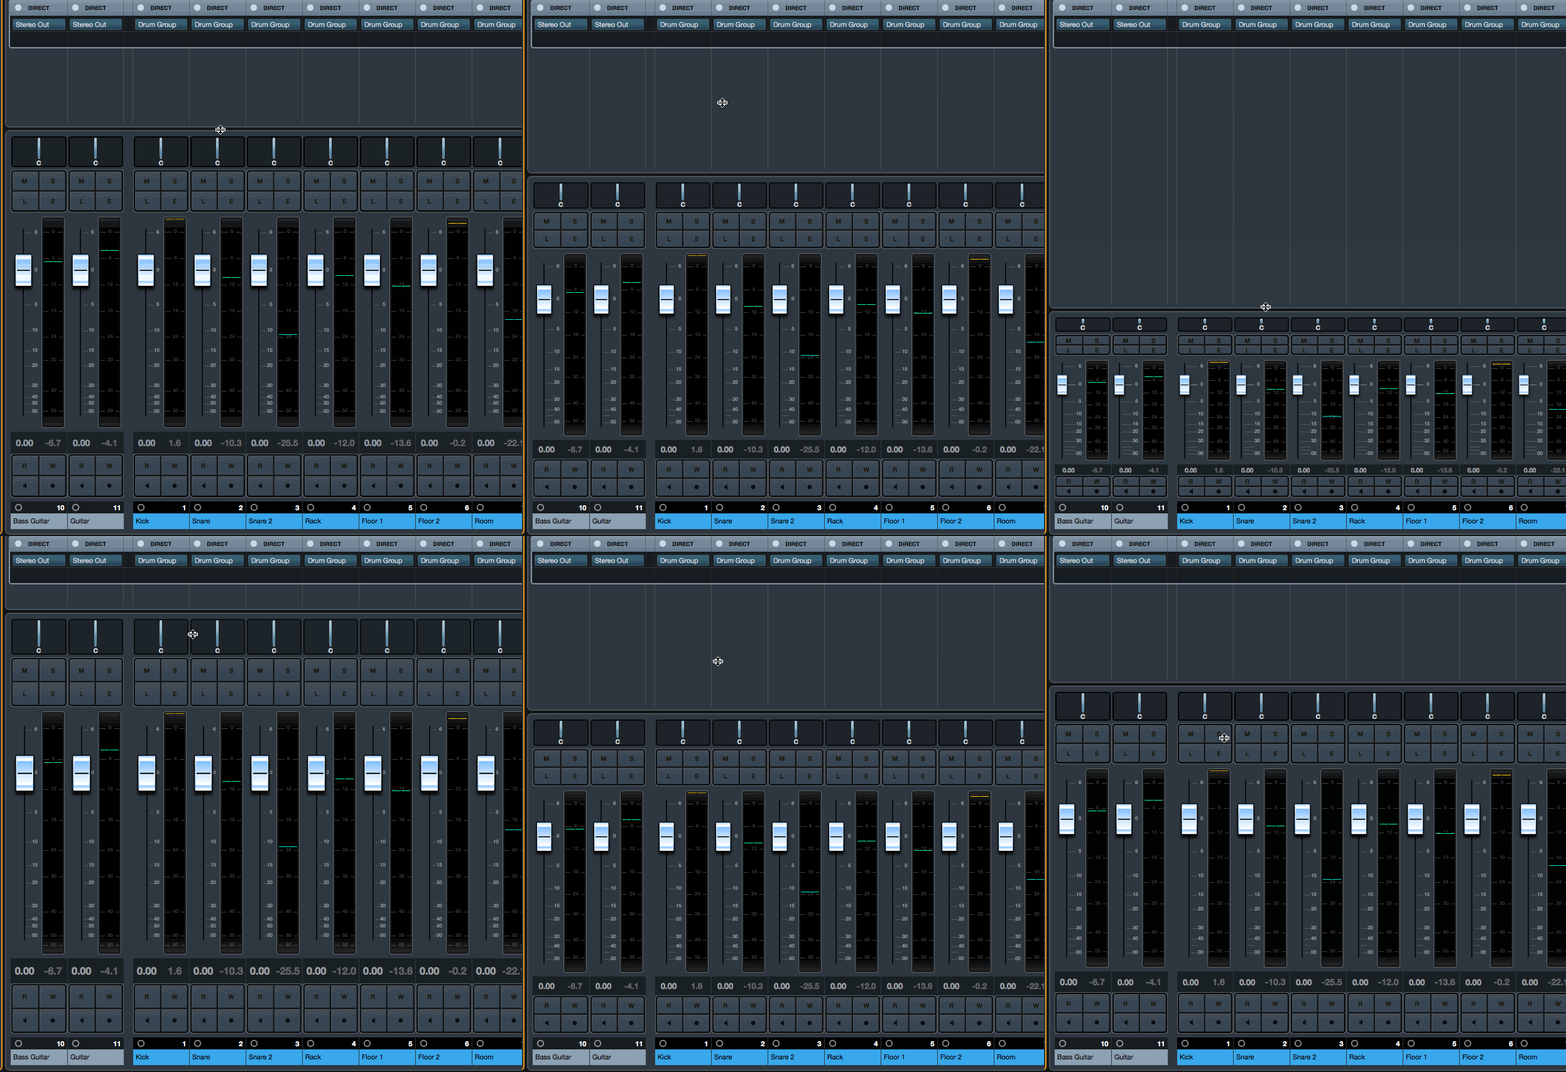
Yes, I know. I’m slightly obsessed with this, but every digital mixer on a computer screen needs to allow you to resize everything
In Cubase’s mixer you can adjust the width and height of each channel. You can change the size of the rack elements. You can change the size of the fader area. You can simply type in how many channels you want to see and the mixer will fill the width to that (!!).
You can also do this for the strip, so you don’t have a gazillion rows of things to see. Only one ‘strip element’ will show at a time.
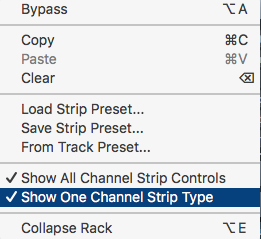
You can also show/hide basically everything in the mixer so you don’t see elements that you don’t need.
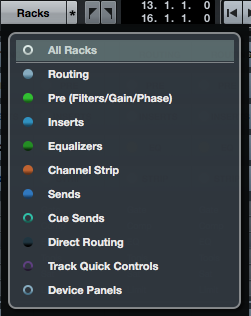
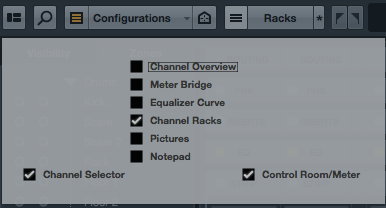
The fact that I can adjust the mixer element’s sizes to fit my project size and workflow is fantastic. Every DAW needs this and very few have it.
Conclusion
I didn’t cover every feature in Cubase’s mixer, but it looks like I covered a lot. The mixer is simply just very well designed.
I’ve read lots of complains from Cubase 7 users about the new mixer and perhaps it was better back then somehow, but my experience with Cubase 8.5 is that the mixer is one of the best mixing experiences that you can get in a DAW.
Support me!
If you appreciate the information presented then please consider joining patreon or donating!
