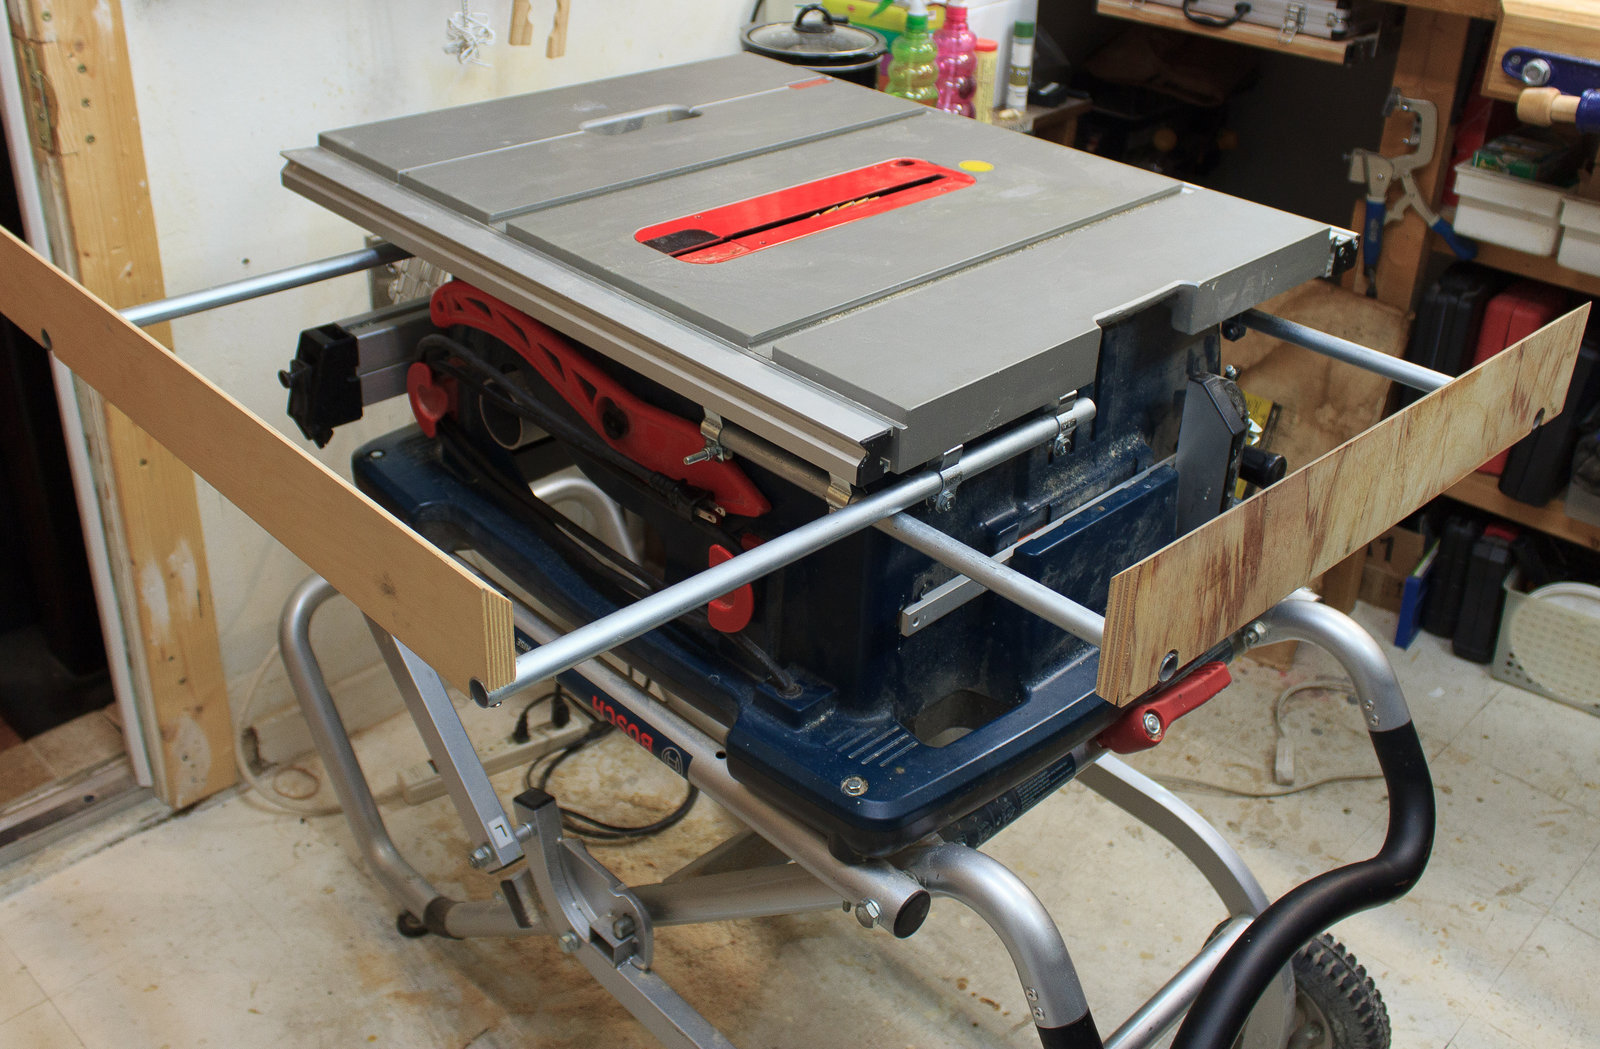
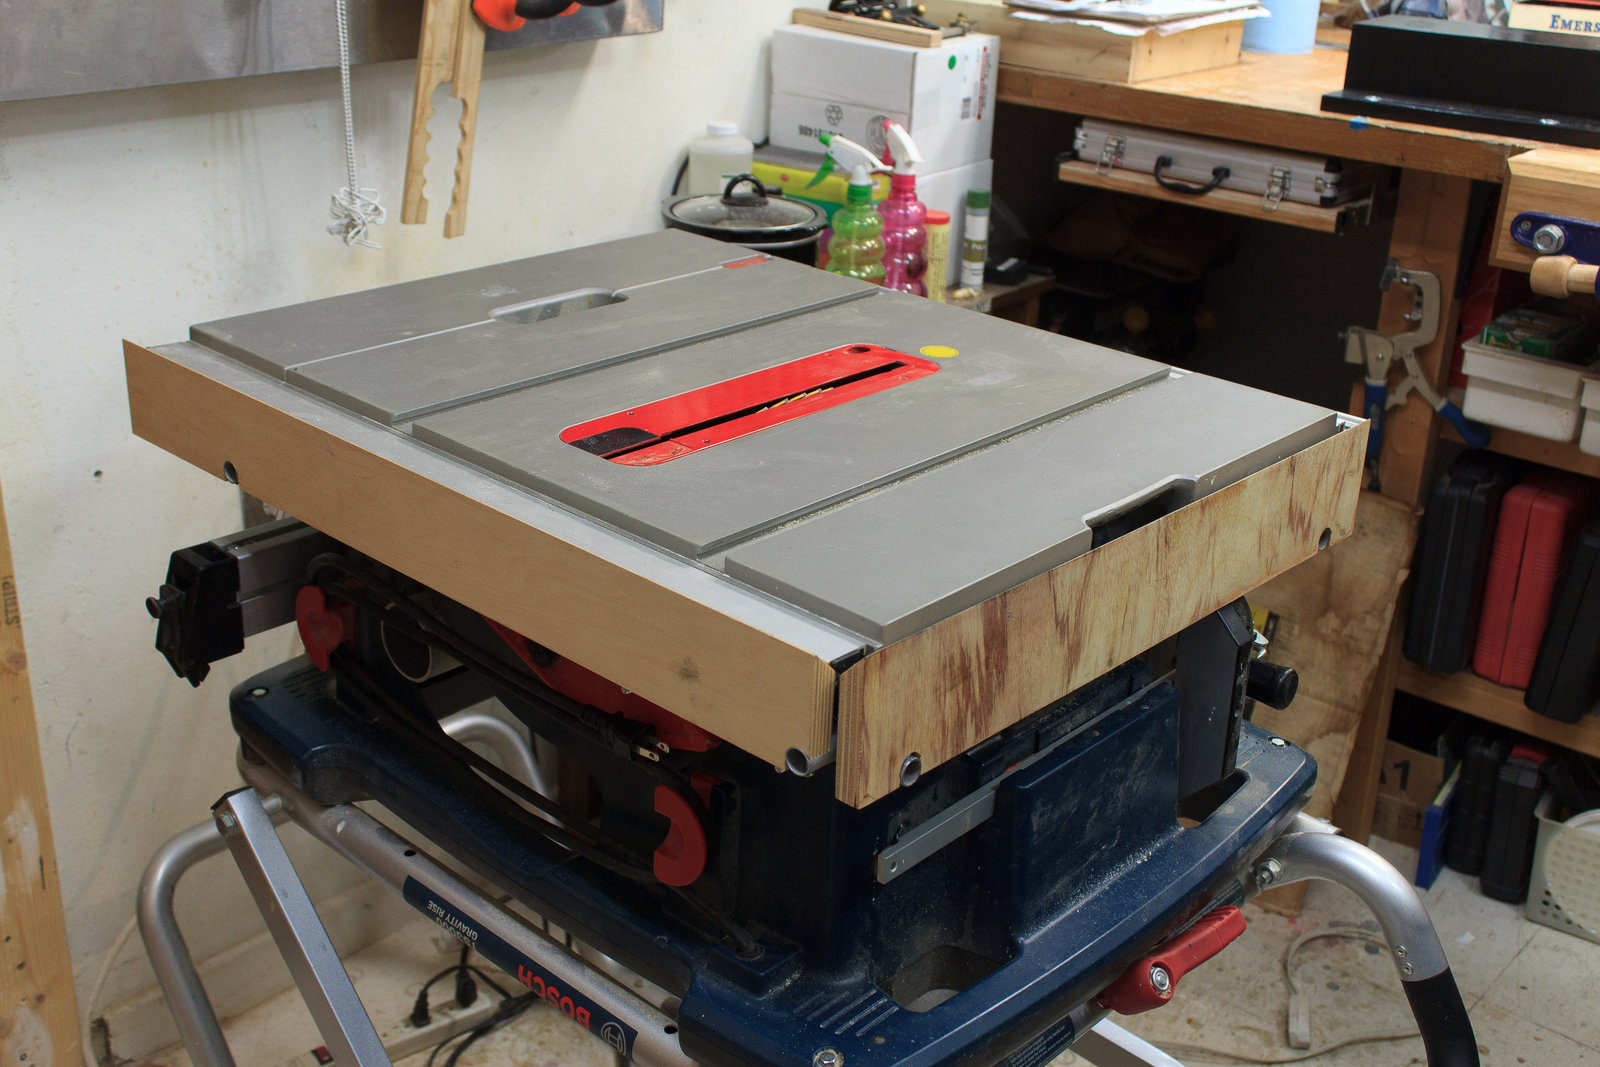
I love my Bosch 4100 table saw. The gravity rise stand is amazing, it’s compact, it’s accurate, it’s well-made.
The issue is that with how compact it is, you need some sort of extension wings to safely support your work as you cut it.
Like most people you could simply buy a TS1002 Outfeed Support Extension or a TS1016 Outfeed Support Assembly for outfeed support. You’ll also need a TS1003 Left Side Support Table or a TS1008 Left Side Support Table for left side support.
Those damn things are too expensive, and we’re workshop men! We can make our own things. Let me show you how I made mine
This is how to make the outfeed tables. See the bottom for the small modification necessary for the left-side supports.
Supplies
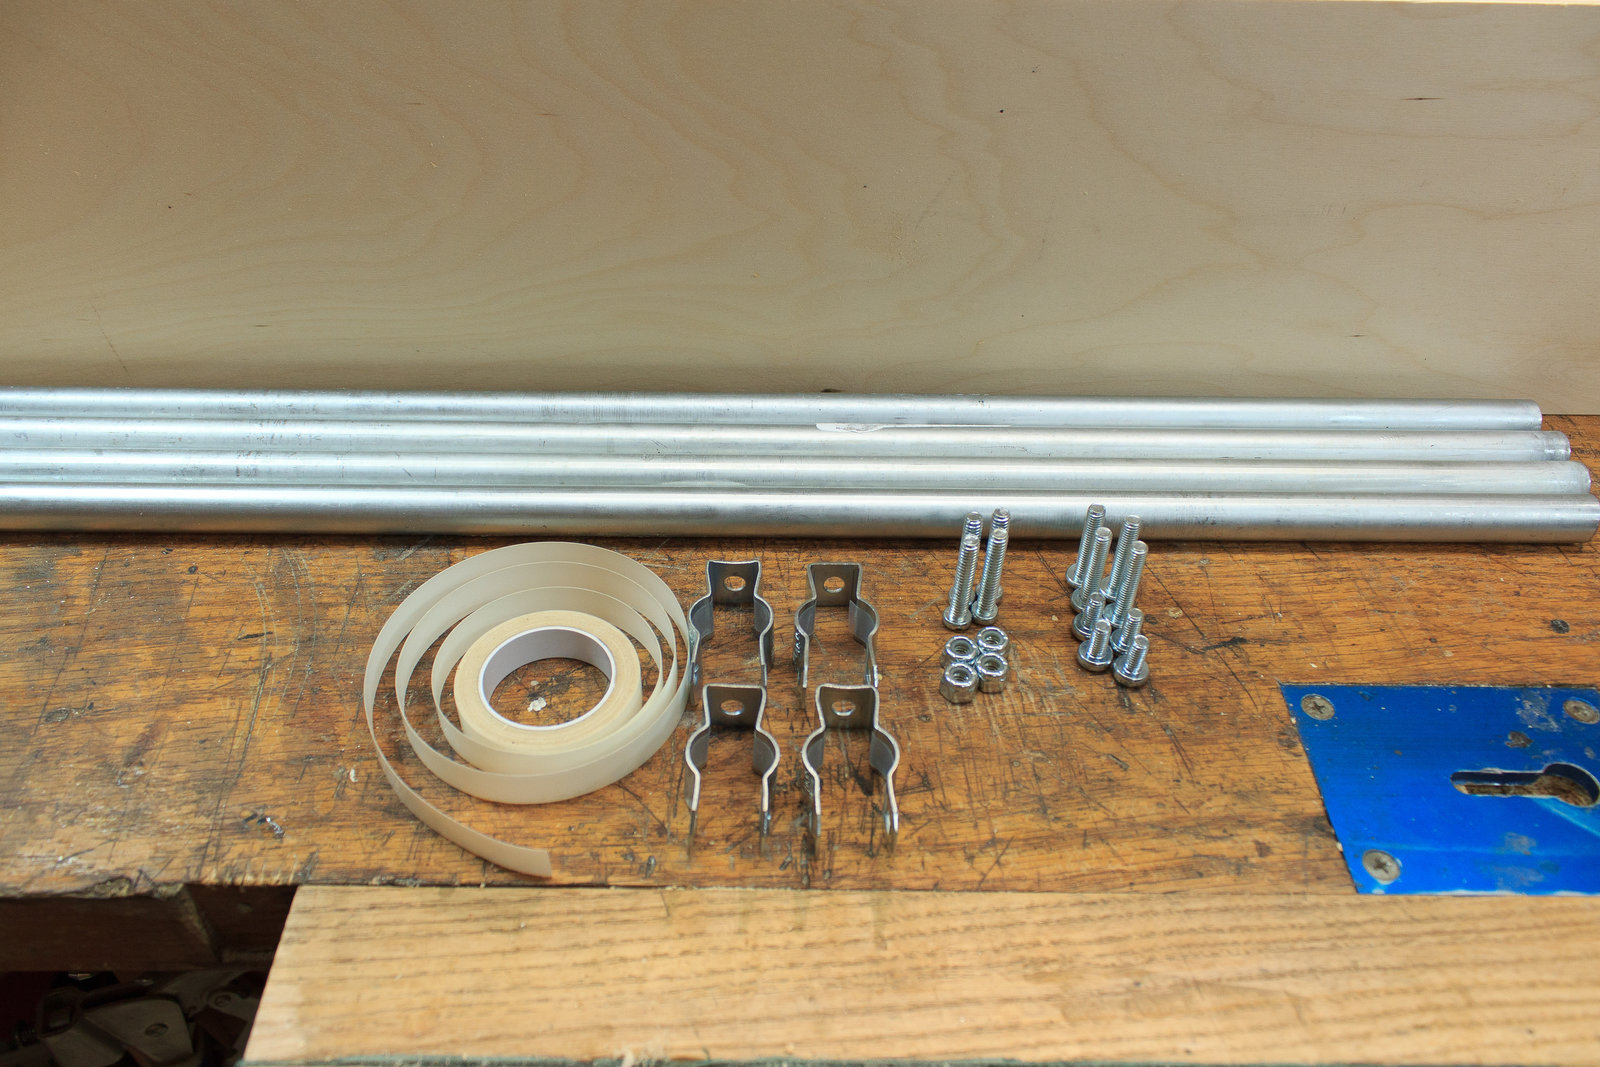
So here’s the supplies you’ll need:
- 4 M6x12mm Bolts
- 4 M6x30mm Bolts for the left side support (not shown)
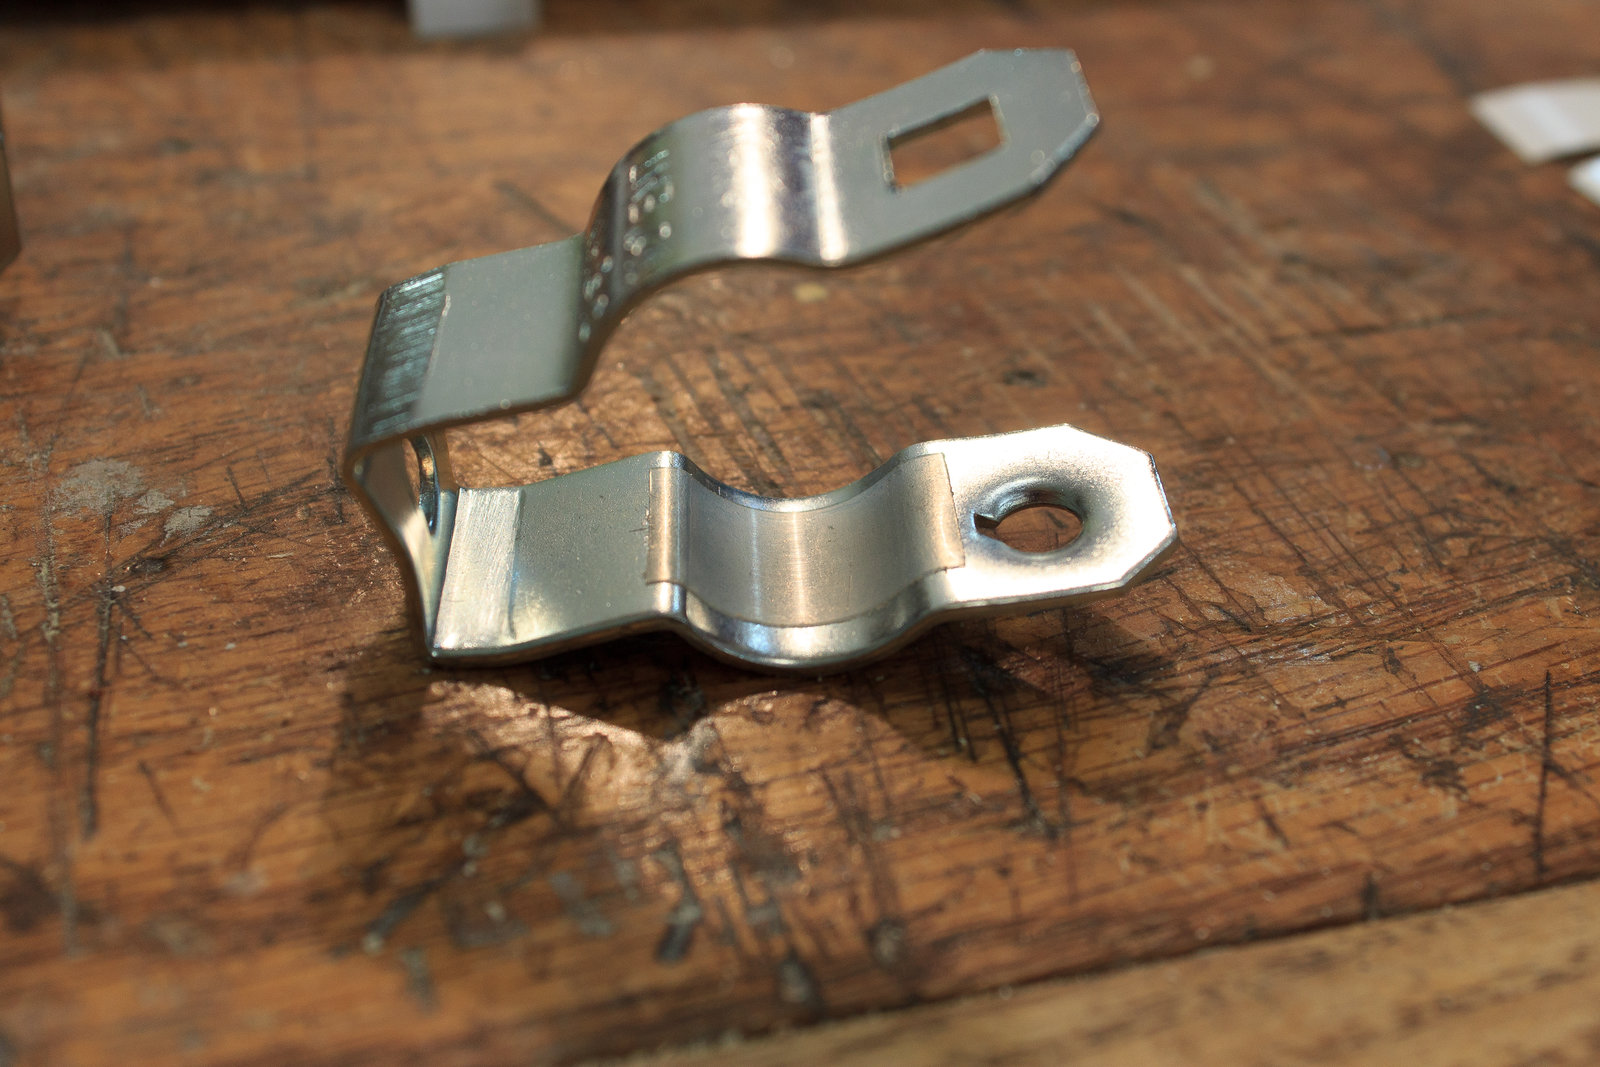
- 8 #0 conduit hangers
- 8 0.5”-20 Nylon Lock washers
- Scrap Roughly 0.75” Plywood I simply used scrap Baltic Birch I had lying around.
- 0.5” Conduit You will need two 15.75” sections and two 20.75” sections.
- Tip: Buy the 10’. It’s cheaper and useful stuff to have.
- Tip: If you can’t fit a full 10’ piece on your vehicle, bring a cordless jigsaw or a hacksaw and cut it down in the parking lot!
- (Optional but Recommended) 0.25-20 Hex Head Bolts
- (Optional) 0.5” UHMW tape Buy it on eBay. It’s cheaper.
Prep-work
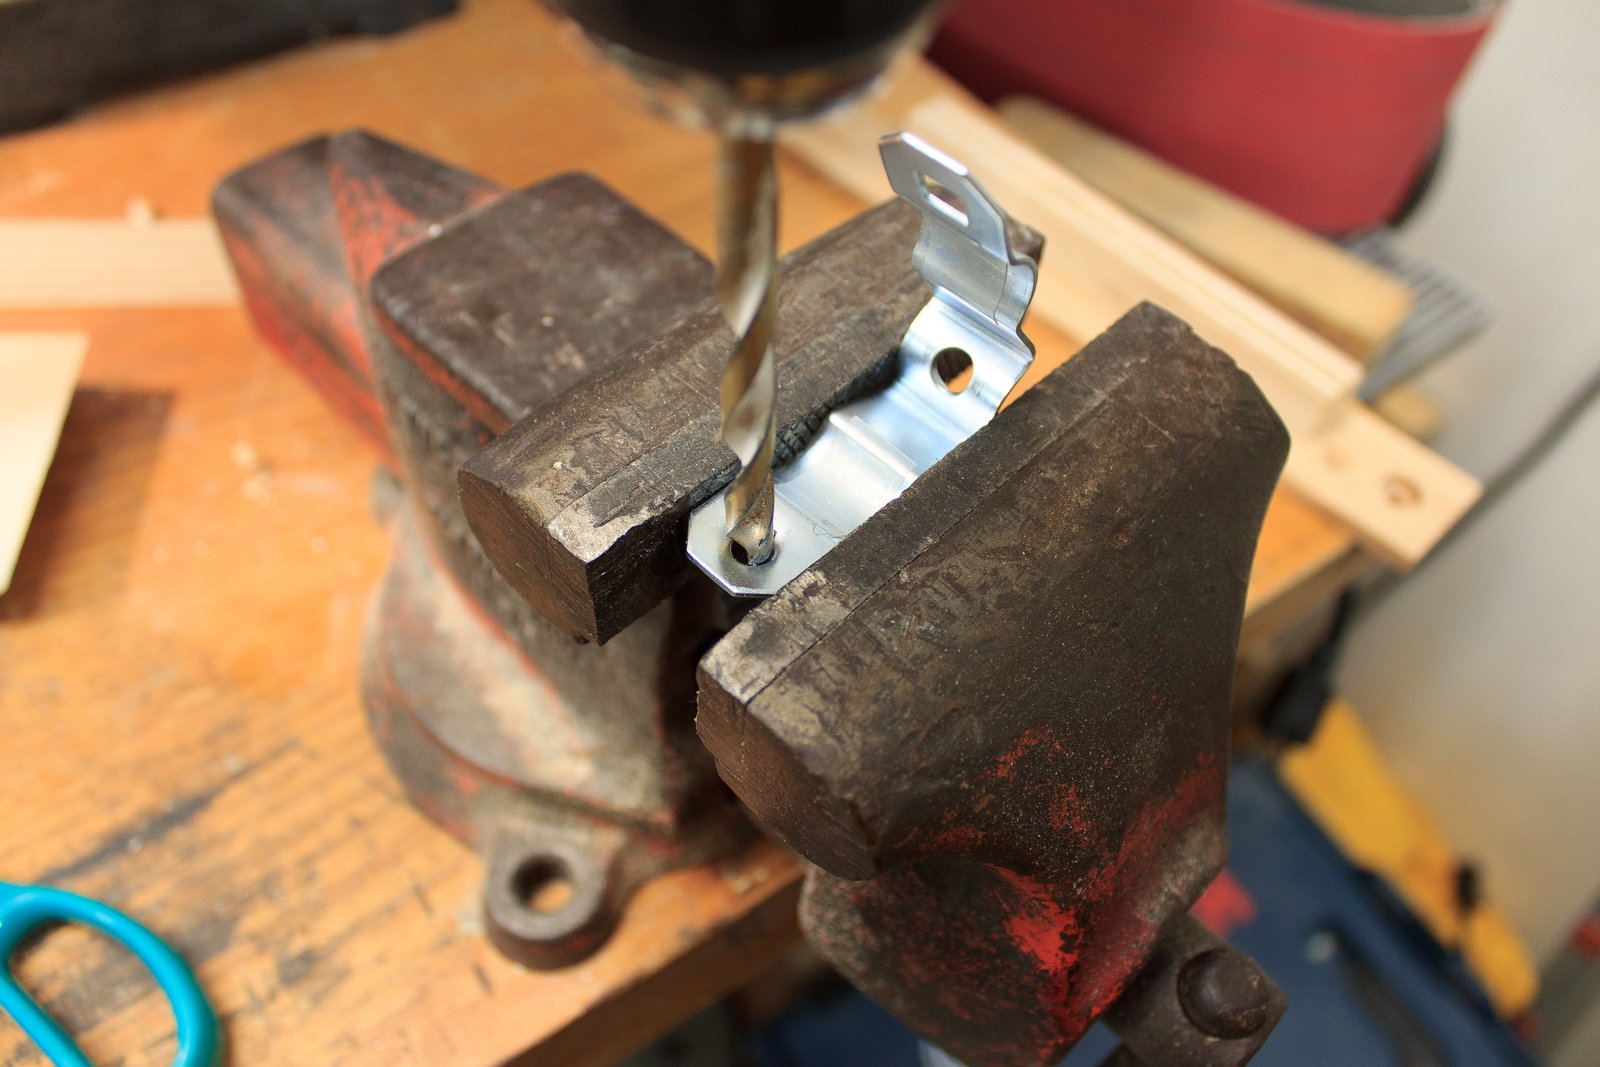
We don’t want the conduit hangers’ screw end to be grabbing the threads. We want the nylon lock washer to be applying the tension alone. So drill out the thread-end of your conduit hangers with a 1.21875” (9/32) drill bit. Anything that lets your 0.25”-20 bolts run through is fine.
Next thing you need to do, if you bought/have the UHMW tape, is to apply it to the inside of the conduit hangers. Just like in the photos.

This allows your conduit to slide easily through the hangers. It makes for a rather pleasant experience when pulling the supports out.
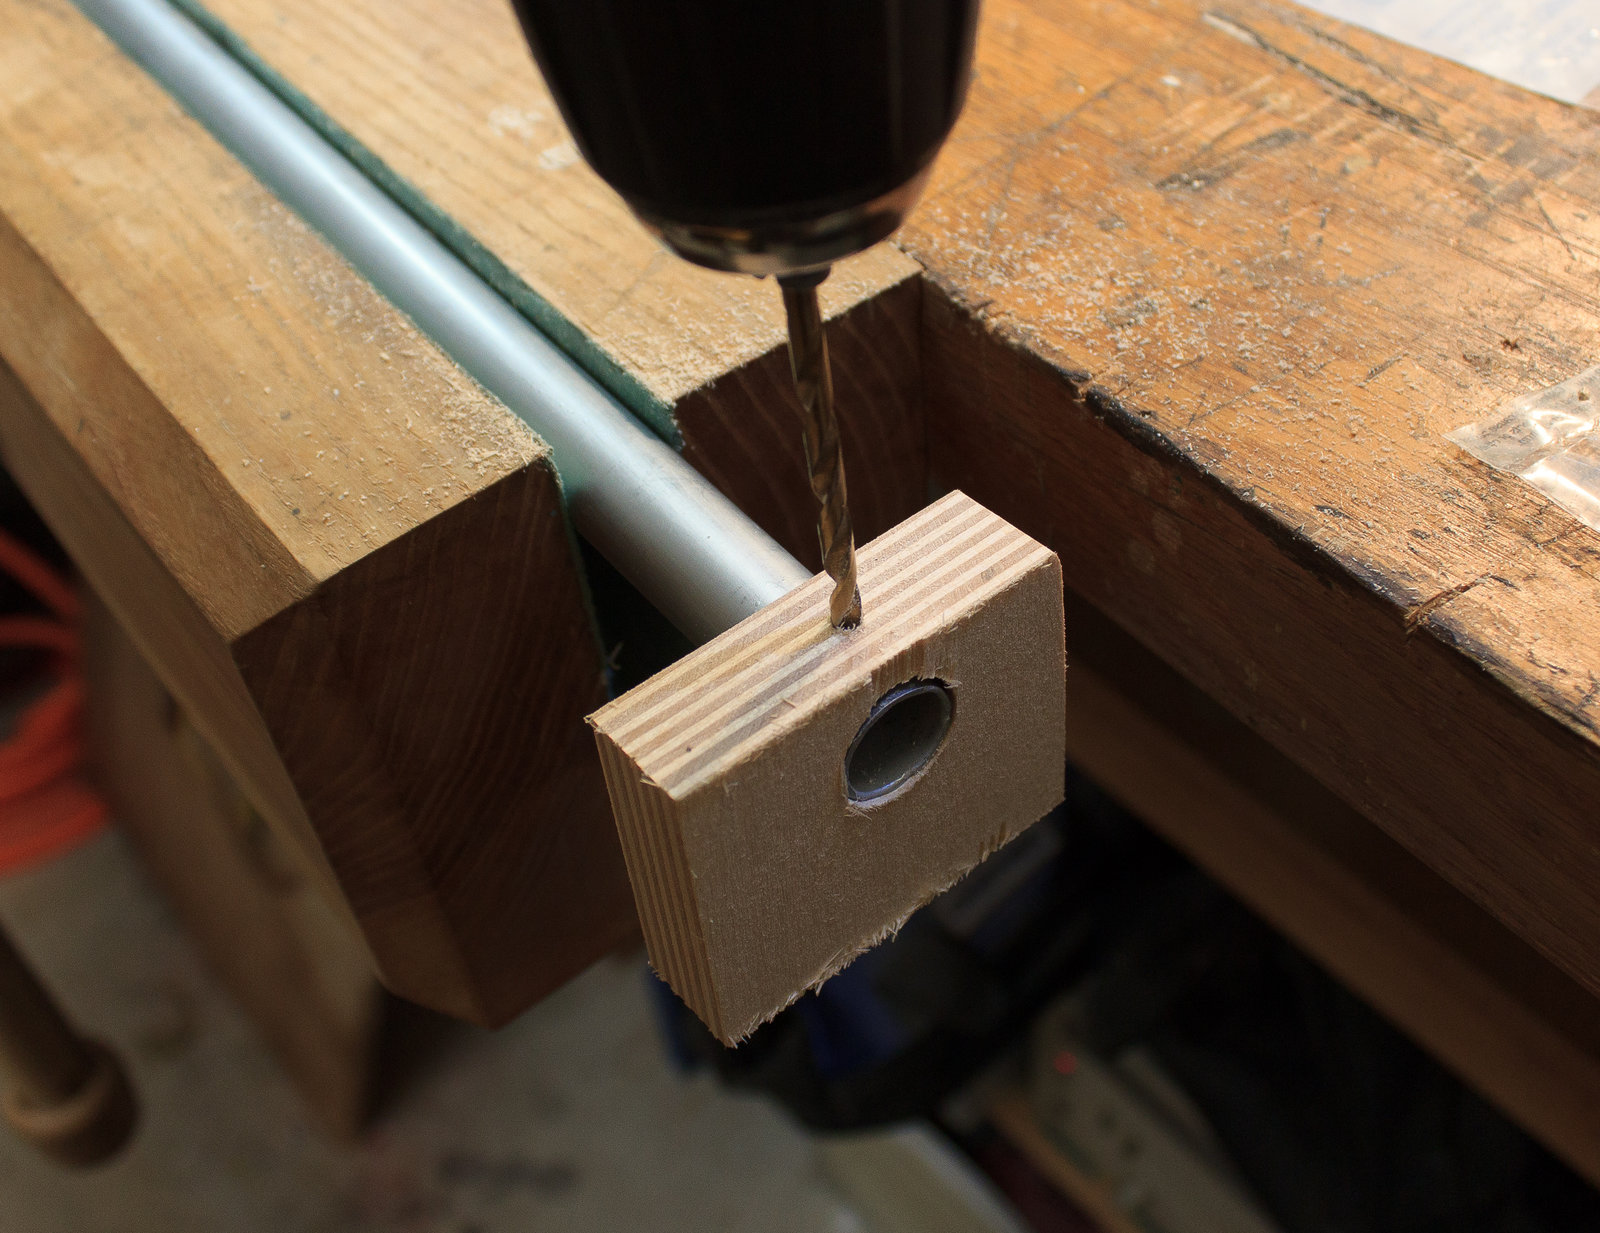
You also need to center drill a hole in 1 end of the conduit to attach it to the support later. I simply drilled a 0.75” hole in a piece of scrap ply wood and drilled it as you can see. You want the hole centered and about 0.375” from the edge of the conduit.
Cut scene 1
Cut your conduit down so you have the following pieces:
- Left side support - 15.75”
- Left side support - 15.75”
- Outfeed extension support - 20.75”
- Outfeed extension support - 20.75”
BE CAREFUL The burrs on the cut end will destroy your beautiful modeling hands. Deburr them with a file or sandpaper on the inside and the outside.
Remove any stickers with some mineral spirits, then lightly sand with #320 sandpaper or light-grey Scotchbrite. Lubricate it. That means not WD-40. Use an actual oil or preferably a dry lubricant.
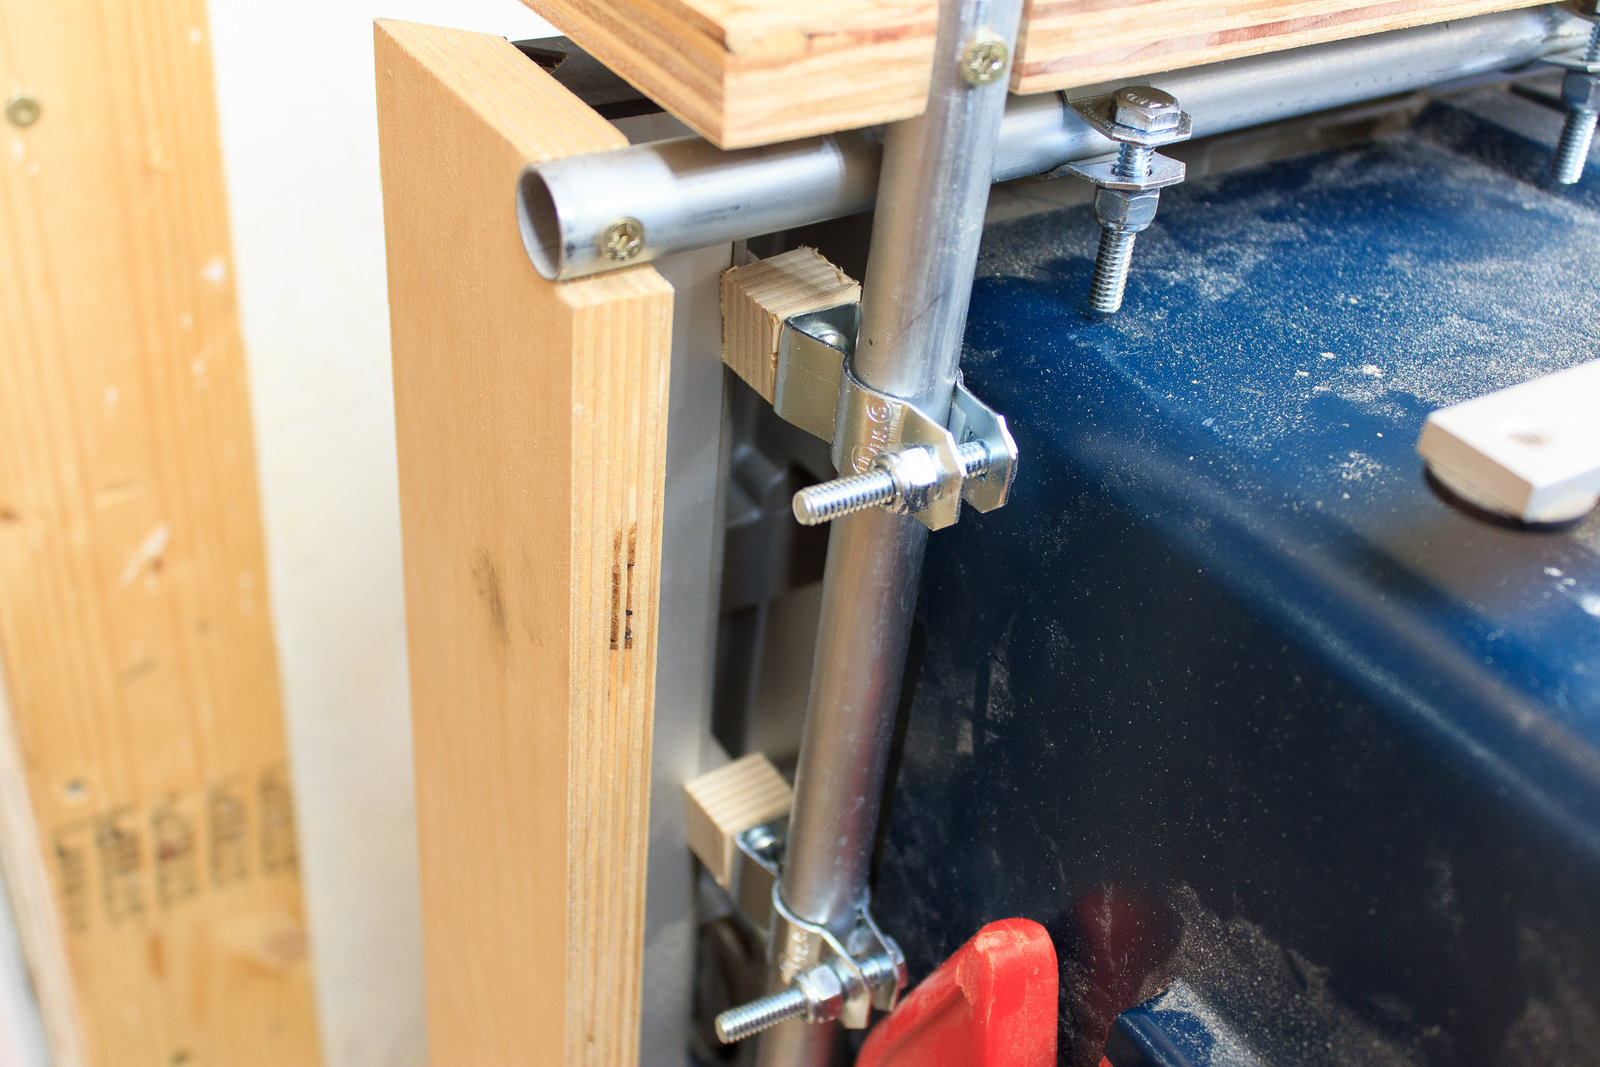
Attaching the conduit on the left side
Start off by screwing the conduit in to the left sides_ using the M6x12mm bolts.
Start with the conduit hangers rotated 90° from their final position, tighten them as much as you can without stripping the screw. Now use a pair of pliers to turn them 90° to their final position.
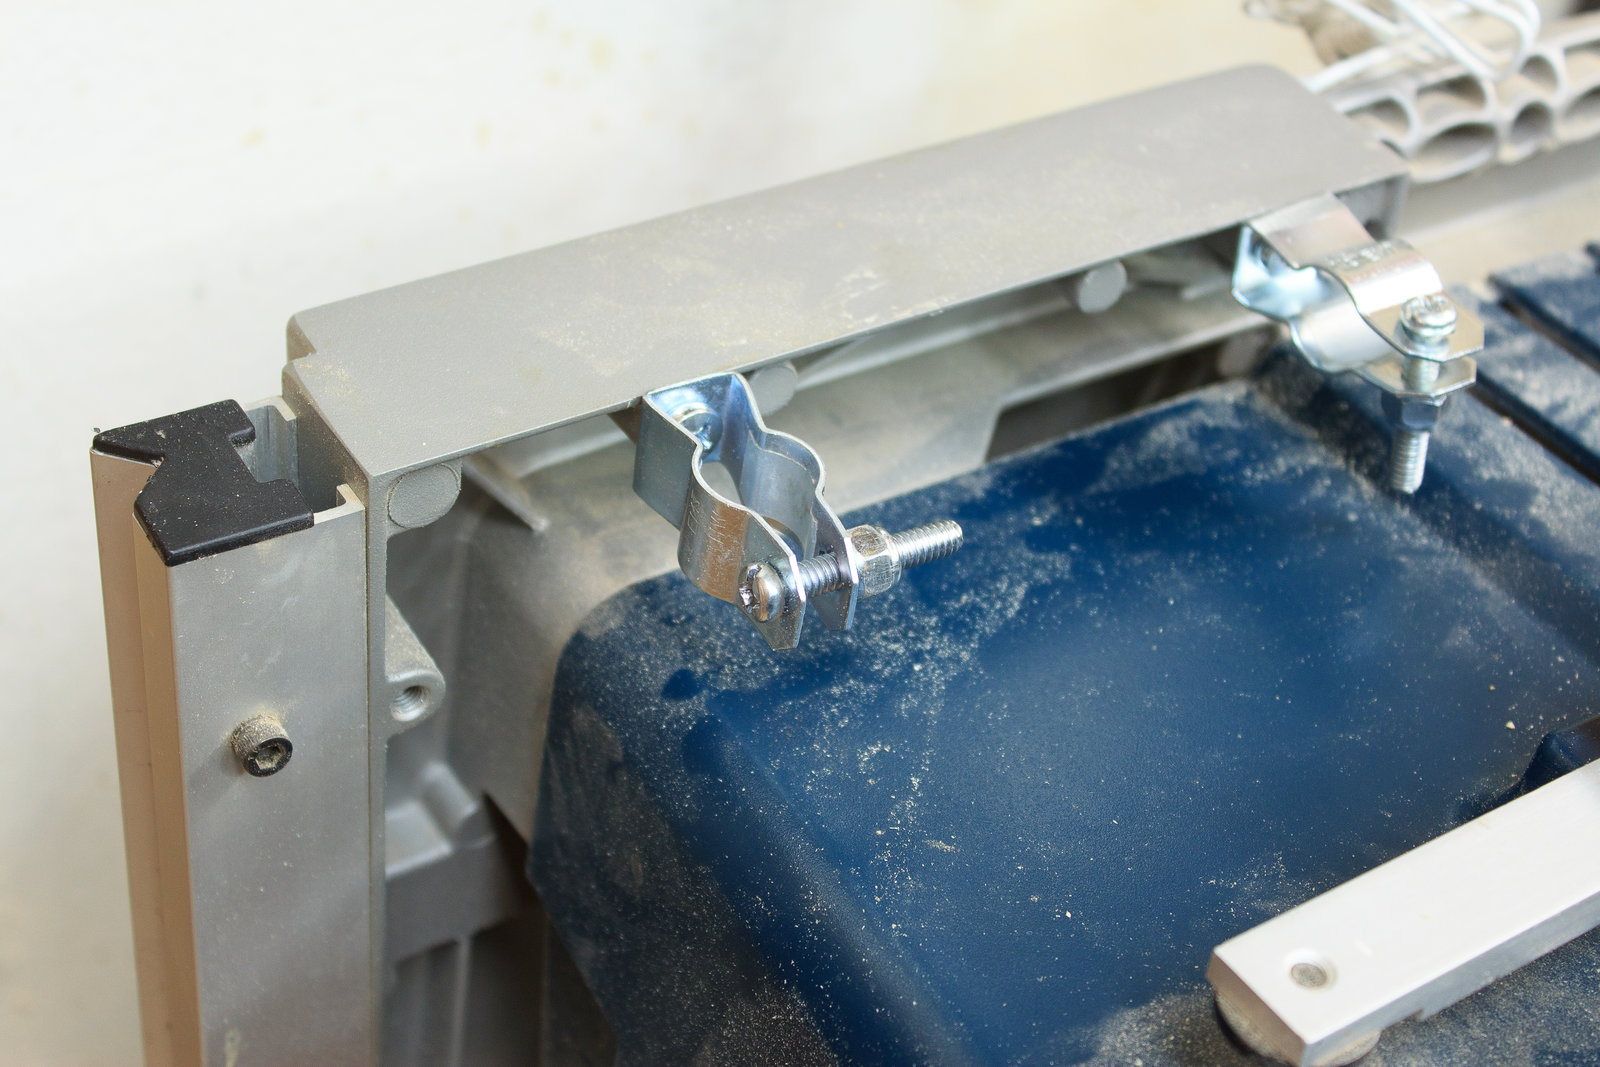


The left side is easy. The right side is a pain.
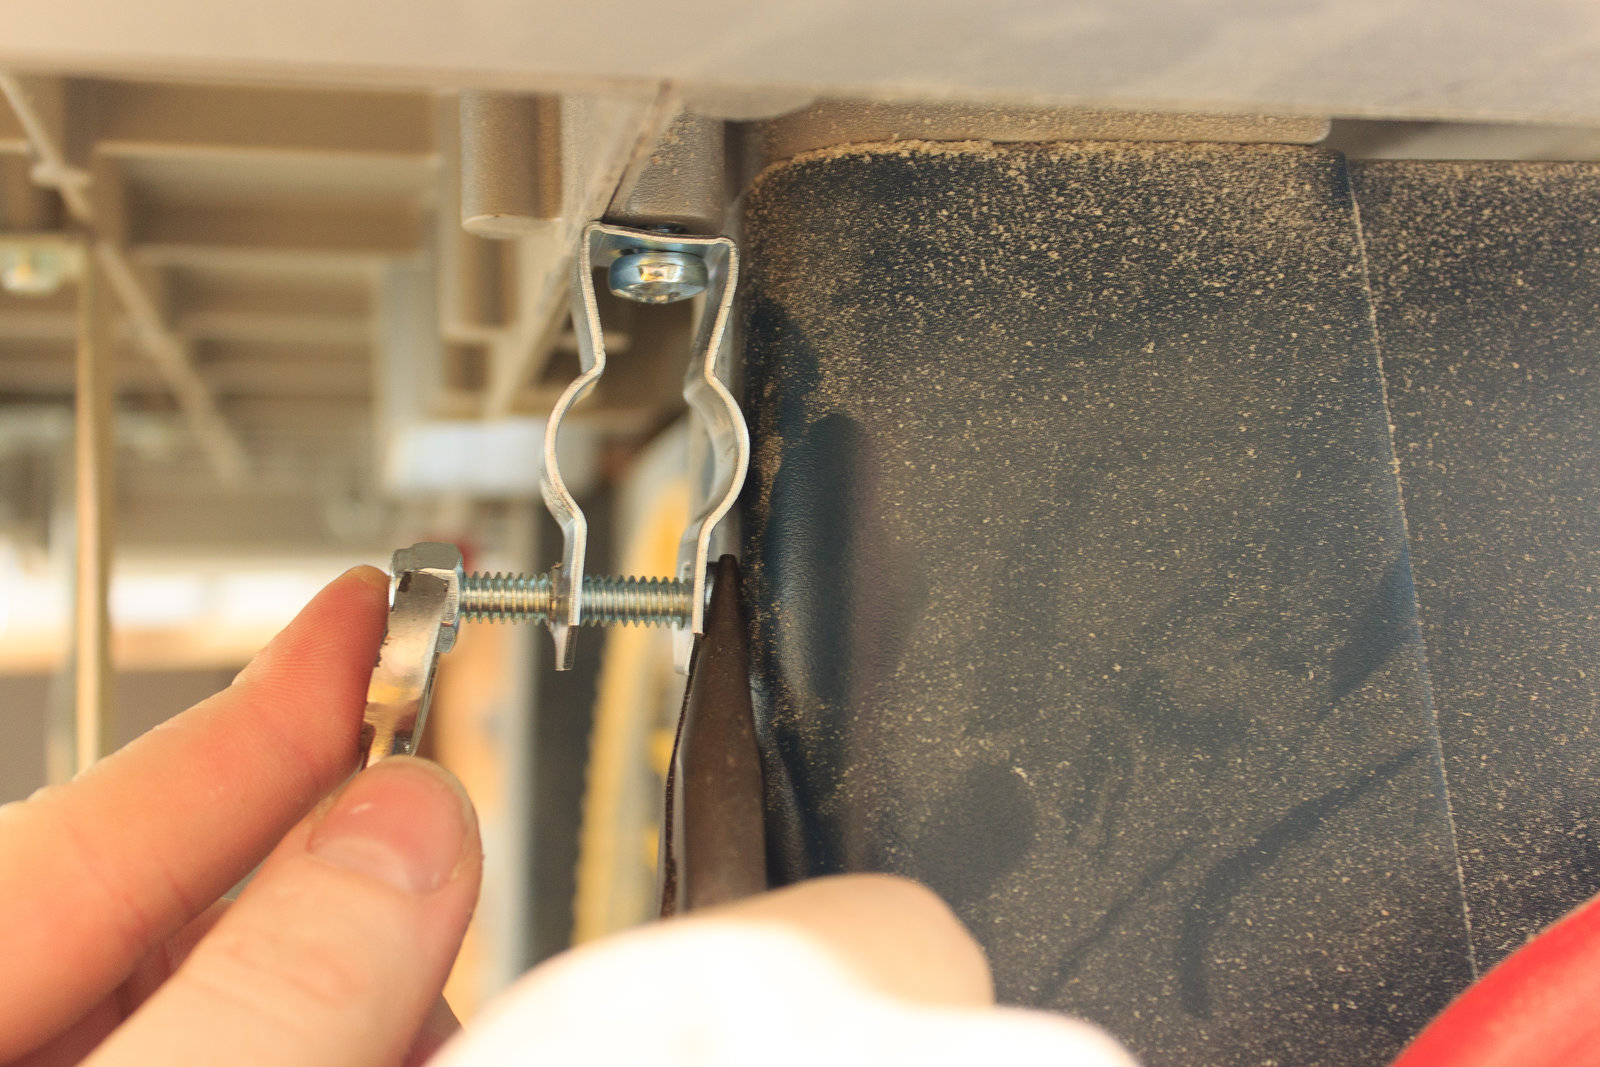
Attaching the conduit on the right side
Make sure your bolts are in first! Good luck. This is a pain.
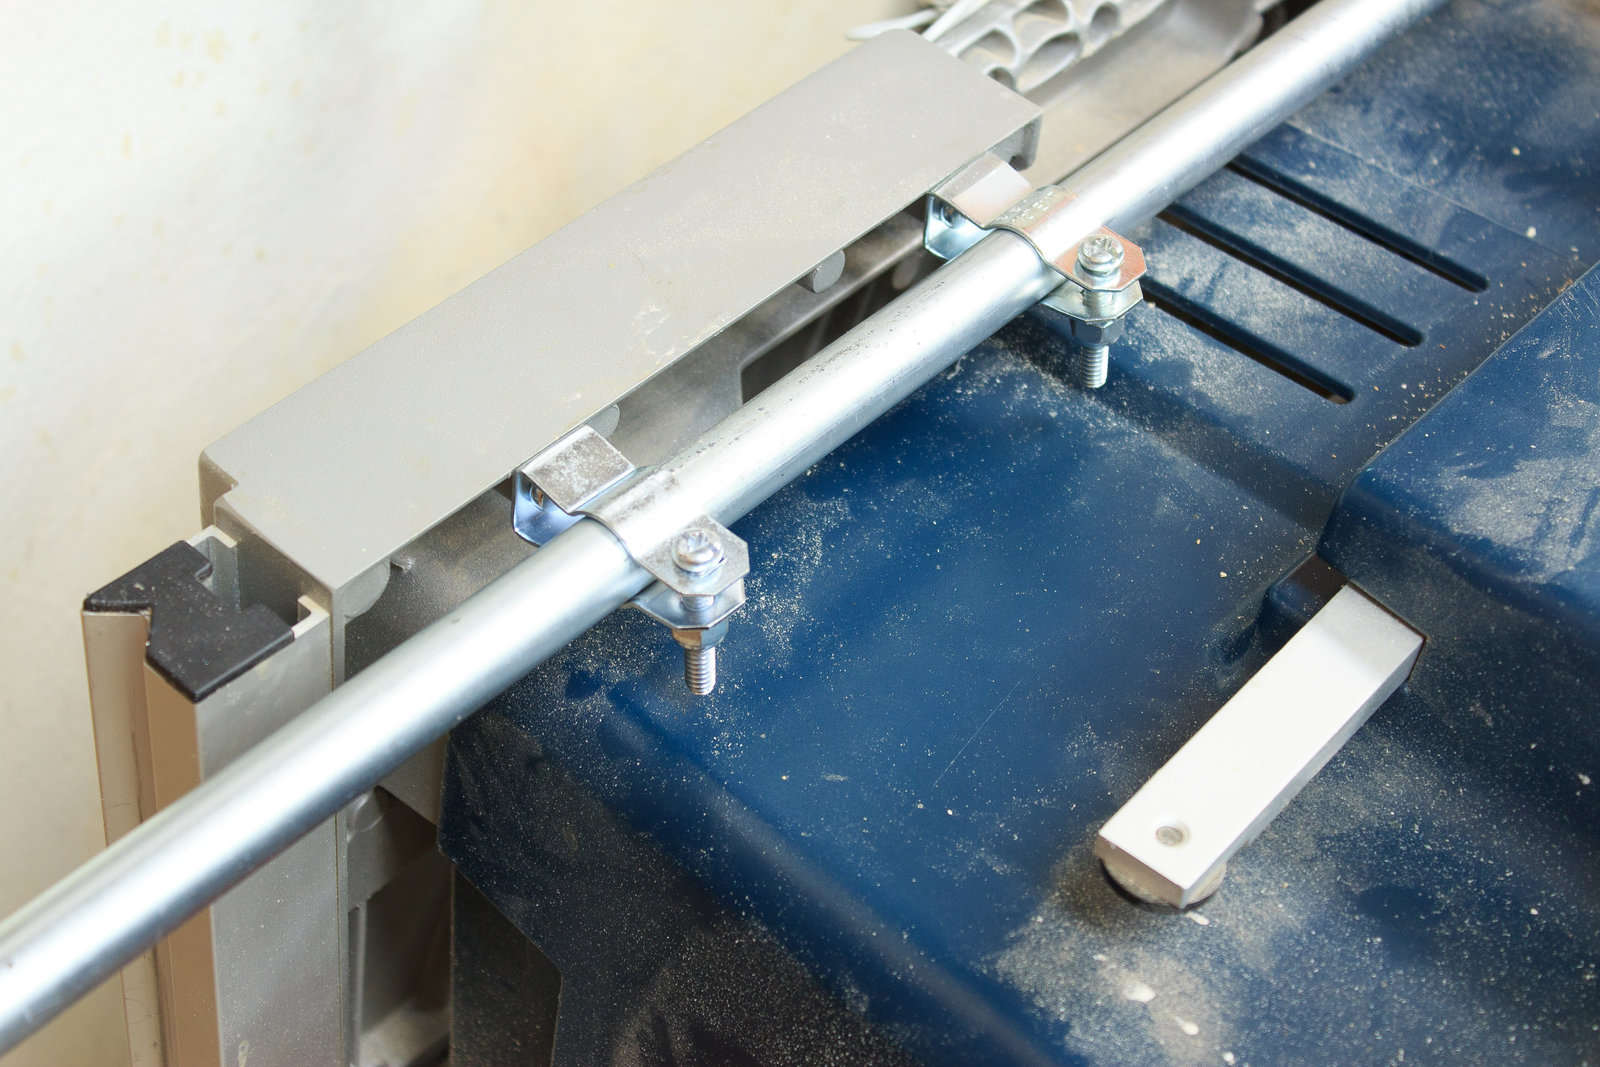
Tightening the conduit hangers
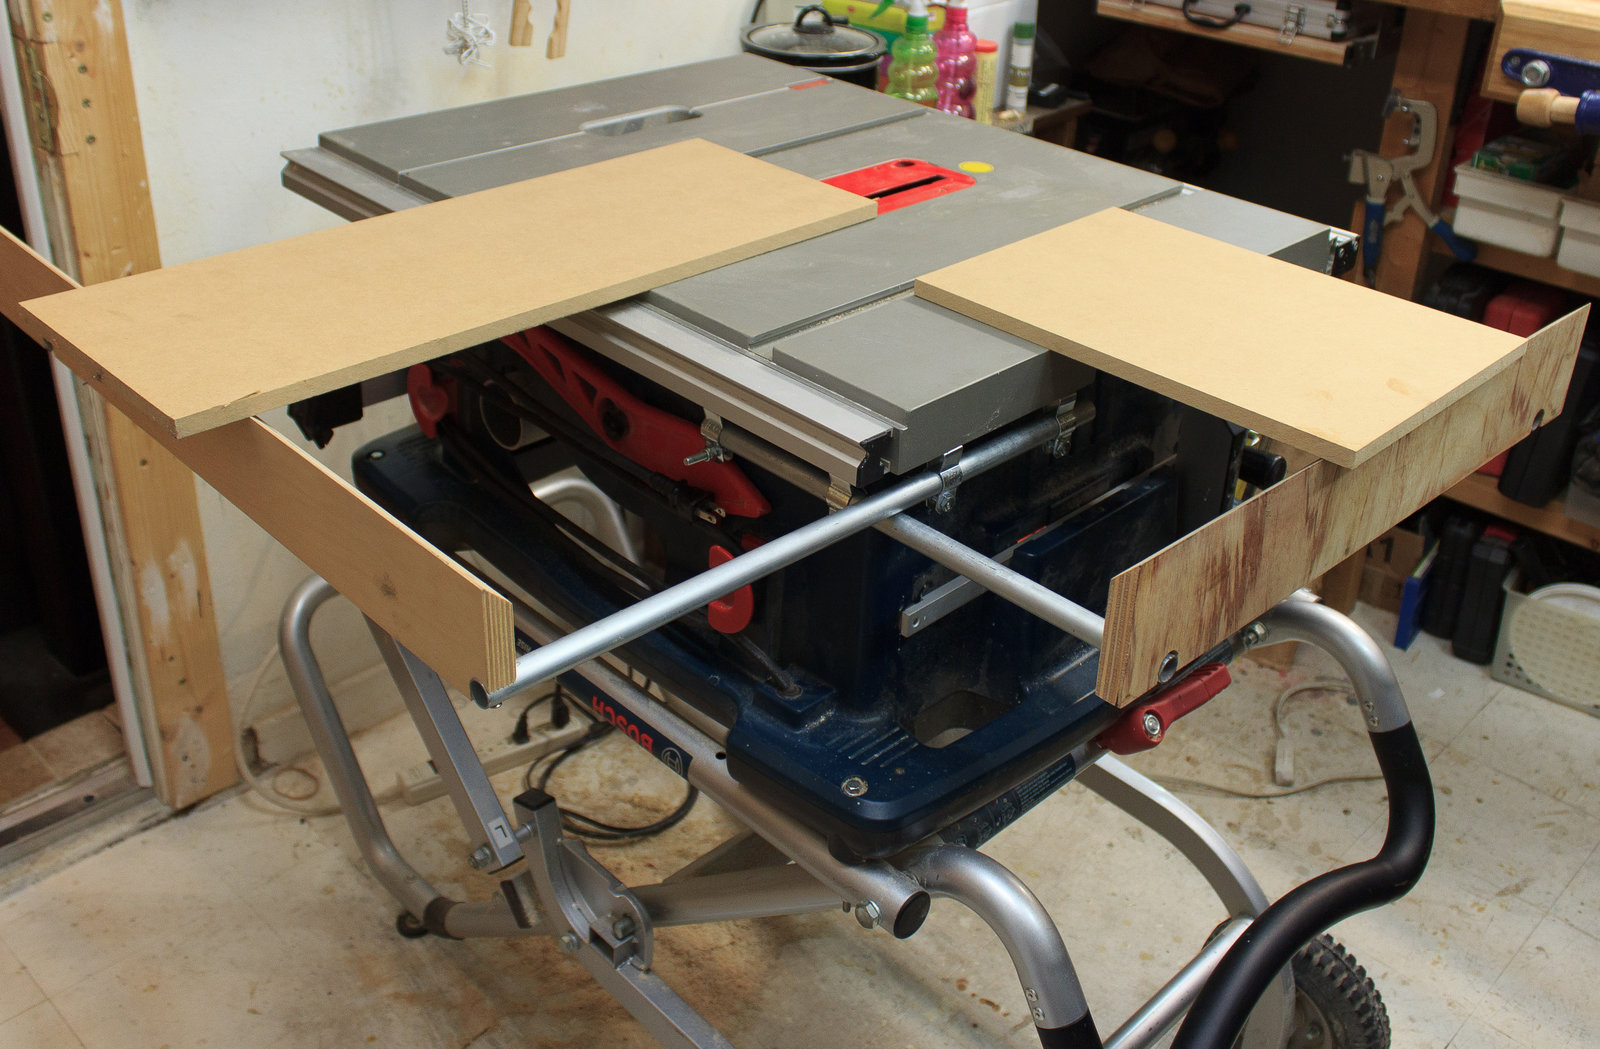
Slide the conduit in carefully. You can easily rip up your UHMW tape the first by catching it with the edge of the conduit if it’s not very well deburred. Remember that for the outfeed extension we are using the 20.75” conduit.
The left side outfeed extension conduit hangers are easy to do. If you are using the standard 1.5” bolts that came with the hangers..
Don’t do this:
Do this instead…
Or you can just grab some ¼-20 1” bolts from around the shop and not be an idiot like I was.
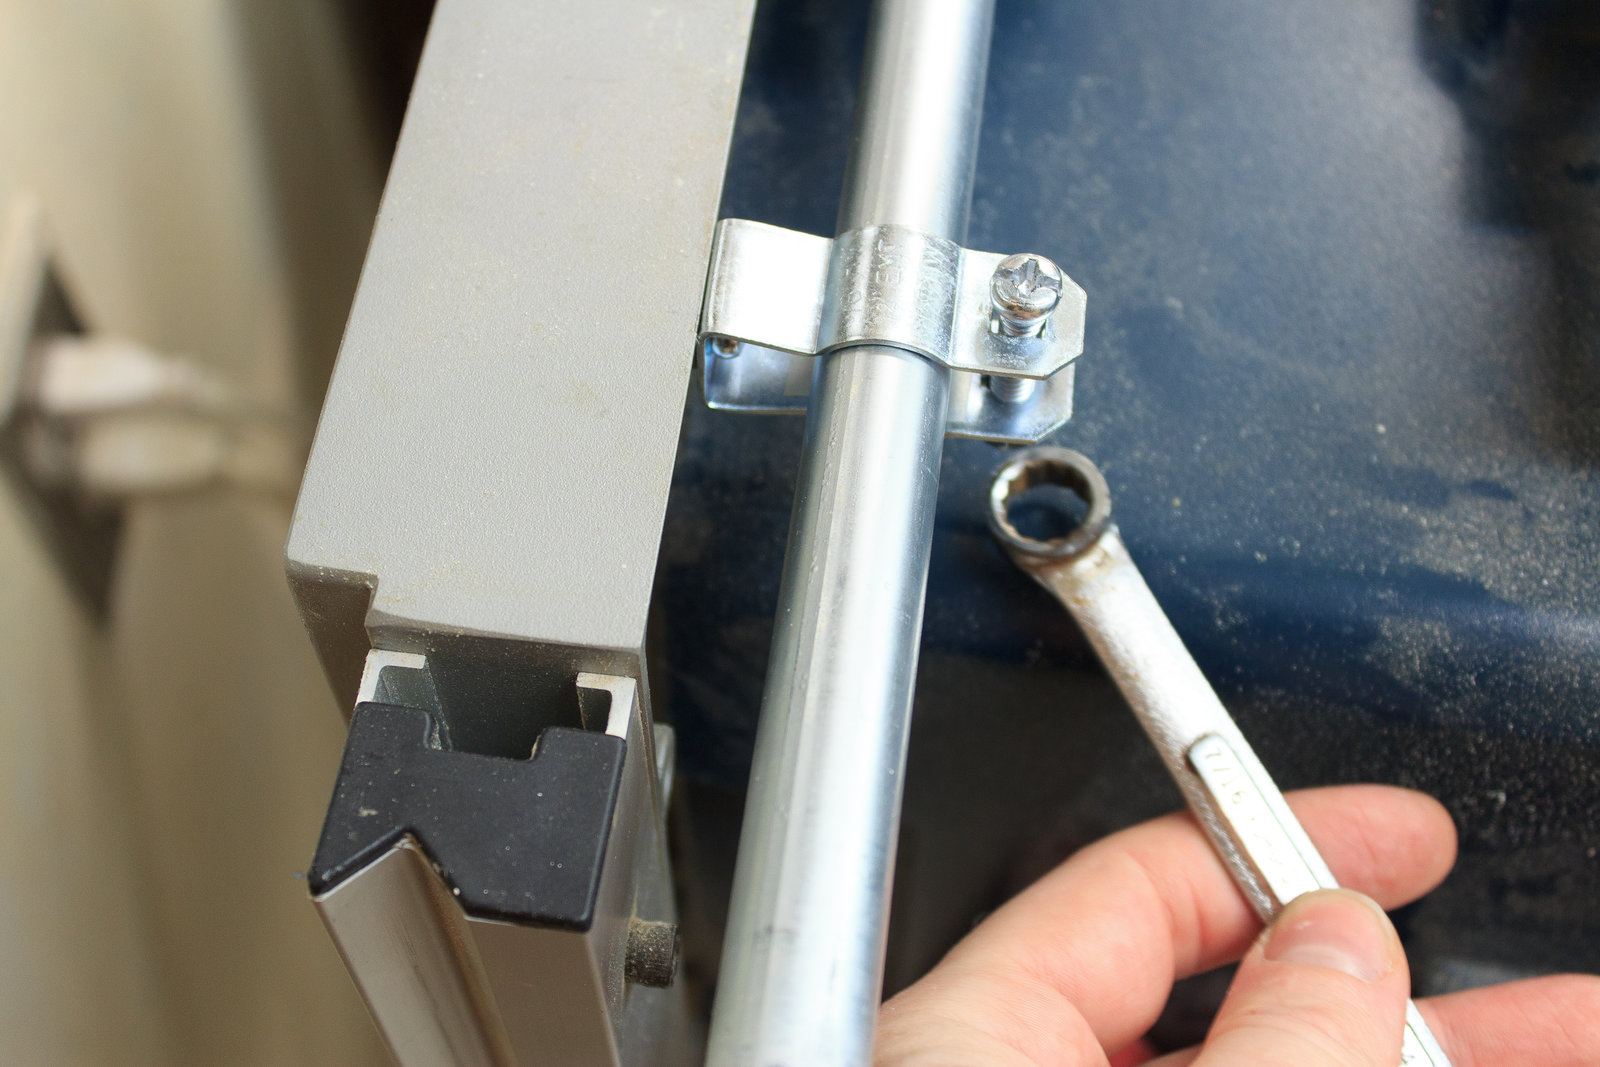
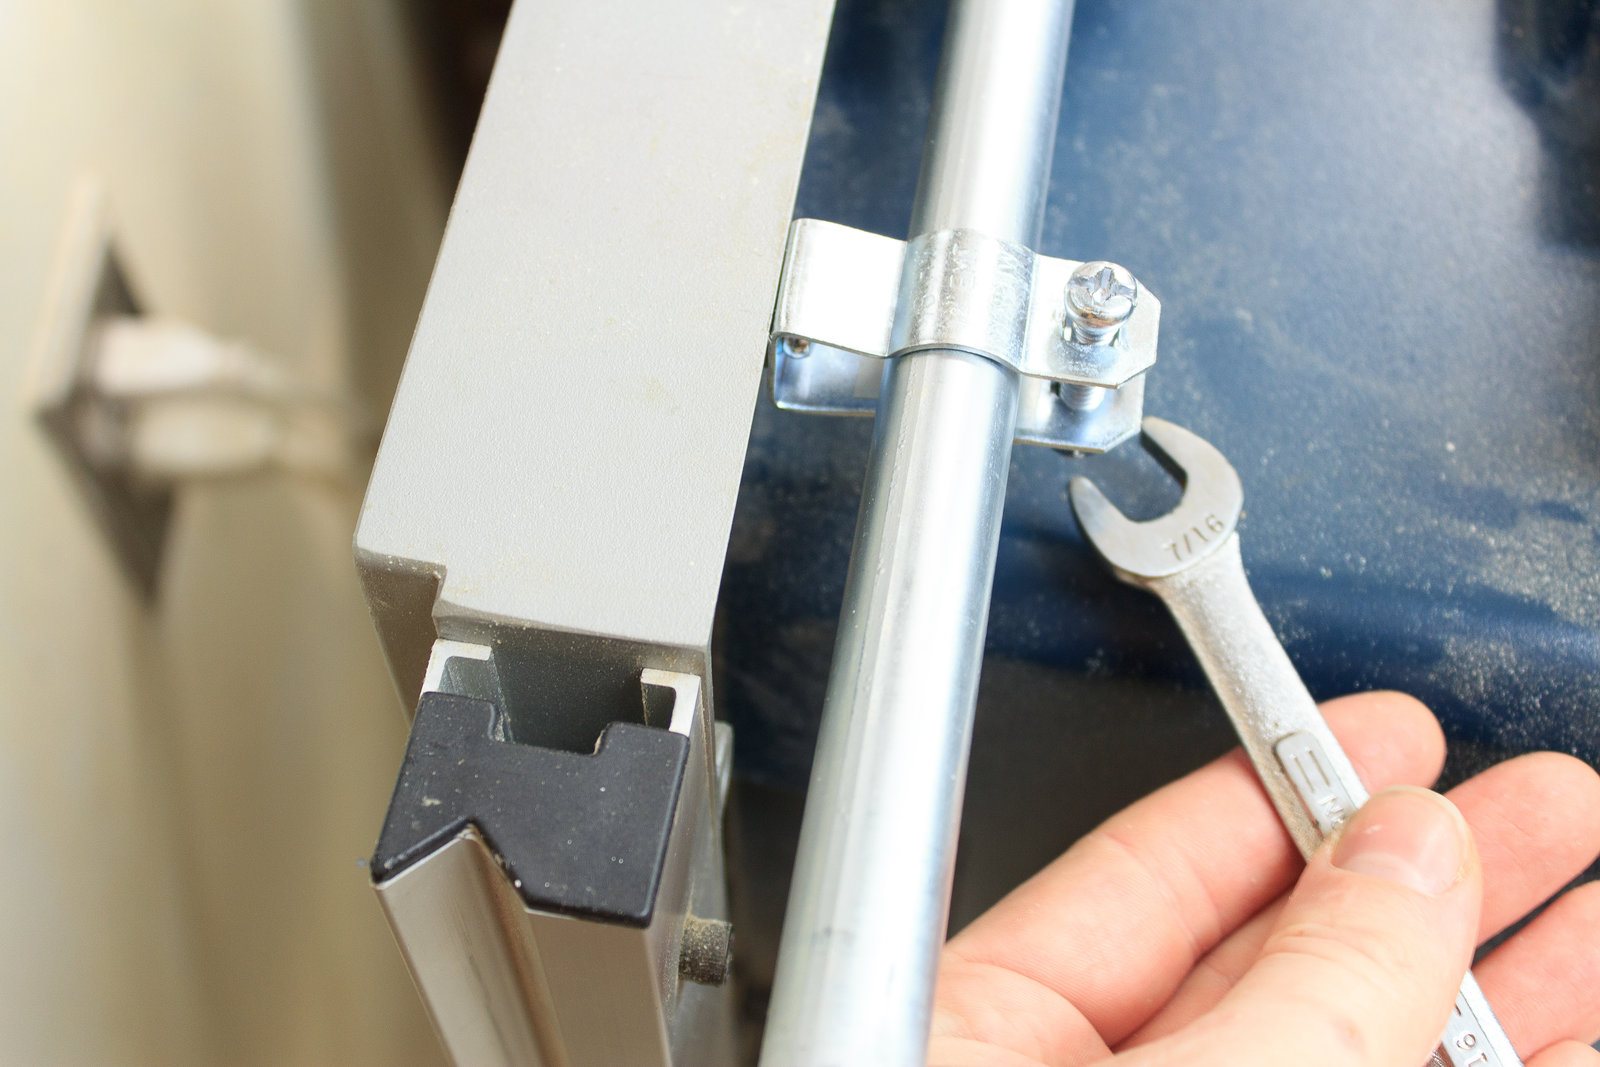
The right-side is a bit more fiddly. With hex-head bolts it’s still fiddly but at least you can use a wrench instead of pliers.
Eventually it will be nice and smooth and pretty and…
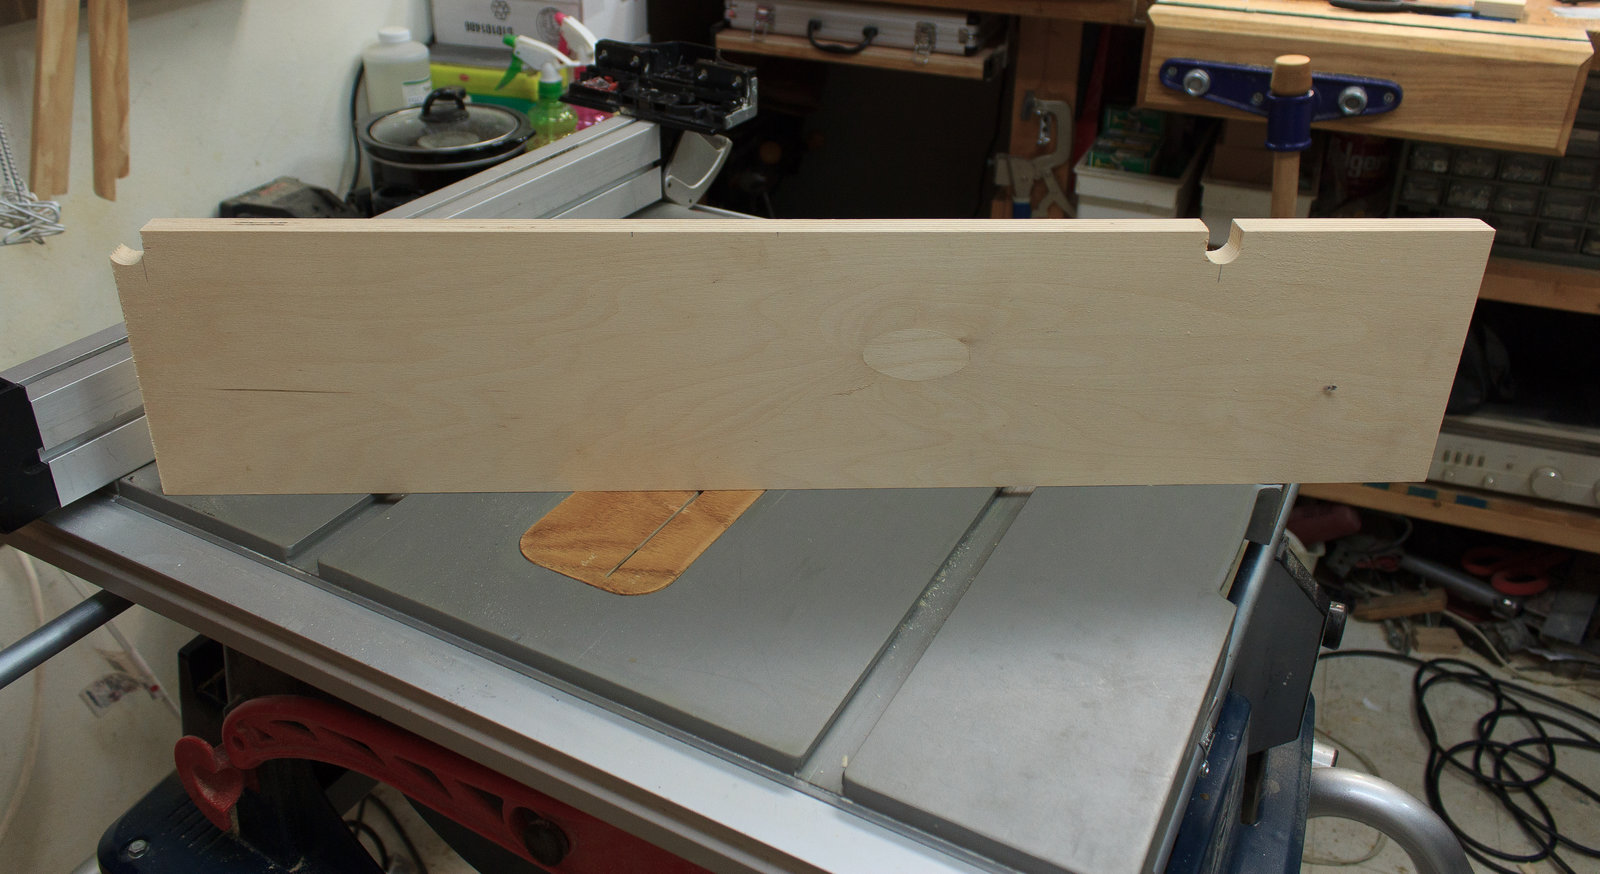
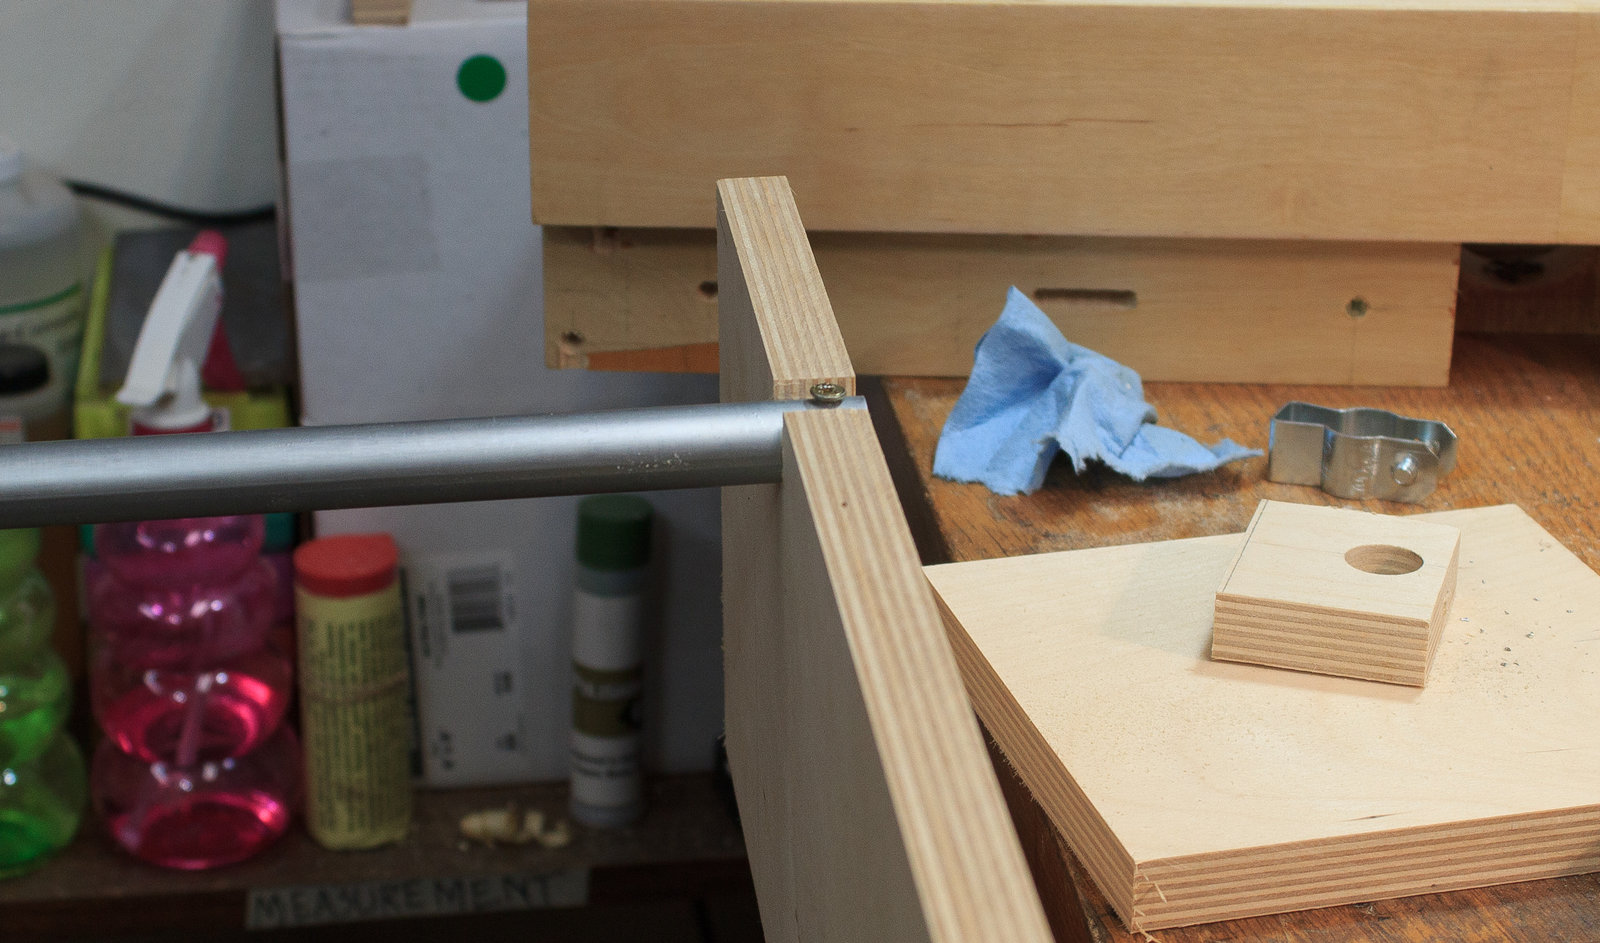
The support bit - Drilling
First cut your plywood to size lengthwise. Leave extra height for now. It’s up to you how wide to make it. My outfeed is exactly 29-1/16” wide.
Measure the location of the conduit sticking out and drill a 0.75” hole at 0.375” from the edge. I measured it by setting the plywood on the conduit, using a combination square to outline both sides of the conduit, then finding the center of those 2 points.
This needs to be fairly exact or your support will be difficult to pull out or push in because of the Y shaped warping that will be caused by not having the holes in the correct place.
You can leave the hole round, but I chopped it down to a U shape.
The support bit - Cutting
You need to attach the conduit to the support the same way you will in the final assembly. I just used some Spax 1.5” screws.
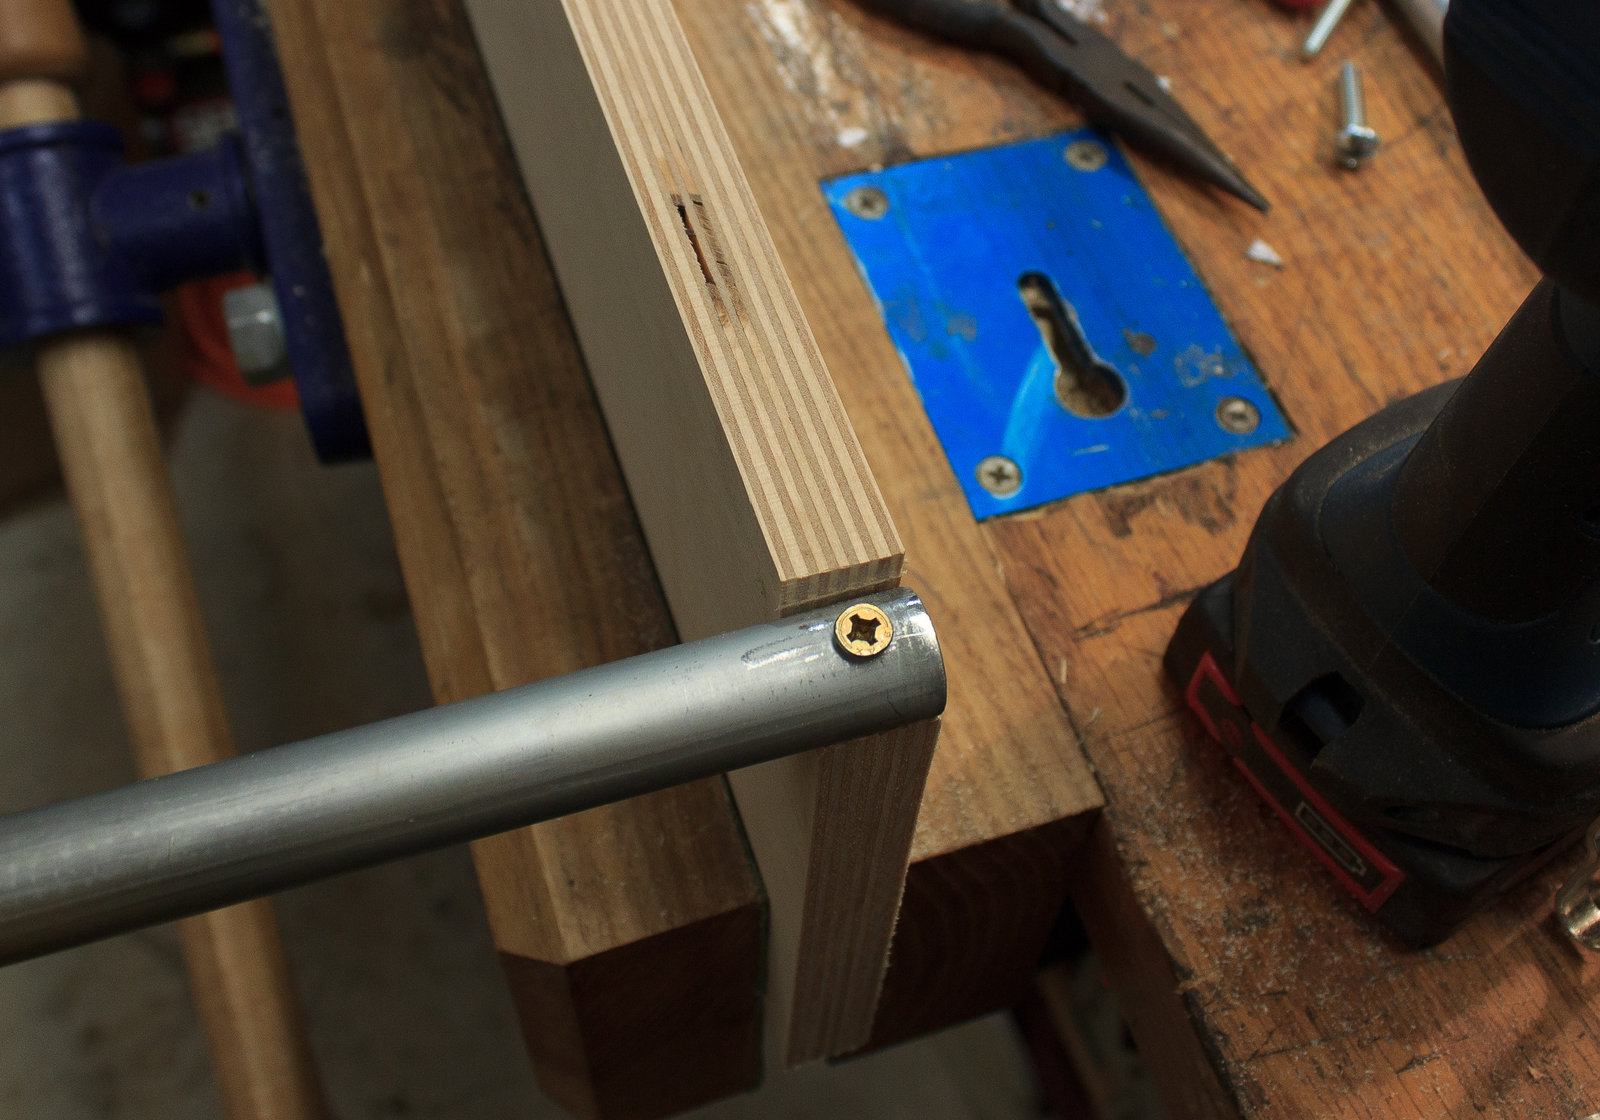
Now insert your support posts. Hehehe.
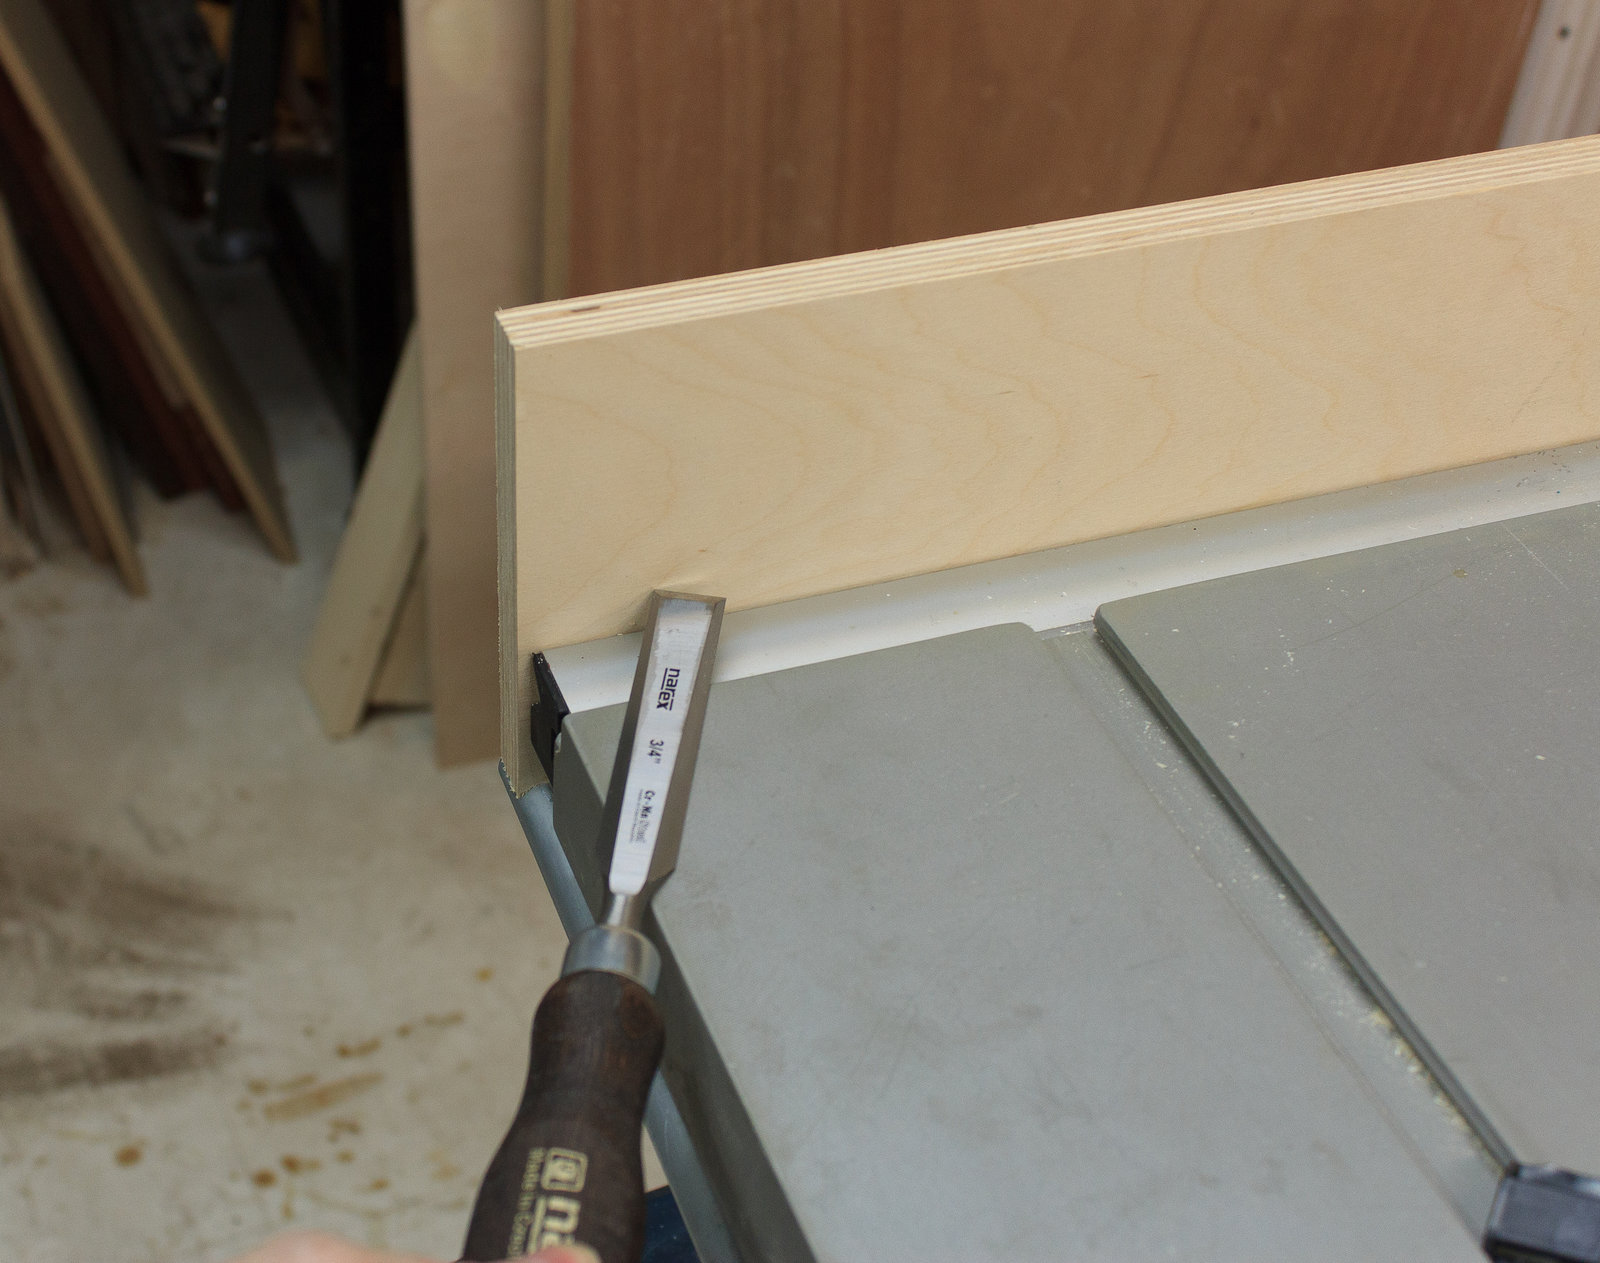
I simply marked the required cutline for the height using a chisel.
I would tell you how tall my piece is, but I don’t want anyone taking shortcuts. Where you drill the holes for the conduit will change everything. This is easy enough to do!
First cut the height with a normal 90°-bevel rip cut.
Then you need to cut a 45° nearly to the top, but not all the way. Sneak up on it. You want there to be a little flat on the top.
Successfully done, it will look like this.
That’s it. You’re done Sand the support and maybe toss on a coat of shellac.
The left side support
The left side support is quite similar. There are some key differences:
- Use the 15.75” conduit
- Make 0.75” risers out of whatever you have.
- Remember that the left side support plywood piece will not be the same size as the outfeed, because it’s offset by the spacers.
Take a look at my lazy spacers. They’re just offcuts of 0.75” plywood with a 0.25” hole drilled in the center.
Results
Notes
I know my saw is on the stand backwards. This conserves space since I need to walk around the left side of the saw in my shop. The right side extension wing goes over the sand’s extended foot. I personally recommend this instead of the ascribed assembly method.
I have updated the bolts since taking the photos 1” hex-head are much better for this project.
The total cost for this project for me was $8.88 after tax. I didn’t need to buy the plywood, nylon lock washers, UHMW tape or conduit. At most this will cost you about $15 if you’re thrifty about the plywood.
Good luck!
