Cutting threaded rod is a pain. Even with the correct equipment it can be error prone.
If you have a saw, a drill and a short piece of wood then you can quickly make a jig that allows you to make repeatable cuts on threaded rod or bolts.
Read more to see the whole process.
Contents
Necessary Equipment
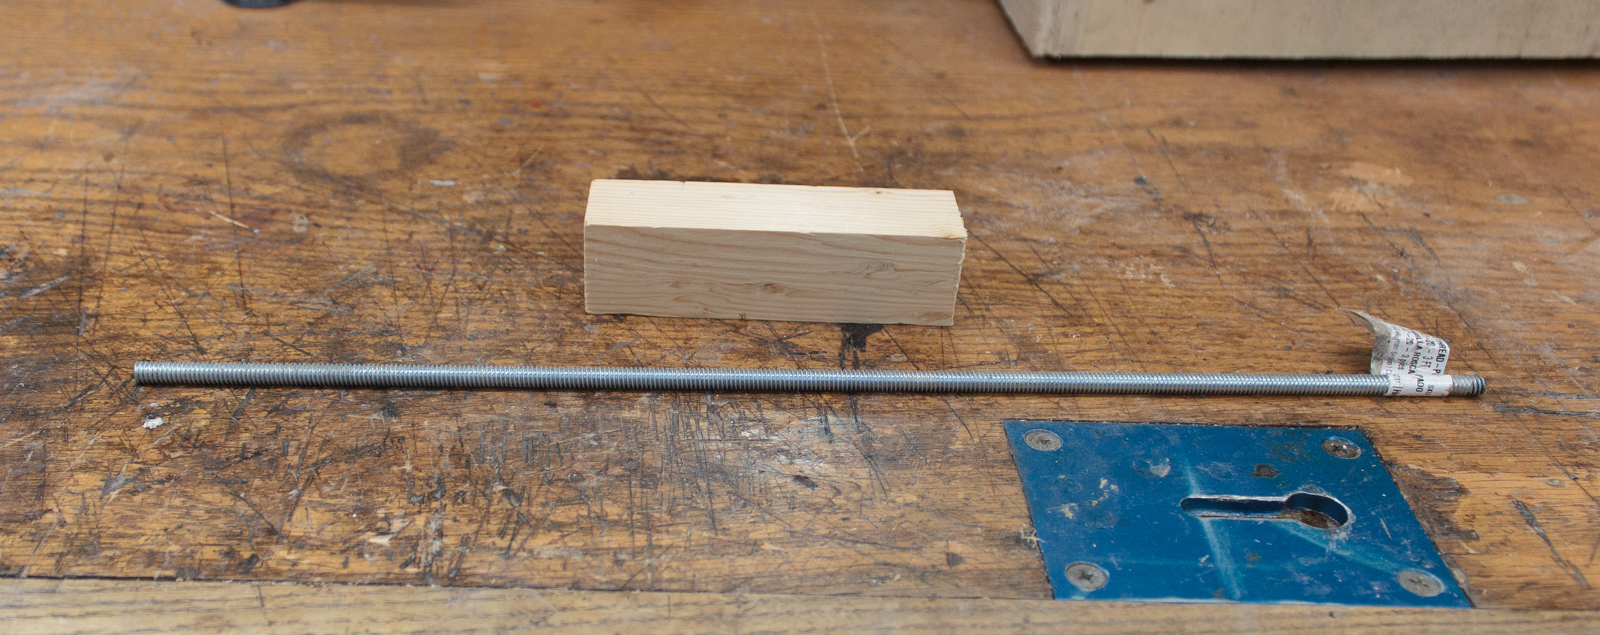
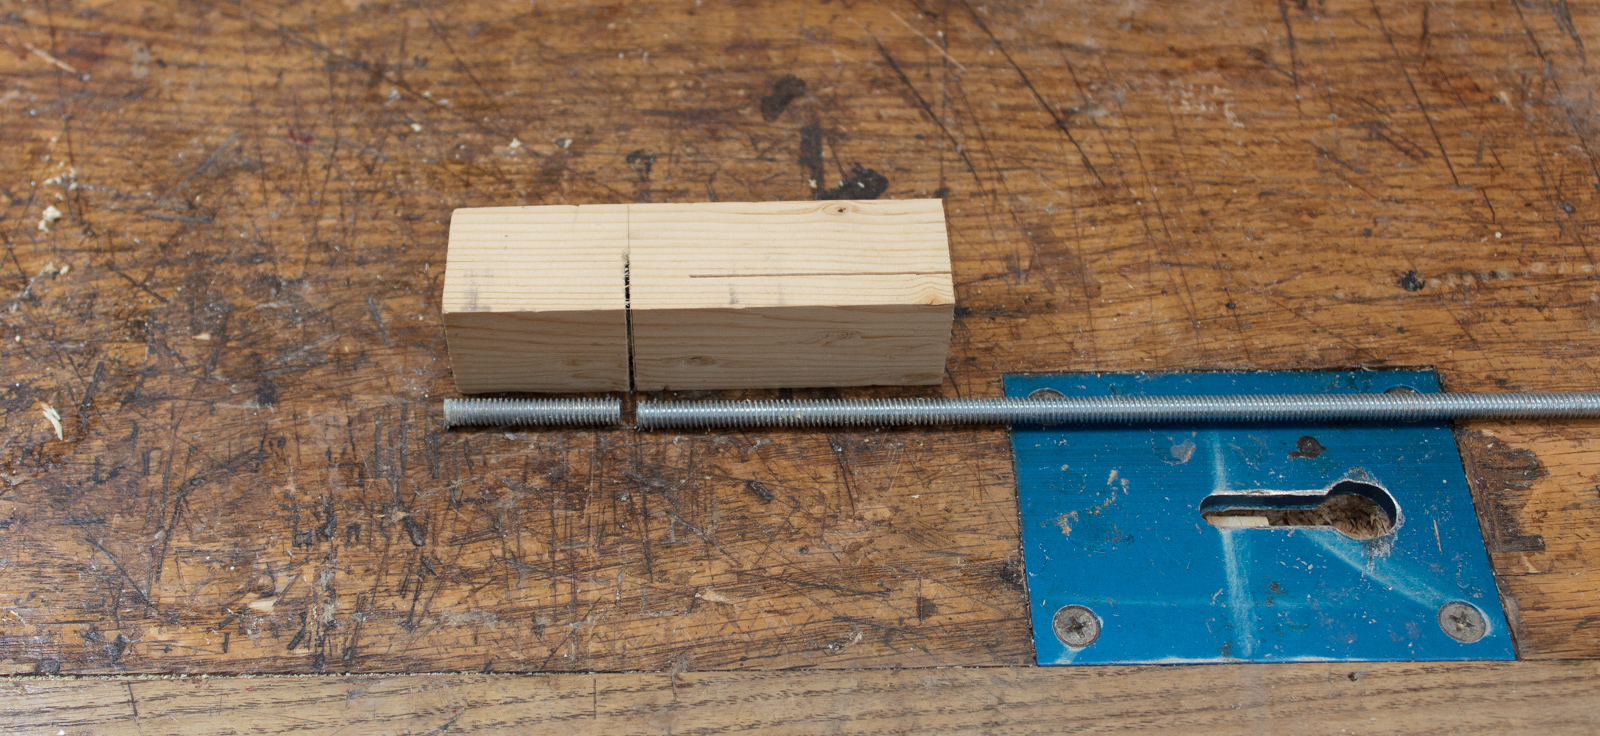
All you need is a piece of wood about that’s thicker than your threaded rod, the threaded rod, a saw and a drill bit.
The drill bit needs to be at least as long as the resulting threaded rod. Your piece of wood can’t be any longer than twice the working length of the drill bit.
Marking #1
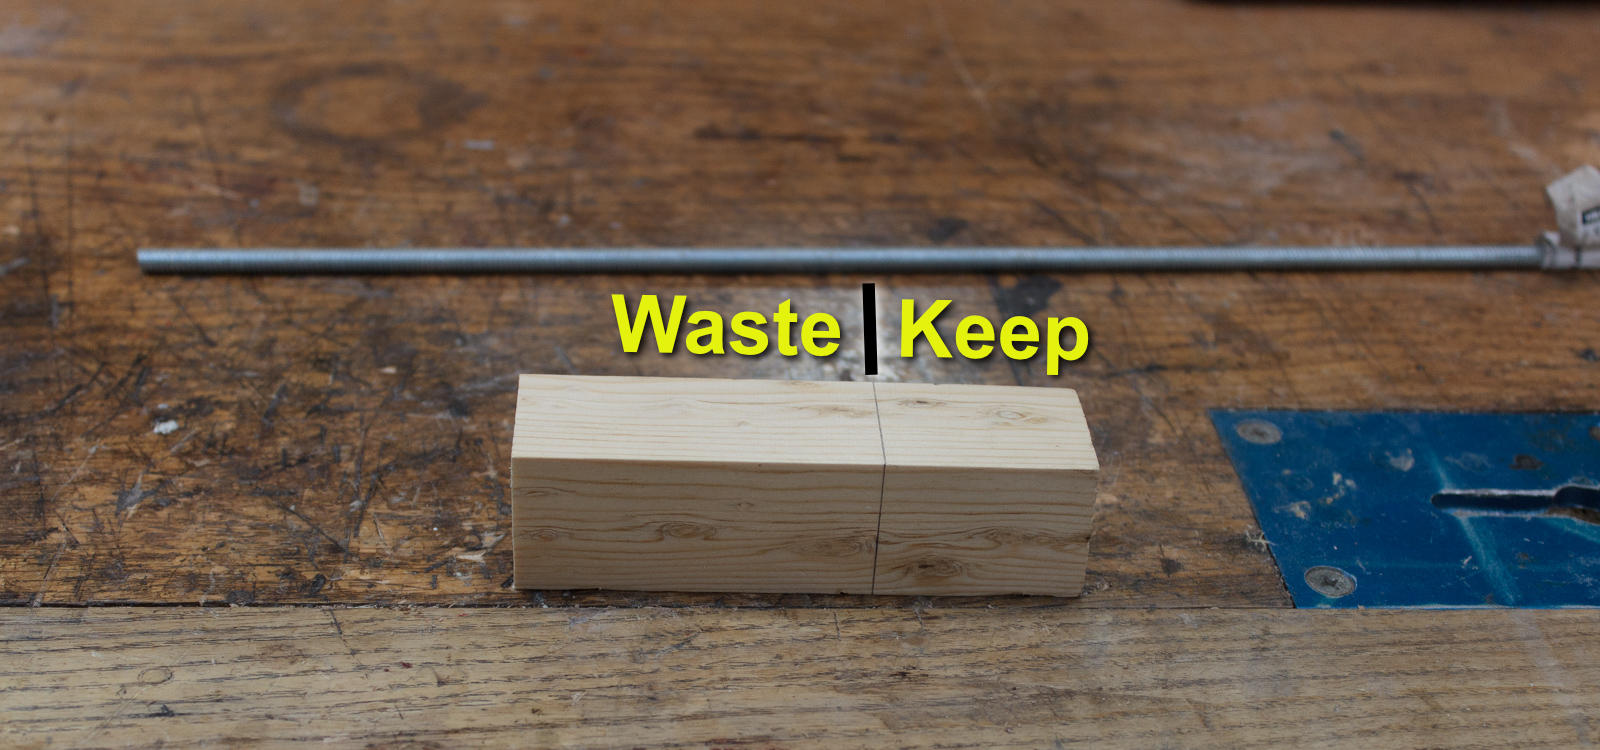
Mark the length of the resulting cut rod on the wood. The short 1.5” (4cm) section will house the resulting cut-off rod.
Marking #2
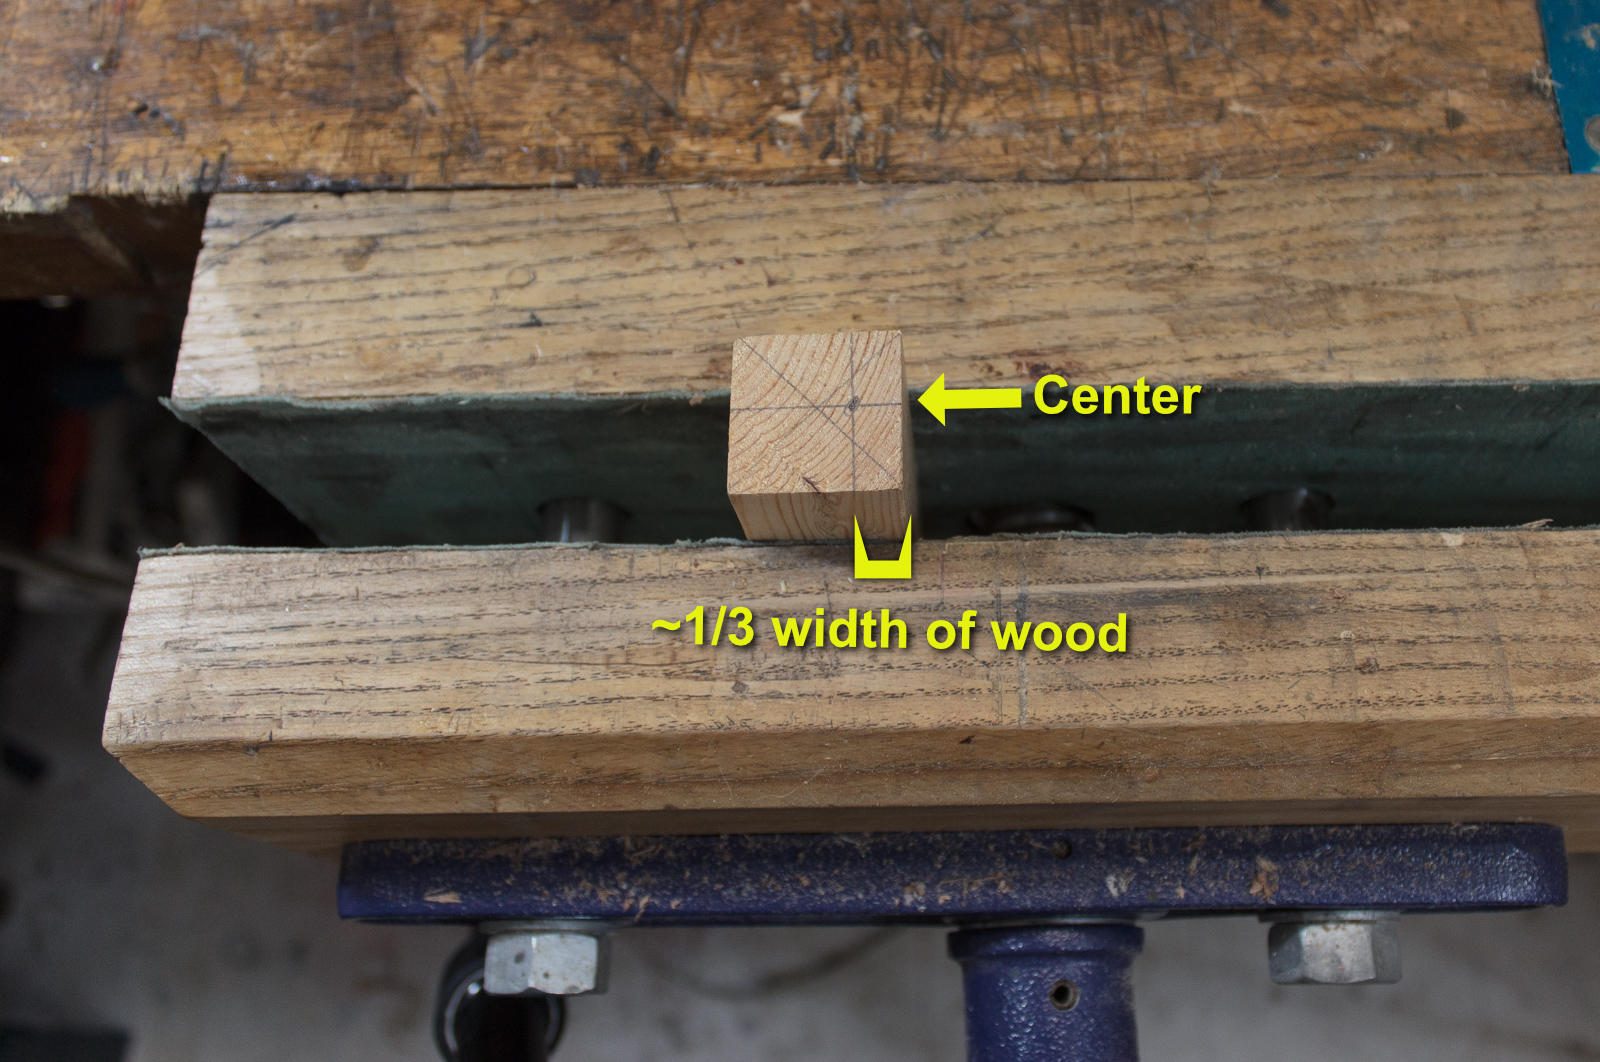
Now we need to drill a hole through the wood piece. The hole needs to be centered in one axis, and about 1/3 of the width from the other edge.
It’s likely that you will have to drill the hole from both sides. Just mark the same thing on both sides and do that.
Drill
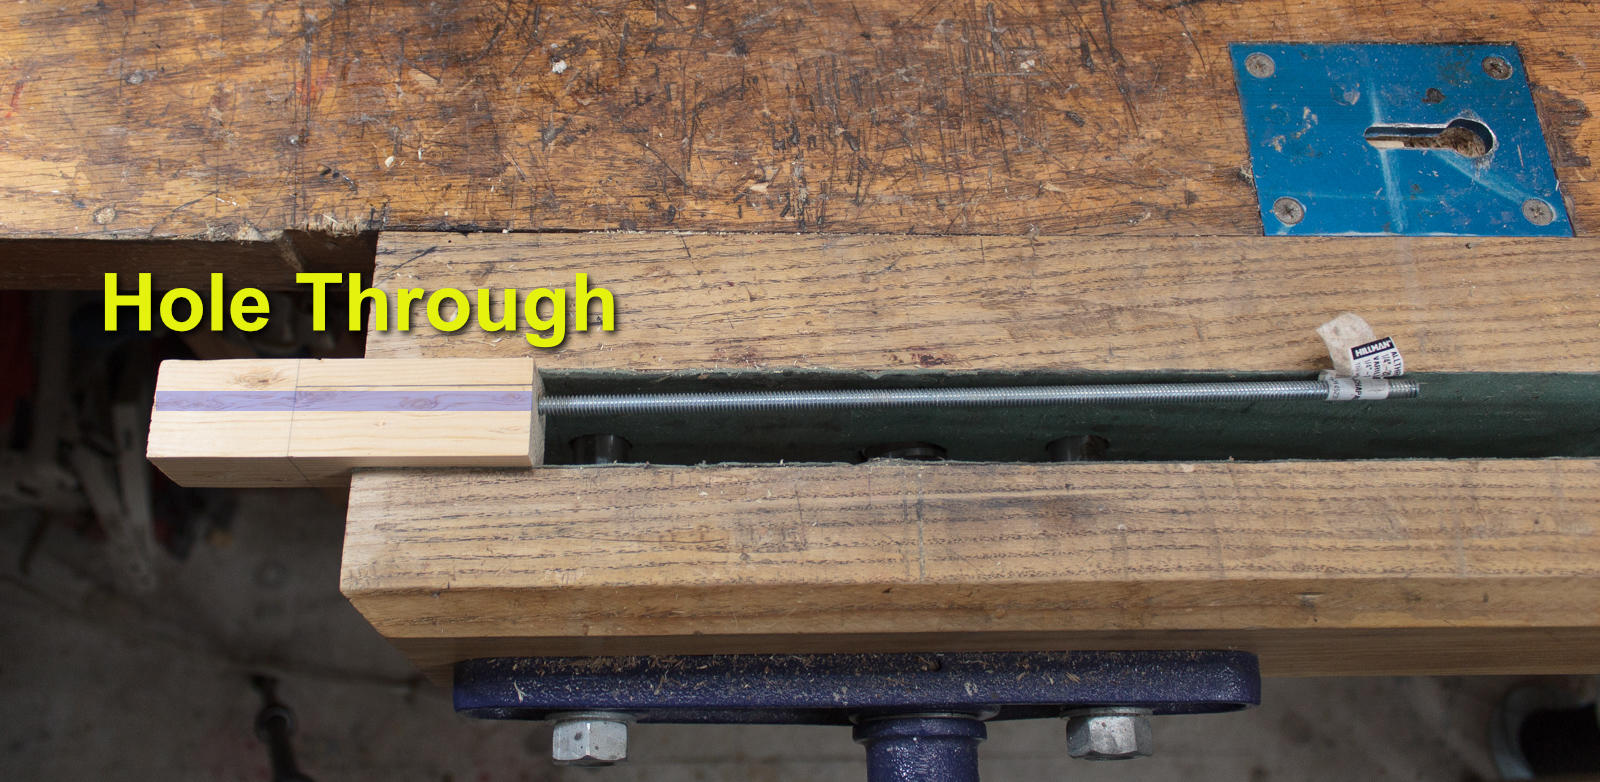
When the hole is drilled, this is your resulting situation.
Draw a line along the waste side that is centered along the hole you drilled. Back in the second marking stage, you should have already made marks on the ends at 1/3 the width of the wood. Connect those 1/3 width marks.
Now we need to cut 2 more slots and we’re done!
Cutting the wood
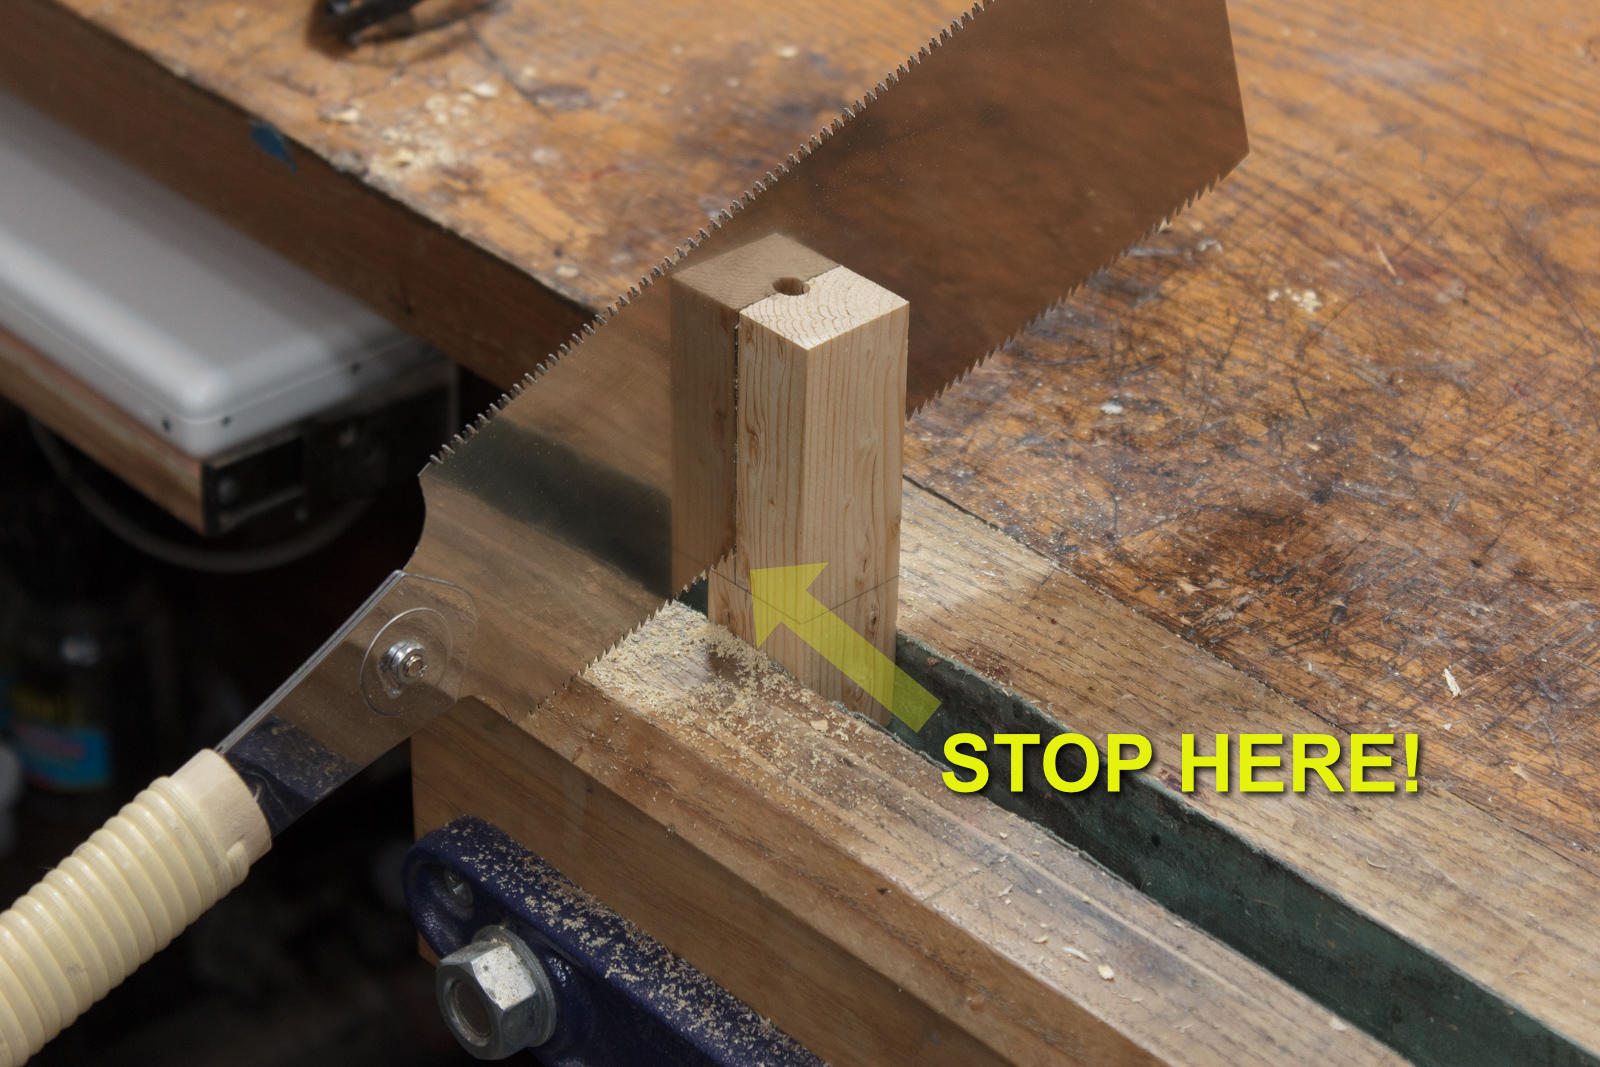
Cut along the line you just drew but do not intersect the first line that you drew. Leave about 1cm or 1/2” of wood. Look at the image to see where I stopped.
I’m using a japanese ryoba to cut my line, but you can simply use the tool that you’ll cut the rod with. Anything that cuts a thin line will work.
This is the final stage in creating the jig. Reference the conclusion or using it section to see how it should look if you’re unsure what you’re making.
Using it
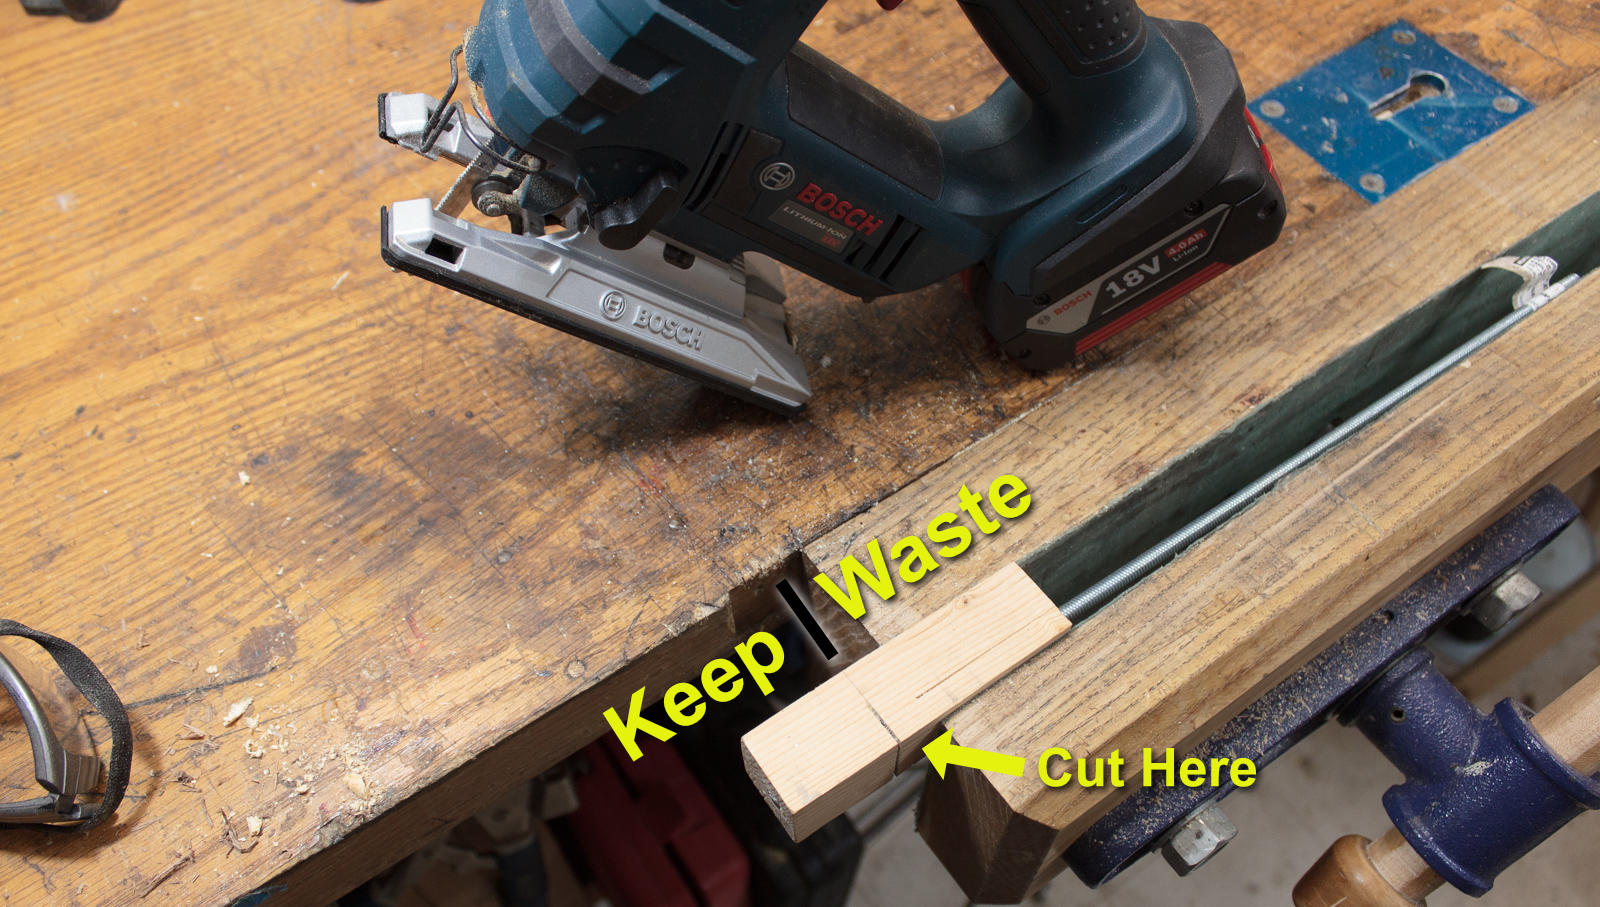
Simply place your rod inside the hole so that nothing pokes out the ‘keep’ side.
Use some sort of reciprocating saw (like a jigsaw), or a hacksaw with a metal-cutting blade to cut down your line until you feel that you are through the rod. That’s it. Your keeper will come out of the keeper side with almost no burr and ready to use.
You may want to quickly sand the resulting cut on the keeper, but usually the result is immediately useable. The only thing to worry about is that the thread-start might be fragile. Rub the thread start on some sandpaper to taper it off, and you’ll be less likely to cross thread when using it.
Un-clamp the vice, slide your rod back over and cut your next rod.
Conclusion
This jig takes about 2 minutes to make and allows you to accurately cut threaded rod and bolts with minimal fuss. I don’t think I’ve seen anyone use this method before, so hopefully my idea helps you out!
(I’m sure someone’s independently come up with this on their own, but I haven’t seen it… congrats if you thought of it too!)
Support Me!
This post took 45 minutes to research, photograph, write and edit. Probably because this jig is so easy and simple. If you appreciate the information presented then please consider joining patreon or donating!
