Ok, I have your attention. It’s actually a script, but it’s free and it’s awesome.
The script is called Radial Menu.
BUT WAIT This is not just another way to mouse around menus. I aim on showing you how this will allow you to utilize key commands in a more structured and easy to remember method.
On with the show…
Contents
Method of Loci
The Method of Loci is integral to this post. Often people ask me how I can fluently utilize many audio softwares, and recollect all of the shortcuts and where options are located.
This is how I do it, and by the end of this post hopefully you will be able to utilize this method as well.
Let me explain the concept though…
Rather than trying to remember things ‘by rote’, or simply remember them as is, I create an imaginary space in my brain. I then imagine placing important information about something in physical locations in that imaginary space.
Then when I wish to recall a specific shortcut I do not need to simply think of what the shortcut is, I think of “where” the shortcut is. I can walk over to my “automation” table in my imaginary space and see the shortcut for thinning automation on a mannequin’s head with no hair. I have a toy train track in the corner of the room, and along the path the train moves there are various objects like trees, ponds, animals, a couple on a bench etc… and these all represent things that I can do in the software. For some software it’s not just a room but an entire house, and it’s often a memorable location from my childhood or a real location that I found particularly memorable. Sometimes I reuse these locations, and sometimes I don’t use imaginary locations at all, but instead visual things.
You may be skeptical and think that you do not have the necessary imagination to utilize this method (which isn’t true if you’re capable of reading this post), but using Radial Menu this is a nonissue.
This will become clearer as this post progresses. I just want to introduce you to the concept first so that maybe you can begin to formulate an idea of how I use the Method of Loci with Radial Menu.
Video
As usual, there’s a video companion to this article. It covers most of what’s here (not everything!). If you prefer videos, then have at it.
What is Radial Menu
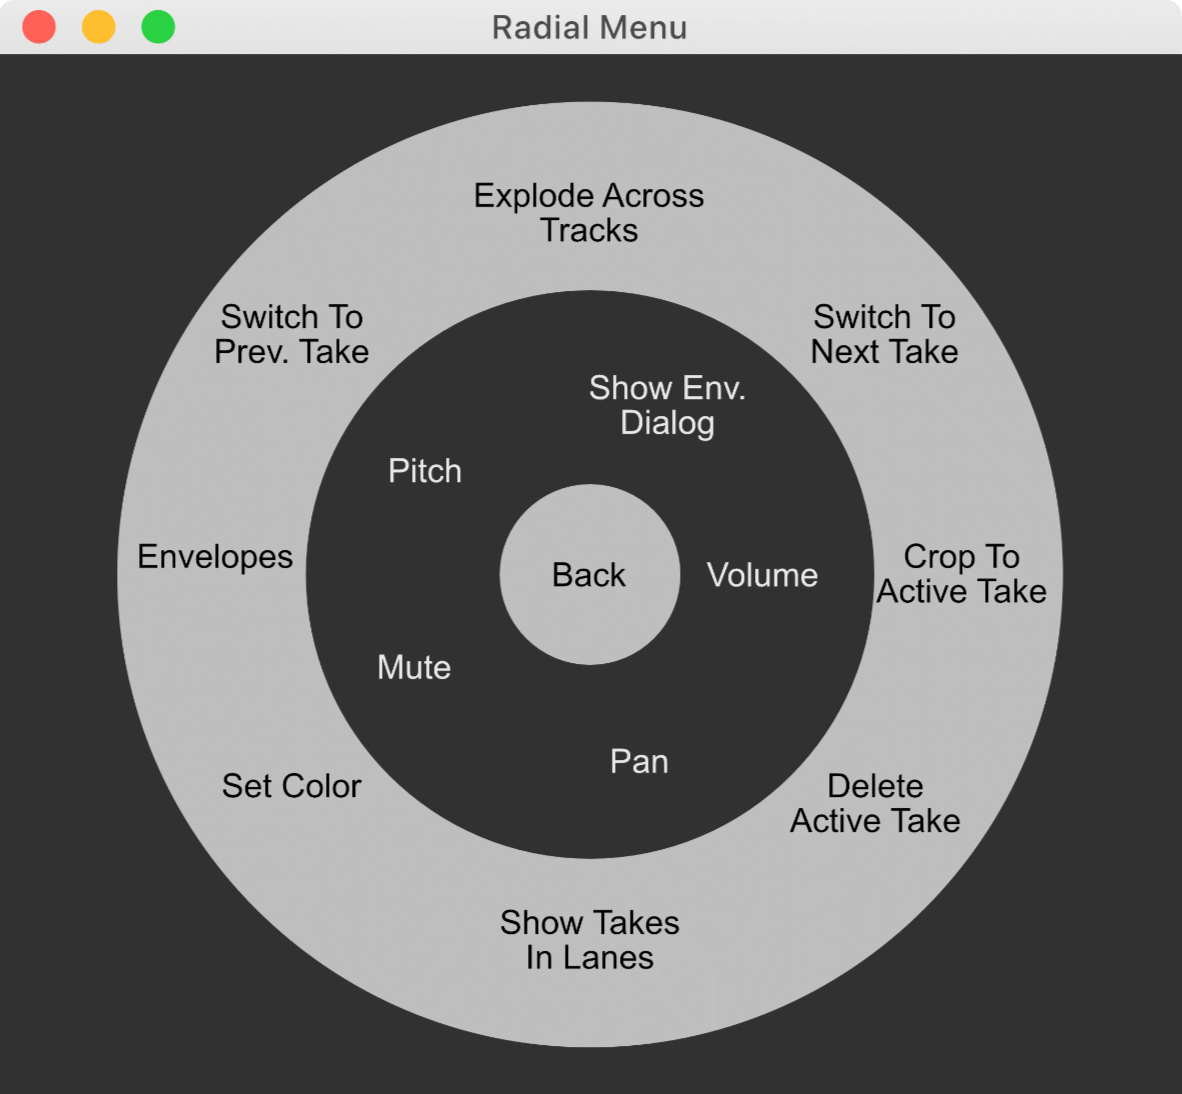
Radial Menu is what it says on the tin, is a menu system presents menu items in a circle.
The circular pattern allows you to browse the menu by moving your mouse in a significantly smaller area than traditional menus. If you want to dive a deep menu (which I will show you isn’t necessary later), then your mouse is kept within a small box area, rather than needing to traverse nearly half your screen.
Where do you get it?
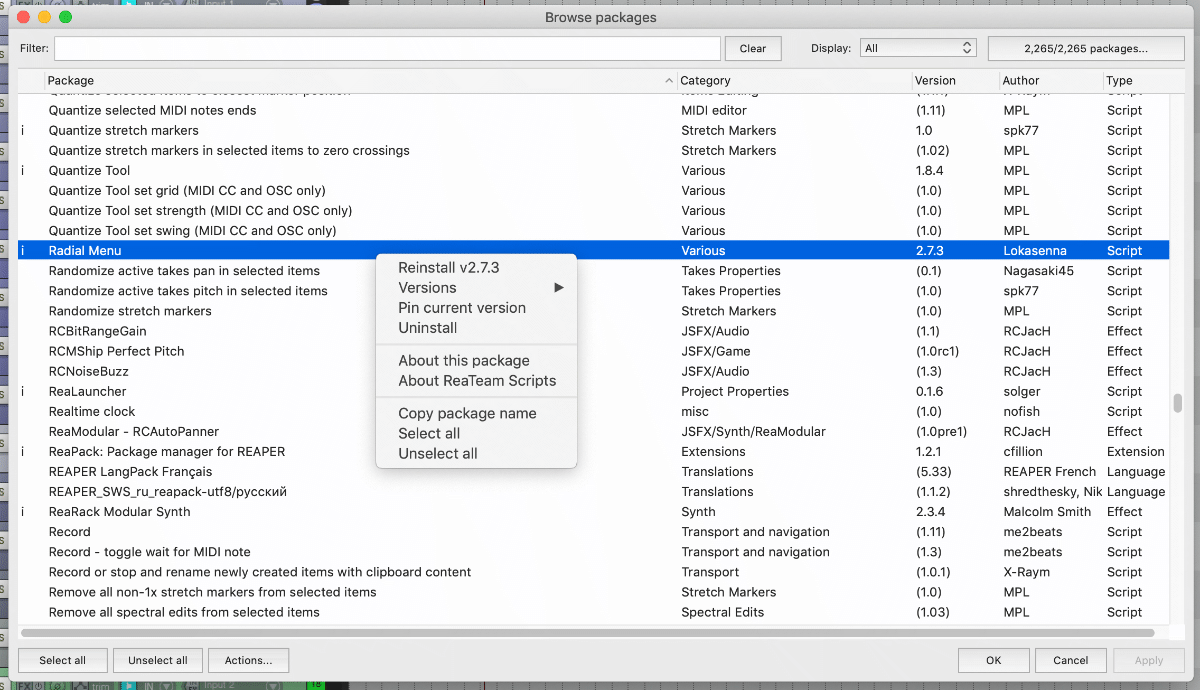
- Head to ReaPack.com and install ReaPack if you don’t have it.
- Go to your “Extensions” menu->ReaPack->Browse Packages
- Search for “Radial”
- Right click “Radial Menu” and select “Install”
- CLICK APPLY - you must do this for it to install.
Head over to the thread on the REAPER forums for more info about the script.
What can it do
Radial Menu is incredibly versatile, so I am going to walk you through everything a little thing that you can do with it. I will not be presenting this as a manual since I feel that the operation is straightforward, and there is plenty of information elsewhere on how to operate the script.
Once you realize what it is capable of then you will probably immediately focus on the things that you are most interested in and search for resources from there.
I strongly suggest opening the actions window (hotkey: shift-/ or ?) and assigning a shortcut to “Script: Lokasenna_Radial Menu.lua”.
Since you will probably utilize the mouse for this to start with, I would suggest using the “A” key. This is an easy key to press with your left hand and will allow you to keep your right hand on the mouse.
If you are left-handed then I would suggest using the “L” key.
If you want to be as cool as me… well, you’ll see later. Keep reading!
Any Action
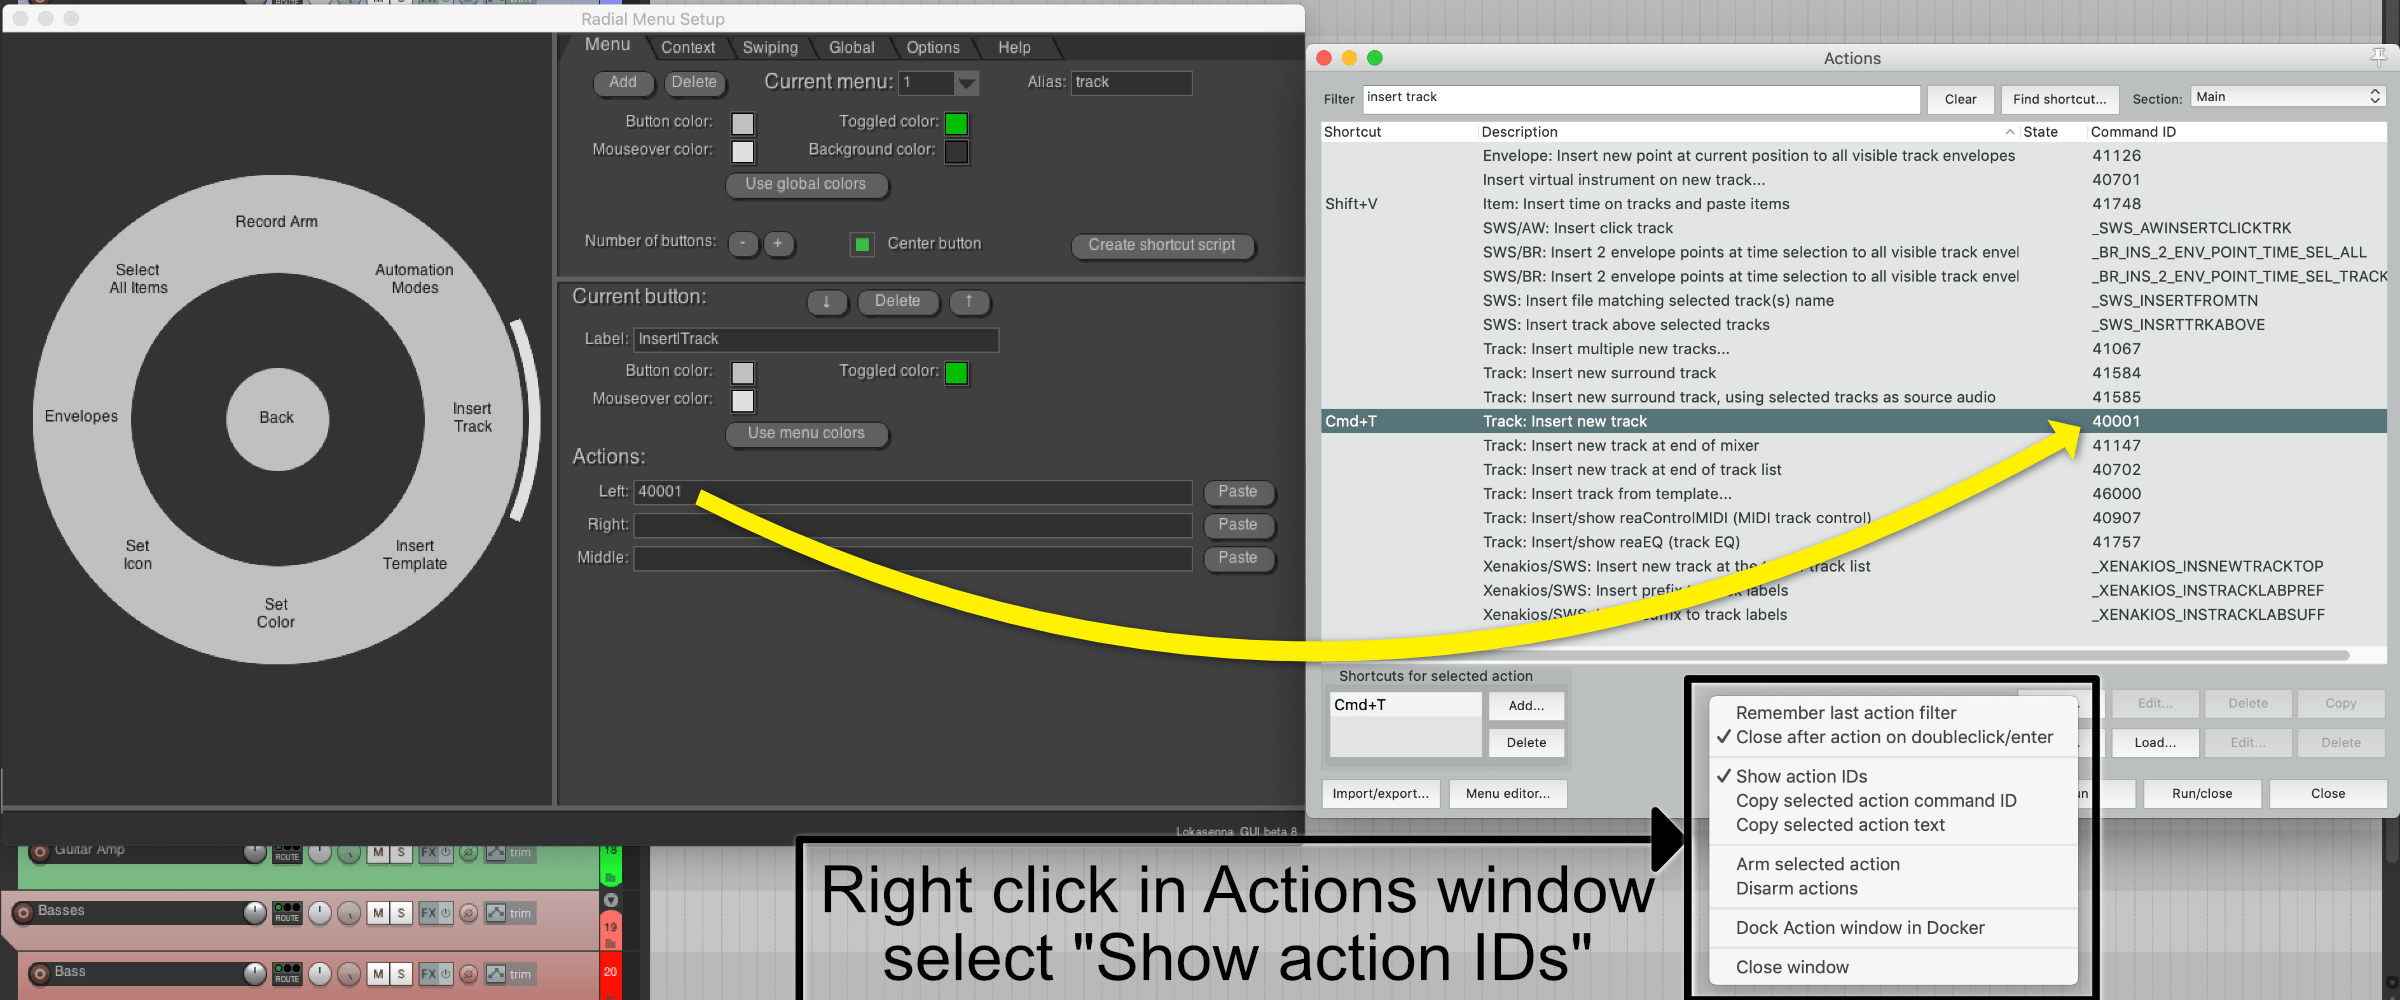
Any action available in reaper can be assigned to a Radial Menu button. (Tip: to see Command IDs, right click in the action window (hotkey: shift-/ or ? and select “Show action IDs)).
So anything you can do in reaper with an action can be done using Radial Menu.
This also means that 99% of the default menu items in REAPER can be set up to work in Radial Menu.
(Almost) Any Look
I’ll be honest, I don’t like the default setup in Radial Menu. Lokasenna did make some changes so it displays nicer on macOS, but there are still some things that I prefer to change.
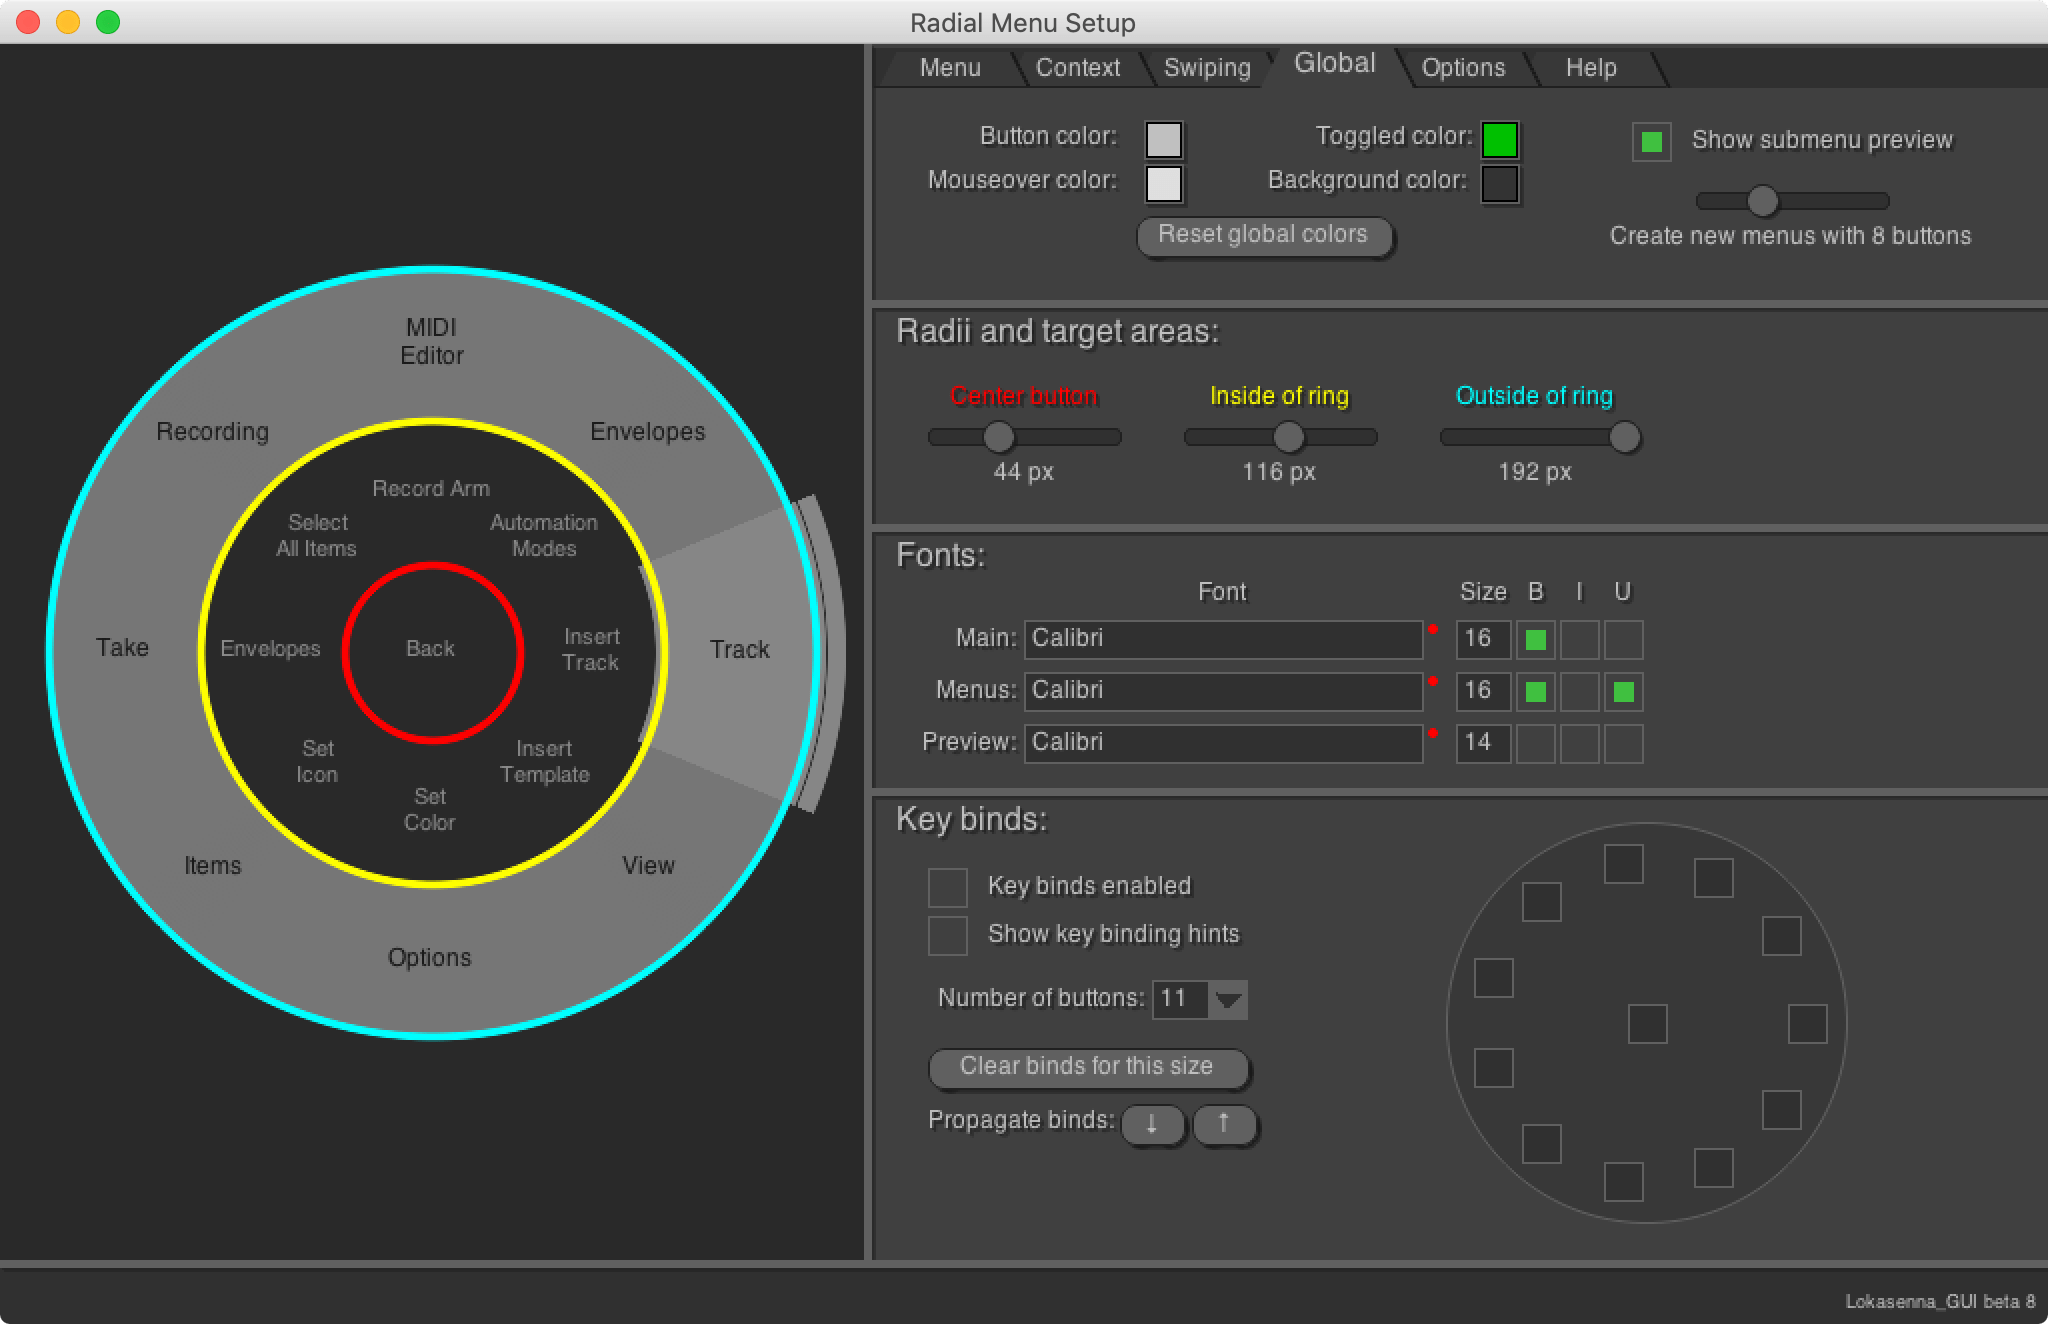
Luckily you can change a wide variety of aspects of how the Radial Menu appears.
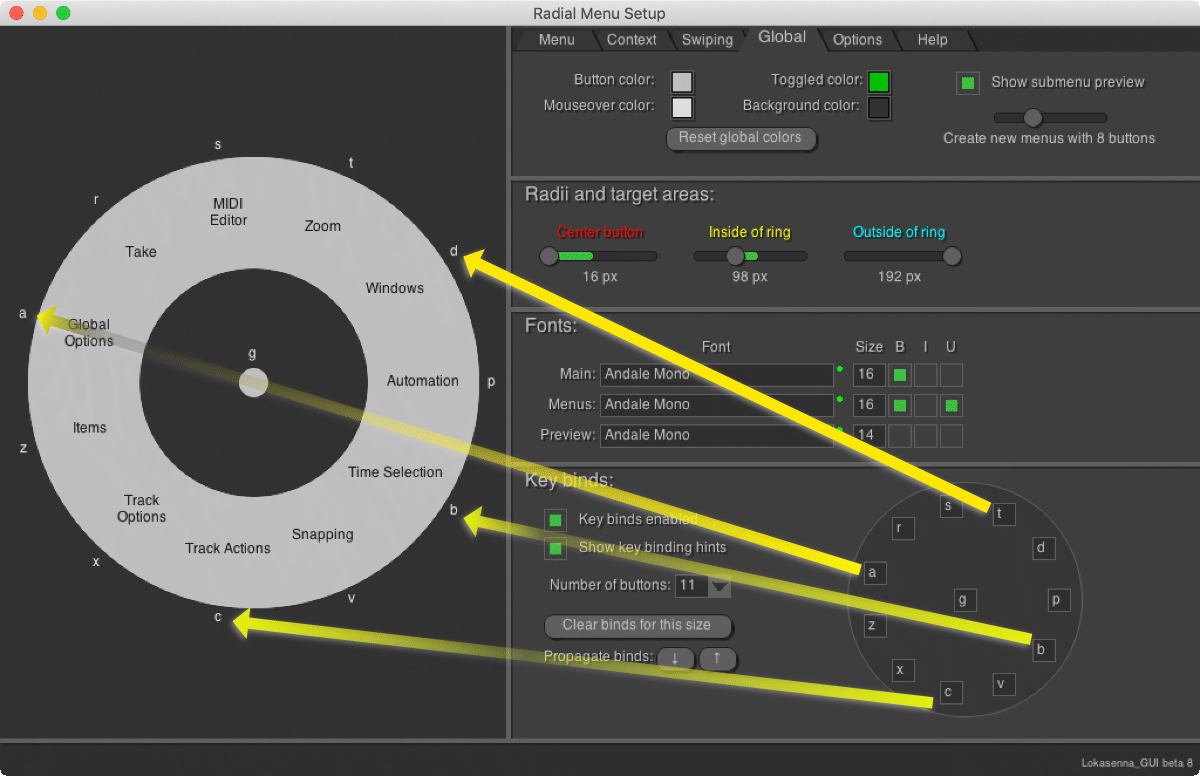
- Outer ring size
- Inner ring size
- Center button
- Multiple font selections
The Radial Menu is a fairly simple beast, so there is not much to change. The things that you may want to change; you can change.
Work how you want
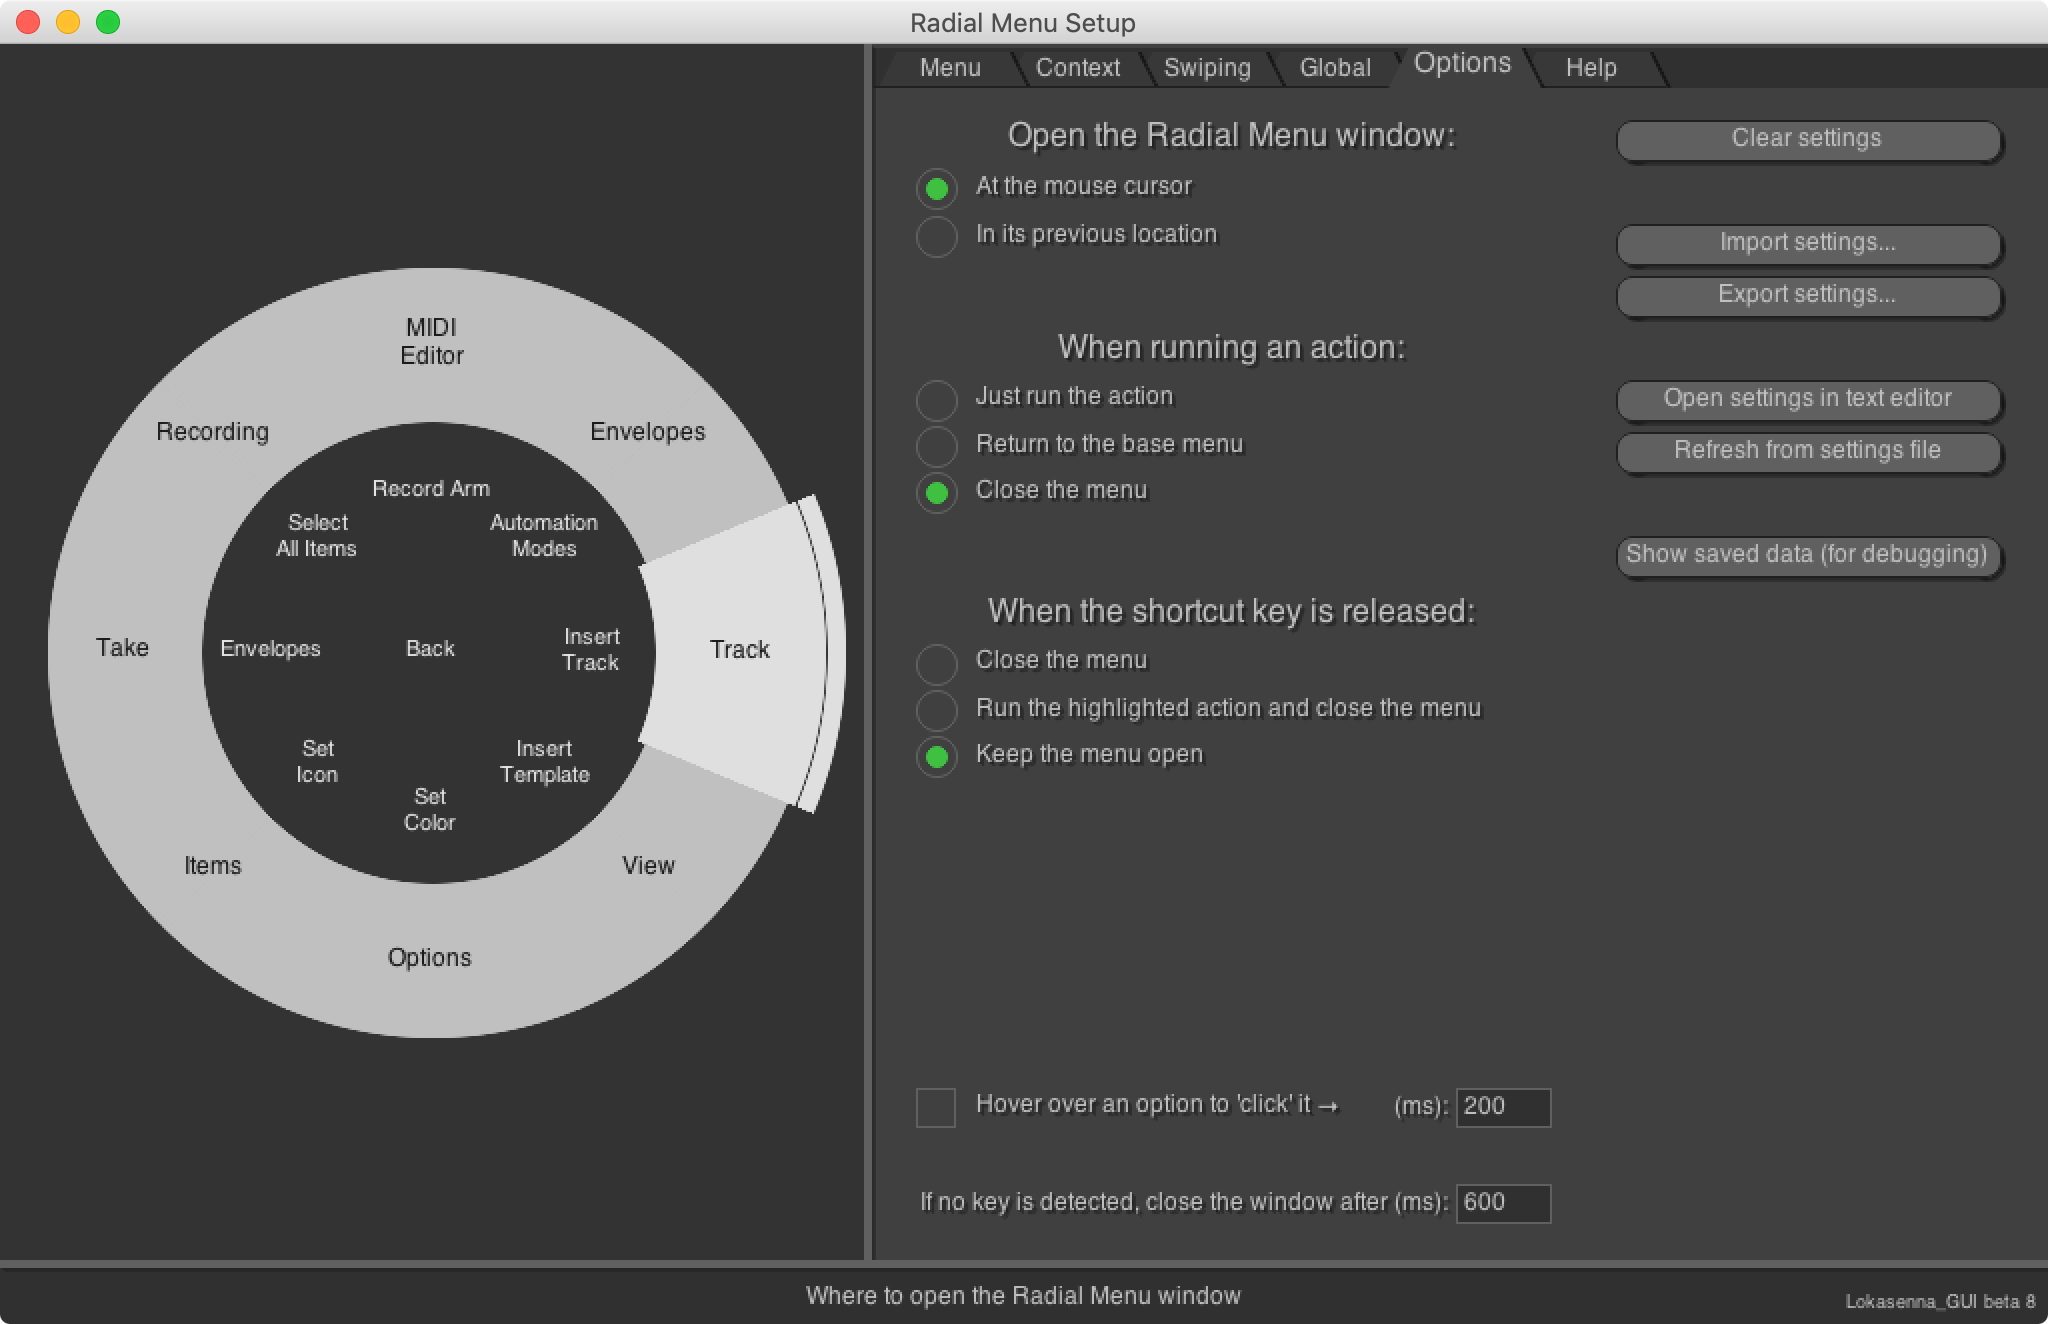
While be focusing on showing you my preferred workflow, there are a number of possible workflows with Radial Menu.
The image above shows some of the options that you can select for choosing how Radial Menu operates. Some notable things are:
- Hover to select an item - By default the buttons are selected by clicking. You can set it so that simply hovering over a menu or action will select it.
- When running an action: Return to base menu - This may not seem like a major thing, but it will allow you to do some quick powerful multitiered actions in REAPER.
IMPORTANT - READ ME
Here lies one of the most significant things about Radial Menu’s ability to speed up your workflow: Open the Radial Menu Window: At the mouse cursor.
We instinctually tend to look at our mouse cursor, and our mouse cursor tends to be where we want an action to occur. The practice of moving your cursor up to a menubar and then moving around through a hierarchy of menus (that may be poorly organized) takes you away from what you are working on.
You will see later that this is irrelevant to how I use A radial Menu, but if you are a heavy mouse user and you wish to utilize Radial Menu in your workflow than having a menu system that pops up at your cursor is a HUGE benefit.
IMPORTANT - READ ME
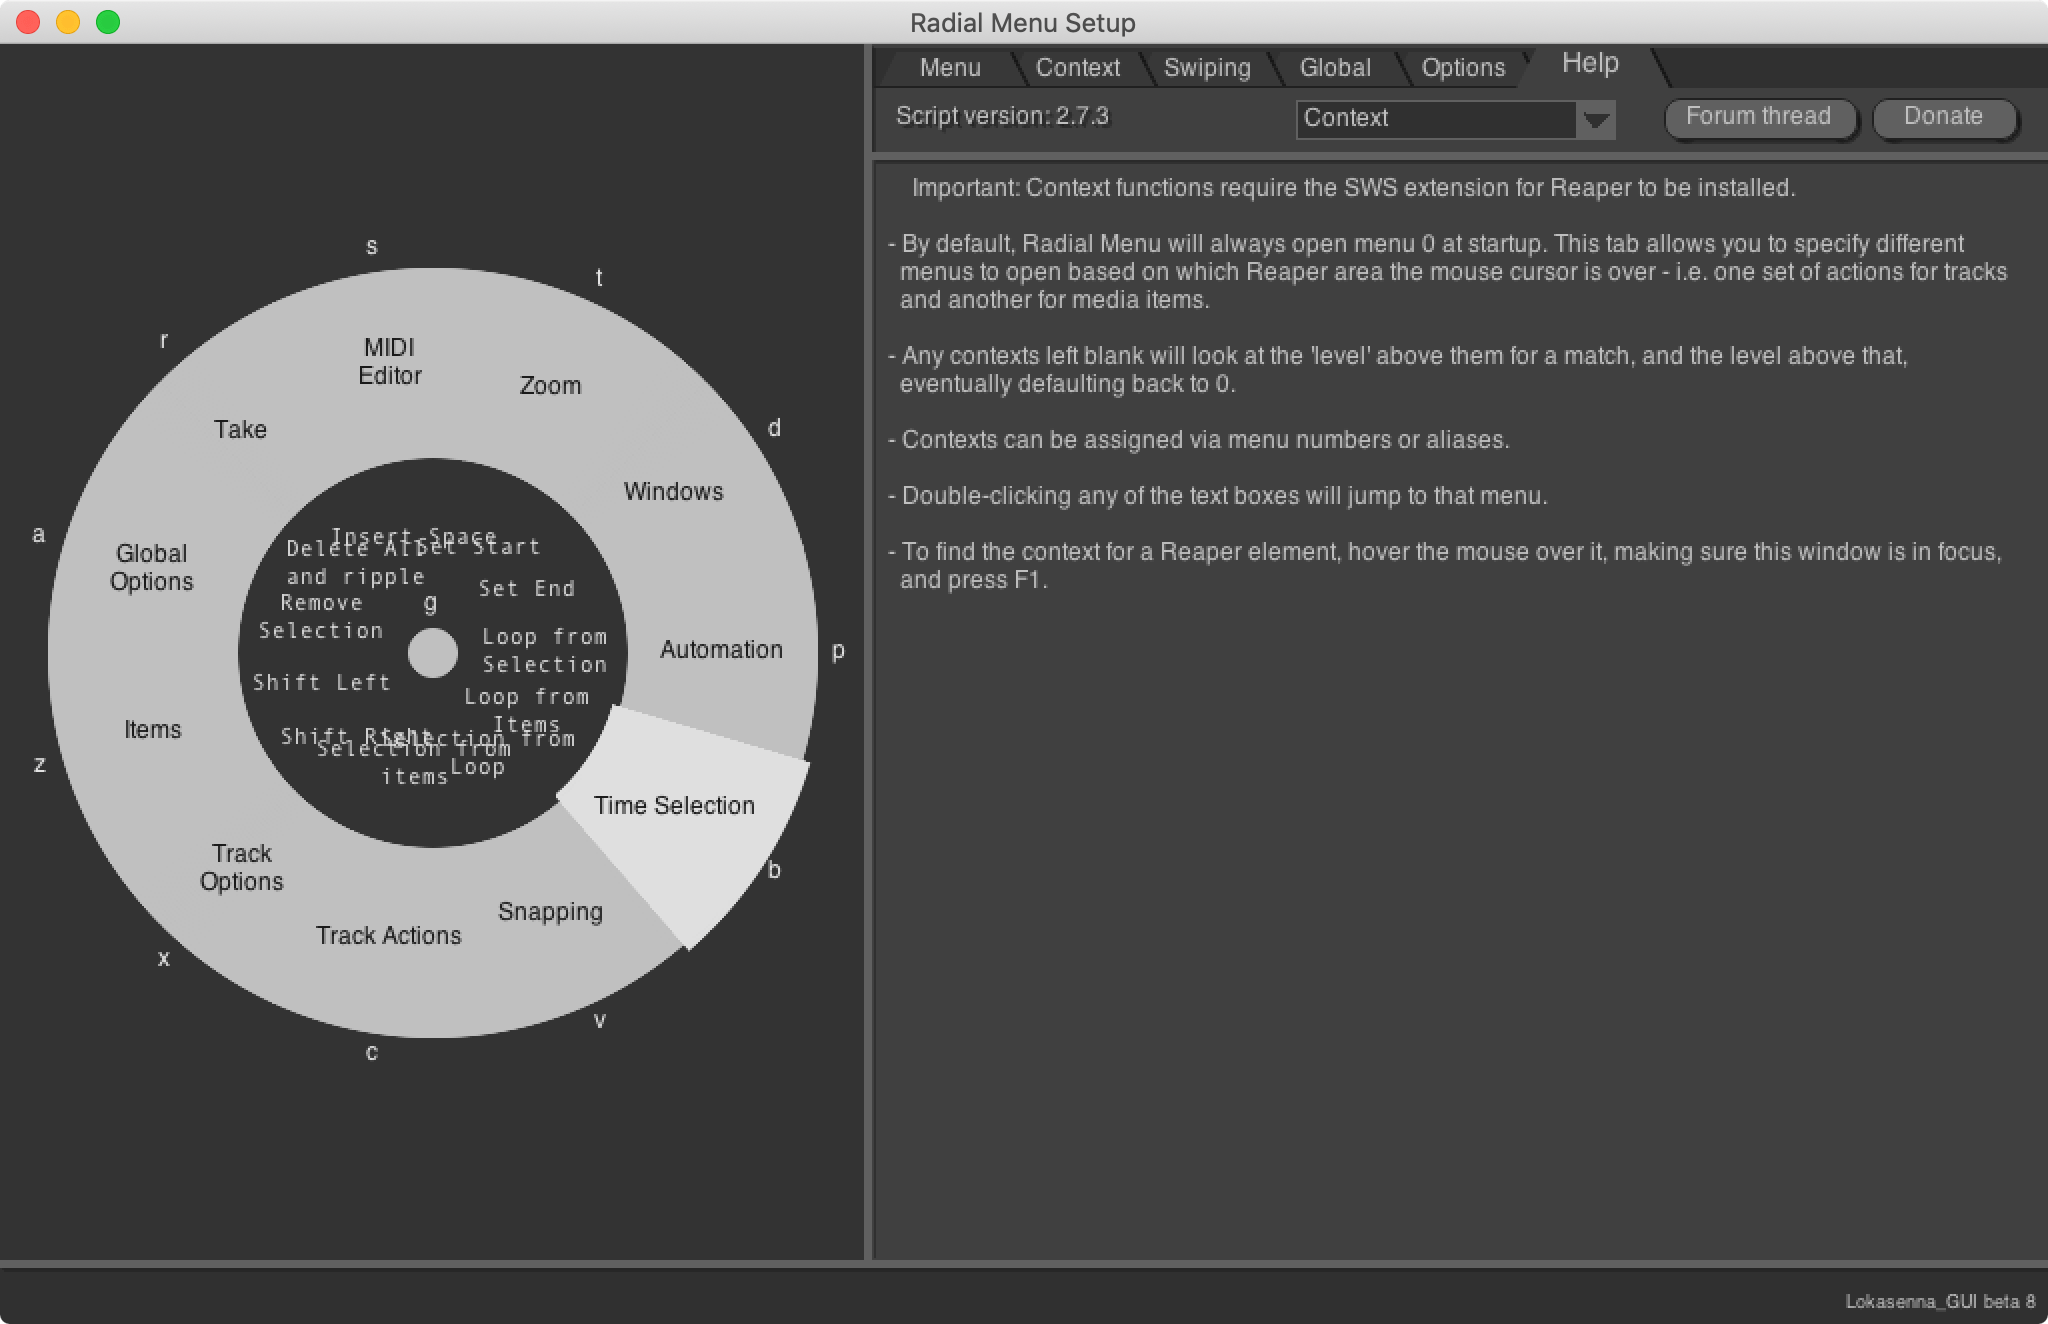
Contexts
Radial Menu allows you to have multiple layers of menus. For instance you may want to have a layer of menus for track options, for the MIDI editor, for automation items etc…
Since Radial Menu can be run via a shortcut at the position of the mouse, that means that Radial Menu knows where your mouses and thusly what you are looking to act on.
Radial Menu allows you to intercept this context and immediately jump to a specific submenu that you have defined. The context tab gives you a number of contexts, and when the mouse is over that context as you instantiate Radial Menu it will immediately jump to the menu defined by the context.
This may sound complex, but it is actually very simple and easy.
Watch the video above and you can see how I have set up Radial Menu to immediately jump to the Track menu, Envelope menu and Arrange menu when the mouse is over those specific things.
I do not use this feature, but I can see how it may be exceptionally useful. You will soon see how I personally make this feature unnecessary (and perhaps harmful!) in my usage.
Swipes
Some touchscreen devices have similar circular-based menu systems, and rather than making you “click” on an item, they allow you to swipe to select something.
Radial Menu also allows you to swipe to select a menu or optionally an action.
If you want to try this out then I suggest making sure that you have the following option selected:
- Open the Radial Menu window - At the mouse cursor
- Wnen running an action - Close the menu
- When the shortcut key is released - Keep the menu open
With these options selected you can press your shortcut to open Radial Menu, then give your mouse a controlled jerk to select a menu or action. No clicking necessary.
If you become quick with this then it looks like you are some sort of Mouse-Zorro with and innate capability for controlling software.
Help
Radial Menu has an excellent help section built right into it. Do not overlook this!
I said DO NOT OVERLOOK THIS!. You are learning a completely new menu system, and you will need to read some documentation to become familiar with it.
There is not a lot to learn, but there are some things that can be slightly tricky when you first start out.
Shortcuts
You can assign keyboard shortcuts to each of the slices in the circle. So rather than clicking the mouse or swiping you can simply press a keyboard shortcut to operate the Radial Menu.
This looks rather enticing doesn’t?
DOES IT NOT????
How do I use Radial Menu
Let me explain what’s happening here. Firstly the setup:
- A - This key opens Radial Menu for me. This always opens Radial Menu for me.
- T - Opens my “zoom” actions
- Z - Opens my “items” actions
- X - Opens my “item options” actions
Don’t worry about the specific keys yet. I will explain my reasons for using these seemingly weird keys.
What you need to recognize is that everything is logically ordered so that I can press a series of keys and always know exactly what the “type” of action I want is and “where” the action is in a physical location.
I don’t think about WHAT the keys are. I think about WHERE they are. That brings us to my selection of keys.
(Astute readers may notice a bug in the video above… Hopefully this is fixed before the post goes live. I will not be redoing the video.)
My keys

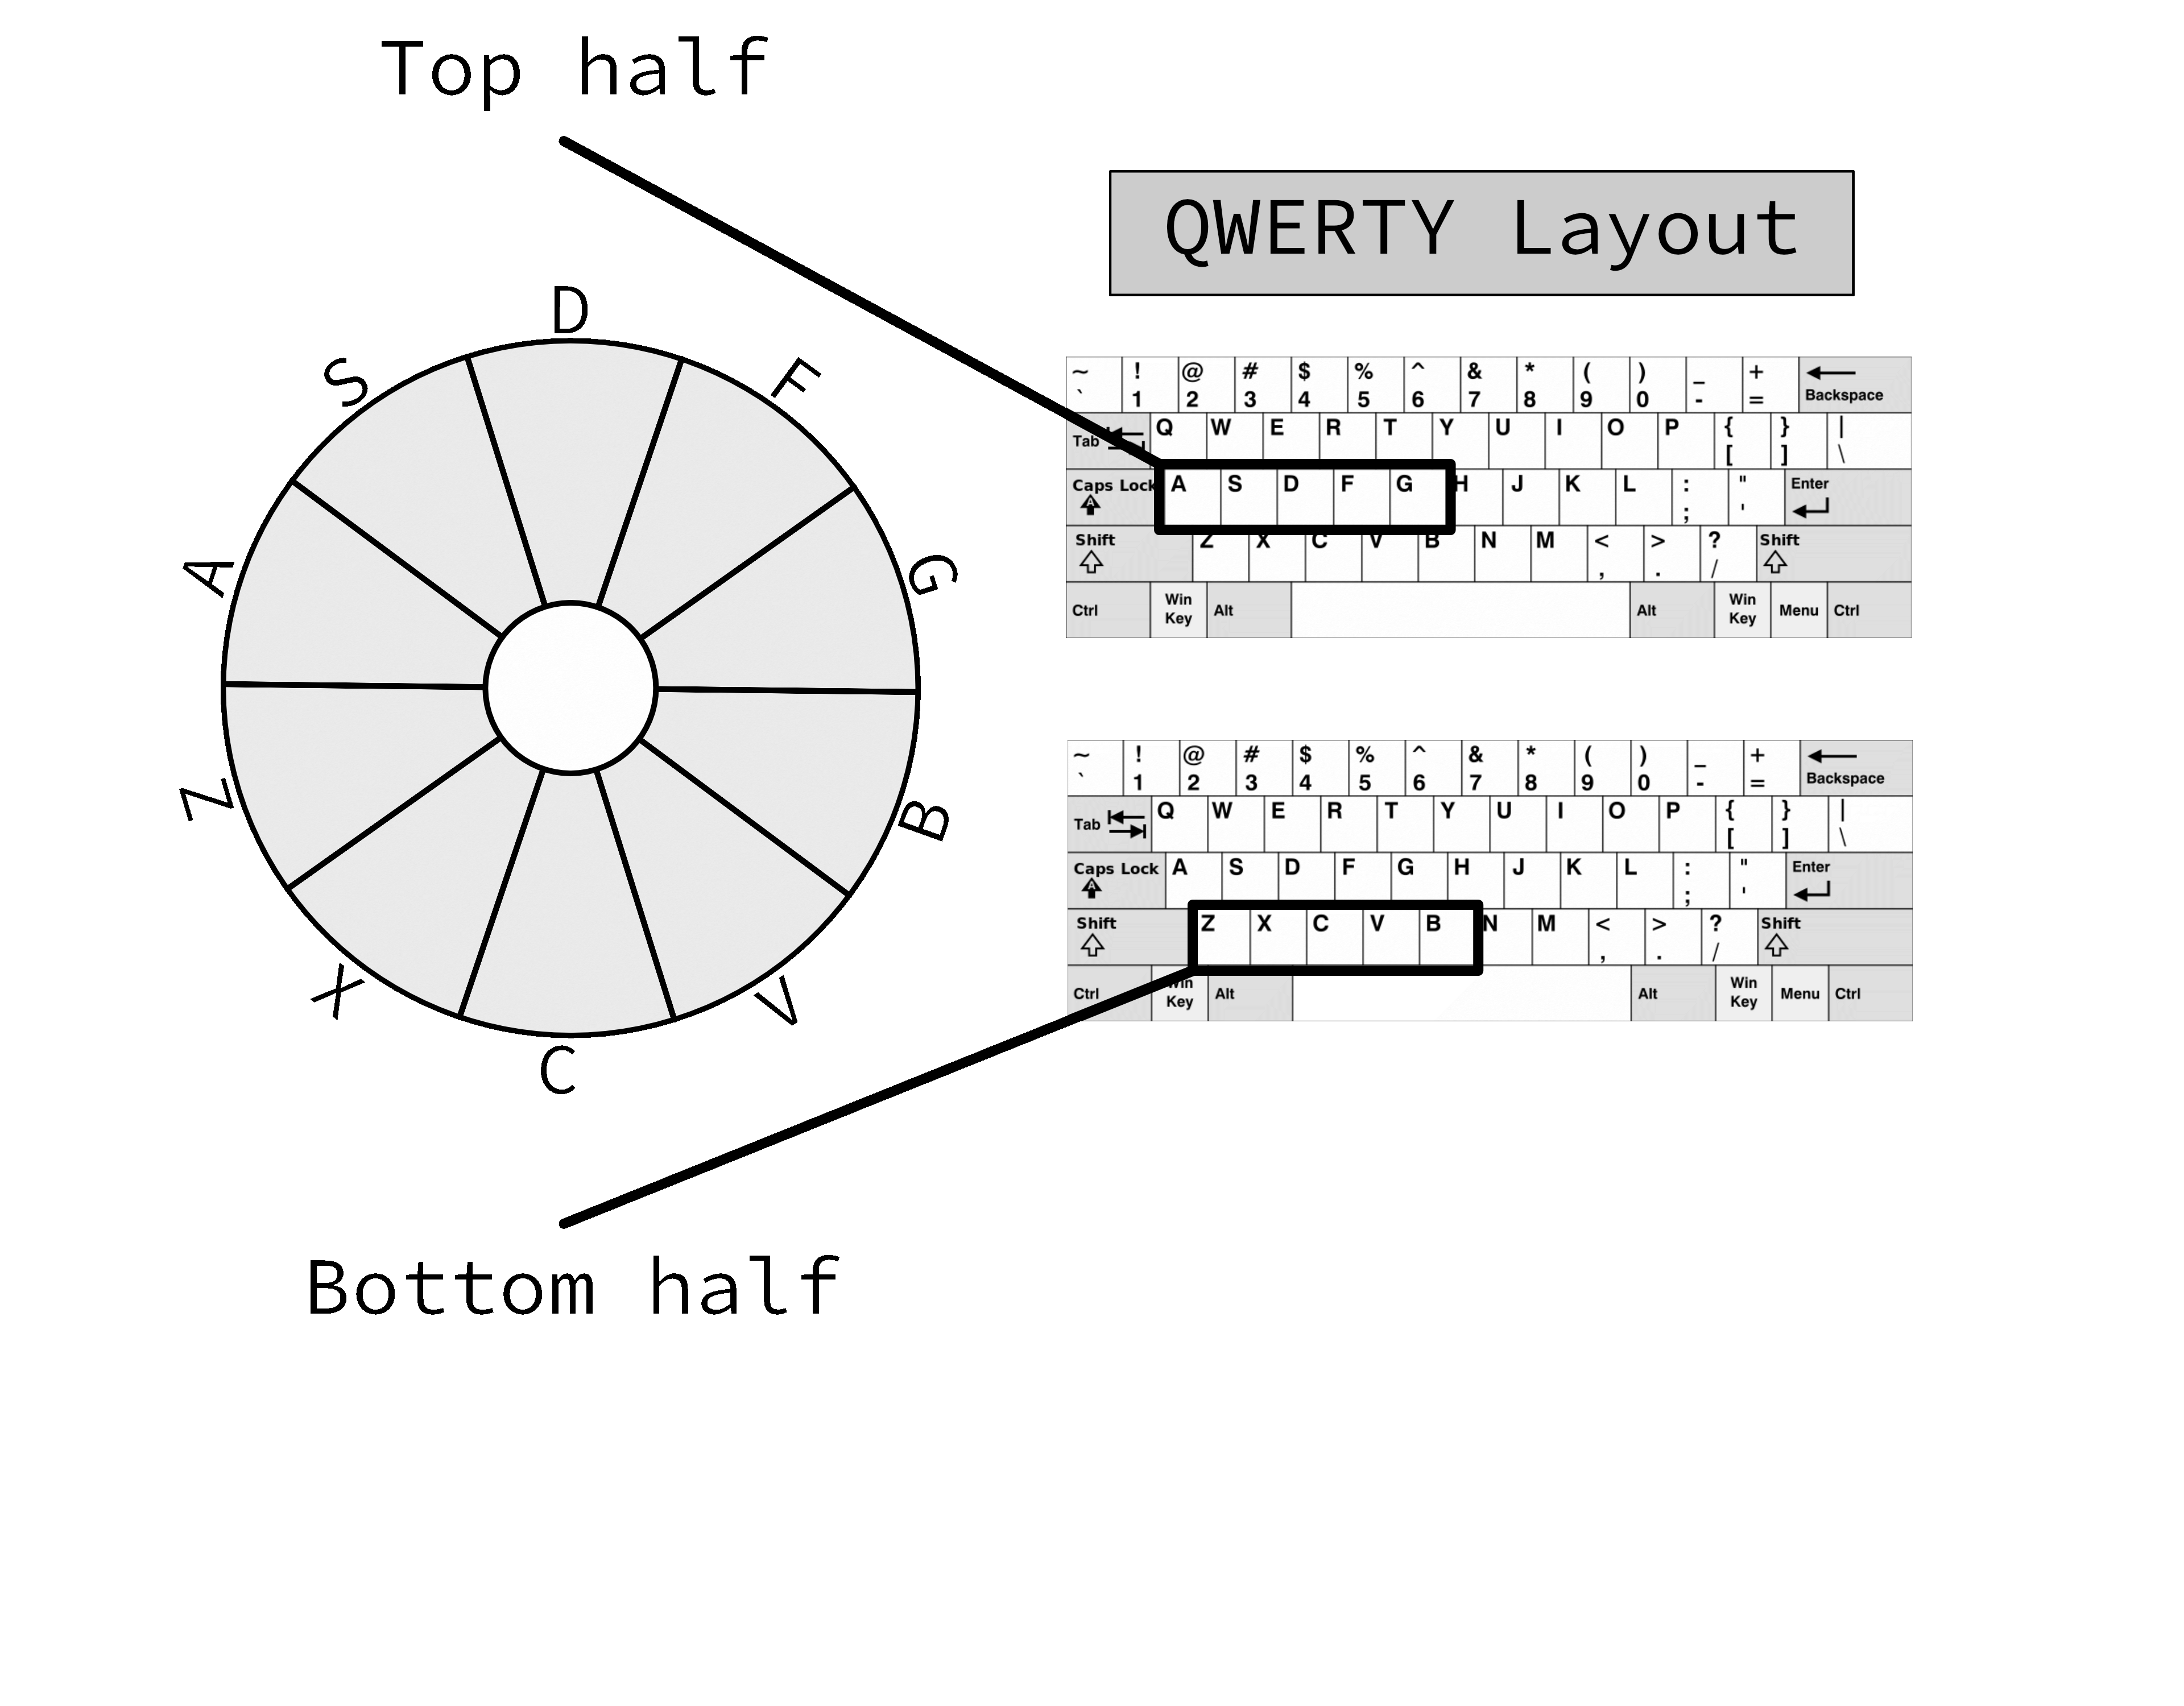
I use a keyboard layout called Colemak. If you are curious why I use this keyword layout then read here. It is the most efficient layout with the fewest keys commonly used keys moved.
I also posted an example QWERTY layout above.
Here is how this all works:
- Top - the top half I set to my home row on my left hand. For me this is the keys A R S T D. On QWERTY it is A S D F G
- Bottom - the top have I said to the row below my home row. For me this is the keys Z X C V B. On QWERTY it is also Z X C V B (see? Few keys moved in Colemak).
I chose using the keys below my home row because I find it easier to bend my fingers then to extend them.
Knowing where these keys correspond to any physical location allows me to also memorize the menu items locations. This is where the Method of Loci comes in.
I know that the lower left-hand corner on my default menu is “Track Options”, and I also know that the lower left hand corner is “X”. I never have to think about what hotkey is for “Custom Colour”. I know that it is going to be under my track options, and I recall that that is in the lower left-hand corner. I will instinctually press “AX” to get to that location.
Once I am in the “track options” menu there are two things that can occur:
- I don’t know where the action is - If I do not know where the action is then I have a menu that easily displays all of the actions that I may use, and their corresponding shortcuts. I can also click the mouse on the action that I want.
- I know where the action is - If I know where the action is then I will simply press the corresponding key for that location.
I don’t have to think about “Oh jeez, what is the hotkey for Track: Freeze to mono (render pre-fader, save/remove items and online FX). I immediately know that this is under “track options”. I also have a vague idea that it is on the right-hand side of the menu. If I just go with that thought and hit “A X D”, it turns out that that is exactly what I needed!
I also know that Track: Freeze to stereo (render pre-fader, save/remove items and online FX) is under the mono freeze. That’s all I remember, it’s under mono. I can quickly translate that to “A X B” without much thought.
At very few points do I ever have to attempt to recollect an abstract mapping of an action to some modifier plus a letter. I only think about where things are located in a physical space.
My Keys - Part Deux
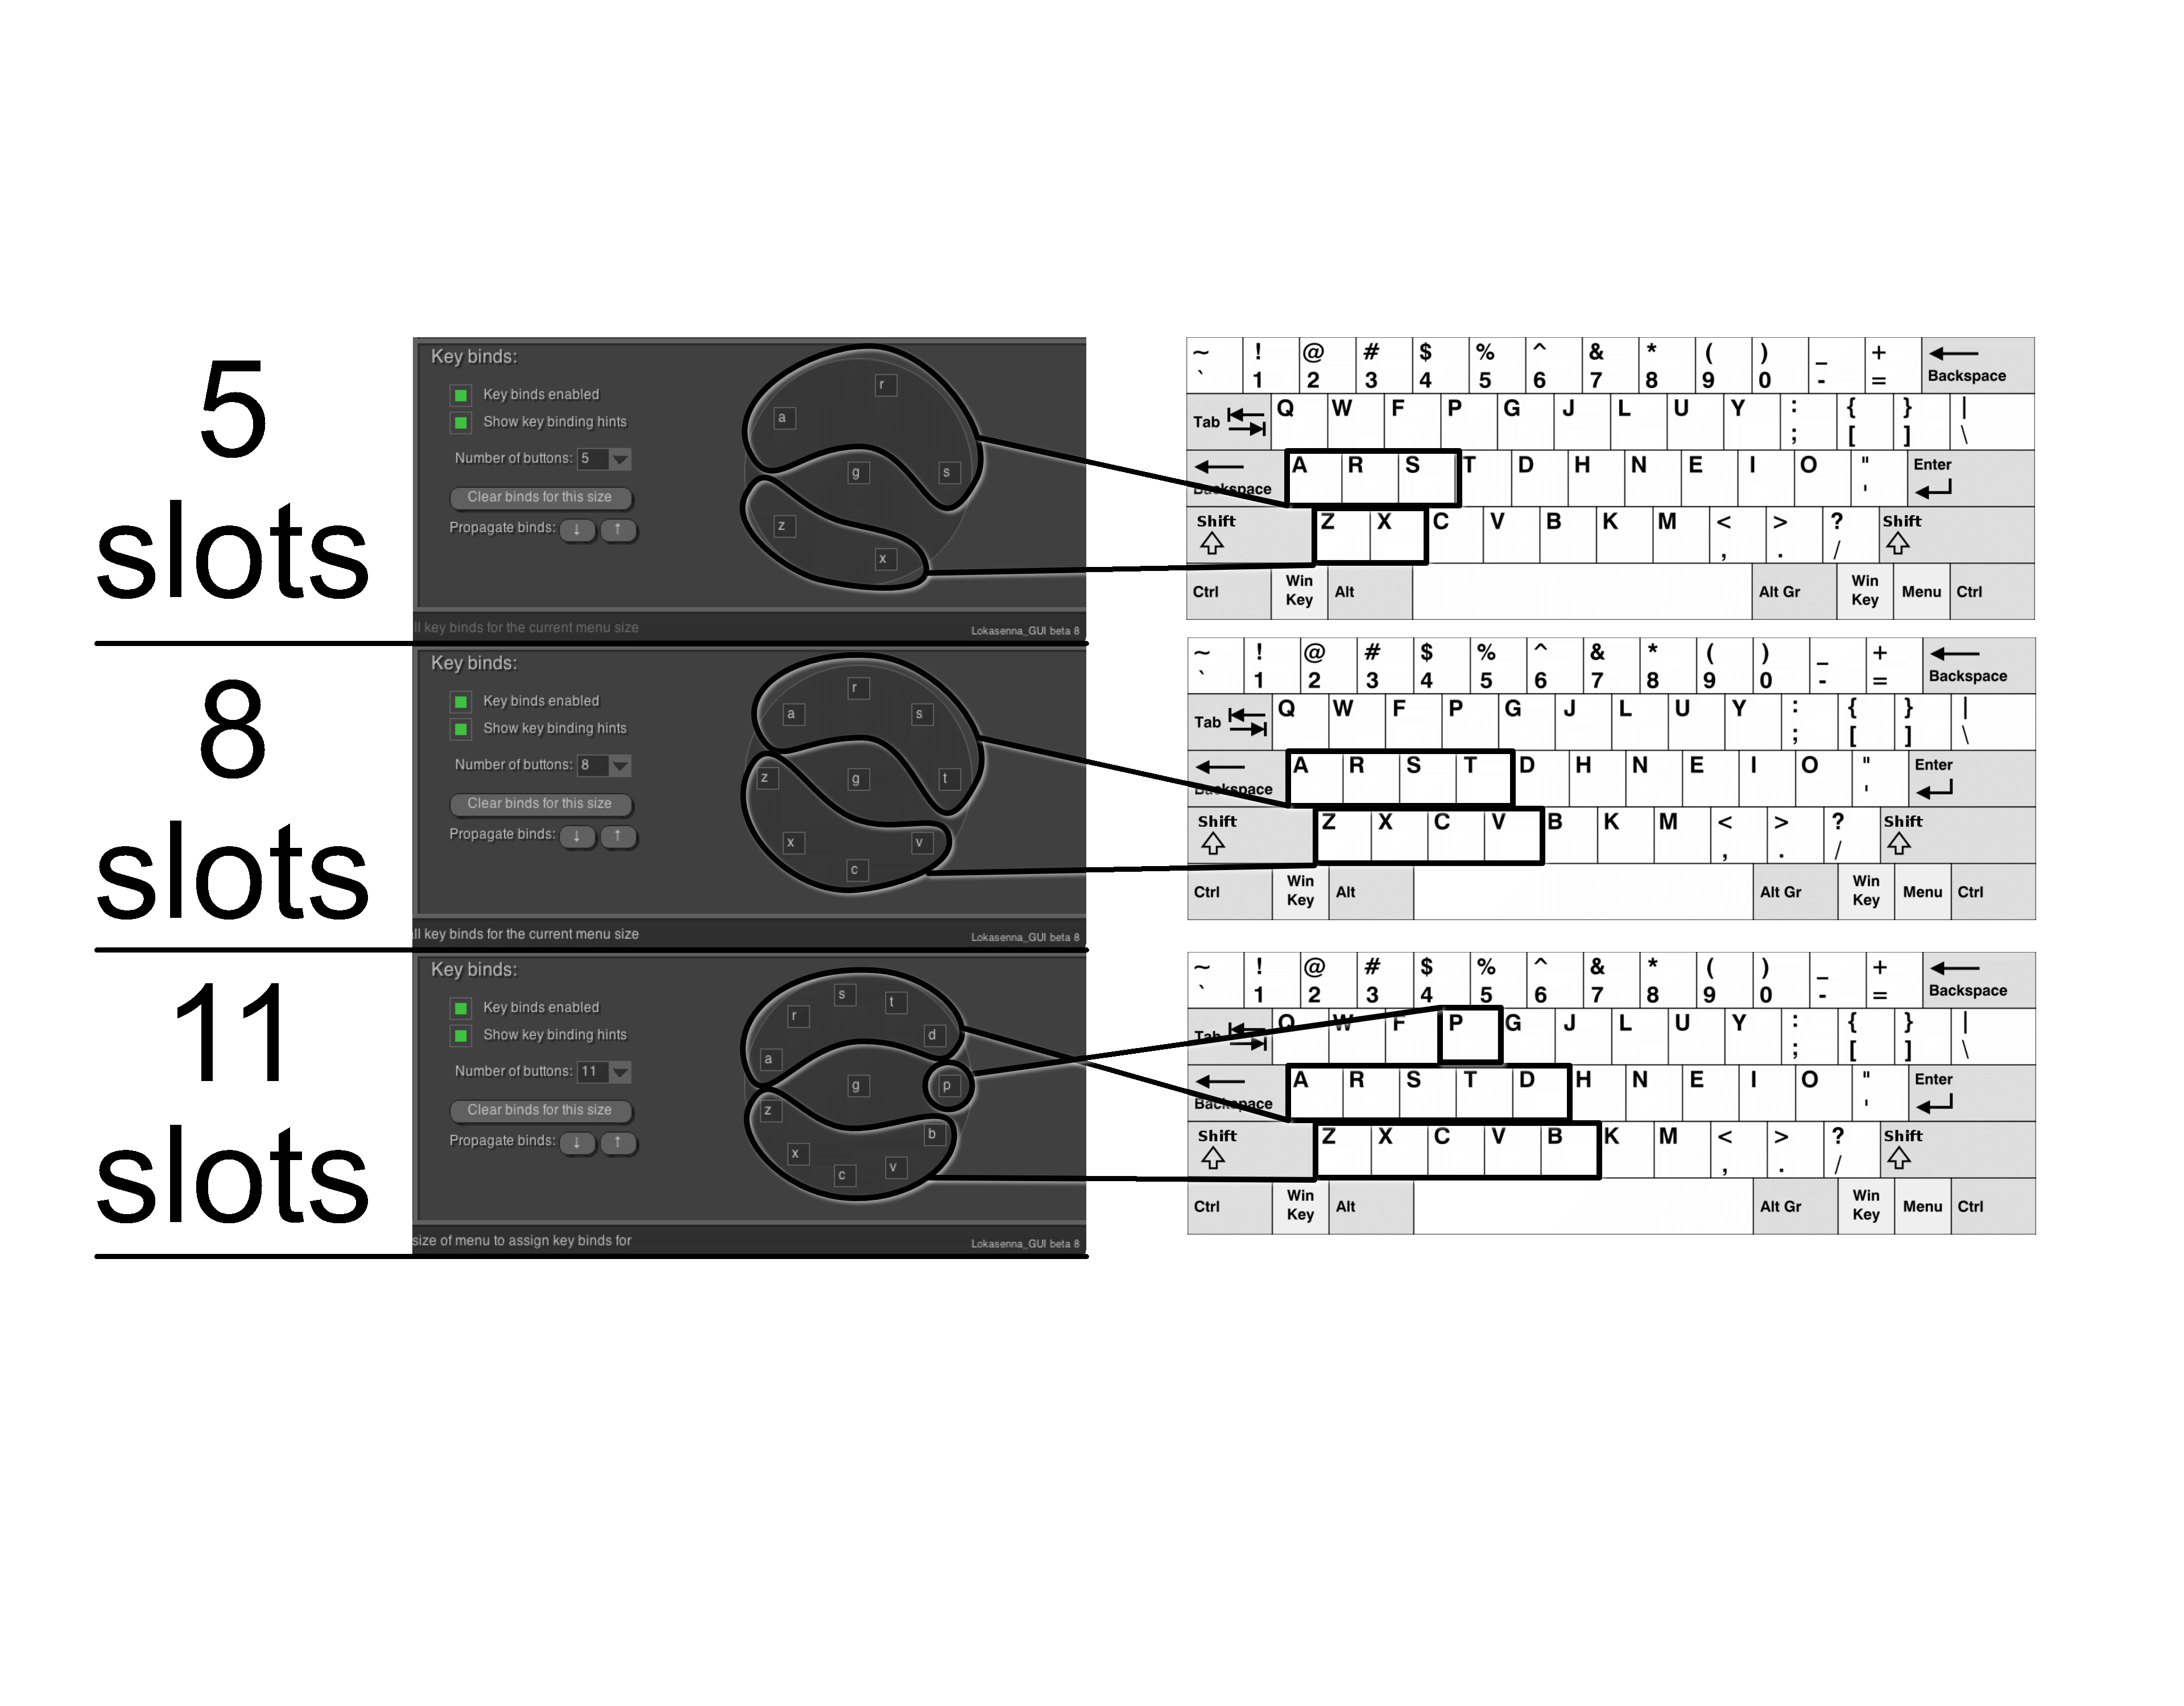
Not all menus have the same number of slots. One menu may have 5 slots, and another may have 12.
Radial Menu requires that you set up the hotkeys for each selection of menu sizes. Here is how I have mine set up, but you may want to set things up your own way.
The primary thing to recognize is that my home row is on the top rail of the Radial Menu, and the row below my home row is on the bottom of the Radial Menu.
- 5 - This starts with “A R S” and “Z X” for me.
- 8 - Now we go to “A R S T” and then “Z X C V”.
- 11 - The obvious progression goes to “A R S T D” and “Z X C V B”. There is something in here that is new though: P. I do not wish to extend my keys to the right because my left hand cannot comfortably reach those. I do not like using the keys “Q” and “W” because those are difficult for my pinky to press. After 10 slots, I begin to extend with the letter “P”. My 12th slot (not shown) is “F”.
“G” is always my “Go back” key.
I do not use menus with more than 12 slots, as I find it unwieldy and difficult to remember. I believe that I could probably pair this down to no more than 10 slots per menu if I put the effort into it.
You may think that I do not put the effort into it because I may ruin my ability to remember where things are located, however that is not the case. I find that adjusting the size of the menus is not particularly difficult. when I adjust menus the only thing that I need to remember are the hotkeys that correspond to the locations. That’s 8-12 keys, all of them easy to press on just one hand.
Conclusion
I have attempted to present this in the simplest manner possible, with a relatively short post. Writing this post was mostly an effort in removing information rather than adding information.
I believe that having a hierarchy of menus that corresponds to locations is the ideal way to work. It greatly reduces the number of things that you need to remember, the number of keys to press and you have visible layers.
All of your layers are visible on screen. With traditional shortcuts your layers are hidden behind modifier keys: command/control, alt/option and shift. With traditional shortcuts you not only need to remember the letter but you also need to remember the modifier keys, and you need to do it on truly dance that is attempting press modifier keys with letters that may be difficult to press alongside them.
Even if you do not jump on board with my exuberance about utilizing Radial Menu’s amazing shortcut system, with some effort you can put together a mouse driven menu that is still significantly easier to operate.
You do need to know what actions you tend to use, and you need to be familiar with using the actions list. It is not a short path to shortcut Nirvana, but with a couple hours of effort you can save yourself a great deal of time and build a system which will allow you to expand your REAPER fluency quickly.
Support Lokasenna!
This post took 22 hours to organize, screenshot, screencast, write and edit. If you appreciate the information presented then Donate to Lokasenna. He built this amazing script, and he’s also responsible for The GUI framework for REAPER that I covered before.
He also put together a great extension for scripting in REAPER using VS Code.
If you can afford it, then please support his fantastic work. Thank you.
Or donate to me…
WRITTEN IN VS Code. See this post for more information.
