Have you ever wanted to control many controls with one control? Automate many parameters with a single track?
Are you using Reaper?
Then this is the blog post for you! I'm going to walk you through the process of creating easy macros in Reaper with a very flexible and quick method.
Previously I have covered a similar method. I suggest checking that out as well for more ideas. Or you may want to check out one of my other wacky posts about routing in Reaper
Contents
- Realearn
- Insert your VST
- Setup ReaControlMIDI
- Setup ReaLearn
- Bonus Tip! Save FX chain
- That's all!
- Support Me!
Realearn
Go to https://www.helgoboss.org/projects/realearn/. Download and install ReaLearn.
Insert your VST
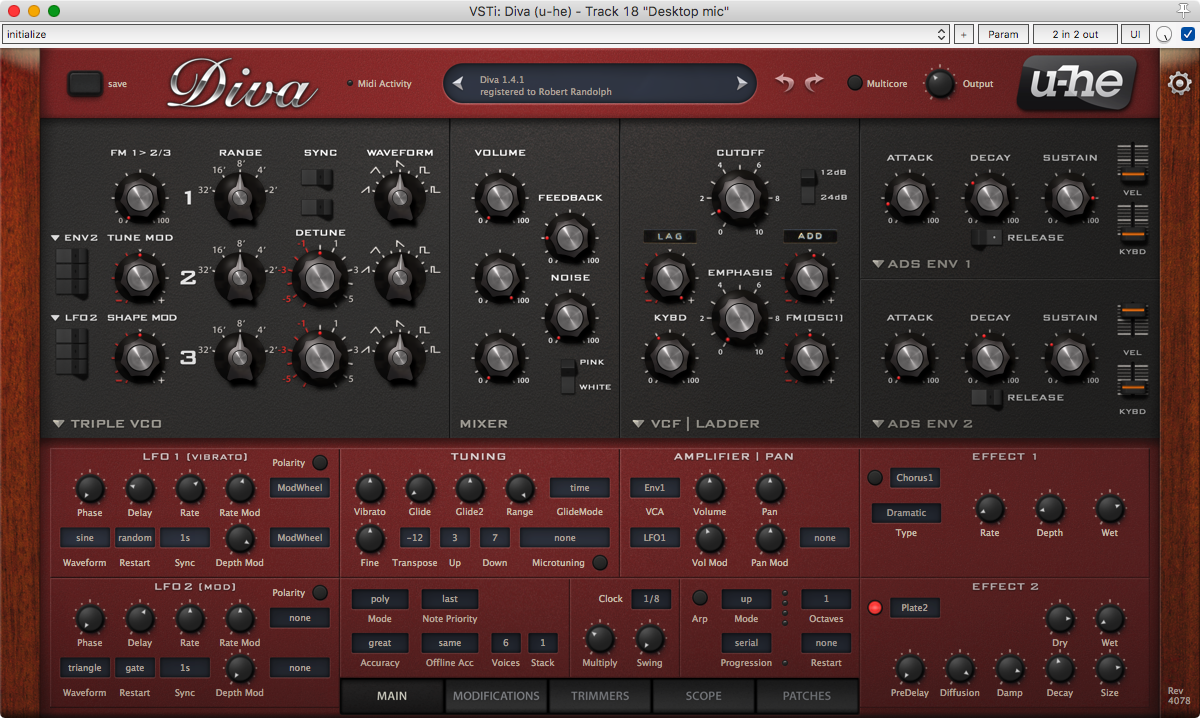
This part is easy. Insert the VST that you wish to control. I'm using U-he Diva because it's awesome.
Setup ReaControlMIDI
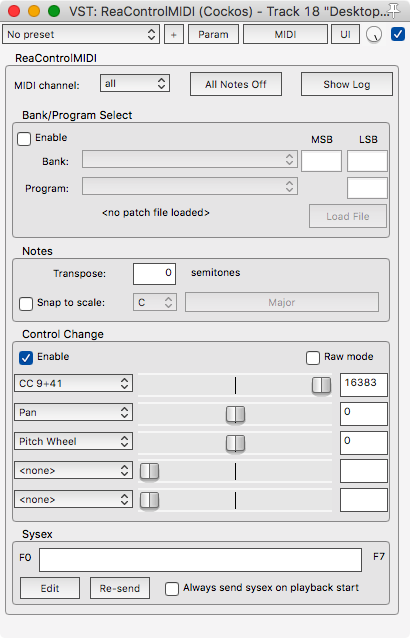
Now you need to insert ReaControlMIDI. This plugin comes with every Reaper installation.
Under the "Control Change" section, enable one checkbox and set it to a 14-bit cc value. These look like 9+41 or 14+46. Number+number.
The fader next to that value is your master macro control. This is what you use
Customize ReaControlMIDI
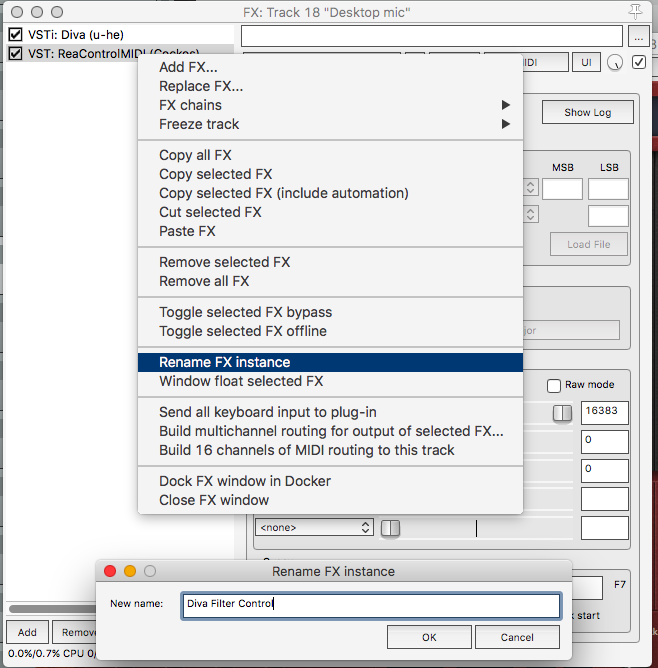
I suggest using one instance of ReaControlMIDI for each parameter. Right click the FX name in the FX Window and rename it.
Now you always know what instance is controlling which parameters.
Setup ReaLearn
First we setup the input.
- Insert an instance of ReaLearn.
- Click "Add Mapping"
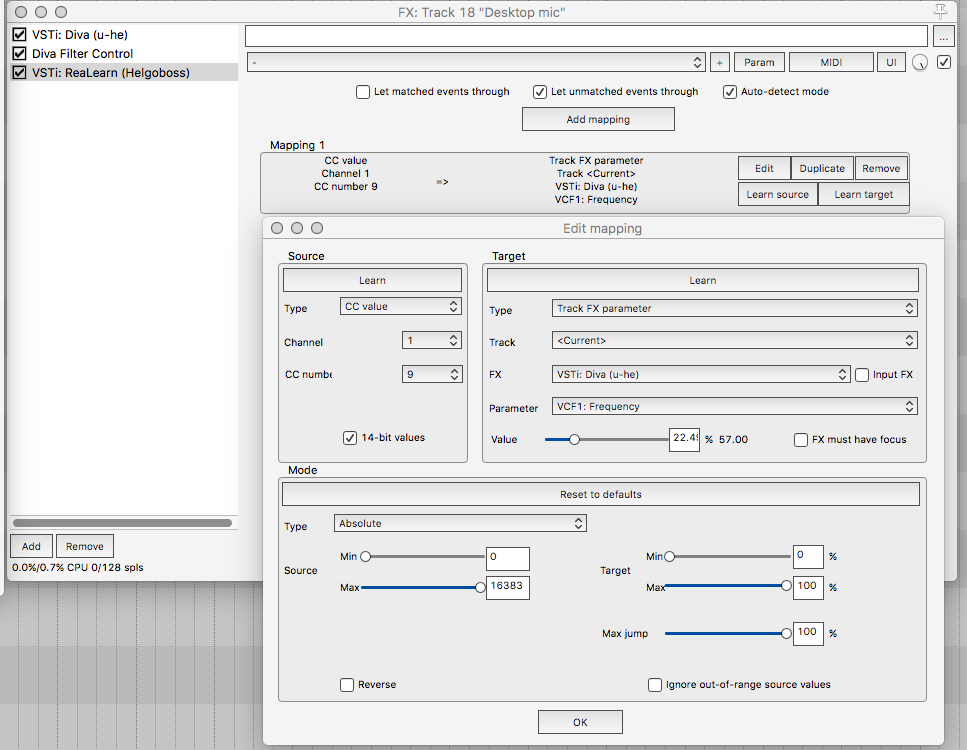
- Make sure under "source" that "14-bit values" is checked.
- Click "Learn" under "Source"
- Go to ReaControlMIDI and move your slider.
Now we setup what this fader controls
- Click "Learn" under "Target"
- Move the control in the VST that you wish to control.
You may now set the Min and Max values for the input, output and optionally reverse them.
Absolute mode maps the controls 1:1. Relative mode adds or subtracts from the current value. Toggle switches between 2 values.
Bonus Tip! Save FX chain
To quickly setup this process for future use, you can save ReaLearn + ReaControlMIDI as an FX chain. Here is the process:
- Add ReaControlMIDI and setup either -
- all 5 "Control Change" Faders to a 14-bit CC (number+number)
- or add multiple ReaControlMIDI instances setup how you want.
- Add ReaLearn
- Setup the appropriate source mappings to link together your ReaControlMIDI instance(s) and ReaLearn.
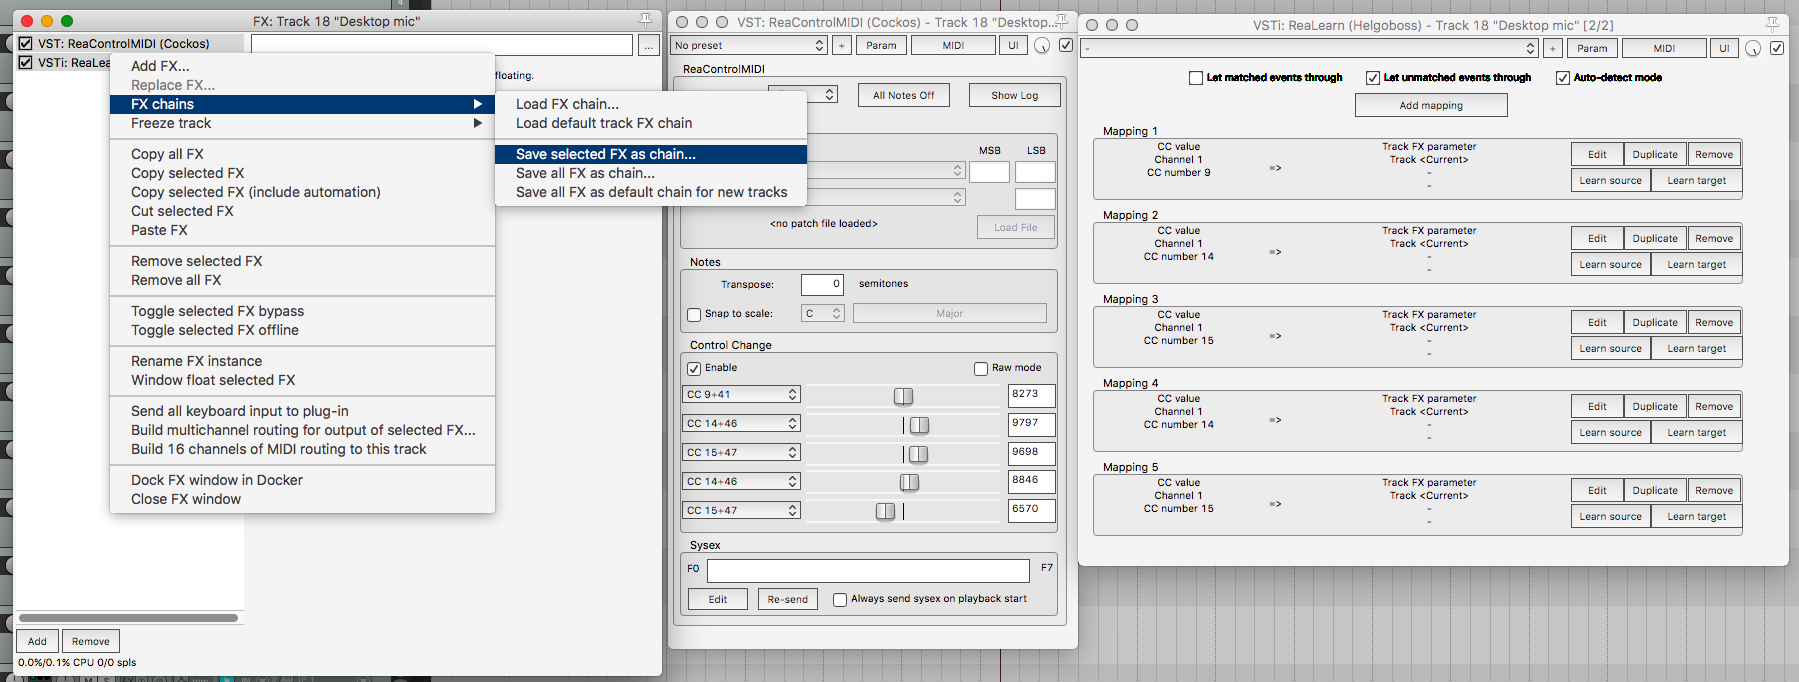
- Select all of the ReaControlMIDI instances, and Realearn.
- Right click and select FX Chains->Save selected FX as chain...
The setup is shown in the image above.
Now in the future, when you want to create a mapping all you need to do is right click in the FX portion of the FX Window and select FX Chains->Load FX chain.
From there it's simply a matter of mapping the VST to the ReaLearn Targets. Quick and simple.
That's all!
You're done. You can add more faders by enabling more CC controls in ReaControlMIDI or adding more ReaControlMIDI instances. You can add more mappings in ReaLearn to control more parameters.
The ReaControlMIDI fader can be automated, and you can do anything you want with it that you can do with a VST control, even link it to another set of Macros!
In the video above I'm adding an LFO to control 10 parameters at once. You can sidechain controls, link macro controls, and do all sorts of crazy cool things.
Explore!
Support Me!
This post took 1 hour to research, screenshot, write and edit. If you appreciate the information presented then please consider joining patreon or donating!
If you appreciate the information presented then please consider joining Patreon or donating money/time.
