Bitwig has what they call their unified modulation system. The modulation system is a set of modulation devices that can be applied to any visible parameter of any effect or instrument in Bitwig.
Along with the capability of modulating existing parameters, Bitwig’s modulation system is capable of being a full-fledged digital modular synthesizer!
Come with me as I walk you through probably the coolest feature in Bitwig, and perhaps a ‘killer feature’ if you’re looking to switch to Bitwig from another DAW
UPDATED FOR 2.3
Other posts in this series:
- Bitwig first impressions
- Bitwig feature review - Note Expression
- Bitwig Modulators - The coolest part of Bitwig
- Bitwig Effects review
- Bitwig Instruments, Note Effects and Instrument Containers Review
- Things that Bitwig could improve.
- Bitwig Conclusion
- Bitwig Review, but better!
Contents
- Introduction
- Modulators
- 4-Stage
- ADSR
- ADHDSR
- Audio Rate
- Audio Sidechain
- Beat LFO
- Button and Buttons
- Classic LFO
- Envelope Follower
- Expressions
- HW CV In
- Keytrack
- LFO
- Macro and Macro-4
- Math
- Midi
- Mix
- Note Counter
- Note Sidechain
- Parseq-8
- Polynom
- Quantize
- Random
- Sample and Hold
- Select-4
- Steps
- Voice Stack
- XY, Vector-4 and Vector-8
- Modular Synthesis
- Complaints
- Roll your own
- Conclusion
- Support me!
Introduction
Besides the fact that you can modulate any parameter of any device, you can also modulate parameters of other modulators. Combinations of modulators modulating each other adds a nearly infinite pallette of functionality. The modulation of modulators also opens the door for the Bitwig Modular Synth
Bitwig’s modulation system is exceptionally easy to use. It’s so simple that I will now show you how to do it in 2 very short videos and accompanying explanations.
EDIT August 10th, 2018 Updated for Bitwig 2.3
Adding a modulation device
The modulation system in Bitwig consists of a small grid to the left of the effect/instrument device. In the lower left of each device there’s a O–> looking button that you click to bring up a grid. You simply click a plus-sign in the grid then select your modulator.
Mouse-hover over the modulation grid, an arrow appears. Clicking the arrow lets you access the parameters of the modulator.
Setting a modulation destination.
Next you need to set the destination. Click the O–> button in the modulator so a flashing black square is the background.
Modulation is assigned by moving the control that you wish modulated. The distance from the current value, in positive or negative values, is shown as a live-modulated blue outline.
Editing
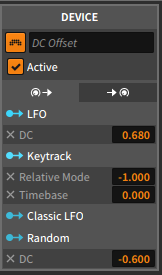
The left inspector panel (‘i’ in the lower left) can be opened, and when you click on a device it shows you all of the current modulation mappings. Their strength can be edited, they can be delete and they can be activated for mapping. Nifty.
Modulators
4-Stage
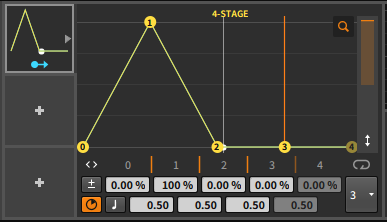
4-Stage is a looping envelope. It can be set in seconds or beats, it’s polar or bi-polar and can be set to loop after n-stages of the envelope.
4-stage is always note triggered, and the loop will start on a note-one message.
The controls for 4-stage are surprisingly well laid out and it’s easy to tweak it to what you need. Curves can be added to the envelope stages by dragging the orange ticks in the middle of the GUI (underneath the envelope display).
When applicable (synth modulation), this modulator can be active per voice.
ADSR
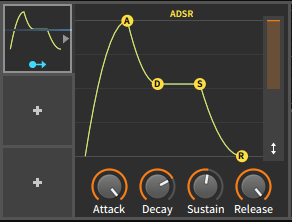
ADSR is a simple one-shot note-triggered envelope with attack/decay/sustain/release.
The envelopes are appear to be cubic, and I see no way to change their curve.
The envelope points are labeled in %. Time and beat values would be much more useful.
When applicable (synth modulation), this modulator can be active per voice.
ADHDSR
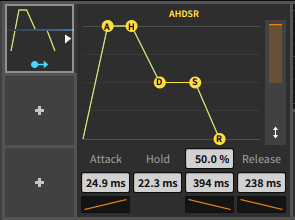
ADHSR is like ADSR with an added hold stage (time til the decay stage starts) and adjustable curves for the attack, hold and release stages.
When applicable (synth modulation), this modulator can be active per voice.
Audio Rate
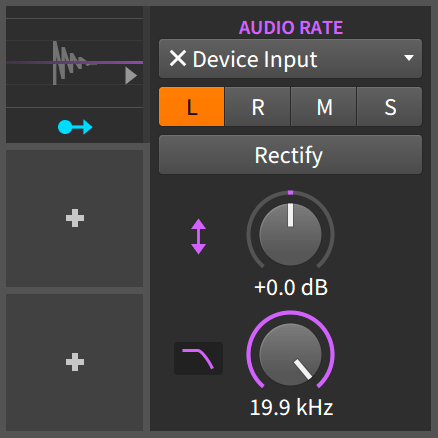
Audio Rate modulation. Take any audio from any track in Bitwig and use that as modulation for anything you can modulate.
It pretty intense. If you like making noise or extreme sounds then this is for you.
There’s a low-pass filter that serves to slow down the speed of what’s coming in (less high frequencies = slower modulation) and a rectifier which makes it unidirectional.
Best used with Bitwig devices, since many VSTs low-pass their parameter input anyway.
I love it. G
Audio Sidechain
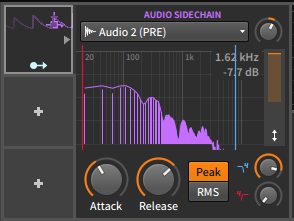
Audio Sidechain takes the output of another track and allows you to apply that audio signal’s envelope as a modulator.
Audio Sidechain allows you to take the signal from another track pre-fx or post-fx, which is a very nice addition. If you have reverb on your snare, but you want to side-chain something before that reverb muddies-up your transients then you have the option to take the signal pre-fx.
Audio Sidechain has attack/release settings for the envelope follow that allow some very fast envelopes, slow or anything in between. Peak and RMS calculation for the envelope follower are also available.
There’s a 4-pole high-pass and low-pass that allows you to fine tune the portion of the signal that is being fed to the envelope follower.
Audio Sidechain is an exceptionally useful modulator in modern music production.
Note: As of this writing, there’s display bug with the graph being drawn offset too low.
Beat LFO
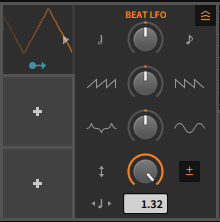
Beat LFO is a tempo-synced, optionally bi-polar LFO with offset.
Simple.
Button and Buttons

Button is a single button, Buttons is 2 buttons. What do the buttons do? They allow you to set a specific parameter offset and when the button is pressed, the modulation destination is offset by that value.
Button and Buttons are modulatable, so they can be used to turn a complex signal to a simple binary signal with corresponding exact offset values. The transitions can be smoothed or fast, selectable by right-clicking the modulator.
You can think of them as Bitwig’s digital Schmitt triggers.
Classic LFO
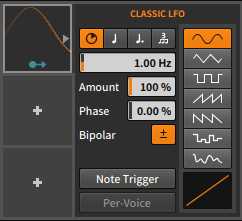
Classic LFO is just that. It’s a classic LFO with option beat-syncing, phase, bipolarity, shape, note trigger and per voice trigger.
LFO values are available from 0.01hz to 50.1hz.
When applicable (synth modulation), this modulator can be active per voice.
Most of your LFO needs will be well served here.
Envelope Follower
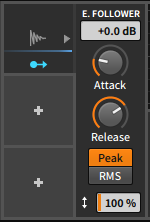
Envelope Follower is similar to the Audio Sidechain device except it lacks high/low-pass filters and only acts on the signal in the device chain at the point of the modulator.
Envelope Follower is your gateway to growly-basses, vocalized synth sounds and other expressive natural-sounding modulations.
Expressions

As discussed in the Note Expression post, the Expression modulator allows you to assign note expression values directly to modulation destinations.
Timbre can be mapped as a relative or absolute value modulation.
When applicable (synth modulation), this modulator can be active per voice.
HW CV In
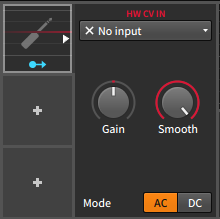
CV Input in a DAW. Wow.
The HW CV In modulator allows you to take common CV input (dc/ac) and apply it as a modulator to your devices in Bitwig. If you use any sort of hardware modular system then this should get you really excited. If you don’t then… buy some!
Keytrack
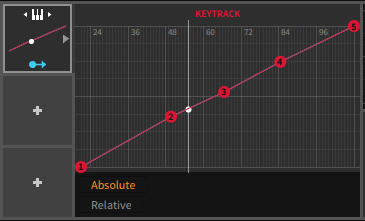
Key track takes a note-input and maps that note to a % of modulation. In short you can play modulation with your midi-device such as a piano.
Key track is particularly useful for controlling LFO’s frequency or having a filter’s value follow your playing. Of course there’s many other things you can do like… make a vocoder.
When applicable (synth modulation), this modulator can be active per voice.
LFO
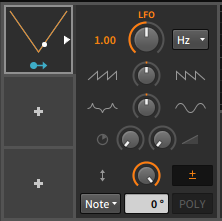
LFO is the newer LFO modulator, where Classic LFO is the LFO included in Bitwig 1.
LFO’s main benefits over Classic LFO is that there’s more easily modulatable parameters, and it has more run-modes (free, note, sync, random).
LFO also has a ‘Poly’ mode which is similar to the per-voice of the classic LFO.
LFO can modulate from 0.02hz to 50khz!
When applicable (synth modulation), this modulator can be active per voice.
Macro and Macro-4
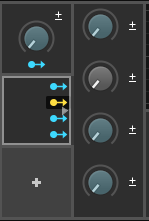
Macro is a single knob that you can assign to multiple parameters. Macro-4 is 4 knobs that can be assigned to multiple parameters. Both offer bi-polar modes.
The Macro modulators are basically the you modulator.
Math

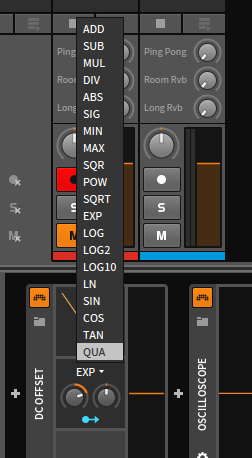
The point of the math modulator is that you have 2 knobs that you attach other modulation sources to, then it adds/subtracts/multiplies, takes min/max of the 2 signals or ‘qua’ (whatever that is?)
edit: Qua will quantize A, with step size of B. I figured this out using some hacky trickery.
Math is a very useful meta device. An example of use would be maybe adding an LFO and an envelope follower attached to the frequency of a ladder filter. Now your filter will have a modulation that’s dependent on the input amplitude of the signal.
When applicable (synth modulation), this modulator can be active per voice.
Math is awesome.
Midi
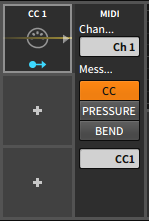
The MIDI modulator lets you take midi CC, Pressure and Pitch Bend information and apply it to any modulation destination.
It even lets you select the channel! (That’s a jab at Ableton Live, in case you haven’t felt that pain yet)
Mix

Mix has 2 controls that you modulate and it allows you to weight one of the signals if desired. The output is the result of that weighted mixing.
When applicable (synth modulation), this modulator can be active per voice.
Yet another useful meta device.
Note Counter
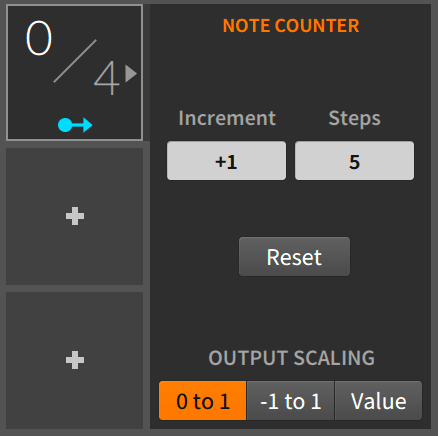
Every time a note is played, a counter increments and along with it a modulation value is output.
You can change how a note increments the value, how many steps there are and make it uni/bipolar.
I’ve come up with some interesting sounding ideas with cycling effects on/off or having a delay change delay time per-note or light filter modulation. I had to stop messing with it and keep writing this review, but I’m going back to it soon as I’m done. Maybe my favorite modulator right now.
Note Sidechain
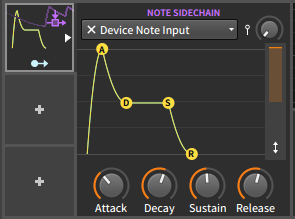
Note Sidechain is the midi version of Audio Sidechain. It takes midi input and translates note velocity to a modulation signal using what appears to be an embedded ADSR device.
The midi input can be from the track at the point in the signal chain, or taken from another track.
The curves of the ADSR can’t be changed as far as I can tell, but this is still a very useful device.
Parseq-8
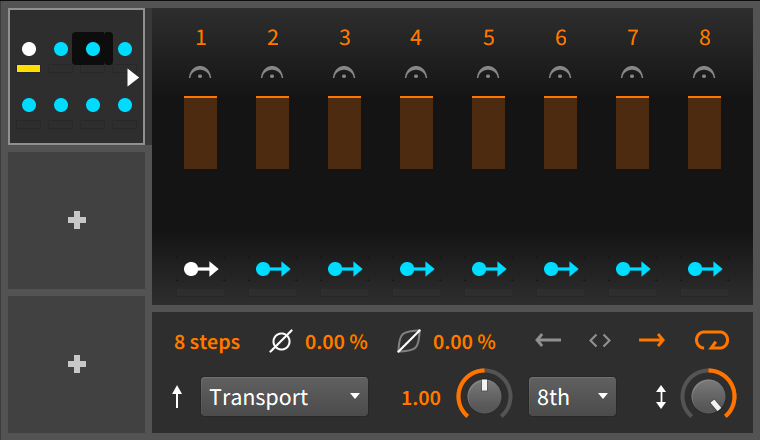
This is a unique little guy.
It’s 8 modulators in a row. A sequencer runs and triggers each modulator. It’s basically a step sequencer with each step having its own modulation output.
You can run the sequencer in forward, reverse and pingpong, and it can cycle or ‘oneshot’. The oneshot mode is useful when you use the “note” modes (restart, random, advance), where a new incoming note is what triggers movement in the sequencer.
Each step ‘turns off’ when it’s no longer its turn, but there’s a ‘hold’ which will make the previous step hold its value.
So why would you use this? The most obvious example would be to sequence other modulators. You could turn on one LFO for a beat, then another LFO, then the next beat use a step sequencer (you would modulate the depth of these to do this). Likewise you can use it for any situation where you want something to change to a specific value for a set period of time, but at a regular rate or in response to note changes.
I love that Bitwig is taking ideas like these from the modular synth community and applying them in a digital environment in ways that make sense.
Polynom
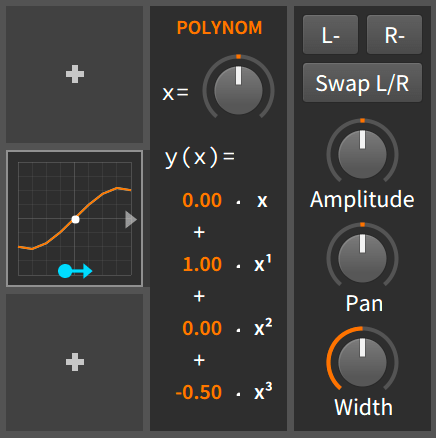
This allows you to reshape a modulation signal using a polynomial equation. It’s basically a waveshaper for modulation.
You modulate the X knob and then that signal is run through the polynomial equation. Here’s what the 4 parameters do in layman’s terms
- X = Offsets the curve
- X1 = Scales the size of the curve
- X2 = Biases the curve in one direction, pulling it all up or down
- X3 = The ‘curviness’ of the curve.
It’s a cool modulator to have, especially when dealing with extreme modulation or to make tame modulation more extreme.
Quantize
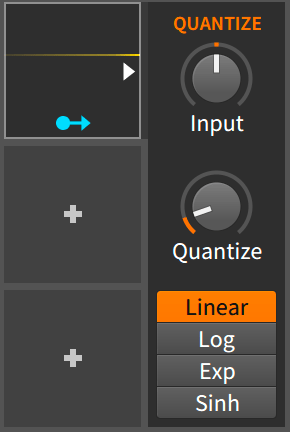
Quantize lets you modulate the input knob and then outputs a ‘stepped’ signal. It’s like bit-depth reduction or ‘bitcrushing’ for your modulation signal. There’s 4 shapes that determine how the quantization occurs.
Another neat ‘meta-modulator’
Random
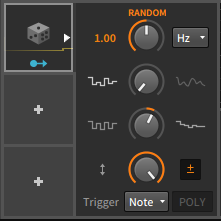
Random is a random LFO. It shares many of the features of LFO with added smoothing and feedback of the randomized signal.
When applicable (synth modulation), this modulator can be active per voice.
Sample and Hold
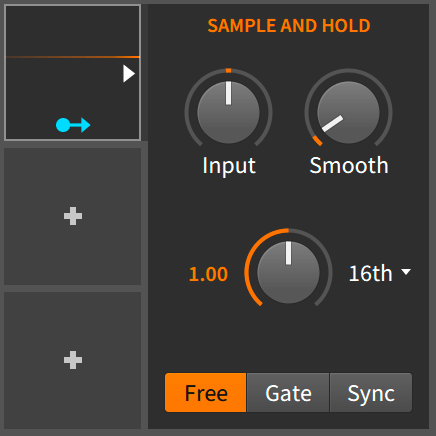
With Sample and Hold you modulate the input knob, then it freeze the signal at specific intervals.
The signal can be smoothed out so you don’t get a completely destroyed signal.
S&H is great for robotic style effects or the sound of broken equipment. It can also be used to just add some slight grit to something or a ‘vintage digital’ sound to parameter modulation.
Yet another new modulator that I love.
Select-4

Select 4 has a single modulatable input and it quantizes that input value to one of 4 assignable values.
Select 4 is a 4 stage comparator. Each of the 4 stages (100%, 200%, 300% and 400% input value) is an individually assignable modulation source. As the input signal reaches a stage’s value it maxes out the modulation destination. The output value is then scaled down to 0 as it moves to the next stage.
So an input of 0-100% sends a linear value out to output 1. A value of 100%-200% sends a value of 100%->0% (downward slope) to output 1 and a 0%-100% to output 2. Another way of saying it is that the value of the stage’s output is the distance from that stage’s trigger value.
Select-4 also has a ‘Fill Mode’ (right-click the modulator and select ‘Fill Mode’). In Fill mode, the modulation output does not go from 0%->100%-0% as it reaches the next stage, it simply continues to increase as the input rises.
When applicable (synth modulation), this modulator can be active per voice.
It’s easier to see what’s happening if you simply try it. Try it.
Steps
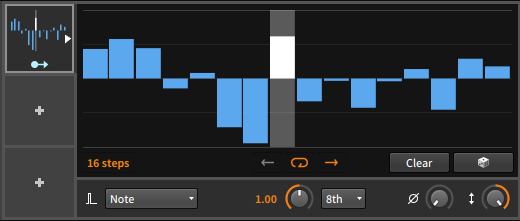
Steps is a step sequencer that outputs modulation. It can be free running, note triggered, note triggered with random start or transport triggered. It has an adjustable speed based on note values that can be scaled by a play rate.
There’s up to 64 steps that can be played forward or in reverse, randomized and the start point (phase) can be adjusted. There’s also a depth knob which is a global scaling of the output values.
Step sequencer is your gateway to modulation heaven. Experiment with modulating the phase and play rate controls for some super neato effects.
As of Bitwig 2.4 you can right click to add predefined shapes and transform the current shape with a number of “effects”. Cool feature. Really cool.
Voice Stack
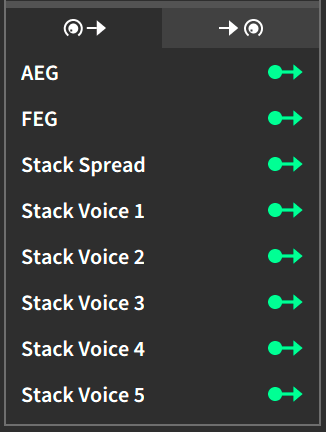
Each bitwig synth, all 4 of them, now has unison/voice stack modes.
It’s not your average voice stacking though. Each voice can modulate any parameter on onset. So you’re not limited to pan/volume, you can basically re-program the entire patch for each voice if you want!
Each voice has a modulator that sets a parameter to the value you set. That’s it. Really. You can use other modulators to do other fun things like “trigger” an LFO when a voice is active or be as clever as you want.
This is really a killer feature, but Bitwig really needs more synths.
XY, Vector-4 and Vector-8
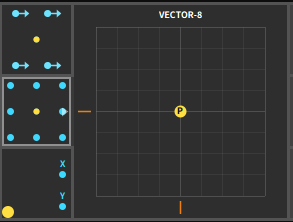
XY, Vector-4 and Vector-8 are multi-dimensional pads with 2, 4 and 8 outputs.
-
XY has 2 outputs that correspond to X and Y positions.
-
Vector-4 has 4 outputs that correspond to the distance from the center to the corners.
-
Vector-8 has 8 outputs, 4 from Vector-4 plus 4 more points of -X/X and -Y/Y (cross axis).
All 3 are great for performance or drawing automation. Toss on a MIDI control or CV control and transform your n-dimensional controller to modulation signal!
Modular Synthesis
Bitwigs modulators aren’t just for modulating/automating existing effects. The modulation system itself is a complete modular synthesizer!
All the effects and modulators are available to do whatever you desire. Check out this video for more information and a tutorial
Complaints
Despite how awesome the Bitwig unified modular system is, I do have a few complaints.
-
There doesn’t seem to be a way to easily modulate a parameter on another track. Yes there are workarounds, but it’s a pain to setup and even harder to figure out what you did a week later.
-
Value labelling on most parameters is in percentage. It would be nice if the modulator could auto-sense when there’s a single connection and display the range of values in that parameter’s native label. When there’s multiple values, it would need to reset to percentage.
-
Modulators can’t work across devices. If you have a cool modulation setup that you want to affect multiple devices then you need to put all those devices in a chain, and transfer the modulation to the chain’s modulation section. It isn’t difficult to drag/drop modulators or devices in to a chain, but it is more work than should be necessary.
-
No formula modulator? Being able to enter a mathematical formula based on input is really useful. Compare to the FL Studio Formula Controller
-
Understanding existing modulation is time-consuming. Other than device inspector, there’s no good way to see what goes where and what it’s doing. A graph display of the current routings would be useful.
-
It doesn’t seem that you can record modulation as automation. When using unpredictable or random modulation, it would be very useful to be able to capture that permanently as automation if you want. Same goes for things like XY.
-
Assigning modulation to VSTs often means browsing through 100s of parameters in the knobby-view. There is a parameter search to make it easier, but it’s still clumsy.
Roll your own
Bitwig has a secret. You can make your own modulators if you’re clever about it. Here’s some more information.
Hopefully they open this up more.
Conclusion
Bitwig’s unified modulation system is fantastic, and one of the truly unique parts about Bitwig. Despite some flaws it makes sound design more fun and simultaneously extends the capability of your entire plug-in arsenal.
If you’re thinking about switching to Bitwig and you focus heavily on sound-design or enjoy experimentation, then this may the one feature that brings you aboard.
Support me!
This post took 17 hours to research, photograph, write and edit. If you appreciate the information presented then please consider joining patreon or donating!