Noise Gates are a staple on multi-tracked drums. The gate turns off the volume until the drum hits and it’s near-instantly turned up for the duration of the drum hit.
There’s 2 issues with this though:
- It sounds unnatural - Having the drum suddenly pop in with whatever background noise is happening just doesn’t sound right. You get this weird blast of rumble and cymbals also messes up the mix slightly.
- It messes with your mix - The drum mix is setup with the relationships of the sound setup somewhat statically. Having a sound pop in that completely messes with that balance can (but not always!) mess up those relationships for that split second.
I have a method that can solve both of these things in some scenarios. It’s not a cure-all of course, and like with any production technique there are tradeoffs. Let’s explore…
Contents
Video
I’m trying to have videos with any of these topics, so here’s the video for this:
I don’t go in depth on some things I cover in this text post, but it’s a quick overview for those that enjoy video content.
Concept
Multitracked drums rely on complex interactions between 8+ sounds at once. Rather than trying to eliminate leakage, embrace it in a controlled manner.
-
While the drum is not being hit, apply a low-pass filter. This keeps a more natural leakage sound, but with less cymbals to cause that warbly nasty sound that can (but not always!) happen from leakage.
-
When the drum is hit, open the low-pass filter for a short moment.
Issues
No free lunch here, like with most things. I don’t susbcribe to the fantasy that there’s magic-bullets in the audio world and everything has tradeoffs. Here’s some issues this presents:
-
Phase - Ideally you want to use a minimum-phase filter of some type for your low pass. This comes with a penalty of phase rotation. This means that the sound of the leakage will change when the filter is closed compared to when it’s open. IMPORTANT this could be a good thing. There’s an equal chance that this will be detrimental to your track or beneficial to your track, and it depends on the settings.
-
Movement - Not all filters automate or modulate well. Ideally you would want to use a product with filters that are designed for modulation. Many EQs have their parameters “smoothed”, which results in the values moving more slowly when modulated. Some products simply can’t/won’t recalculate the filter co-efficients often enough to have a decent sound anyway.
-
Leakage isn’t the enemy - Leakage is a big part of big drum sounds. I think that many people erroneously pre-suppose that leakage is something to avoid when it it’s not. I’m a proponent of the idea that you should try to get the best drum sound possible before ever touching a noise gate (or the technique I’m presenting here).
-
Noise gates DO work - Noise gates have been used on drums for longer than either of us have been alive. (If you’re over 90 and are reading this, let me know). They’re on millions of records, and many of those records sound great. Yes, this method is cool and it’s sometimes better than a plain noise-gate, but noise-gates work. Don’t be afraid to try a noise gate too!
Couture
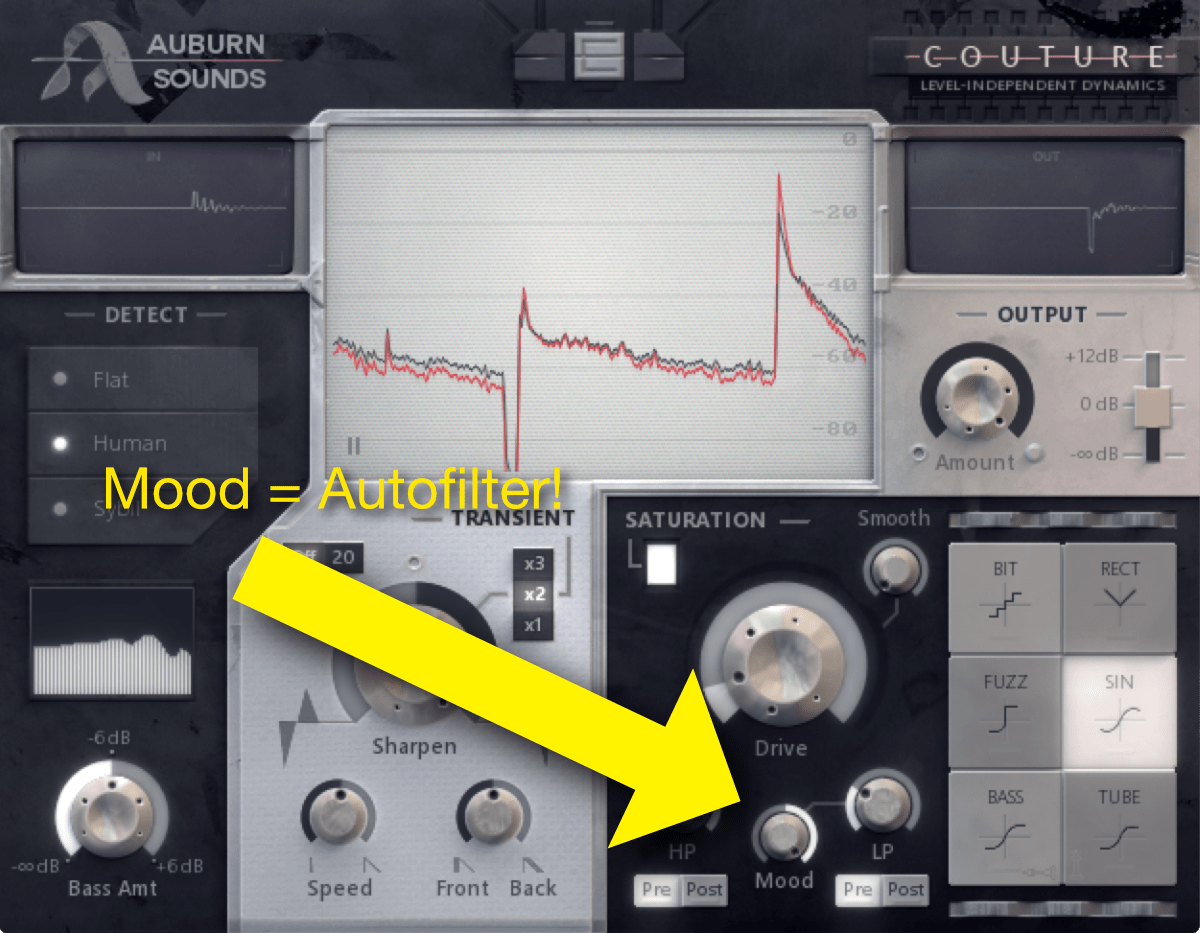
Couture is the new transient-processor/distortion plugin from Auburn Sounds, and in the saturation section there is a low-pass with a parameter called “mood”.
Mood causes the low-pass filter to respond to the dynamics of the signal. So you can have the filter close or open in response to audio.
I discovered this technique while using Couture, and despite trying many other filter plugins, Couture still does it best. It’s not only just for this trick though, and hopefully I’ll cover that in another post.
Reaper Setup
This can be done fairly well in Reaper or any DAW with audio-modulation. I’m just going to cover doing it in Reaper for now.
Plain

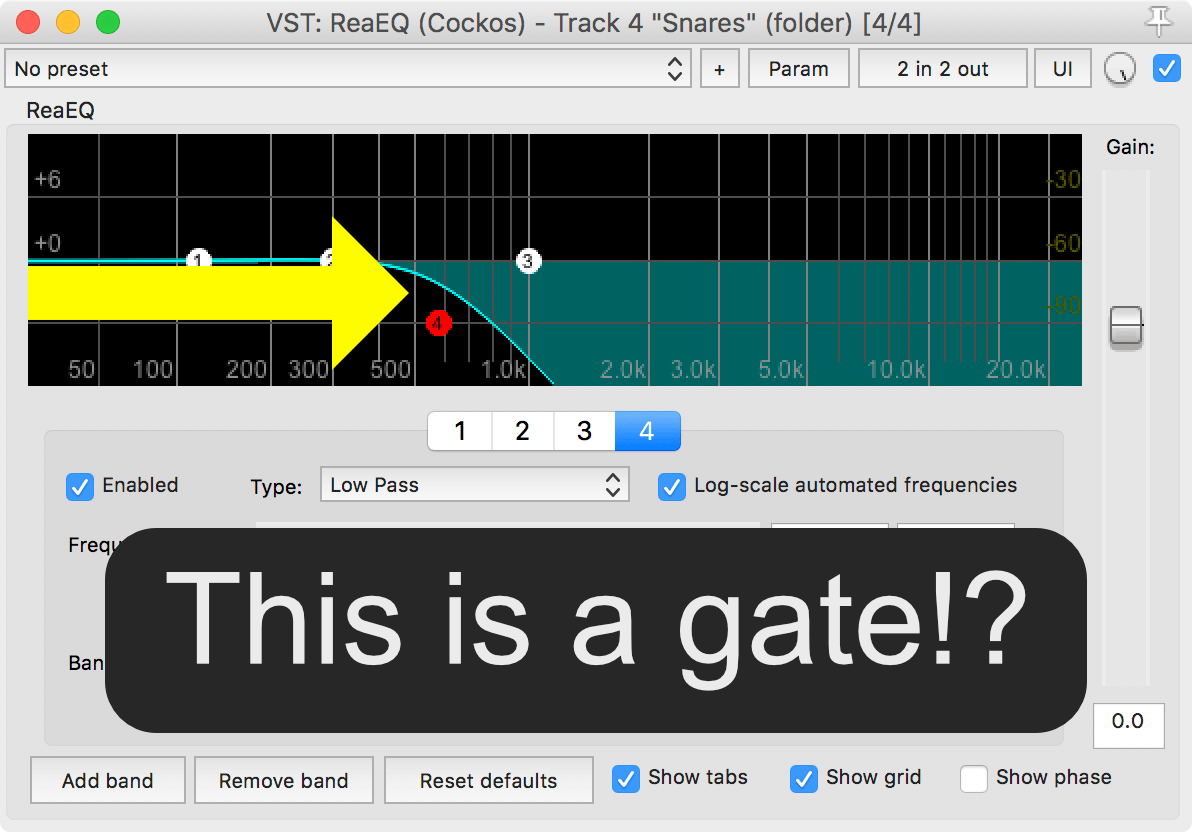
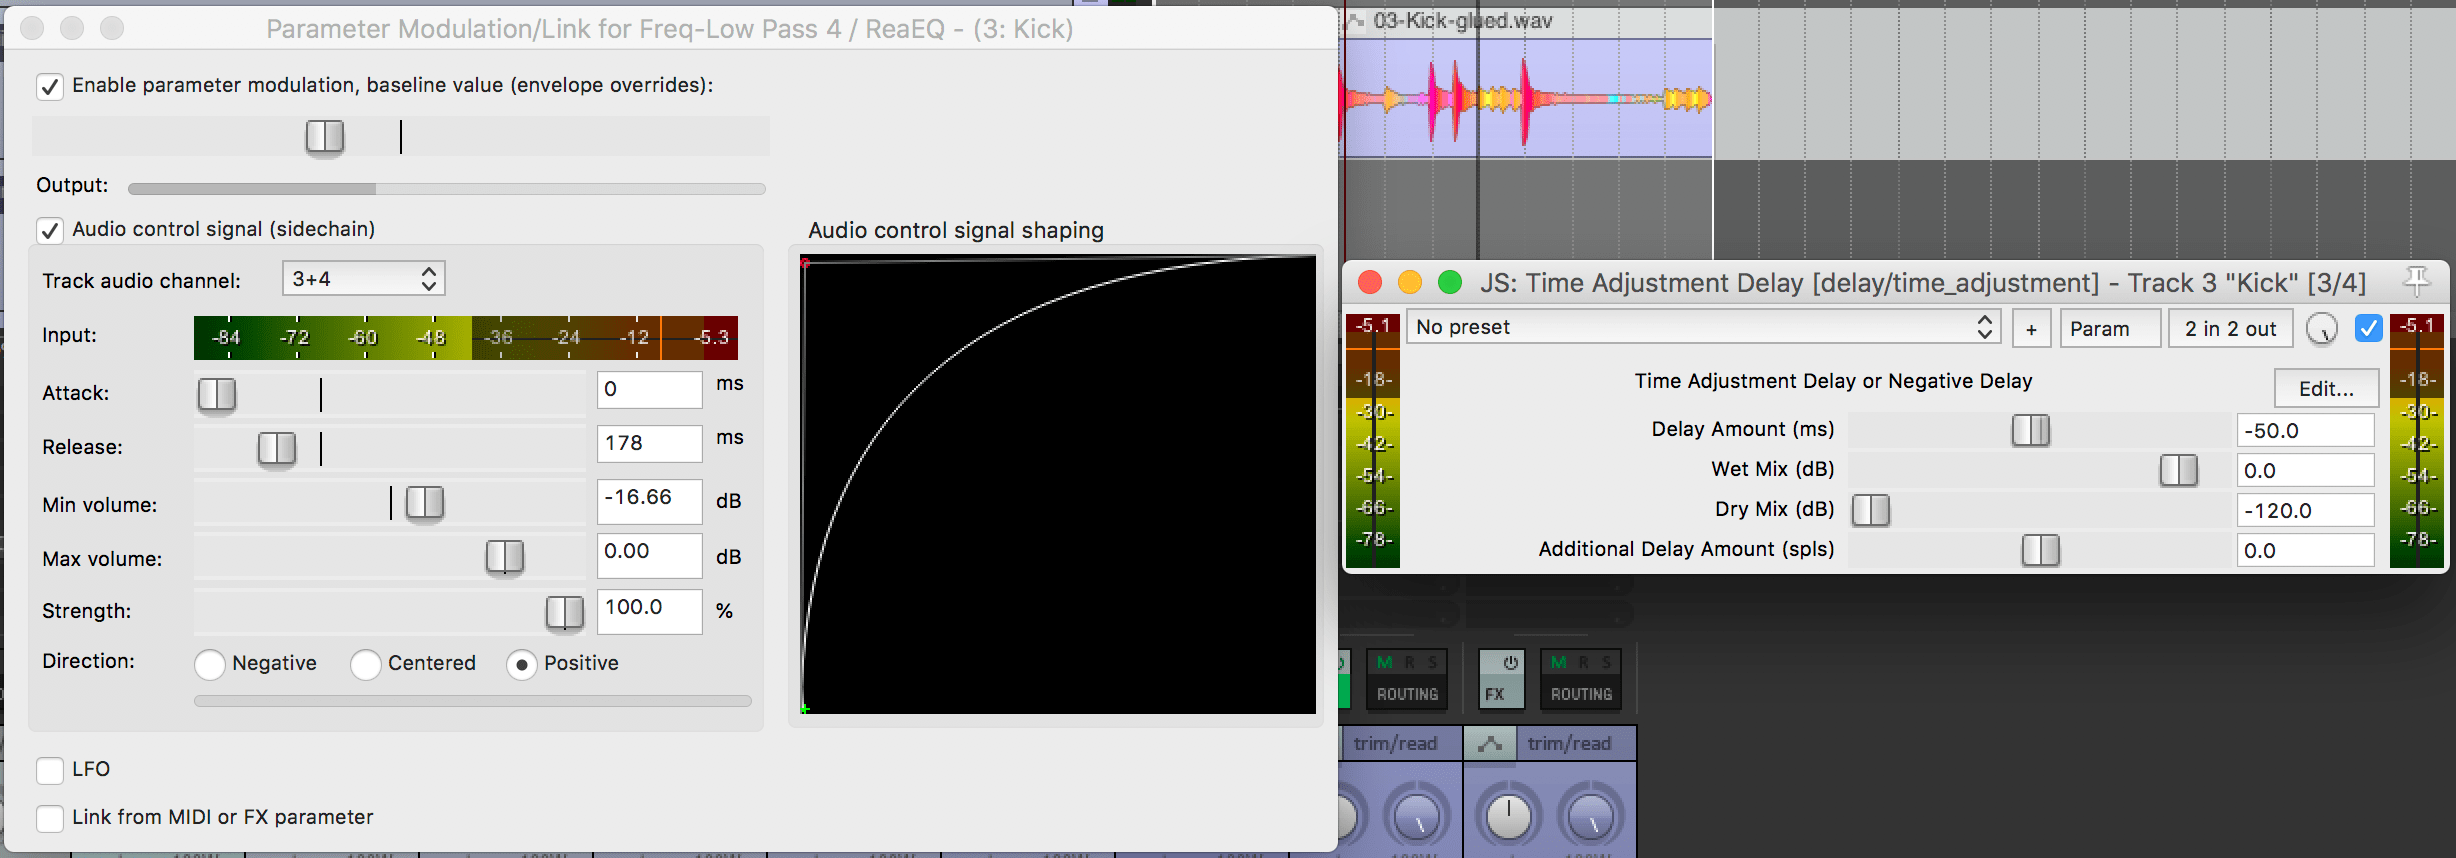
This is pretty quick to setup. Refer to the image above and I’ll walk you through the steps.
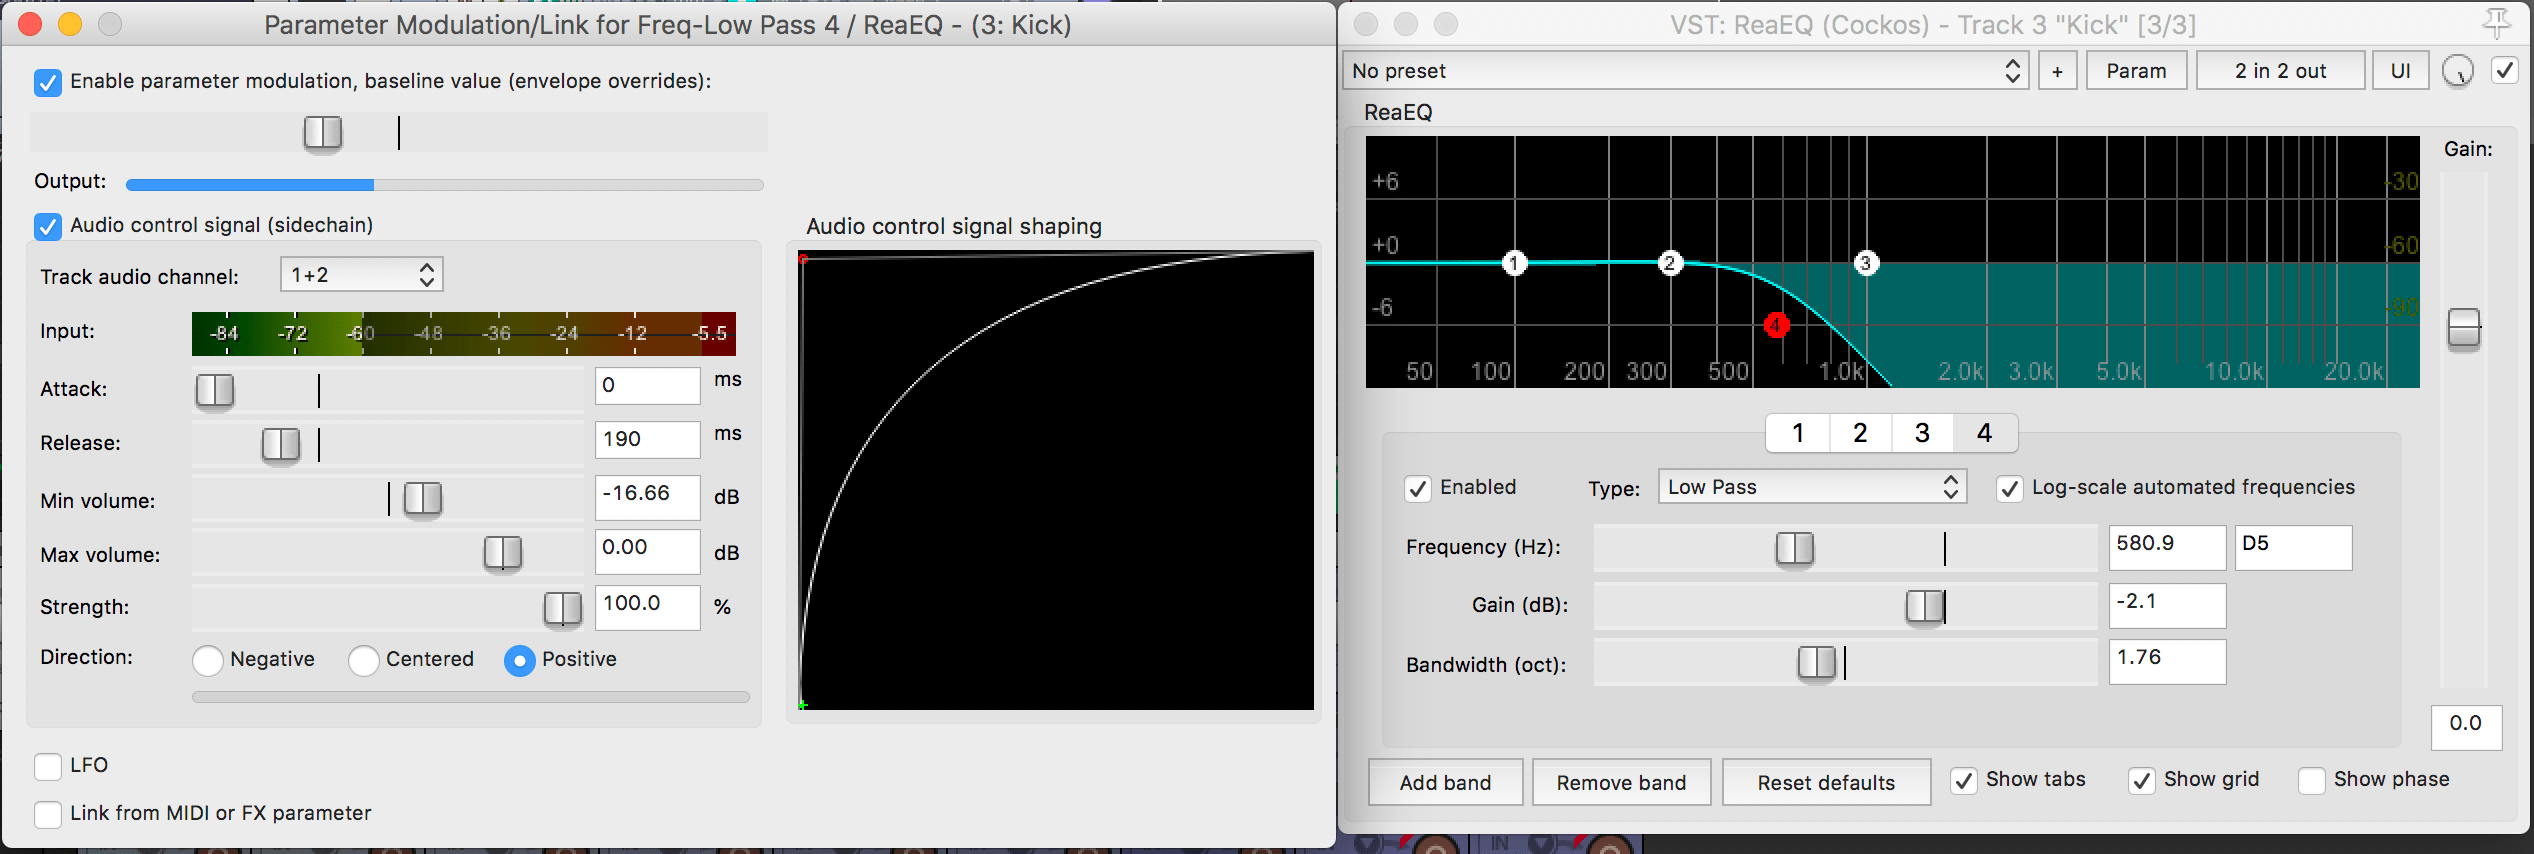
- Apply ReaEQ to the track and set a low-pass filter so that you can’t hear any cymbals in the leakage.
- Jiggle the ‘Frequency” slider of that band.
- Go to the “Param” menu and select “Parameter Modulation/MIDI Link”
- In the parameter modulation window - Set baseline to the middle value (where the mark is)
- In the parameter modulation window Set:
- Track audio channel to 1+2
- Attack to 0
- Release between 500-600ms (to start)
- Audio control signal shaping somewhat like in the image.
That’s it. You now have a noise gate setup that has a natural ‘off’ state without that big bright jump. Try it out.
If you jump to the sound examples you may notice that the attack transient is softened a bit. You may like this and you may not. If you dislike it then go to the next section.
Attack Compensated

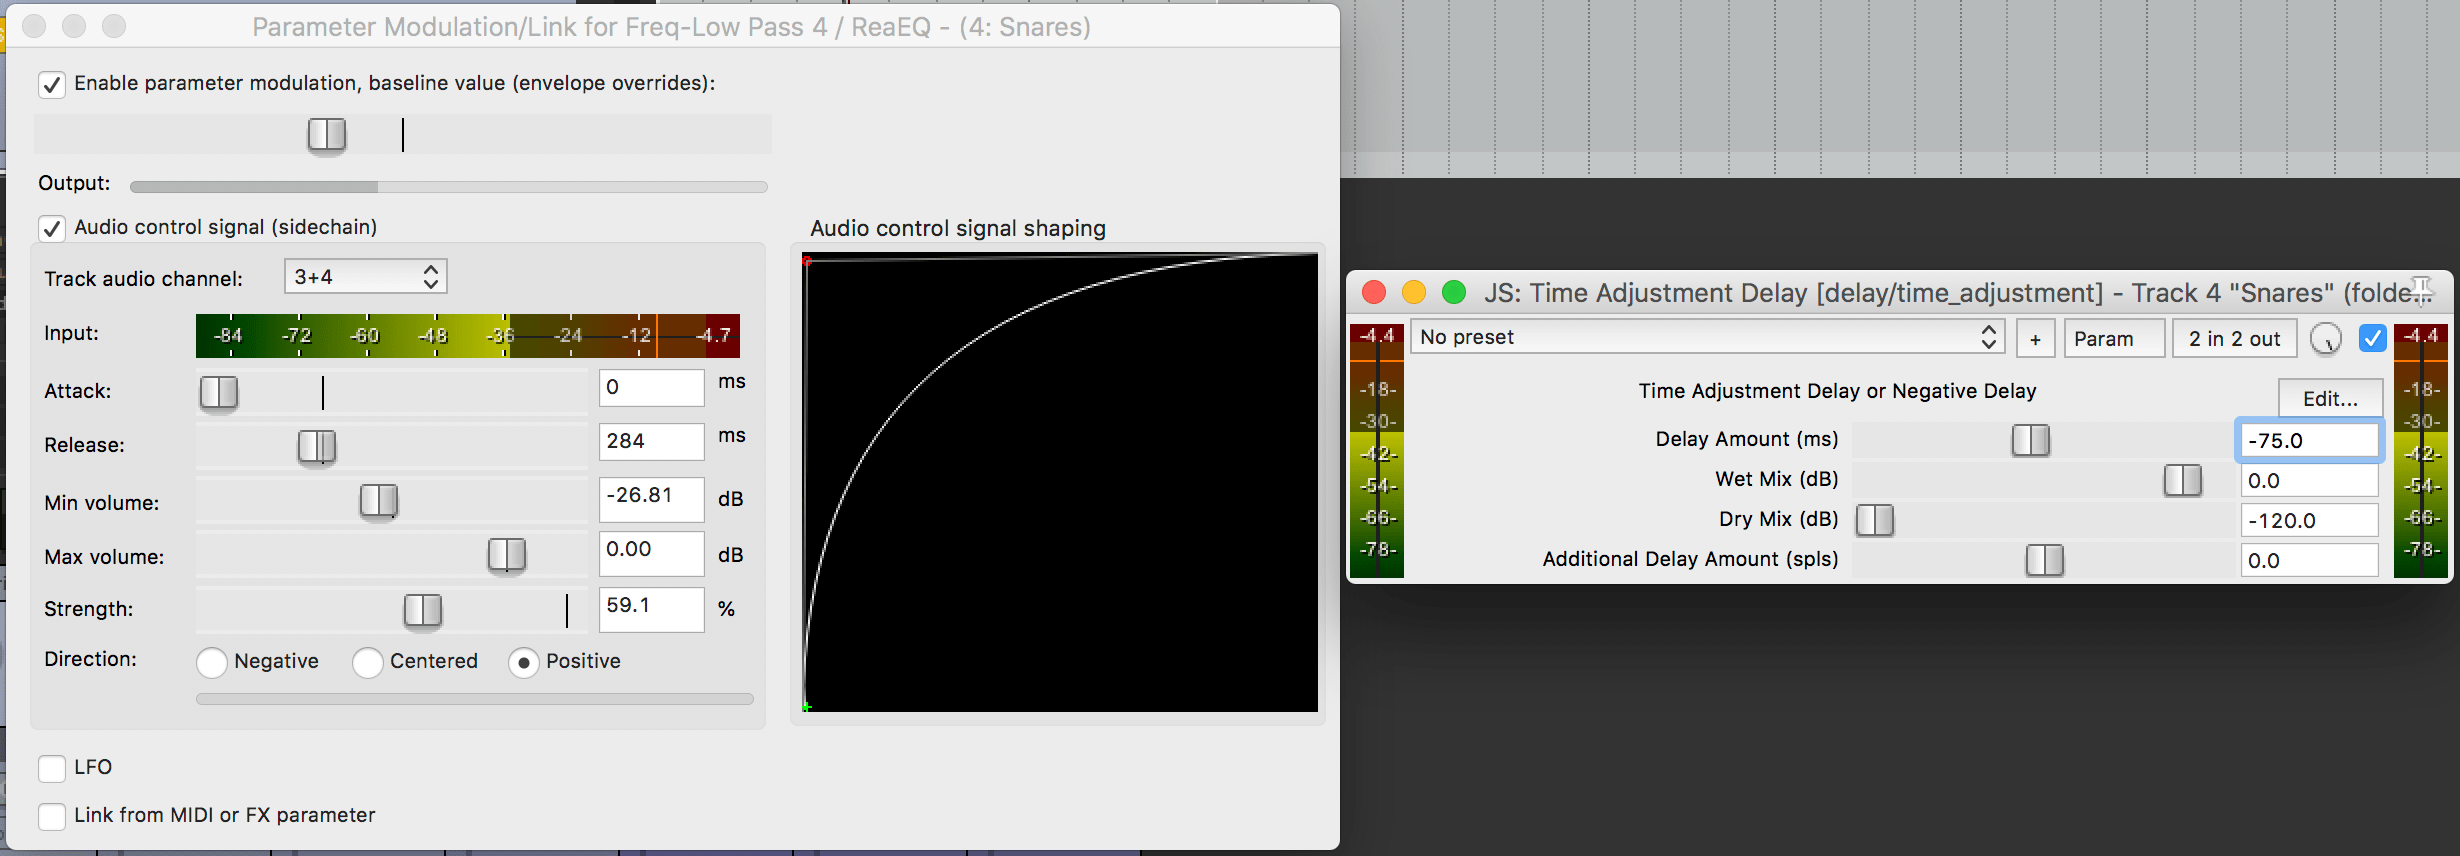
Compensating for the attack ramp isn’t too difficult either. Once again refer to the image above.
- Apply the
JS: Time Adjustment Delay [delay/time_adjustment]plugin that comes with Reaper - Set the Delay amount to ~50ms to start. You can adjust this later.
- Click the button in the upper right of
JS: Time Adjustment Delay [delay/time_adjustment]that says ‘2 in 2 out’ (or similar) and set the output to 3/4 like shown. You may need to hit the plus in the lower-left of that window to see these channels. - Go back to the low-pass filter’s parameter modulation (follow step 2 and 3 here) and set the input to ‘3+4’
- Since we’ve made the filter react to a signal that’s 50ms earlier, you may wish to adjust the release time in the modulation by a similar amount.
What we’ve done here is take the input signal, shifted it back in time by 50ms, output that to a different signal bus than our main effect signal bus, and made the modulation react to that.
The result is that our filter opens before the drum hit happens. This makes the drum transient cleaner.
If you want to be extra fancy and make this whole thing sound even more natural (in context of the mix), set the time adjustment to ~100ms and use an attack time of 50ms in your modulation. This will give you a nice fade-in rather than that sharp filter sweep (which can sound good or bad depending on what’s happening).
Sound Examples
It’s the amazing Comparator that I made entirely in vanilla javascript.
I’ve included 4 versions:
- Gated with Reagate
- “Frequency Gated” with Couture
- “Frequency Gated” with ReaEQ and no transient compensation
- “Frequency Gated” with ReaEQ and transients are compensated for
Each of these 4 versions I’ve included these varients:
- Just the snare processed
- Just the kick processed
- Kick and Snare together
- The whole drum track with kick and snare processed
To fully appreciate this, you should listen to the cymbals and less to the drums. The cymbals are the thing that is being targeted.
Some of these will sound rather weird with just kick/snare, but when listening to the “All…” samples you’ll hear some difference in the clarity of the cymbals and the overall power of the hits themselves relative to the cymbals.
I know the names are overwriting things and the GUI gets weird in some places. I’m working on it.
Settings
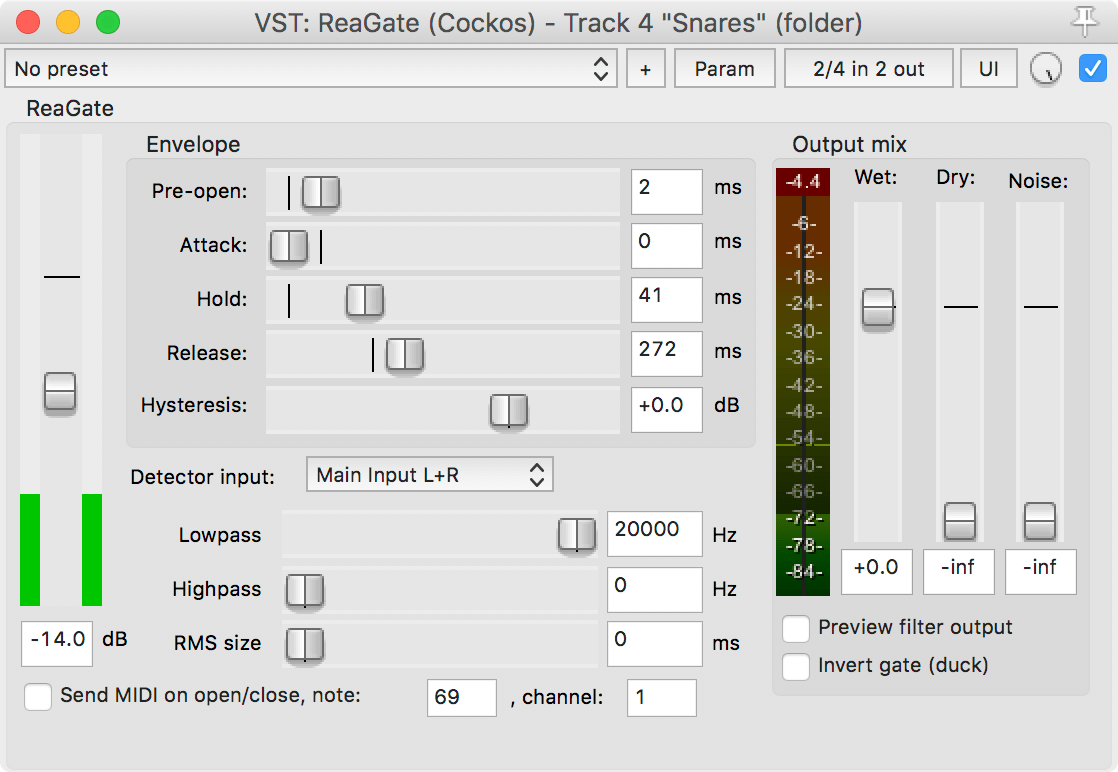
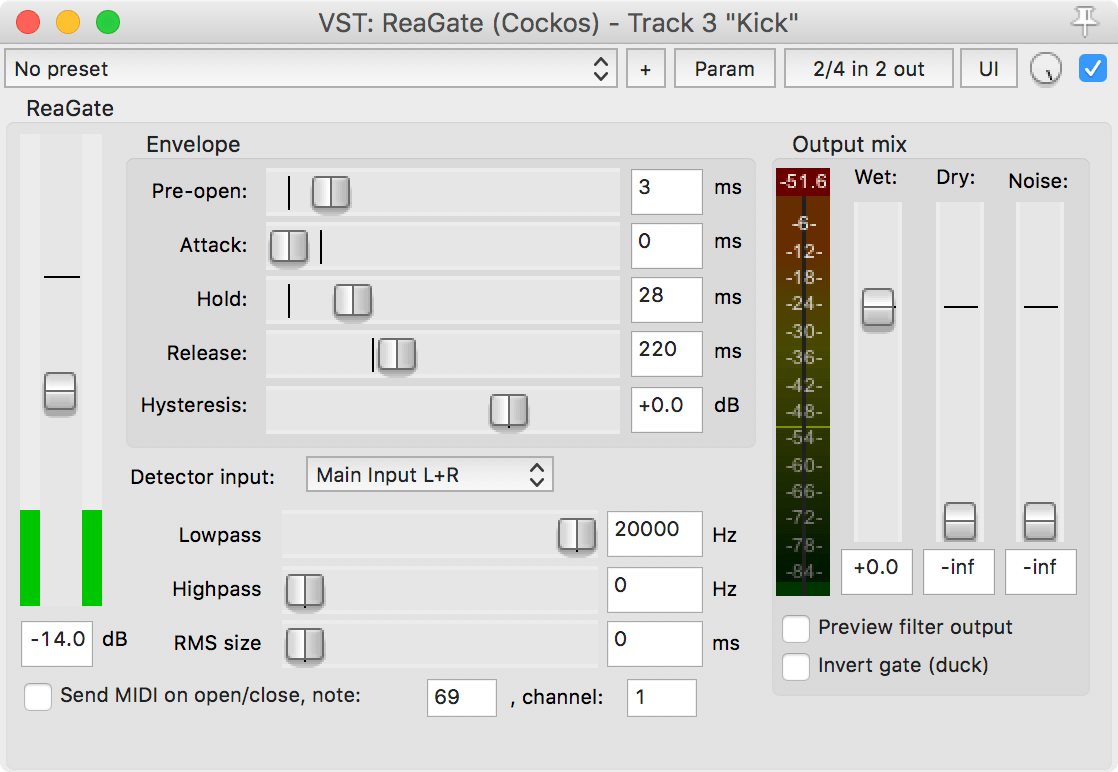
ReaGate
Couture
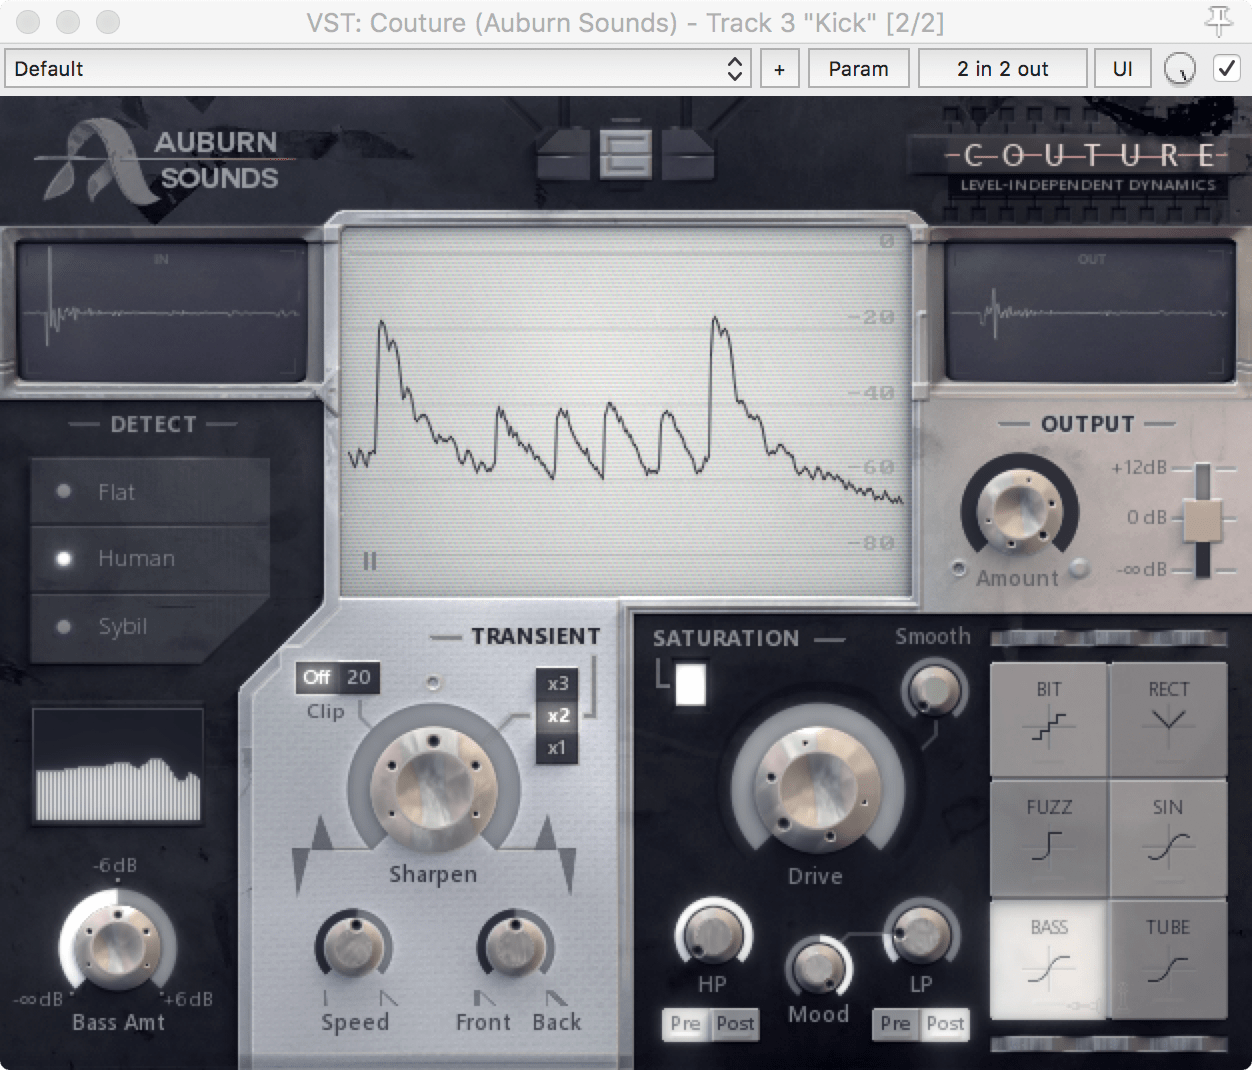
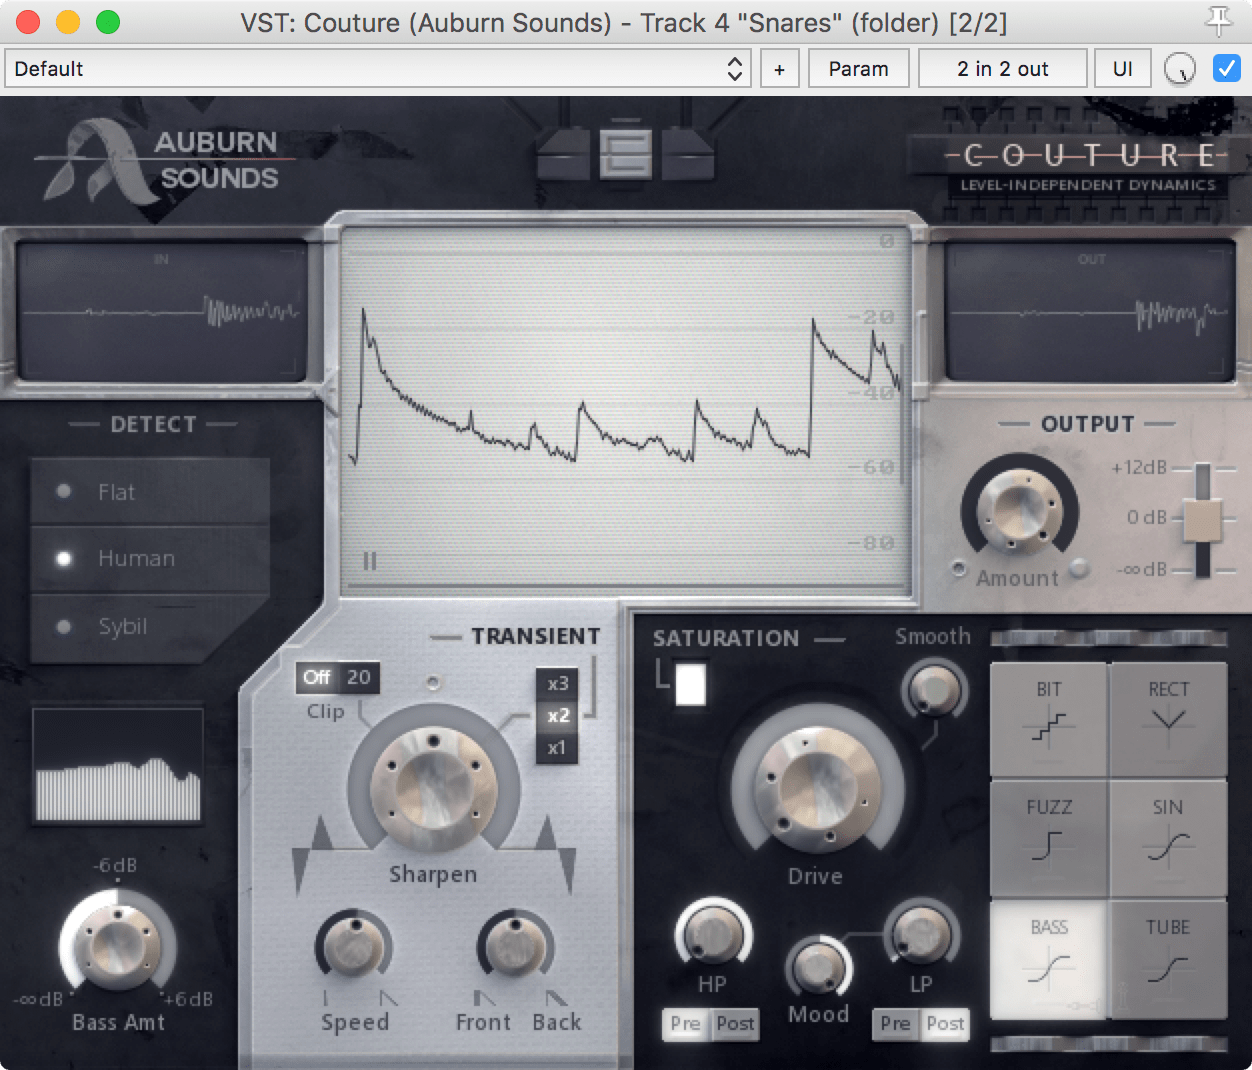
ReaEQ transient non-compensated
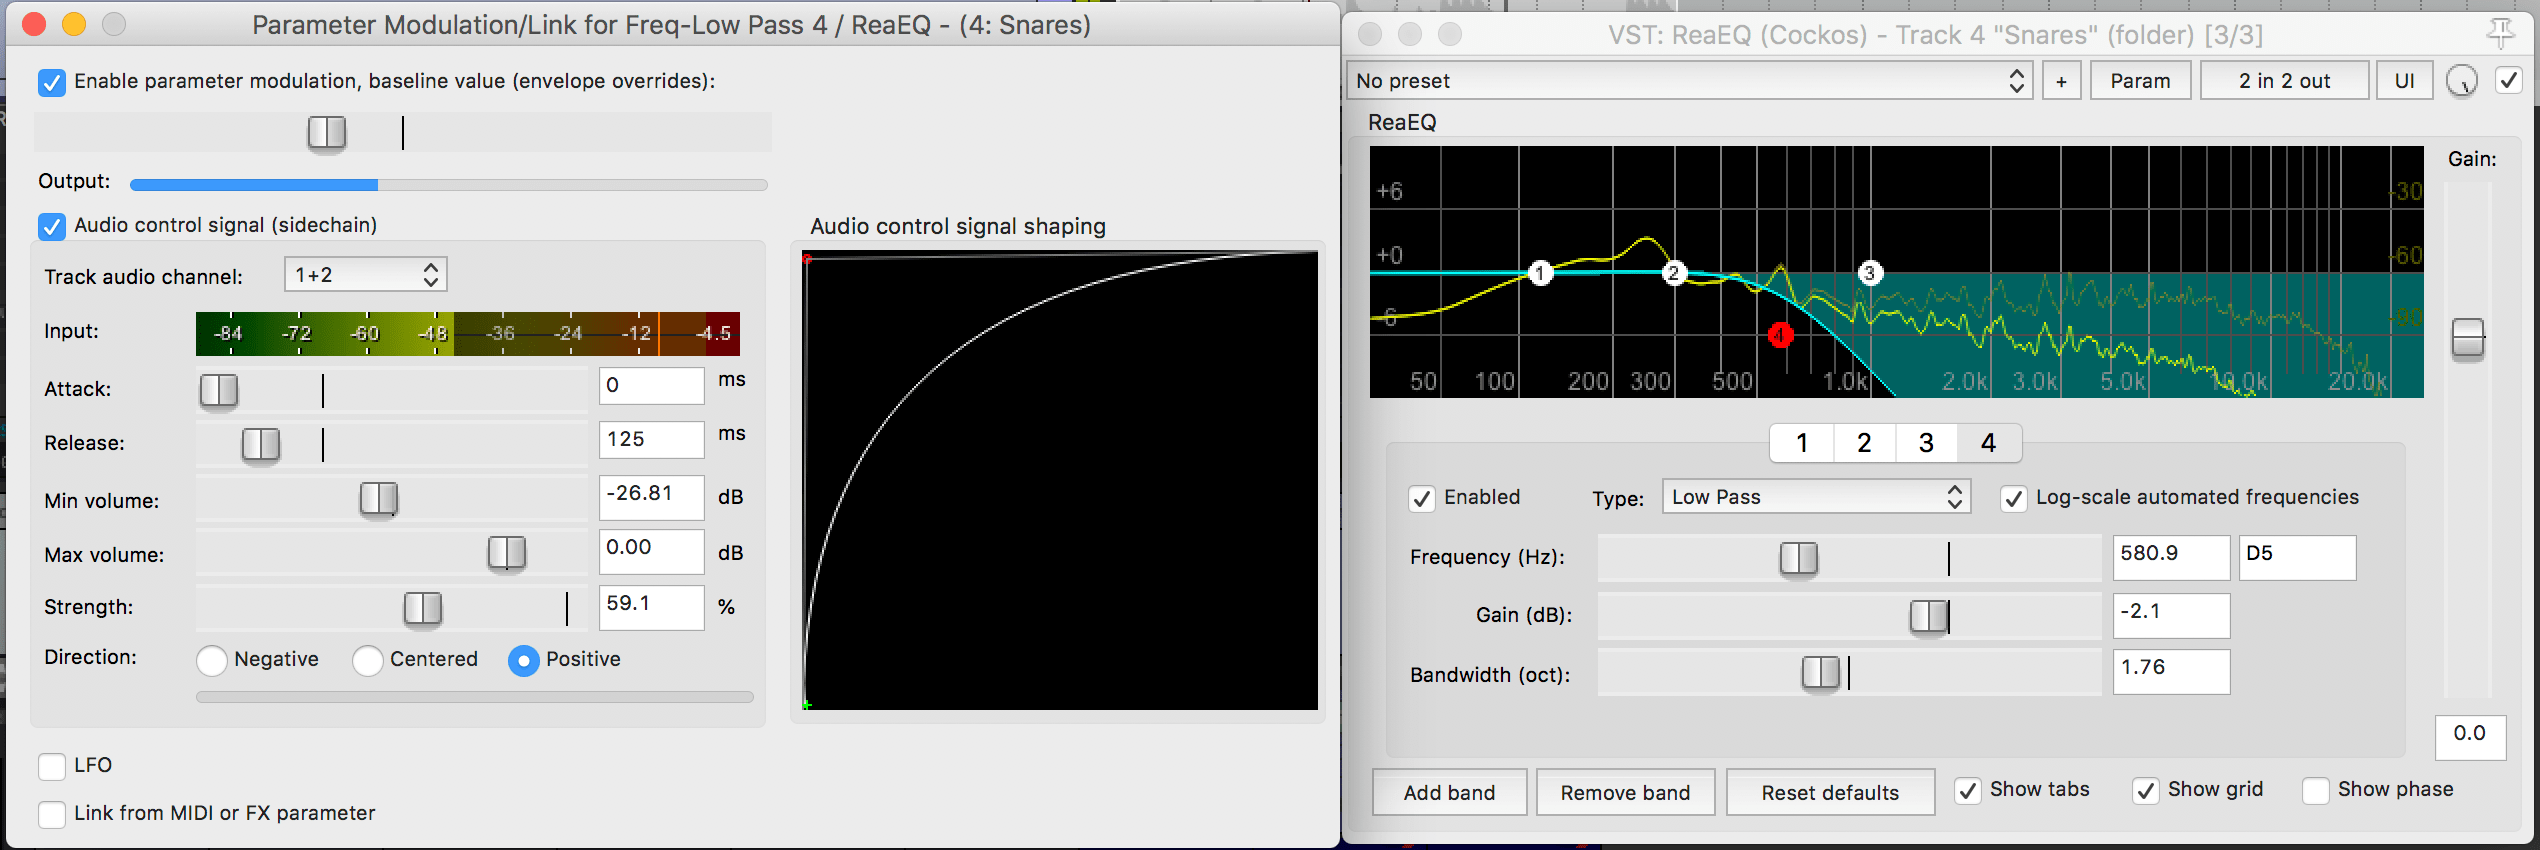
ReaEQ transient compensated
Conclusion
This isn’t just a Reaper trick. You can do it in Bitwig or Waveform or make it in Reaktor or Max for Live or… anything that lets you modulate filters.
I’ve tried dozens of filters and setups though, and for whatever reason; Couture does it the best. It’s extra handy because Couture is a really fantastic transient processor too.
I use Goodhertz LOHI on nearly every track, and it’s probably the cleanest at executing this technique, but you are at the mercy of your modulating source. That seems to be where Couture wins out, but for a general purpose low/high pass, LOHI is my favorite.
I have found a few situations where Cytomic’s The Drop did an amazing job of this. I already use the high-pass on The Drop very frequently for low-passing (due to another trick I abuse in nearly all of my projects), so it’s also rather convenient.
If you’re lazy though, you may as well just get Couture. If I get some time later I’ll see if I can do a review on this super awesome plugin.
Support Me!
This post took 11 hours to research, screenshot, screencast, write and edit. If you appreciate the information presented then please consider joining patreon or donating!