
In Part One of this series I discussed placement of microphones. Microphone placement is very important with regards to tonality and time/phase coherence. When using two microphones for a stereo array, distance is also an important factor with regards to amplitude.
There’s a missing piece of the puzzle though: Microphone pickup patterns. So in this post I’m going to discuss various drum miking systems, their deficiencies and how to approach correcting them if necessary.
I want to reiterate once again, since many people seemed to miss it, I am not claiming that any specific system of drum miking is wrong. My claim is that if you are making decisions about microphone placement without being aware of the tradeoffs of each system, then you’re doing it wrong.
However I do strongly believe that there are systems that can be used with minimal tradeoffs (and likewise minimal artistic benefits).
Anyway…
Reading Part One is pre-requisite for reading Part Two.
Contents
- Introduction
- Polar Patterns
- XY
- Near Spaced Pairs (like ORTF)
- Far Spaced Pairs
- Even Spaced Pairs
- Glyn Johns’ and Recorderman
- Nothing is perfect, so why should you be?
- Conclusion
- Support Me!
Introduction
In our previous episode we discussed microphone placement, and to do that I completely ignored microphone pickup patterns.
Microphone polar patterns have a big influence on what a microphone picks up in 3d space. By retaining the capsule’s position, but rotating it on any axis (with the center of the capsule as the origin), you can control ‘how much’ of each part of 3d space is picked up by the microphone.
I’m going to explore the concept of utilizing polar patterns to optimize the use of various drum overhead miking techniques. There’s a wide variety of patterns available, but I’m only going to cover the cardioid pattern.
Why only cardioid? It’s both the most common, and I feel that it’s the most instructive. (It’s also the easiest for me to model in 3d). I won’t be covering other patterns like figure-eight, ultra-directional, hyper-cardioid, super-cardioid or ウルトラマン pickup patterns. (Forgive my humour, I loved watching tokusatsu as a kid, especially super sentai and ultraman)
First I need to explain what cardioid is, and what polar patterns are.
Polar Patterns

Microphones have pickup patterns. Omnidirectional is just that: it picks up sounds in all directions equally. That’s easy since a capsule floating in the air is going to be omnidirectional usually.
The fun happens when you put the capsule inside of something, and you close it off mostly. By putting vents around the capsule you can introduce cancellations at specific points in the 3d space surrounding the capsule. (Note, this is why cupping a microphone with your hands causes feedback. You would be nullifying these vents, causing the pickup pattern to be altered and the otherwise-directional mic to pick up from the monitors!)
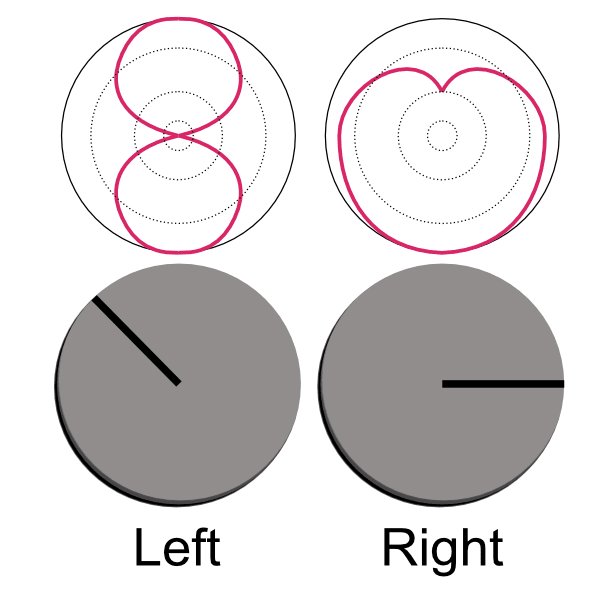
Let’s look at my drawing of a cardioid shape above. What does that mean?
The first thing we need to notice is that this is not a perfect mathematical cardioid. I know some pedant will have an LSA about that.
The graph above represents ‘how much sound’ a microphone picks up, relative to the angle that the sound enters. So in our image 0° is the direction that the mic is pointing. It has 100% pickup there.
At 90° the microphone’s pickup is -6db down. A sound that’s perpendicular to the microphone will be captured -6db lower (half the amplitude) than a source that’s right in front of the microphone.
At 180° the pickup is reduced by -30db. That’s a lot, but it is still some. I’ve seen sources that indicate total reject at 180°, but is very, very difficult to do (impossible?). We’ll see why later.
At 45° our sound is about -3db down. At 135° we’re about -12db down.
This plot is a 2d representation of the pickup pattern too. Real microphones record sound in a 3d world. The real polar pattern is that graph, but in 3d. You’ll see this later.
Polar Patterns and frequency
Microphones create polar patterns by using a system of vents and paths that change how much sound comes in from primarily the front, and the back.
By changing what’s allowed in the back compared to the front and the path that the sound takes, the designer can cause cancellations at the capsule. These cancellations are what change the response pattern depending on what sound gets to these vents.
But there’s a problem…
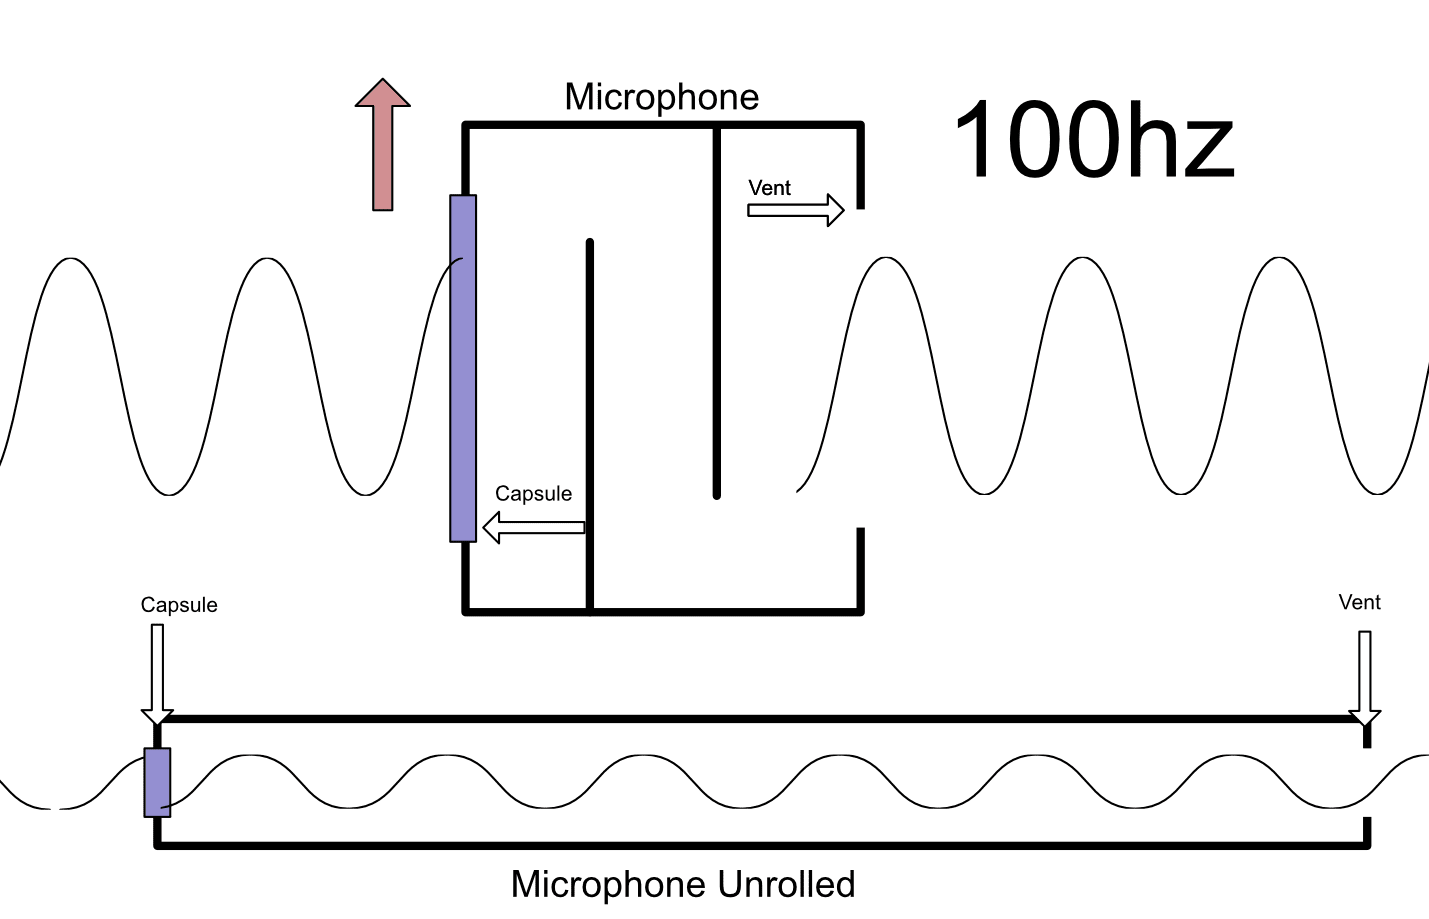
A path works great for one frequency, but when the wavelength changes, the path’s length doesn’t change. Our fancy cancellation is ruined.
Let’s look at the example above. We have a 100hz wave going from left to right to the microphone. The wave hits the capsule right at a high point in the pressure wave.
The important thing here that needs to be recognized is that sound is pressure waves. When the sound passes the microphone, it’s still sucking and pushing and that affects the air behind the mic. That sucking and pushing influence enters the back of the microphone as nearly-identical sound.
The microphone has the venting though! So the sound enters through the vents, travels through a pathway that makes the sound travel a bit more distance and voila! Cancellation! You can see in the ‘unrolled’ pathway that the rear-entering sound arrives at the capsule at the inverse polarity of the front-entering sound. These 2 pressure waves cancel each other out and the capsule doesn’t respond (much).
Here’s the problem… our vent and pathway is a fixed length. Our sound waves are varying wave_lengths_.
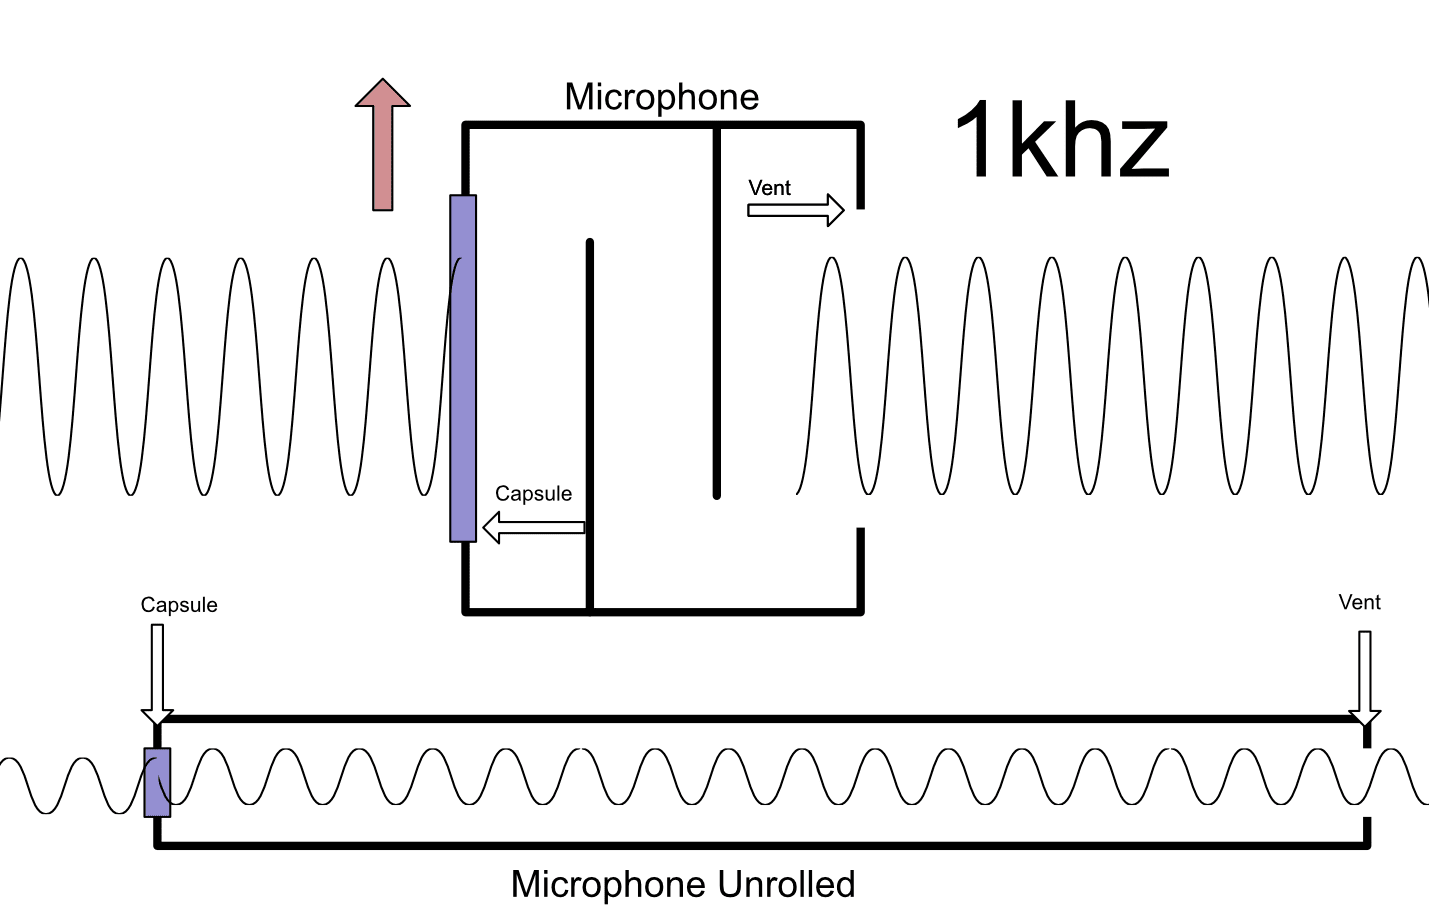
Now instead of a 100hz wave, we’re looking at 1,000hz wave. It’s entering the front at the same phase, but as it enters the vent and goes through our time-realignment path we don’t get the same results.
The 1khz wave hits the capsule in the back at about 50% through the travel of the wave, and we end up with a slight summing. The result is that anything that’s 1khz coming from the back we hear as -6db lower rather than totally canceled out.
Blast! Darnit!
Anything at 100hz cancels perfect in our fictional design, but 1khz is only -6db down.
That’s unfortunately what happens with real microphones. The polar pattern is frequency dependent. Our actual polar pattern looks more like this…
The polar pattern depends on the frequency. We may get fantastic rejection at 100hz, but terrible at 5khz.
This may also trigger something in your brain… What if we could utilize that frequency specific rejection to make microphones for certain scenarios?
What if we want a microphone to reject cymbals, but we don’t care about how low-frequency info is rejected? You just designed a kick microphone. Good job.
Frequency Response
Hopefully it’s entered your mind by now that those fancy frequency response charts you see selling microphones are total garbage.
They’re only accurate for a perfectly on-axis sound at a specific distance, and with a mic that’s in perfect shape.
Guess what… those things are rarely true in the real world. This goes for speakers too. Don’t be fooled! Use your ears (but it always helps to have a good base to start from)!
3d
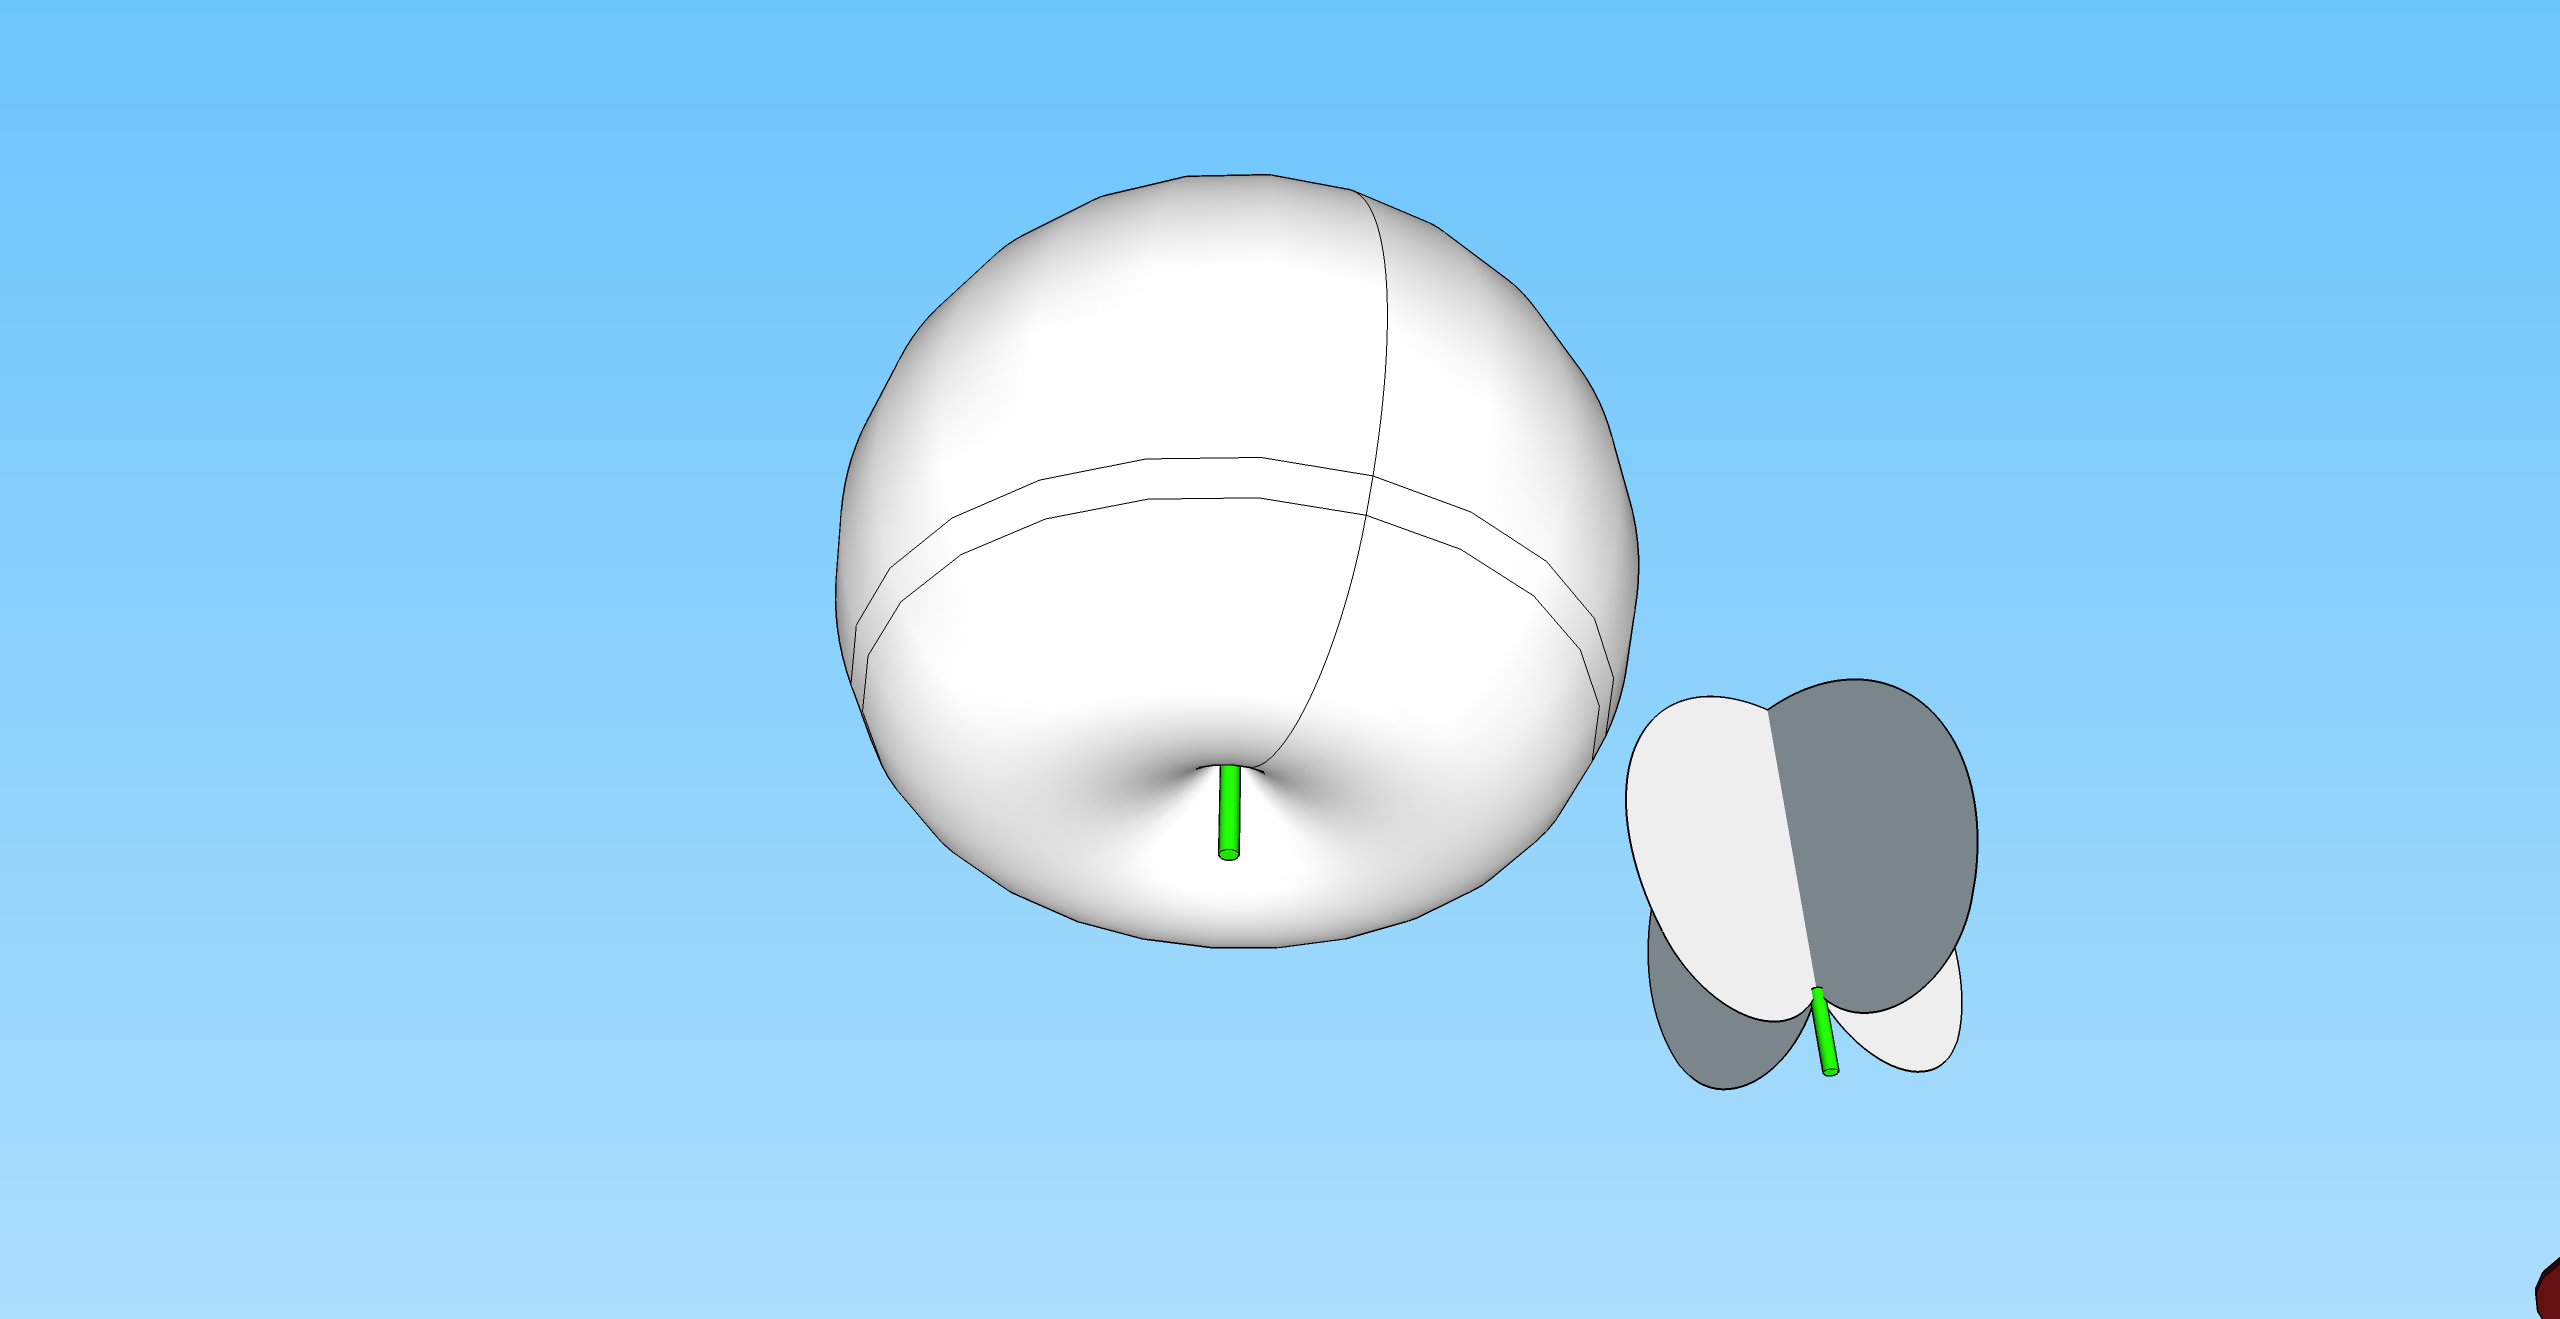
Here’s what I’ll be using in the follow examples.
I have a split up cardioid-like shape. Then the 3d version.
I’ll be using these shapes to help demonstrate what you’ll pickup on the drumset by pointing the mic in various directions.
(Turns out I didn’t use the balloon. It obfuscated too much)
XY
Let’s revisit XY Miking. I’m not covering Mid-Side since it’s depending on a specific configuration.
Last time I said that XY miking is boring, but that’s assuming that we keep the microphones at 90°. We can make it much more interesting with some fiddling.
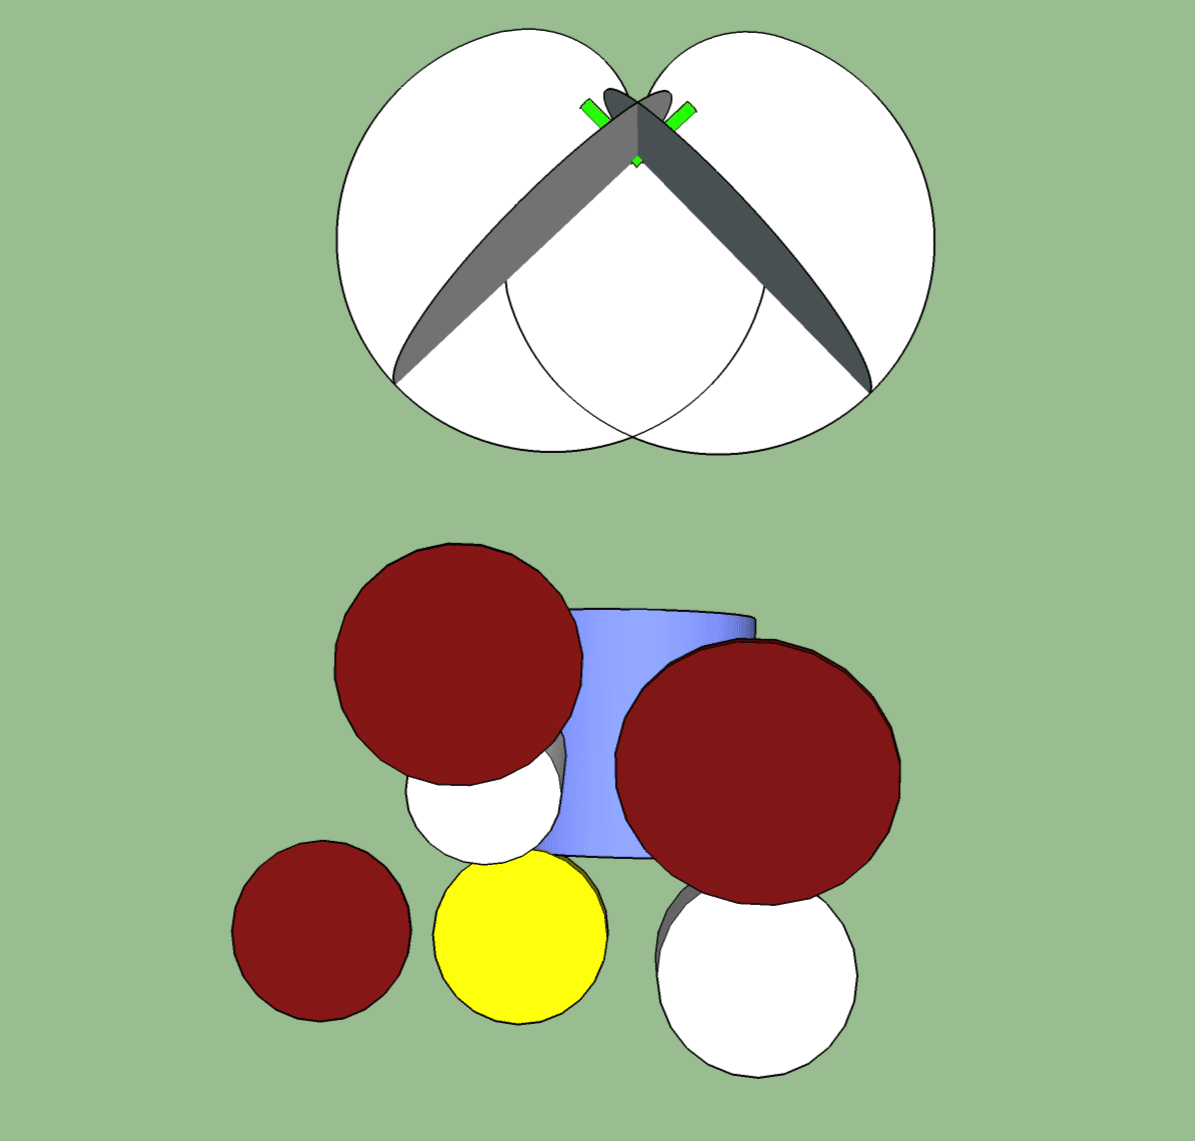
First let’s look at the video above. The microphones are set at 90° to each other. There’s a very large overlap in the center, which gives is a very strong center image.
The “problem” is that everything is within 0°-90° of each mic. If 90° offers us -6db rejection then that’s a very minimal difference between the channels. In the example above our floor tom is about -2db in the right channel and -5db in the left channel. That’s not going to give us a very wide image.
This very strong overlapping of the center, near-perfect phase coherence and limited amplitude differences are what contribute to a “boring” sound.
We have ways of dealing with this though.
XY Wider
The most obvious solution is to just go beyond 90°. Let’s try with the mics adjusted a bit.
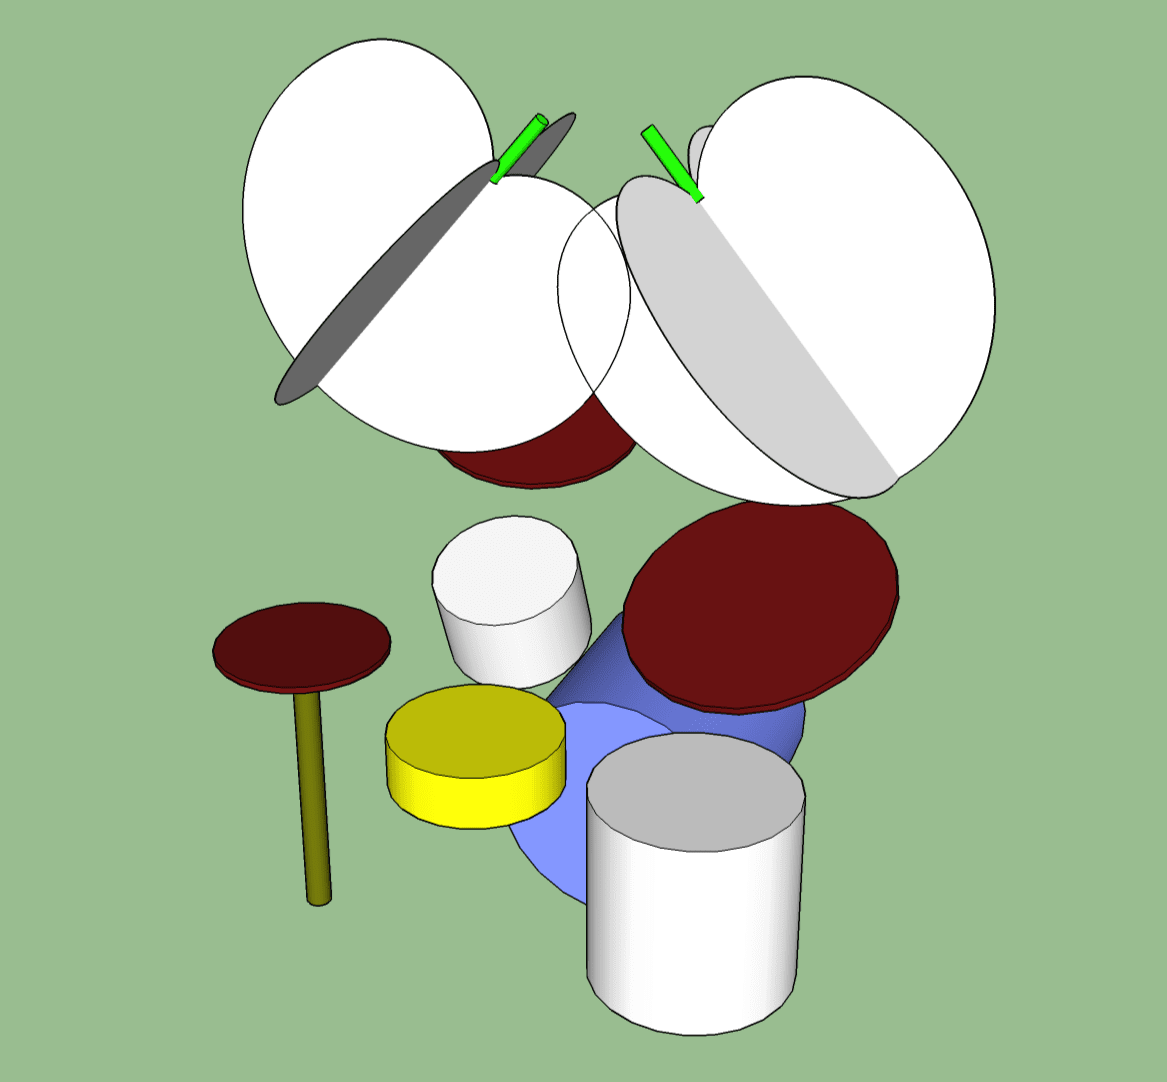
In the image above the mics are 105° to each other, and they are tilted together. The left mic points past the hi-hat and the right mic points past the floor tom.
The center now points right at our snare drum, which gives us a more snare-centric image.
Our sound is wider as well, since there’s less common pickup between the mics. The bigger gain here is that we’re not pointing the mics exactly at anything. We’re relying entirely on the non-direct sound reaching the mic.
Due to how cardioid, hyper/super-cardioid mics tend to work, using the off-axis pickup also tends to reduce high frequency pickup too.
The net result: a wider sound, less harsh and a centered snare. You can go even wider still, and you can move the mics…
XY Front
The next thing we can try is to not mic looking down at the drums.
XY from the front allows us to have a kick-centric sound. The majority of the drum pick up will be shell-sound instead of direct head sound, and we are also pointing the mics ‘around’ the drumset. The microphones will pick up more room sound in this configuration, which usually lends to a ‘wide’ sound.
The distance from the set can be varied from ‘direct’ to ‘room mic’. The height can be varied to take advantage of the 3d nature of the microphone’s pickup pattern.
You can even go crazy and do things like this…
Controlling the tilt of the setup lets you get more room sound or more direct sound.
Of course you can come at it from behind the drummer too, which gives you more direct head sound.
The options are vast, but you always maintain phase coherence. That’s nice, but it’s also still a bit boring no matter what you do.
Near Spaced Pairs (like ORTF)
In Part One I didn’t cover ORTF and I was called out on this a few times.
I didn’t cover this because ORTF is nothing more than a spaced pair, but spaced very closely with specific angles involved.
Spaced Pairs don’t offer phase coherence, so they sound wide. Each drum arrives at the mics at different times, and those times are not the same for each microphone. The same thing applies to amplitude.
The benefit here is that due to the slight overlap between the pickup patterns, we still have a coherent center channel for things that are perfectly in the center (the sound arrives at both mics at the same time).
When you angle the mics away from each other in this setup, you are changing the amplitude of the center channel. There’s less overlap, so less total volume for things that arrive at both mics in phase. The result is that the ‘wide’ phase-uncorrelated signal is relatively louder than the center.
Angling the mics together reinforces the center, but reduces the relative volume of the ‘wide’ uncorrelated pickup.
The entire setup can be twisted and turned like in XY Front to help emphasize specific parts of the kit, or the room.
Far Spaced Pairs
Far spaced pairs are basically the ‘widest’ drum sound you’re going to get. As described before, they have very little phase correlation. It’s a pretty messy sound (but sometimes messy is good!)
Far spaced pairs offer you total and complete freedom though. Since the arc of coherence is basically out somewhere in Wisconsin, you don’t have to think about it at all.
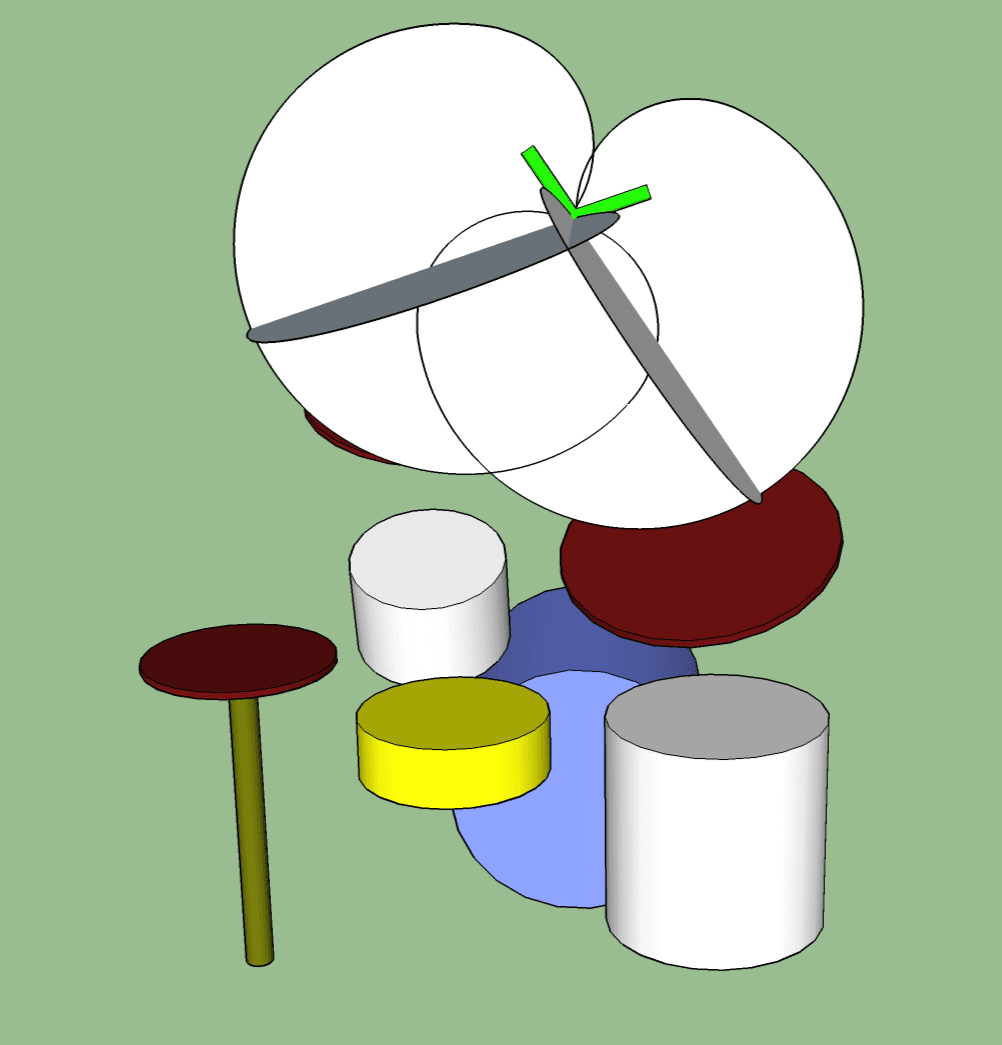
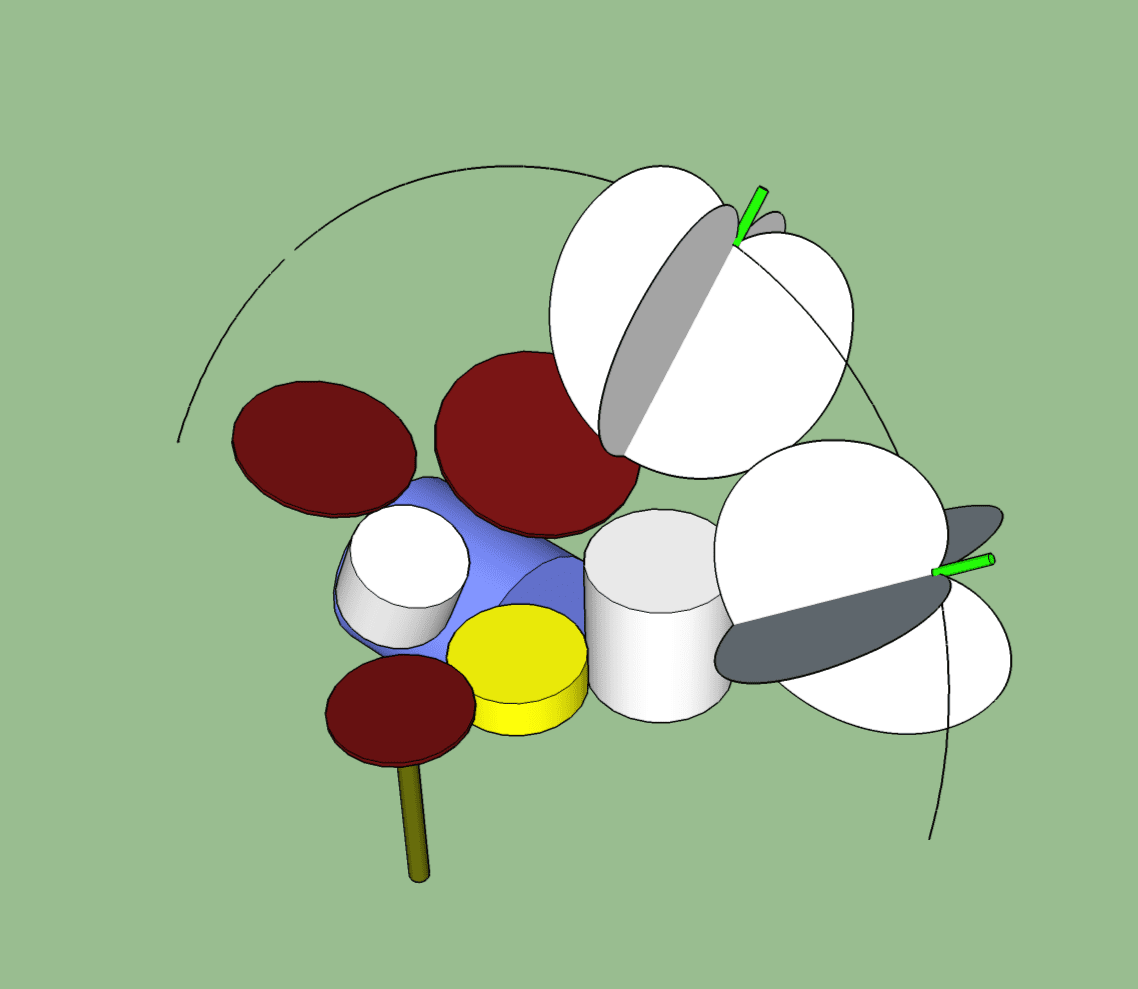
Set the mics where you want and think only about what each mic picks up. You can do something even like this…
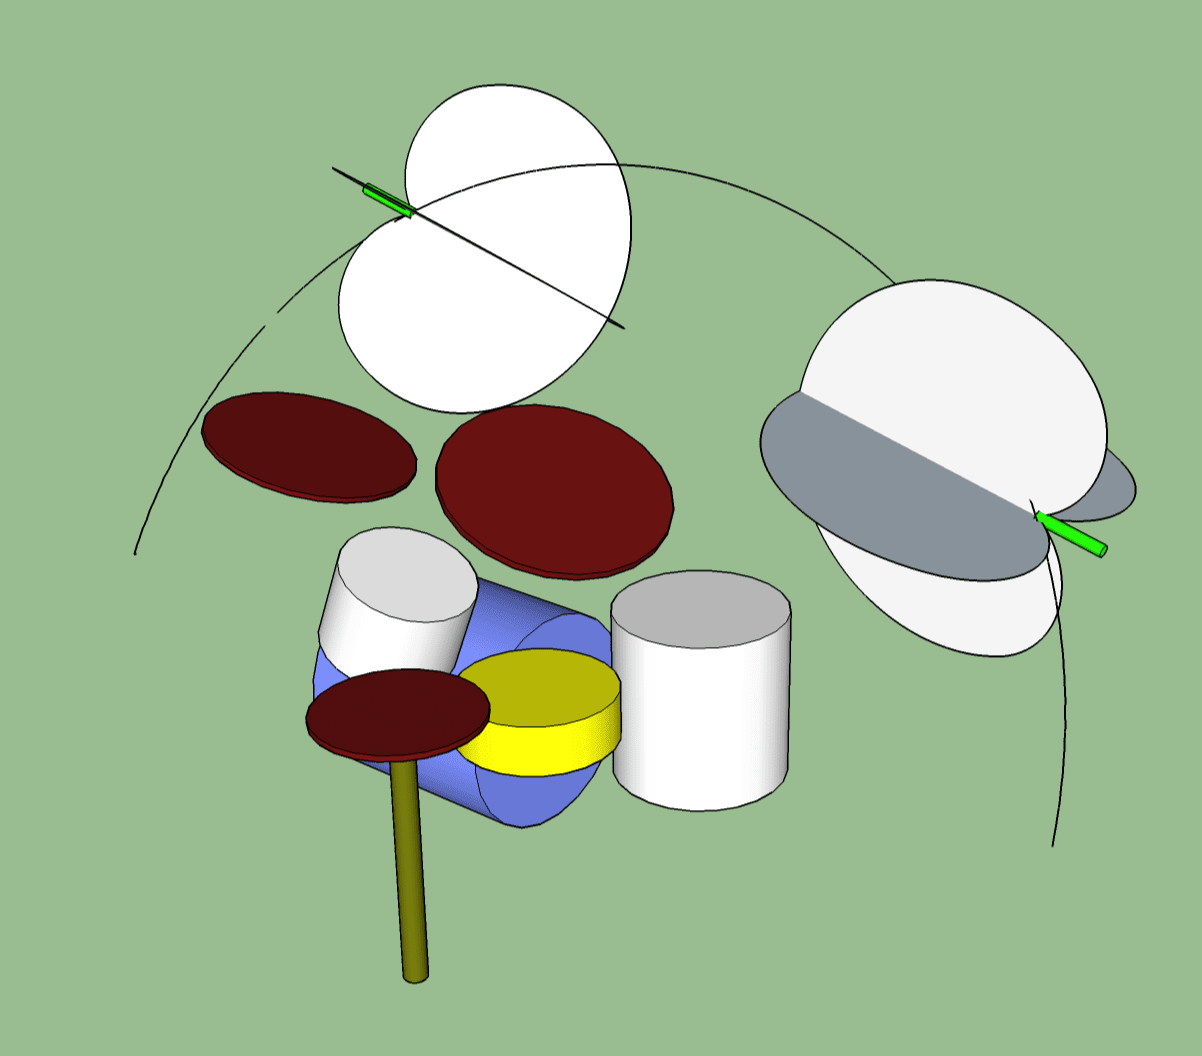
I have the left mic pointing right at the snare (line added for demonstration). The right mic is pointed down at the floor tom.
The left mic’s angle helps reduce the hi-hat’s level in that mic, as does the angle of the right mic. Both mics are angled to reduce cymbal pickup (more so in high frequencies, remember? Offaxis rejects high frequencies more usually).
The resulting sound gives us a snare to the left, but an overall wide and mellow picture of the drumset.
You can do anything you want. Get the ‘width’ you want by spacing the mics out, listen to the track, then adjust where the microphones are pointing to emphasize or de-emphasize specific elements.
Even Spaced Pairs
Oh boy. This is what I said was the “best method”. (However, if you read… I was only claiming that it’s a good starting point if you don’t want to think about anything).
We run in to some issues here though when we consider pickup patterns. So let’s look at it.
Uneven Pickup
If you watch the video above, you’ll notice that we have a serious issue.
The ‘left’ mic (in front of the kit) is getting most of its kick sound from the front/middle of the kick drum, and the right mic is getting it from the beater.
If you’ve tried this method you’ll no doubt have recognized that issue, but it’s a surprisingly easy fix, and one that I really should have covered in the first post.
Another issue is that our ‘left’ mic picks up a lot of the ride cymbal, which is on the ‘right’ of the kit. There’s nothing we can do about that one if we want to maintain kick and snare coherency. Is that an issue though?
Uneven Pickup Correction
The solution is to minimize the issue proportional to the position on the arc…
Point the mics at each other!
This does reduce the direct sound pickup, but it does it proportionally, and both mics suffer it for minimal net change (other than off-axis frequency response).
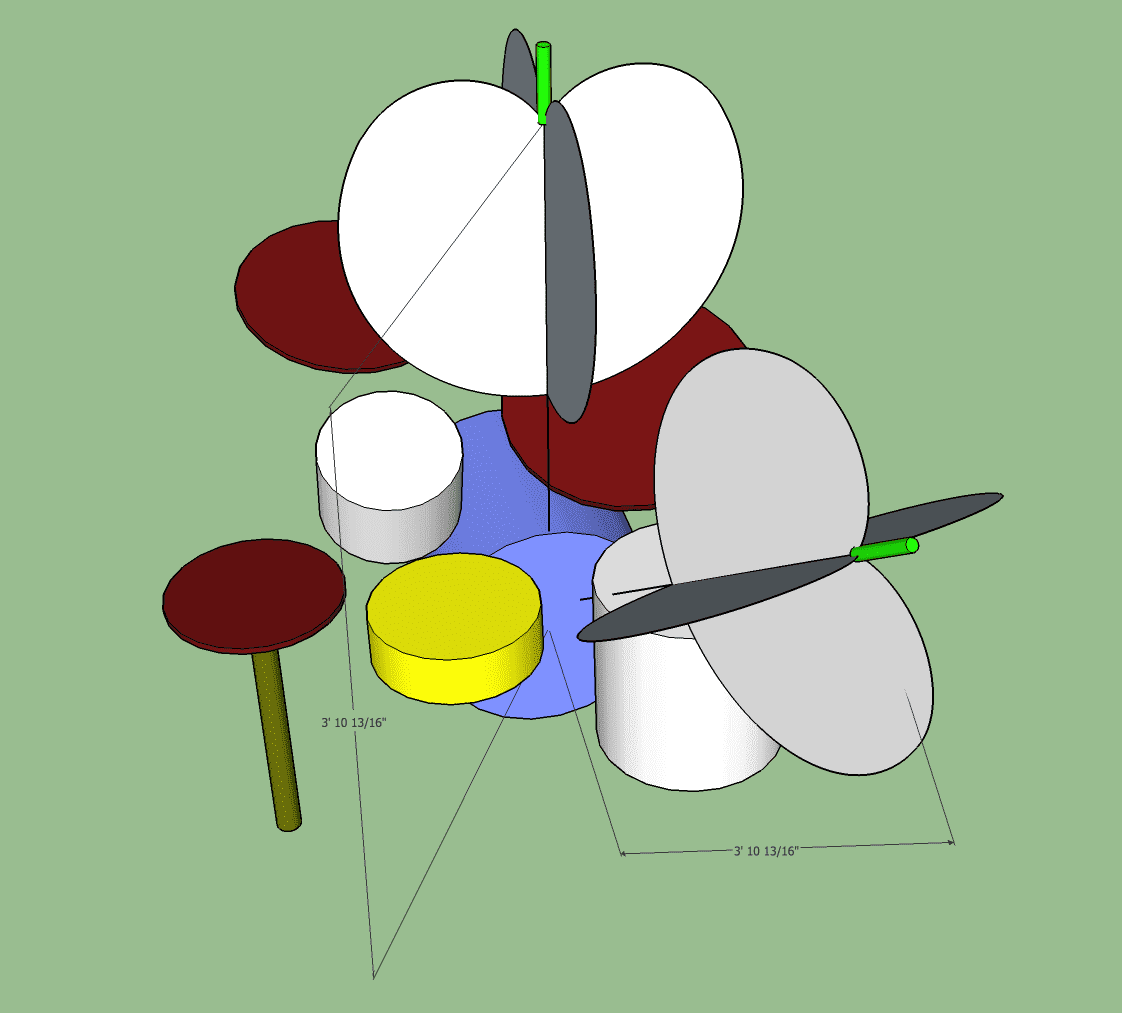
You might be slightly worried about the stereo spread with this strange setup, but let me show you an overhead view…
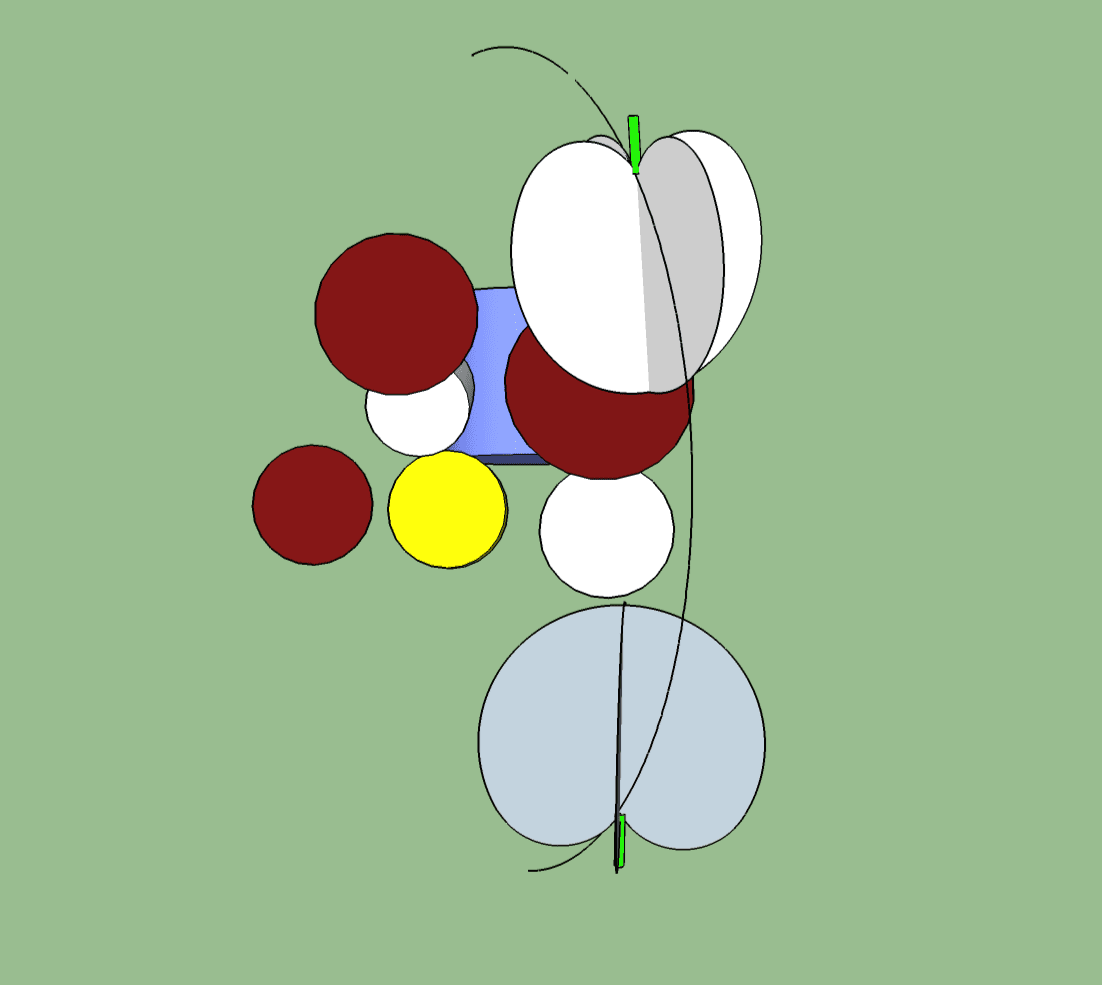
You can see that the mic on the top is closer to the rack, the mic on the bottom is closer to the floor. You get a spread of cymbals.
We know that the kick/snare will be centered, and the high-hat ends up in the left channel due to the precedence effect.
Uneven Pickup issues
It might seem like I’m making case for this being the ‘ultimate’ drum mic overhead setup. It’s not.
Various kit setups can interfere with the arc. Sometimes certain elements on the drummers left will actually be closer to the right mic. Sometimes the drummer’s body/head blocks the right mic.
Sometimes you just want a really wide drum sound, and this doesn’t give it to you.
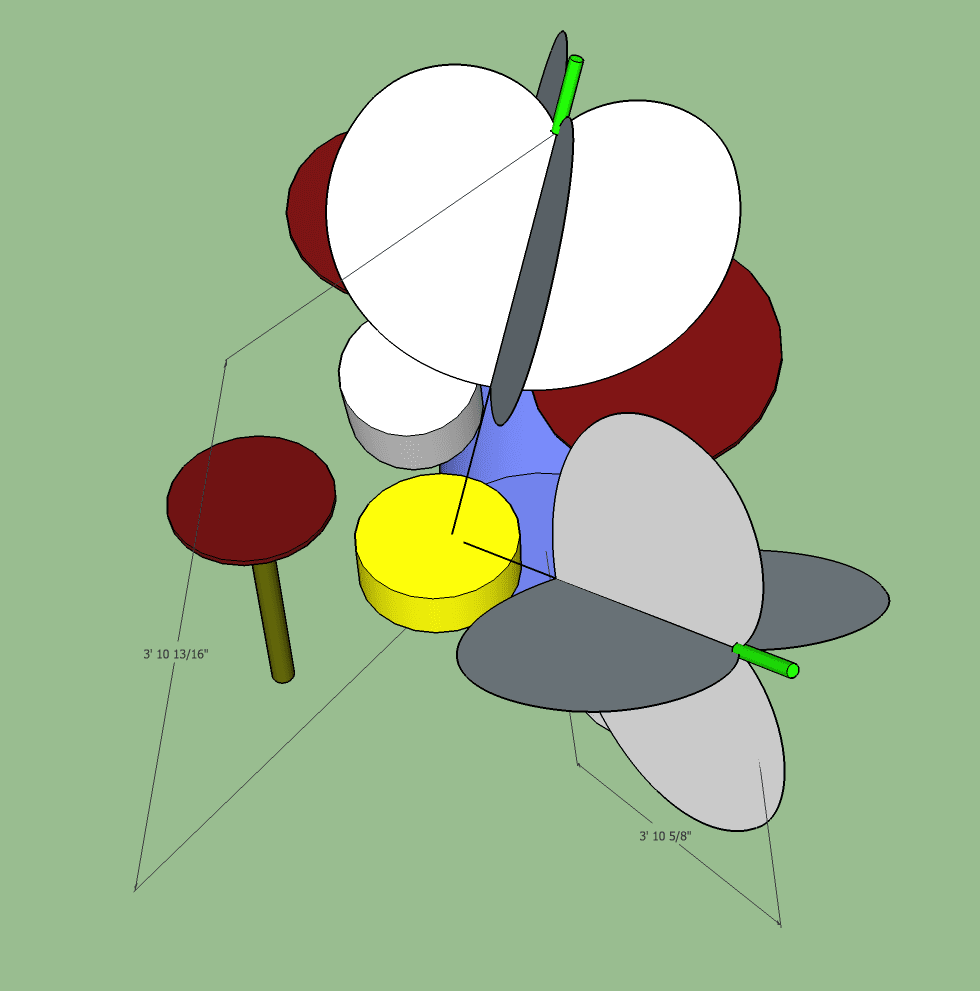
The other issue is that if you want a really consistent snare sound and kick sound, with a somewhat wide-feeling sound, you end up with the above image. If a drummer listens back to this they will be very confused!
The above image results in the ride in the left channel, the floor tom in the right channel, the hi-hat is in the right channel, but the floor tom is in the left channel. Does it sound good if you’ve never sat behind a drum kit before? Yes… it sounds fantastic. Do you want your drums to sound like the audience at a concert hears it, or how the drummer hears it? Then this is very much not for you.
There’s tradeoffs everywhere.
Then again… if you try this with omni mics, all bets are off. New avenues open! Remember that since we were measuring with spheres it would stand to reason that miking with spherical pickup patterns may work. It does work much better, but once again… tradeoffs. More room sound, more sensitive to placement.
Glyn Johns’ and Recorderman
Sacred ground once again. Many, many records recorded with these techniques and many satisfied customers. Why?
Because they work. There’s nothing “wrong” with them. I’m trying to make this clear, because apparently I wasn’t clear enough in the last post.
First look at my analysis of phase and amplitude coherency between kick/snare on this methods. Note that these two methods, for the context of this discussion, are basically identical. Glyn Johns’ does have some issues with cymbals, but you should know that by now.
The potential issue with these methods is that they come with inherent tradeoffs that are rarely discussed. The primary one being that the kick drum is treated as a second class citizen. Nearly every bit of education material on these methods has you setup microphone distance from the snare. You should know by now what that does to the recorded kick sound. (Ok, the kick is a huge drum, and it’s always going to be a problem… but there’s no reason to make it worse!)
So what can we do? Two things.
GlynMan’s Kick-centricity
In nearly every modern record, the kick drum is dead center. The close mic is dead center. There’s no reason to have your left and right overhead channels with different information that muddles up your wonderfully punchy close mic in different ways.
Likewise, in a good number of rock records, the snare drum is not centered but instead panned slightly. We can achieve this easily with our overheads!
Start with the overhead mic dead center over the kick, and place your second mic (in either Glyn Johns’ or Recorderman’s method) the same distance _from the kick drum).
That’s it. A way better starting point.
Funny enough, Glyn Johns’ doesn’t even measure. If you listen to records he’s recorded though, the kick is most certain centered and the snare is off to the side. I strongly suspect that he’s subconsciously using th e method I’m recommending. Of course, I wouldn’t be recommending anything if he didn’t record a mass of brilliant records with it… this ain’t my idea, just my thoughts on it.
GlynMan’s Directionality
The next step you can take is to point the microphones slightly differently. Start with the kick-centric approach then point both mics at the snare!
Now your kick is phase coherent (mostly) between the mics, but is about -3db down. The snare is about +3db up in the phantom center image. The best of both worlds.
Measure from the kick, point at the snare. It’s that easy. Utilize those polar patterns!
Nothing is perfect, so why should you be?
There’s one thing that really irks me about amateur recordists: they’re afraid of asymmetry. While writing this series I’ve been watching various videos on how people mic drums. I’ve also seen this many times watching bands setup, working live, and even fell for this myself.
The drumset is naturally an asymmetrical instrument. There’s no getting around that. Trying to get the kick/snare perfectly in line causes other tradeoffs that may sound unnatural. Not getting the kick/snare coherent between mics causes issues when you start to mix in close mics and they interact with each channel differently.
Using different microphones on different parts of the kit is totally fine. If you need to emphasize or reject some portion of the kit, then use a suitable mic and directionality to do that.
If ride is too bright, then switch out mics on the side that is too bright. If the kick sounds too loud in one side, then pan it further (less center influence).
Only methods like XY rely somewhat on having similar mics, but even then it works pretty well with very different mics. Space pairs pick up the kit in totally different ways on each side, so who cares if it’s two different mics if it gets the sound you want?
Conclusion
Once again, I’m only here to tell you that you’re doing it wrong if you don’t know why you’re making the choices that you’re making. Be aware of the tradeoffs and you’re doing it right.
Any given method is only ‘the right method’ if it satisfies the goals set out. Do you need phase consistency between certain elements? Do you need width? Do you need to emphasize a specific cymbal? Do you need to reduce cymbal ‘warble’? Do you want a strong punchy snare or strong punchy kick or both?
Only with specific goals in mind can you make choices, and only by knowing the limitations and strengths of those choices can you satisfy those goals.
I hope that so far I’ve helped allow you to make choices the right way some.
Disclaimer - I know that I oversimplified the venting explanation explanation. I tried to reach a middle ground where it should be relatively understandable, yet sufficiently accurate for the context of this article. If I caused any engineers undue grief, I apologize. Go watch some baseball and chill :)
To any 3d artists out there - How do you do it? Every 3d modeling software sucks :(
Support Me!
This post took 9 hours to research, photograph, write and edit. If you appreciate the information presented then please consider joining patreon or donating!